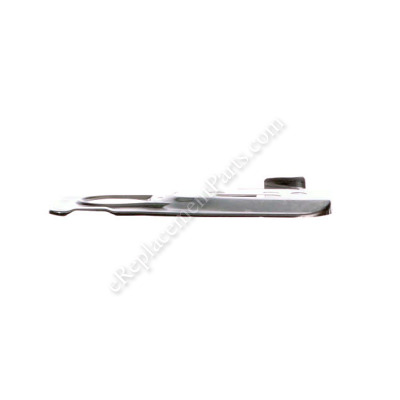


The plate is made out of metal and attaches to the crankcase. It is an original part for Husqvarna and Jonsered chainsaws and is sold individually. This part may become cracked or broken and will need to be replaced. A screwdriver and a socket set may be needed during the installation of this part.
Plate 537271302
OEM part for: Husqvarna, Jonsered
Part Number: 537271302
$18.68
In Stock
Jump To:
Frequently Purchased Together ?


Compatibility
This part will fit the following 23 machines
Husqvarna
455 E (2007-01) Chainsaw View Diagrams & Manuals
455 E (2006-06) Chainsaw View Diagrams & Manuals
455 (2004-10) Chainsaw View Diagrams & Manuals
455 (2005-01) Chainsaw View Diagrams & Manuals
455 (2005-03) Chainsaw View Diagrams & Manuals
455 Rancher (2006-02) Chainsaw View Diagrams & Manuals
455 (2006-06) Chainsaw View Diagrams & Manuals
455 (2007-01) Chainsaw View Diagrams & Manuals
460 (2005-03) Chainsaw View Diagrams & Manuals
460 (2006-02) Chainsaw View Diagrams & Manuals
460 (2006-06) Chainsaw View Diagrams & Manuals
460 (2007-01) Chainsaw View Diagrams & Manuals
460 (2011-01) Rancher Chainsaw View Diagrams & Manuals
455 E RANCHER II Chain Saw View Diagrams & Manuals
455 E RANCHER II TRIOBRAKE Chain Saw View Diagrams & Manuals
455 E TRIOBRAKE (2010-05) Chain Saw View Diagrams & Manuals
455 E TRIOBRAKE Chain Saw View Diagrams & Manuals
455 RANCHER II Chain Saw View Diagrams & Manuals
461 Chain Saw View Diagrams & Manuals
460 Rancher Chainsaw View Diagrams & Manuals
Jonsered
CS2255 (2008-03) Chain Saw View Diagrams & Manuals
CS2255 (2009-03) Chain Saw View Diagrams & Manuals
CS2255 (2011-01) Chain Saw View Diagrams & Manuals
Show More Compatible Models
This item works with the following types of products:
- Chain Saw Parts
- Saw Parts
This part replaces obsolete part #: 537271301
Questions & Answers ?
Our customer Service team is at the ready daily to answer your part and product questions.

Ask our Team
We have a dedicated staff with decades of collective experience in helping customers just like you purchase parts to repair their products.
Does this fit my product?Questions & Answers for Plate
No questions have been asked yet
Customer Repair Instructions ?
All our customer repair instructions are solicited directly from other customers just like you who have purchased and replaced this exact part.
Over time the chain would come off the bar after getting caught on twigs and tore off the bottom of the plate, leaving jagged edges
Walter - December 24, 2015
👍 6 of 6 people found this instruction helpful
Tool Type
Chain Saw
Difficulty
Easy
Time
15-30 minutes
Tools Used
Screwdriver, chainsaw supplied wrench
Parts Used
I simply removed the bar and chain, knocked the clutch loose as described in the owner's manual, exposing the plate. Removed the two screws that held the plate and removed the old plate, cleaned out a few years accumulation of saw dust and oil, and attached the new plate, which fit perfectly. I reversed the removal procedure and that's that.
Did you find this story helpful?
Thanks for voting and helping fellow customers!
Chain Plate worn out.
George - August 19, 2016
👍 1 of 1 people found this instruction helpful
Tool Type
Chain Saw
Difficulty
Hard
Time
15-30 minutes
Tools Used
Screwdriver, Socket set, Special Clutch removal Tool
Parts Used
The chain sprocket cover must be removed and the Clutch assembly. A special Tool is required to remove the Clutch, I made one. You can also purchase a Piston stop tool " I made One" or a piece of Rope to keep the Crankshaft from Turning in order to remove the Clutch. The Rope can be fed into the Spark plug hole until enough Rope stops the Crankshaft from turning. One the Clutch has been removed there is only one screw that holds the chain plate in place.
Did you find this story helpful?
Thanks for voting and helping fellow customers!
The plate was damaged
Gregory - November 15, 2021
Tool Type
Chain Saw
Difficulty
Easy
Time
15-30 minutes
Tools Used
Screwdriver, Socket set, allen wrench
1) Remove the clutch cover, clutch ,drum and plate.
2) Cleaned dirt out.
3) Replaced a new plate and 2 new parts.
4) Reassembled the clutch drum, clutch and cover,
2) Cleaned dirt out.
3) Replaced a new plate and 2 new parts.
4) Reassembled the clutch drum, clutch and cover,
Did you find this story helpful?
Thanks for voting and helping fellow customers!
Wear and tear, leaking bar oil, fuel lined cracked and running lean,
ROBERT - April 17, 2020
Tool Type
Chain Saw
Difficulty
Medium
Time
More than 2 hours
Tools Used
Screwdriver, Pliers, Socket set, Wrench Set
Watched u-tube videos for each individual repair
Did you find this story helpful?
Thanks for voting and helping fellow customers!
Chain brake handle wore out need new clutch hub
Loren - October 18, 2019
Tool Type
Chain Saw
Difficulty
Easy
Time
30-60 minutes
Tools Used
Screwdriver, Socket set, Allen wrenches
Remove the cover that hold bar and chain on take the fasteners that hold on chain brake handle on each side of housing. Reverse process to assemble. Clutch drum use clutch removal tool take off clutch and remove hub then reverse process to assemble
Did you find this story helpful?
Thanks for voting and helping fellow customers!
Chain was snagging in the metal plate behind the the sprocket
FRANCIS - August 9, 2017
Tool Type
Chain Saw
Difficulty
Easy
Time
15-30 minutes
Tools Used
Screwdriver, Socket set
Parts Used
Removed the housing cover, removed the bar and chain, removed the sprocket/drive wheel and unscrewed old metal plate that covers the bar oil pump mechanism. Screwed on the new plate cleaning all as I went and installed the sprocket,bar and chain, and the covering plastic case.
Did you find this story helpful?
Thanks for voting and helping fellow customers!
No oil getting to the bar. Damage to plate due to chain throw off. Oil tube seal hard.
Danny - December 13, 2016
Tool Type
Chain Saw
Difficulty
Easy
Time
15-30 minutes
Tools Used
Screwdriver, Hammer and punch to remove clutch.bar wrench. T30 Torx
Remove bar and chain. Remove clutch, sprocket,oil pump drive gear. Remove plate and oil tube. Reverse assembly.
Did you find this story helpful?
Thanks for voting and helping fellow customers!
The chain had been digging into the plate under the clutch. I had been using a .050 chain with a .058 bar. That could of been why the chain was hitting the plate.
David - November 20, 2016
Tool Type
Chain Saw
Difficulty
Easy
Time
Less than 15 minutes
Tools Used
Screwdriver, Hammer, rope.
Parts Used
Once I get the proper bar for my chain, I will take the spark plug out, insert a rope, hit the clutch to loosen taking it off along with the sprocket. Then I will take out the screw that holds down the plate, and then replace the plate with the new one.
Did you find this story helpful?
Thanks for voting and helping fellow customers!
OEM stands for Original Equipment Manufacturer and means the part you’re buying is sourced directly from the manufacturer who made your product. At eReplacementParts, we sell only genuine OEM parts, guaranteeing the part you’re purchasing is of better design and of higher quality than aftermarket parts.
Our product descriptions are a combination of data sourced directly from the manufacturers who made your product as well as content researched and curated by our content & customer service teams. This content is edited and reviewed internally before being made public to customers.
Our customer service team are at the ready daily to answer your part and product questions. We have a dedicated staff with decades of collective experience in helping customers just like you purchase parts to repair their products.
All our part reviews are solicited directly from other customers who have purchased this exact part. While we moderate these reviews for profanity, offensive language or personally identifiable information, these reviews are posted exactly as submitted and no alterations are made by our team.
All our customer repair instructions are solicited directly from other customers just like you who have purchased and replaced this exact part. While we moderate these reviews for profanity, offensive language or personally identifiable information, these reviews are posted exactly as submitted and no alterations are made by our team.
Based on data from past customer purchasing behaviors, these parts are most commonly purchased together along with the part you are viewing. These parts may be necessary or helpful to replace to complete your current repair.
All our installation videos are created and produced in collaboration with our in-house repair technician, Mark Sodja, who has helped millions of eReplacementParts customers over the last 13 years repair their products. Mark has years of experience in selling and repairing both commercial and residential products with a specialty in gas-powered equipment.
This data is collected from customers who submitted a repair instruction after replacing this exact part. Customers can rate how easy the repair was to complete and how long it took. We aggregate this data to provide a repair rating that allows customers to quickly determine the difficulty and time needed to perform their own repair.