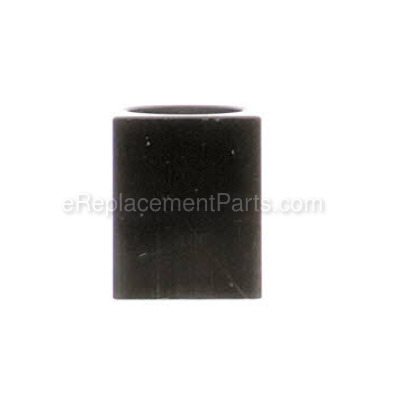


This is an Authentic OEM Approved replacement part designed for use with Makita Planers/Jointers. This part is made out of Metal and it is Sold Separately. This part helps to secure the Roller and allows it to spin smoothly.
To replace this part you would need Retaining Ring Pliers, Screwdriver and a Set of Wrenches.
Plane Bearing 214251-1
OEM part for: Makita
Part Number: 214251-1
$8.11
In Stock
Jump To:
Product Description ?
- Classification: Part
- Weight: 0.05 lbs.
- Shipping: Ships Worldwide
Frequently Purchased Together ?


Compatibility
This part will fit the following 7 machines
Makita
2012 Planer View Diagrams & Manuals
2040 Planer View Diagrams & Manuals
2030S Jointer View Diagrams & Manuals
2012NB Planer View Diagrams & Manuals
2004 Planer View Diagrams & Manuals
2030SZ Planer View Diagrams & Manuals
2040-2 Planer View Diagrams & Manuals
Show More Compatible Models
This item works with the following types of products:
- Planer Parts
- Jointer Parts
Repair Videos ?
Watch the Repair Video for
Plane Bearing

Customer Part Reviews ?
Average Rating (out of 5):
Click to filter by ratings:
5 stars
3
4 stars
0
3 stars
0
2 stars
0
1 stars
0
< PREV
- 1
Very satisfied
The bearing was a very simple part, however, it made a huge difference on my planer. The bearing was on the outfeed side and it was causing the wood to skip and then have feeding problems.
charles -
April 12, 2022
Verified Purchase
What it said it was
Well seized my feed roller on my planer, of course I thought I killed it. Turned out I just needed a bearing and a roller. They had it in stock and shipped out the next day. Back in business in my hobby wood shop. Thanks
Guest -
January 12, 2022
Verified Purchase
Bearing
Works fine - good fit
Guest -
November 26, 2019
Verified Purchase
t
t
t -
t days ago
Verified Purchase
eReplacementParts Team
t
Questions & Answers ?
Our customer Service team is at the ready daily to answer your part and product questions.

Ask our Team
We have a dedicated staff with decades of collective experience in helping customers just like you purchase parts to repair their products.
Does this fit my product?Questions & Answers for Plane Bearing
No questions have been asked yet
Customer Repair Instructions ?
All our customer repair instructions are solicited directly from other customers just like you who have purchased and replaced this exact part.
The bearing was wore through by the out feed roller shaft. Causing the stock to feed in a jerking motion as it went through the planer.
Pete - February 5, 2016
👍 3 of 3 people found this instruction helpful
Tool Type
Planer
Difficulty
Medium
Time
15-30 minutes
Tools Used
Screwdriver, Need split ring pliers
Parts Used
Remove the planer side panels
Remove the sprocket from the roller shaft
Remove the plane bearing retainer clips
Remove the roller and the plane bearing
Install new plane bearing on roller shaft
Re assemble
Remove the sprocket from the roller shaft
Remove the plane bearing retainer clips
Remove the roller and the plane bearing
Install new plane bearing on roller shaft
Re assemble
Did you find this story helpful?
Thanks for voting and helping fellow customers!
Replacing the roller bearings on a Makita 2040
mark - March 3, 2016
👍 1 of 1 people found this instruction helpful
Tool Type
Planer
Difficulty
Medium
Time
More than 2 hours
Tools Used
Screwdriver, Pliers, Socket set, Wrench Set, Nutdriver, Adjustable Wrench
Parts Used
The 2 screws that hold the bearing housing in are phillips heads. Discard those and replace with allen heads, works great! There are 4 roller adjustment pieces, a height adjustment and tension adjustment. Only one height adjustment goes all the way up and down per roller. So one has a some adjustment, and the other a lot. I assume it is a preventative measure by Makita to insure you CANT run the rollers to low. You are restricted by the travel of one side. No biggie, just spent 30 minutes trying to figure out why two of the adjustments had so little travel. I found a large old chisel, ground a bit, worked good for the adjustment.
Put the rollers up on blocks of wood and raise the bed till the bearings are in place, then have at the screws. Go slow, lube them good and don't cross thread them. Maybe have a small tap on hand.
Put the rollers up on blocks of wood and raise the bed till the bearings are in place, then have at the screws. Go slow, lube them good and don't cross thread them. Maybe have a small tap on hand.
Did you find this story helpful?
Thanks for voting and helping fellow customers!
Bearing noise upon shutdown.
Dennis - October 11, 2020
Tool Type
Planer
Difficulty
Hard
Time
More than 2 hours
Tools Used
Screwdriver, Socket set, Wrench Set
Removed the feed drive mechanism. Removed the spool and blades. Pulled the spool and pressed the bearings off. Carefully pressed the new bearings onto the spool shaft, using a deep well socket to press the bearings on. Put 'er back together and fired 'er up.
Did you find this story helpful?
Thanks for voting and helping fellow customers!
Broken chain, bent sprocket, worn bearings
Tom - September 3, 2020
Tool Type
Planer
Difficulty
Medium
Time
1-2 hours
Tools Used
Screwdriver, Snap ring pliers
Took the chain cover off, replaced old parts.
Did you find this story helpful?
Thanks for voting and helping fellow customers!
Wood would not feed evenly--stop and start
Steven - April 29, 2020
Tool Type
Planer
Difficulty
Medium
Time
More than 2 hours
Tools Used
, Expanding circlip pliers
Parts Used
There are a few points that might be helpful to others:
1. All three chain sprockets and chain can come off as one unit, no need to open master link.
2. Support bearing blocks with F clamp or your fingers to reduce load on the screws during R&R. Keep track of the springs; my outfeed roller had two springs on the drive side.
3. The bearing bores were slightly eccentric in the blocks, about 0.007" meaning that near-perfect alignment of the roller shafts is possible with selective assembly. Up-and-down variation is probably not important owing to spring pressure, but it made sense to me to align the bearings front-to-back as accurately as possible. Easily done by matching up the sides that will slot into the main casting in this dimension.
4. I asked a professional repairer of woodworking machines about lubing the bearings and he suggested a small amount of teflon-containing light grease. He said do not use Lubriplate as it will eventually harden.
5. I had to clean the rollers after assembly with isopropyl alcohol to remove traces of my grease. Isopropyl is not particularly aggressive and it worked well.
Did you find this story helpful?
Thanks for voting and helping fellow customers!
Replace rollers on old Makita 2040 planer.
Peter - February 7, 2020
Tool Type
Planer
Difficulty
Medium
Time
More than 2 hours
Tools Used
Screwdriver, Pliers, Wrench Set, Hammer, ring spreader
Removed old rollers, sprockets, bearings from machine and replaced with new parts.
Did you find this story helpful?
Thanks for voting and helping fellow customers!
1 broken and 3 worn feed roller bearings
Ted - August 20, 2017
Tool Type
Planer
Difficulty
Easy
Time
15-30 minutes
Tools Used
Screwdriver, Wrench Set
Parts Used
Removed the covers, roller chain, and old bearings. Replaced with new and replaced covers.
Did you find this story helpful?
Thanks for voting and helping fellow customers!
Would start and stop due severely damaged bearing.
Mitchell - March 15, 2017
Tool Type
Planer
Difficulty
Easy
Time
Less than 15 minutes
Tools Used
Screwdriver, Snap ring pliers
Parts Used
1. Remove cover over roller chain drive.
2. Using snap ring pliers, remove sprocket on roller that bearings are being changed.
3. Removed 4 screws that hold the clips retaining bearing and roller.
4. Replaced bearing.
5. Installed roller with clip and 4 screws. (Make sure springs are installed on top of bearing).
6. Install sprocket and chain.
7. Install chain drive cover.
Did you find this story helpful?
Thanks for voting and helping fellow customers!
Broke bearing roller shaft wore away material resulting in loose roller and poor out feed performance.
Garrett - January 24, 2017
Tool Type
Planer
Difficulty
Easy
Time
15-30 minutes
Tools Used
Screwdriver, Dial indicator and magnetic base
Lower planer bed. Remove metal gearbox cover. Remove chain. Loosen roller spring tension screw. Remove retainer plate for bearing and spring housing.drop bearing and roller out of housing. Remove gear retaining clip and gear from roller shaft. Replace bearings, and put back together. Use dial indicator to verify head is level to table, pressure plates and chip breakers are correct drop from head, and rollers are correct drop for the stock you feed. Adjust spring tension and test.
Did you find this story helpful?
Thanks for voting and helping fellow customers!
Sprocket broke, shaft on main drive roller broke, plane bearing worn through, and metal cover S broke.
Larry - December 30, 2016
Tool Type
Planer
Difficulty
Medium
Time
1-2 hours
Tools Used
Screwdriver, Pliers, Hammer, jack, file
Removed old roller, bearing, sprocket, and metal cover, that holds the roller in place, and replaced them with new ones. I used a car jack to hold the roller in place while I put the springs, bearings and roller back in place. Then I replace the sprocket, oiled the chain and clean everything. It is working great. This is a Makita 15 inch model 2040 planer. The new sprocket was hard to get back on. I had to do some minor filing. Using the car jack and a piece of wood freed my hands to get the springs, bearings, and roller back in place. I have had this planer for about thirty years.
Did you find this story helpful?
Thanks for voting and helping fellow customers!
Load More Install Stories
OEM stands for Original Equipment Manufacturer and means the part you’re buying is sourced directly from the manufacturer who made your product. At eReplacementParts, we sell only genuine OEM parts, guaranteeing the part you’re purchasing is of better design and of higher quality than aftermarket parts.
Our product descriptions are a combination of data sourced directly from the manufacturers who made your product as well as content researched and curated by our content & customer service teams. This content is edited and reviewed internally before being made public to customers.
Our customer service team are at the ready daily to answer your part and product questions. We have a dedicated staff with decades of collective experience in helping customers just like you purchase parts to repair their products.
All our part reviews are solicited directly from other customers who have purchased this exact part. While we moderate these reviews for profanity, offensive language or personally identifiable information, these reviews are posted exactly as submitted and no alterations are made by our team.
All our customer repair instructions are solicited directly from other customers just like you who have purchased and replaced this exact part. While we moderate these reviews for profanity, offensive language or personally identifiable information, these reviews are posted exactly as submitted and no alterations are made by our team.
Based on data from past customer purchasing behaviors, these parts are most commonly purchased together along with the part you are viewing. These parts may be necessary or helpful to replace to complete your current repair.
All our installation videos are created and produced in collaboration with our in-house repair technician, Mark Sodja, who has helped millions of eReplacementParts customers over the last 13 years repair their products. Mark has years of experience in selling and repairing both commercial and residential products with a specialty in gas-powered equipment.
This data is collected from customers who submitted a repair instruction after replacing this exact part. Customers can rate how easy the repair was to complete and how long it took. We aggregate this data to provide a repair rating that allows customers to quickly determine the difficulty and time needed to perform their own repair.