


Genuine Bostitch replacement part, this item is sold individually.
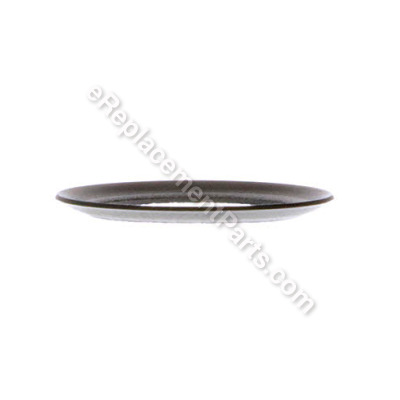
This part is installed on top of the piston/connecting rod.
Its purpose is to create a seal in the cylinder so that air can be pump into the compressor tank.
If this part wears your compressor will not pump the air properly. This is a wear part and it is advised to keep an extra one on hand.
Piston Ring AB-9040019
OEM part for: Bostitch
Part Number: AB-9040019
$10.68
In Stock
Jump To:
Product Description ?
- Classification: Part
- Weight: 0.01 lbs.
- Shipping: Ships Worldwide
Frequently Purchased Together ?


Compatibility
This part will fit the following 9 machines
Bostitch
CAP2000P-OF Type 0 Air Compressor View Diagrams & Manuals
CAP2040P-OF Air Compressor View Diagrams & Manuals
CAP60P-OF Air Compressor View Diagrams & Manuals
CAP60PB-OF Air Compressor View Diagrams & Manuals
CAP1512-OF (Type 0) Air Compressor View Diagrams & Manuals
CAP2000P-OF (Type 1) Air Compressor Power Tool View Diagrams & Manuals
CAP2040P-OF (Type 0) Air Compressor Power Tool View Diagrams & Manuals
CAP60P-OF (Type 0) Air Compressor Power Tool View Diagrams & Manuals
CAP60PB-OF (Type 0) Air Compressor Power Tool View Diagrams & Manuals
Show More Compatible Models
This item works with the following types of products:
- Compressor Parts
Customer Part Reviews ?
Average Rating (out of 5):
Click to filter by ratings:
5 stars
5
4 stars
0
3 stars
0
2 stars
0
1 stars
0
< PREV
- 1
Service was great, and the part was a genuine OEM part. Worked great.!!
Part was as expected. Genuine OEM part. Worked great!!
Guest -
August 15, 2022
Verified Purchase
Ordered 4 pcs Great parts - as expexted
Arrived quick and in NEW condition
My pump is now up and running
iGlobal -
November 10, 2021
Verified Purchase
Kompressor parts
Perfect fit. Shipping time not so fast but have arrived. Thank You
iGlobal -
November 19, 2020
Verified Purchase
Fit perfectly and immediately increased pressure without constant running of the compressor.
Part arrived when expected and fit perfectly.
Guest -
May 2, 2020
Verified Purchase
Perfect
Exactly as described, just what I needed
Guest -
October 25, 2019
Verified Purchase
t
t
t -
t days ago
Verified Purchase
eReplacementParts Team
t
Questions & Answers ?
Our customer Service team is at the ready daily to answer your part and product questions.

Ask our Team
We have a dedicated staff with decades of collective experience in helping customers just like you purchase parts to repair their products.
Does this fit my product?Questions & Answers for Piston Ring
Will this ring fit a 2.6 scfm 6 gal pancake compressor
Melvin
for model number Btfp02012
asked on 2022-03-31
Hi Melvin,
Thank you for your question. The piston ring listed for your air compressor is sold with the cylinder kit. The part number listed under your model number for the cylinder kit is N036517. If you need help placing an order for it, customer service is open 7 days a week and anyone will be happy to assist you. Please feel free to give us a call. We look forward to hearing from you!
eReplacementParts Team March 31, 2022
Customer Repair Instructions ?
All our customer repair instructions are solicited directly from other customers just like you who have purchased and replaced this exact part.
Torx screw failed, piston came apart destroying piston ring and ring cover, also scored cylinder.
Jimmie - April 7, 2016
👍 8 of 8 people found this instruction helpful
Tool Type
Compressor
Difficulty
Easy
Time
1-2 hours
Tools Used
Screwdriver, Socket set, Wrench Set
This is for a small, pancake air compressor used to drive a nail gun.
On disassembly, take photo or do drawing to show where parts go, especially reeds in the head..
Assemble new piston parts, use thread lock on torx screw.
Pass connecting rod up and through new cylinder barrel with connecting rod sticking out the end without the flange. Then hold on flat work surface with piston end down. Stiff piston ring is hard to bend so it will go into cylinder. I put some WD40 on the cylinder to make it easier. push down on cylinder while rocking piston a little until piston ring compresses and piston slides into cylinder. Ring should be concave toward cylinder head.
Assemble piston, connecting rod and cylinder into compressor through the cylinder frame, lightly tap connecting rod onto bearing. Don't let piston slide out of cylinder barrel.
Fix connecting rod to bearing with connecting rod clamping screw, thread lock would be good here too.
Install fan onto crankshaft with socket head screw.
Assemble cylinder head parts, taking care to keep reeds in proper place. Use your photo to make sure you get things right. Use new gaskets. Head parts and gaskets form several layers. While holding layered parts together, install on compressor with cylinder head bolts. Two inside nuts are captive in frame, outside nuts require 10mm box wrench to tighten. Install cylinder-to-tank tube and tighten. Run compressor briefly (keeping body, fingers, etc. away from the fan and connecting rod in case something comes loose) and see that pressure starts to build. If so, reassemble cover halves using the long bolts and screws. You will have to take the hose connection off to get one cover half on so release the pressure in the tank if any. Job done. Would have taken less time, but doubted whether reeds stayed in place and took head apart again. Also make sure you order all gaskets and parts you'll need up front. I didn't and it cost me more for shipping. ereplacementParts was fast on the orders and had the right parts. When a piston lets go, it is best to replace all the parts from connecting rod to piston cover and likely the cylinder too as it gets scored from the piston without ring banging around. Doesn't take much banging to do it.
Did you find this story helpful?
Thanks for voting and helping fellow customers!
Loss of compression generation
Anthony - March 23, 2018
👍 1 of 1 people found this instruction helpful
Tool Type
Compressor
Difficulty
Easy
Time
Less than 15 minutes
Tools Used
Screwdriver, Socket set
Removed head, cleaned off old gasket, replaced valve plate and lower and upper gaskets, retightened head bolts attached feeder tube. Turned on compressor allowed to get to full pressure, checked for leaks.
Did you find this story helpful?
Thanks for voting and helping fellow customers!
Blown Reed valve & supply tube to tank
peter - October 7, 2023
Tool Type
Compressor
Difficulty
Medium
Time
30-60 minutes
Tools Used
Screwdriver, Socket set, Wrench Set, Allen wrench, fine fine sandpaper
Parts Used
Took apart head, replaced gaskets and reeds, also on piston and screwed it back together.
I think it's on the right track to work again.
I think it's on the right track to work again.
Did you find this story helpful?
Thanks for voting and helping fellow customers!
Compressor would not build pressure above 80 psi.
Bruce - March 17, 2022
Tool Type
Compressor
Difficulty
Easy
Time
15-30 minutes
Tools Used
Screwdriver, Wrench Set, Nutdriver, Torx bit
Replaced cover, connecting rod, piston ring, cylinder and torx screw. Put the piston and rod in the cylinder and connect the connecting rod. By replacing these parts it fixed the problem.
Did you find this story helpful?
Thanks for voting and helping fellow customers!
compressor not building pressure
charlie - March 6, 2022
Tool Type
Compressor
Difficulty
Expert
Time
More than 2 hours
Tools Used
, oil,grease,heat
Parts Used
gave up. put in new valves but after the 3rd piston seal I quit. They are way to stiff to get into the piston cylinder without tearing. tried grease, oil and heat but when you try to get it into the cylinder it tears. The last one does get pressure up to 70 lbs so i'll quit with that.
Did you find this story helpful?
Thanks for voting and helping fellow customers!
Fan/connecting rod evidently slipped off bearing destroying fan and putting excessive wear on piston ring. Also fan pieces sucked into prison and melted onto reed valve.
Richard - August 24, 2020
Tool Type
Compressor
Difficulty
Easy
Time
15-30 minutes
Tools Used
Screwdriver, Wrench Set, Adjustable Wrench, Star drive & Allen wrench set.
Removed cover from compressor.
Removed head and broken fan.
Pushed piston up thru top of cylinder
Cleaned piston head w/ brass wire rush to remove melted plastic. Also cleaned cylinder w/ fine steel wool. Replaced piston ring, reed valve & fan.
Tap connecting rod onto bearing. You may also want to order the head gaskets. Do not overtightened heads.
Be sure to tighten all fittings to prevent air leakage.
Reassembled cover, plugged unit in and it pressured right up to 140psi.
Did you find this story helpful?
Thanks for voting and helping fellow customers!
drive belt broken, bad crank brgs
richard - January 20, 2020
Tool Type
Compressor
Difficulty
Medium
Time
1-2 hours
Tools Used
Screwdriver, Pliers, Socket set, Wrench Set, snap ring pliers
disassembled and replaced needed parts
Did you find this story helpful?
Thanks for voting and helping fellow customers!
Burned off the timing belt and damaged the piston ring during repair.
Rodger - September 5, 2019
Tool Type
Compressor
Difficulty
Expert
Time
More than 2 hours
Tools Used
Screwdriver, Power Drill, Socket set, Wrench Set, Nutdriver, torx. propane torch, allen wrenches
I first replaced the timing belt and damaged the piston ring (rubber). I had to go on internet several times to complete repair. There are (weird)long bolts through the covering. There is a reverse thread bolt on the fan. There is a torx bolt holding the piston ring cover on. Had to heat the piston ring crank shaft with a torch to get the torx bolt out. Couldn't get it out with an impact driver. The new piston ring is hard to get back in place. You need to premold the new ring and slide the piston in at an angle in to the cylinder or you will never get it back in. There are two small plates of steel in the compressor head that keep falling out and getting out of position. Getting the timing belt on is difficult too. Bostitch Model CAP2000P-OF
Did you find this story helpful?
Thanks for voting and helping fellow customers!
Bearing went out.
Craig - July 11, 2017
Tool Type
Compressor
Difficulty
Medium
Time
30-60 minutes
Tools Used
Screwdriver, Pliers, Socket set, Wrench Set, Adjustable Wrench
Replaced the bearing and the piston.
Did you find this story helpful?
Thanks for voting and helping fellow customers!
Connecting rod bearing failed and it threw the rod.
Thomas - May 19, 2017
Tool Type
Compressor
Difficulty
Medium
Time
30-60 minutes
Tools Used
Screwdriver, Pliers, Socket set, Adjustable Wrench
1. Disassembled the compressor.
2. Discover what I needed and ordered parts.
3. Had to take the reed valve (head) off to install the connecting rod and piston seal.
4. Tapped the rod bearing on the crankshaft.
5. Installed the fan
6. Put it back together.
Be extra careful when working with the head(reed valve) to be sure they don't get out of place.
Did you find this story helpful?
Thanks for voting and helping fellow customers!
Load More Install Stories
OEM stands for Original Equipment Manufacturer and means the part you’re buying is sourced directly from the manufacturer who made your product. At eReplacementParts, we sell only genuine OEM parts, guaranteeing the part you’re purchasing is of better design and of higher quality than aftermarket parts.
Our product descriptions are a combination of data sourced directly from the manufacturers who made your product as well as content researched and curated by our content & customer service teams. This content is edited and reviewed internally before being made public to customers.
Our customer service team are at the ready daily to answer your part and product questions. We have a dedicated staff with decades of collective experience in helping customers just like you purchase parts to repair their products.
All our part reviews are solicited directly from other customers who have purchased this exact part. While we moderate these reviews for profanity, offensive language or personally identifiable information, these reviews are posted exactly as submitted and no alterations are made by our team.
All our customer repair instructions are solicited directly from other customers just like you who have purchased and replaced this exact part. While we moderate these reviews for profanity, offensive language or personally identifiable information, these reviews are posted exactly as submitted and no alterations are made by our team.
Based on data from past customer purchasing behaviors, these parts are most commonly purchased together along with the part you are viewing. These parts may be necessary or helpful to replace to complete your current repair.
All our installation videos are created and produced in collaboration with our in-house repair technician, Mark Sodja, who has helped millions of eReplacementParts customers over the last 13 years repair their products. Mark has years of experience in selling and repairing both commercial and residential products with a specialty in gas-powered equipment.
This data is collected from customers who submitted a repair instruction after replacing this exact part. Customers can rate how easy the repair was to complete and how long it took. We aggregate this data to provide a repair rating that allows customers to quickly determine the difficulty and time needed to perform their own repair.