eReplacementParts.com
877-346-4815
Porter Cable Parts

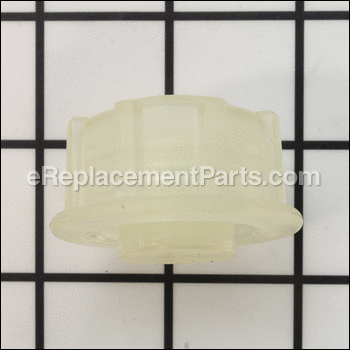
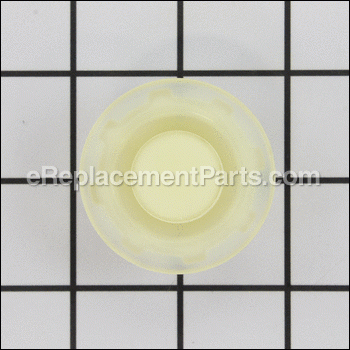
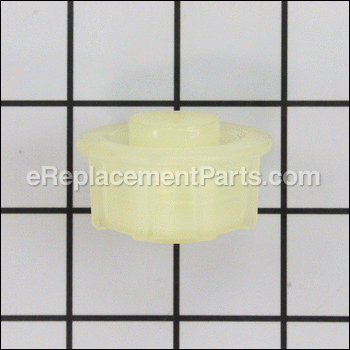
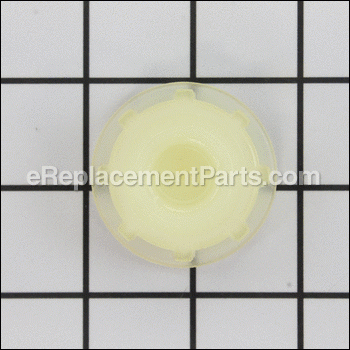
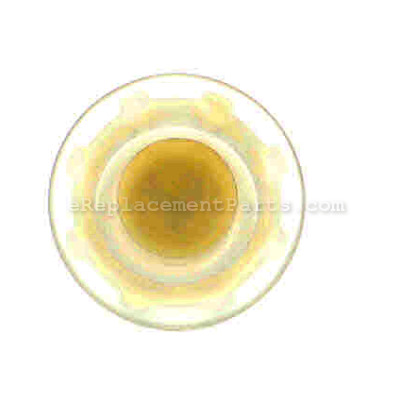
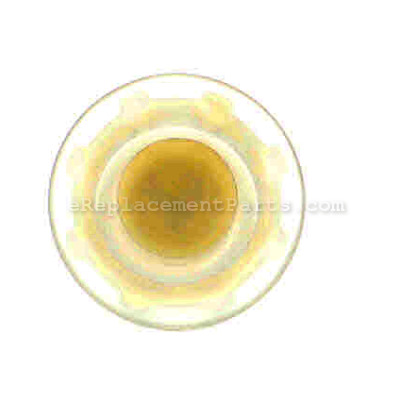
Piston Bumper 901901

OEM part for: Porter Cable

Part Number: 901901


Install
Videos!
Piston Bumper - 901901:Porter Cable 360 View
Piston Bumper - 901901:Porter CablePiston Bumper - 901901:Porter CablePiston Bumper - 901901:Porter CablePiston Bumper - 901901:Porter CablePiston Bumper - 901901:Porter CablePiston Bumper - 901901:Porter Cable 360 View
In Stock
Order within the next 1 hour and your part ships today!
Easy 15-30 minutes (37 rated repairs)?
OEM: Original Equipment Manufacturer ?
Porter Cable
Does this d-block d-md-none fit my product?

Product Description ?

Genuine Porter Cable replacement part, this item is sold individually.
The Piston Bumper is located Cylinder Cap of the nail guns listed below.
This part acts as a cushion when the piston/driver retracts back into the cylinder after being fired.

  • Classification: Part
  • Weight: 0.03 lbs.
  • Shipping: Ships Worldwide

Frequently Purchased Together ?

Compatibility

This part will fit the following 6 machines

Porter Cable

FC350 Type 1 Clipped Head Framing Nailer View Diagrams & Manuals
FC350 Type 2 Clipped Head Framing Nailer View Diagrams & Manuals
FC350 Type 3 Clipped Head Framing Nailer View Diagrams & Manuals
FR350 Type 1 Round Head Framing Nailer View Diagrams & Manuals
FR350 Type 3 Round Head Framing Nailer View Diagrams & Manuals
FR350 Type 2 Round Head Framer View Diagrams & Manuals
Show More Compatible Models
Don't see yours? Try searching our site for :

This item works with the following types of products:

  • Nailer Parts

Customer Part Reviews ?

4.8
Average Rating (out of 5):
13 Reviews
Click to filter by ratings:
5 stars
11
4 stars
2
3 stars
0
2 stars
0
1 stars
0
  • Highest Rating
  • Most Recent
< PREV
  • 1
  • 2
NEXT >
  • Easy Repair.
    Working like new.
    Guest - June 29, 2023 Verified Purchase
    Excellent fit!
    “ Like a plug and play device on a computer “ Works and the air nailer is alive again. Thanks
    Guest - February 16, 2022 Verified Purchase
    Nail gun part
    Found parts effortlessly. Received without issue. Part was easy to install with provided video links. Thanks.
    Guest - January 21, 2022 Verified Purchase
    The right part for my Porter Cable nail gun.
    This was the part I needed. It replaced the disintegrated part that I found inside.
    Rod - August 2, 2021 Verified Purchase
    Perfect fit
    Quick delivery. Package well with no damage. Gun works perfect.
    MIKE - July 19, 2021 Verified Purchase
    Easy fix
    Thanks for my part now my nail gun it’s back on business
    Guest - November 11, 2020 Verified Purchase
    Easy repair
    nailer works like new
    Guest - November 18, 2019 Verified Purchase
    easy to order and find parts
    Arrived quickly.
    Guest - September 25, 2019 Verified Purchase
    Excellent transaction
    Like usual, it was easy to find just what I need on your website, even if I don't know the exact name of the part. Shipping was fast and reasonably priced. Really happy that I could repair this expensive nail gun rather than have to replace it. Thanks!
    Guest - July 29, 2019 Verified Purchase
    Nail gun
    I received the right parts and my nail gun is working just like new
    Guest - June 22, 2019 Verified Purchase
    t
    t
    t - t days ago Verified Purchase
    eReplacementParts Team
    t

    Questions & Answers ?

    Our customer Service team is at the ready daily to answer your part and product questions.

    photo of team member
    Ask our Team

    We have a dedicated staff with decades of collective experience in helping customers just like you purchase parts to repair their products.

    Does this fit my product?

    Questions & Answers for Piston Bumper


    No questions have been asked yet

    Customer Repair Instructions ?

    All our customer repair instructions are solicited directly from other customers just like you who have purchased and replaced this exact part.

    Easy 15-30 minutes (37 rated repairs)?

    Nailer would not feed. One shot, then nothing but the a mark from the end of the driver - no nail.

    Chad - February 2, 2016
    👍 30 of 30 people found this instruction helpful
    Tool Type

    Nailer

    Difficulty

    Medium

    Time

    30-60 minutes

    Tools Used

    , Allen wrench

    I initially thought the problem was a damaged nail driver. Once I disassembled the top of the nailer I found the plastic piston bumper had disintegrated. Note: A properly functioning bumper and spring assembly dampens the recoil of the driver and keeps it high enough in the unit to be in position to strike the next nail. Without the bumper intact the driver snaps down below the nails and will not pick them up on the next trigger pull. Other than not picking up a nail, everything else appears to work properly. The youtube video produced by ereplacementparts (the one that addresses an overhaul) was all I needed to see how to fix it. I used the air compressor to blow out the 10,000 some odd pieces of piston bumper - it was all over the place. All of my o rings look intact, but it probably would have been worth the time to replace them. We'll see how that goes. I did lube them all with o ring silicone when I put it back together. Worked great on the test run.
    Did you find this story helpful?
    Thanks for voting and helping fellow customers!

    Nailer would not draw all the way back to allow another nail in the chamber

    Travis - January 21, 2016
    👍 13 of 13 people found this instruction helpful
    Tool Type

    Nailer

    Difficulty

    Easy

    Time

    30-60 minutes

    Tools Used

    Wrench Set, Nutdriver

    I removed the top cap of the nail gun and saw the broken pieces of the piston bumper. I removed all plastic debris from upper area. Then replaced piston bumper, worked like charm. all my seals, o-rings and gaskets were good as I had oiled religiously over the years. All good
    Did you find this story helpful?
    Thanks for voting and helping fellow customers!

    The framing nailer stopped working

    Roger - November 22, 2015
    👍 7 of 7 people found this instruction helpful
    Tool Type

    Nailer

    Difficulty

    Easy

    Time

    15-30 minutes

    Tools Used

    , Allen wrench that came with kit

    Had to disassemble and inspect. Found piston bumper had broken up and damaged the piston seals. Thoroughly cleaned all internal parts as per instructions and install new seals the come with the Overhaul Kit.. I had watched the video that was on your site and found Overhaul a breeze.
    Thanks R.G.
    Did you find this story helpful?
    Thanks for voting and helping fellow customers!

    Piston bumper disintegration

    Keith - June 22, 2016
    👍 4 of 4 people found this instruction helpful
    Tool Type

    Nailer

    Difficulty

    Medium

    Time

    15-30 minutes

    Tools Used

    Pliers, Power Drill

    1. Removed 4 Allen screws on head
    2. Remove piston and collar
    3. Use pliers to remove what was left of piston bumper
    4. Use air and parts cleaner to remove all pieces of disintegrated piston bumper
    5. Install in bumper
    6. Apply lube to the o-rings
    8. Install head torque bolts
    Did you find this story helpful?
    Thanks for voting and helping fellow customers!

    Broken bumper

    reynaldo - May 20, 2017
    👍 2 of 2 people found this instruction helpful
    Tool Type

    Nailer

    Difficulty

    Easy

    Time

    15-30 minutes

    Tools Used

    Screwdriver, Nutdriver

    Remove the screws from the top cap. Remove the broken bumper and all of the pieces of it in the gun. Replace the bumper and oil the interior of the gun. The screw the top cap back on.
    Did you find this story helpful?
    Thanks for voting and helping fellow customers!

    The piston bumper was smashed into a million pieces.

    John - September 5, 2018
    👍 1 of 1 people found this instruction helpful
    Tool Type

    Nailer

    Difficulty

    Medium

    Time

    15-30 minutes

    Tools Used

    , Allen Wrench

    Watched your U tube movie on how to repair. That showed me how to do the job. I have never had a nailer apart before. Took nailer apart. The nailer did not need the piston or nailing slide taken out as shown on the movie. It did need to be banged on a block of wood to remove parts in the top (as shown in movie). Removed top section from nailer. Removed all particles of busted bumper. Reassembled with new bumper, applied air pressure, tested on a 2x4 block of wood. It worked just fine.
    Did you find this story helpful?
    Thanks for voting and helping fellow customers!

    Nailer was slow to recover after power stroke. It drove the nail fine and then would leak air for a bit before it fully recovered.

    Robert - July 8, 2018
    👍 1 of 1 people found this instruction helpful
    Tool Type

    Nailer

    Difficulty

    Easy

    Time

    Less than 15 minutes

    Tools Used

    , Allen wrench included with the nailer

    1. Removed the tool from the air supply.
    2. Removed the four cap screws that hold on the top cover.
    3. Removed the air chamber seal piston, spring, and washer from the top cover. Pay attention to the order of parts as you remove them.
    4. Removed the shattered piston bumper.
    5. Cleaned up the interior of the top cover and the seal piston.
    6. Installed the new piston bumper. It just pushes into place.
    7. Inserted the air chamber seal piston, spring, and washer back into the top cover.
    8. Reattached the top cover and tightened the four cap screws that hold it in place.
    Did you find this story helpful?
    Thanks for voting and helping fellow customers!

    Piston bumper deteriorated inside the gun

    Matt - May 26, 2017
    👍 1 of 1 people found this instruction helpful
    Repair was easy and cost effective. All I did was watch the video first to see if I wanted to tackle the project. When it was over discovered there really isn't a lot of parts inside to keep me from trying it. So, I disassembled the nailer and found the source- broken piston bumper. I could see all kinds of plastic pieces scattered throughout the internal workings of the gun. After a good cleaning and a check of all the o-rings, the top portion of the nailer would have to be replaced. Next, I ordered the parts from the website which was simple and easy- in fact I also found a part to my Porter Cable sander as well. After a few short days the parts arrived and I put the gun back together, plugged it into the compressor and tried it out. "P-ka," the nailer was once again making that sweet sound that my wife can't stand.

    Now if I had to buy the complete overhaul kit I'm not too sure I would have fixed the nailer. Reason being, the big box stores are always having a sale and a new one could be found for 30-50 dollars more with a one year warranty. Unless, I already had an abundance of nails that were specific to the old nailer then I would fix the old one.

    Good Luck with your project and may the force be with you!
    Did you find this story helpful?
    Thanks for voting and helping fellow customers!

    Air leaking out of top

    robert - December 3, 2016
    👍 1 of 1 people found this instruction helpful
    Tool Type

    Nailer

    Difficulty

    Easy

    Time

    15-30 minutes

    Tools Used

    , Allen Wrench / Channel Lock Pliers

    I used the allen wrench that came with the nailer to remove the cap.
    I removed the broken piston bumper
    I removed the valve seal
    I cleaned the internal area of the gun completely & oiled it
    I installed the new parts
    I then screwed the cap back on


    Did you find this story helpful?
    Thanks for voting and helping fellow customers!

    Piston Bumper was old and several pieces. Nailer 20 years old!!!!

    Mark - July 21, 2018
    Tool Type

    Nailer

    Difficulty

    Easy

    Time

    15-30 minutes

    Tools Used

    , Allen wrench set

    Disassembled piston unit and installed new piston Bumper. Replaced trigger pin retainer and re-assembled unit back and installed nose cushion and unit is back in business. Thanks
    Did you find this story helpful?
    Thanks for voting and helping fellow customers!

    OEM stands for Original Equipment Manufacturer and means the part you’re buying is sourced directly from the manufacturer who made your product. At eReplacementParts, we sell only genuine OEM parts, guaranteeing the part you’re purchasing is of better design and of higher quality than aftermarket parts.

    Our product descriptions are a combination of data sourced directly from the manufacturers who made your product as well as content researched and curated by our content & customer service teams. This content is edited and reviewed internally before being made public to customers.

    Our customer service team are at the ready daily to answer your part and product questions. We have a dedicated staff with decades of collective experience in helping customers just like you purchase parts to repair their products.

    All our part reviews are solicited directly from other customers who have purchased this exact part. While we moderate these reviews for profanity, offensive language or personally identifiable information, these reviews are posted exactly as submitted and no alterations are made by our team.

    All our customer repair instructions are solicited directly from other customers just like you who have purchased and replaced this exact part. While we moderate these reviews for profanity, offensive language or personally identifiable information, these reviews are posted exactly as submitted and no alterations are made by our team.

    Based on data from past customer purchasing behaviors, these parts are most commonly purchased together along with the part you are viewing. These parts may be necessary or helpful to replace to complete your current repair.

    All our installation videos are created and produced in collaboration with our in-house repair technician, Mark Sodja, who has helped millions of eReplacementParts customers over the last 13 years repair their products. Mark has years of experience in selling and repairing both commercial and residential products with a specialty in gas-powered equipment.

    This data is collected from customers who submitted a repair instruction after replacing this exact part. Customers can rate how easy the repair was to complete and how long it took. We aggregate this data to provide a repair rating that allows customers to quickly determine the difficulty and time needed to perform their own repair.

    eReplacementParts.com
    7174 South 400 West
    Suite 5
    Midvale, UT 84047
    visa mastercard discover american express PayPal