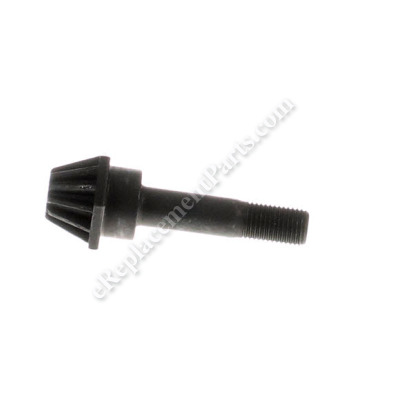


This item is an authentic replacement part that has been OEM sourced and is intended to be used with lawnmowers from Toro and Lawn Boy. The metal pinion is part of the transmission assembly. This item is driven by the pulley and is used to driver the transaxle gear. This item is available as an individual replacement part.
Pinion 92-5790
OEM part for: Toro, Lawn Boy
Part Number: 92-5790
$16.18
In Stock
Jump To:
Frequently Purchased Together ?


Compatibility
This part will fit the following 200 machines
Toro
20001 (240000001-240999999)(2004) Lawn Mower View Diagrams & Manuals
20003 (250000001-250999999)(2005) Lawn Mower View Diagrams & Manuals
20003 (260000001-260999999)(2006) Lawn Mower View Diagrams & Manuals
20005 (250000001-250999999)(2005) Lawn Mower View Diagrams & Manuals
20005 (260000001-260999999)(2006) Lawn Mower View Diagrams & Manuals
20007 (240000001-240999999)(2004) Lawn Mower View Diagrams & Manuals
20012 (220000001-220300000)(2002) Lawn Mower View Diagrams & Manuals
20012 (220300001-220999999)(2002) Lawn Mower View Diagrams & Manuals
20012 (230000001-230999999)(2003) Lawn Mower View Diagrams & Manuals
20012 (240000001-240999999)(2004) Lawn Mower View Diagrams & Manuals
20012 (250000001-250999999)(2005) Lawn Mower View Diagrams & Manuals
20012 (260000001-260999999)(2006) Lawn Mower View Diagrams & Manuals
20013 (220000001-220300000)(2002) Lawn Mower View Diagrams & Manuals
20013 (220300001-220999999)(2002) Lawn Mower View Diagrams & Manuals
20013 (230000001-230999999)(2003) Lawn Mower View Diagrams & Manuals
20013 (240000001-240999999)(2004) Lawn Mower View Diagrams & Manuals
20013 (250000001-250999999)(2005) Lawn Mower View Diagrams & Manuals
20013 (260000001-260999999)(2006) Lawn Mower View Diagrams & Manuals
20014 (220000001-220300000)(2002) Lawn Mower View Diagrams & Manuals
20014 (220300001-220999999)(2002) Lawn Mower View Diagrams & Manuals
20014 (230000001-230999999)(2003) Lawn Mower View Diagrams & Manuals
20016 (220000001-220300000)(2002) Lawn Mower View Diagrams & Manuals
20016 (220300001-220999999)(2002) Lawn Mower View Diagrams & Manuals
20016 (230000001-230999999)(2003) Lawn Mower View Diagrams & Manuals
20016 (240000001-240999999)(2004) Lawn Mower View Diagrams & Manuals
20016 (250000001-250999999)(2005) Lawn Mower View Diagrams & Manuals
20016 (260000001-260999999)(2006) Lawn Mower View Diagrams & Manuals
20017 (220000001-220300000)(2002) Lawn Mower View Diagrams & Manuals
20017 (220300001-220999999)(2002) Lawn Mower View Diagrams & Manuals
20017 (230000001-230999999)(2003) Lawn Mower View Diagrams & Manuals
20017 (240000001-240999999)(2004) Lawn Mower View Diagrams & Manuals
20017 (250000001-250999999)(2005) Lawn Mower View Diagrams & Manuals
20017 (260000001-260999999)(2006) Lawn Mower View Diagrams & Manuals
20018 (220000001-220300000)(2002) Lawn Mower View Diagrams & Manuals
20018 (220300001-220999999)(2002) Lawn Mower View Diagrams & Manuals
20018 (230000001-230999999)(2003) Lawn Mower View Diagrams & Manuals
20019 (230000001-230999999)(2003) Lawn Mower View Diagrams & Manuals
20031 (240000001-240999999)(2004) Lawn Mower View Diagrams & Manuals
20041 (250000001-250999999)(2005) Lawn Mower View Diagrams & Manuals
20047 (260000001-260999999)(2006) Lawn Mower View Diagrams & Manuals
20049 (250000001-250999999)(2005) Lawn Mower View Diagrams & Manuals
20051 (240000001-240999999)(2004) Lawn Mower View Diagrams & Manuals
20064 (270000001-270999999)(2007) Lawn Mower View Diagrams & Manuals
20064 (280000001-280070155)(2008) Lawn Mower View Diagrams & Manuals
20064 (280070156-280999999)(2008) Lawn Mower View Diagrams & Manuals
20065 (270000001-270999999)(2007) Lawn Mower View Diagrams & Manuals
20065 (280000001-280072441)(2008) Lawn Mower View Diagrams & Manuals
20065 (280072442-280999999)(2008) Lawn Mower View Diagrams & Manuals
20066 (270000001-270999999)(2007) Lawn Mower View Diagrams & Manuals
20066 (280000001-280999999)(2008) Lawn Mower View Diagrams & Manuals
20067 (270000001-270999999)(2007) Lawn Mower View Diagrams & Manuals
20067 (280000001-280999999)(2008) Lawn Mower View Diagrams & Manuals
20068 (280000001-280999999)(2008) Lawn Mower View Diagrams & Manuals
20069 (270000001-270999999)(2007) Lawn Mower View Diagrams & Manuals
20070 (260000001-260999999)(2006) Lawn Mower View Diagrams & Manuals
20071 (270000001-270999999)(2007) Lawn Mower View Diagrams & Manuals
20071A (270000001-270999999)(2007) Lawn Mower View Diagrams & Manuals
20072 (270000001-270999999)(2007) Lawn Mower View Diagrams & Manuals
20072A (270000001-270999999)(2007) Lawn Mower View Diagrams & Manuals
20073 (270000001-270999999)(2007) Lawn Mower View Diagrams & Manuals
20073A (270000001-270999999)(2007) Lawn Mower View Diagrams & Manuals
20074 (270000001-270999999)(2007) Lawn Mower View Diagrams & Manuals
20074A (270000001-270999999)(2007) Lawn Mower View Diagrams & Manuals
20075 (270000001-270999999)(2007) Lawn Mower View Diagrams & Manuals
20076 (270000001-270999999)(2007) Lawn Mower View Diagrams & Manuals
20076A (270000001-270999999)(2007) Lawn Mower View Diagrams & Manuals
20079 (260000001-260999999)(2006) Lawn Mower View Diagrams & Manuals
20086 (280000001-280011041)(2008) Lawn Mower View Diagrams & Manuals
20086 (280011042-280999999)(2008) Lawn Mower View Diagrams & Manuals
20087 (280000001-280009000)(2008) Lawn Mower View Diagrams & Manuals
20087 (280009001-280999999)(2008) Lawn Mower View Diagrams & Manuals
20089 (280000001-280999999)(2008) Lawn Mower View Diagrams & Manuals
20094 (270000001-270999999)(2007) Lawn Mower View Diagrams & Manuals
20096 (270000001-270999999)(2007) Lawn Mower View Diagrams & Manuals
20098 (270000001-270999999)(2007) Lawn Mower View Diagrams & Manuals
20110 (280000001-280001676)(2008) Lawn Mower View Diagrams & Manuals
20110 (280001677-280999999)(2008) Lawn Mower View Diagrams & Manuals
20110 (290000001-290999999)(2009) Lawn Mower View Diagrams & Manuals
20111 (280000001-280001951)(2008) Lawn Mower View Diagrams & Manuals
20111 (280001952-280999999)(2008) Lawn Mower View Diagrams & Manuals
20111 (290000001-290999999)(2009) Lawn Mower View Diagrams & Manuals
20112 (280000001-280999999)(2008) Lawn Mower View Diagrams & Manuals
20113 (280000001-280999999)(2008) Lawn Mower View Diagrams & Manuals
20113 (290000001-290999999)(2009) Lawn Mower View Diagrams & Manuals
20655 (270000001-270999999)(2007) Lawn Mower View Diagrams & Manuals
20655 (280000001-280999999)(2008) Lawn Mower View Diagrams & Manuals
20655 (240000001-240999999)(2004) Lawn Mower View Diagrams & Manuals
20655 (250000001-250999999)(2005) Lawn Mower View Diagrams & Manuals
20655 (260000001-260999999)(2006) Lawn Mower View Diagrams & Manuals
20656 (270000001-270999999)(2007) Lawn Mower View Diagrams & Manuals
20656 (280000001-280999999)(2008) Lawn Mower View Diagrams & Manuals
20656 (240000001-240999999)(2004) Lawn Mower View Diagrams & Manuals
20656 (250000001-250999999)(2005) Lawn Mower View Diagrams & Manuals
20656 (260000001-260999999)(2006) Lawn Mower View Diagrams & Manuals
20658 (280000001-280999999)(2008) Lawn Mower View Diagrams & Manuals
20658 (290000001-290999999)(2009) Lawn Mower View Diagrams & Manuals
11001 (7900001-7999999) (1997) Side Discharge Mower View Diagrams & Manuals
11003 (8900001-8999999) (1998) 53cm Lawnmower View Diagrams & Manuals
11003 (9900001-9999999) (1999) 53cm Lawnmower View Diagrams & Manuals
22241 (7900001-7999999) (1997) Side Discharge Mower View Diagrams & Manuals
22243 (250000001-250999999) Commercial Side-discharge Lawnmower, 2005 View Diagrams & Manuals
22243 (260000001-260999999) Commercial Side-discharge Lawnmower, 2006 View Diagrams & Manuals
22243 (270000001-270999999) Commercial Side-discharge Lawnmower, 2007 View Diagrams & Manuals
22261 (8900001-8999999) (1998) Side Discharge Lawnmower View Diagrams & Manuals
22261 (9900001-9999999) (1999) Side-discharge Lawnmower View Diagrams & Manuals
22261 (200000001-200999999) Side-discharge Lawnmower, 2000 View Diagrams & Manuals
22261 (210000001-210999999) Side-discharge Lawnmower, 2001 View Diagrams & Manuals
22261 (220000001-220999999) Side-discharge Lawnmower, 2002 View Diagrams & Manuals
22261 (230000001-230999999) Side-discharge Lawnmower, 2003 View Diagrams & Manuals
22261 (240000001-240999999) Side-discharge Lawnmower, 2004 View Diagrams & Manuals
Lawn Boy
10321 (8900001-8999999)(1998) Silver Series Lawnmower View Diagrams & Manuals
10415 (4900001-4999999)(1994) Gold Series Lawnmower View Diagrams & Manuals
10416 (4900001-4999999)(1994) Gold Series Lawnmower View Diagrams & Manuals
10418 (6900001-6999999)(1996) Gold Series Lawnmower View Diagrams & Manuals
10420 (5900001-5999999)(1995) Gold Series Lawnmower View Diagrams & Manuals
10420 (4900001-4999999)(1994) Gold Series Lawnmower View Diagrams & Manuals
10421 (4900001-4999999)(1994) Gold Series Lawnmower View Diagrams & Manuals
10422 (7900001-7999999)(1997) Gold Series Lawnmower View Diagrams & Manuals
10515 (5900001-5999999)(1995) Gold Series Lawnmower View Diagrams & Manuals
10515 (4900001-4999999)(1994) Gold Series Lawnmower View Diagrams & Manuals
10516 (5900001-5999999)(1995) Gold Series Lawnmower View Diagrams & Manuals
10516 (4900001-4999999)(1994) Gold Series Lawnmower View Diagrams & Manuals
10517 (6900001-6999999)(1996) Gold Series Lawnmower View Diagrams & Manuals
10518 (7900001-7999999)(1997) Gold Series Lawnmower View Diagrams & Manuals
10518 (6900001-6999999)(1996) Gold Series Lawnmower View Diagrams & Manuals
10519 (7900001-7999999)(1997) Gold Series Lawnmower View Diagrams & Manuals
10520 (5900001-5999999)(1995) Gold Series Lawnmower View Diagrams & Manuals
10520 (4900001-4999999)(1994) Gold Series Lawnmower View Diagrams & Manuals
10521 (5900001-5999999)(1995) Gold Series Lawnmower View Diagrams & Manuals
10521 (4900001-4999999)(1994) Gold Series Lawnmower View Diagrams & Manuals
10522 (6900001-6999999)(1996) Gold Series Lawnmower View Diagrams & Manuals
10523 (7900001-7999999)(1997) Gold Series Lawnmower View Diagrams & Manuals
10523 (6900001-6999999)(1996) Gold Series Lawnmower View Diagrams & Manuals
10524 (7900001-7999999)(1997) Gold Series Lawnmower View Diagrams & Manuals
10525 (200000001-200999999)(2000) Goldpro Series Lawnmower View Diagrams & Manuals
10528 (200000001-200999999)(2000) Goldpro Series Lawnmower View Diagrams & Manuals
10545 (5900001-5999999)(1995) Gold Series Lawnmower View Diagrams & Manuals
10545 (4900001-4999999)(1994) Gold Series Lawnmower View Diagrams & Manuals
10546 (7900001-7999999)(1997) Gold Series Lawnmower View Diagrams & Manuals
10546 (6900001-6999999)(1996) Gold Series Lawnmower View Diagrams & Manuals
10547 (200000001-200999999)(2000) Goldpro Series Lawnmower View Diagrams & Manuals
10547 (9900001-9999999)(1999) Goldpro Series Lawnmower View Diagrams & Manuals
10547 (8900001-8999999)(1998) Goldpro Series Lawnmower View Diagrams & Manuals
10548 (8900001-8999999)(1998) Goldpro Series Lawnmower View Diagrams & Manuals
10651 (6900001-6999999)(1996) Commercial View Diagrams & Manuals
10655 (250000001-250999999)(2005) Gold Series Lawnmower View Diagrams & Manuals
10655 (240000001-240999999)(2004) Gold Series Lawnmower View Diagrams & Manuals
10656 (240000001-240999999)(2004) Gold Series Lawnmower View Diagrams & Manuals
10672 (270000001-270999999)(2007) Insight Gold Lawn Mower View Diagrams & Manuals
10672 (260000001-260999999)(2006) Insight Gold Lawn Mower View Diagrams & Manuals
10672 (250000001-250999999)(2005) Insight Gold Lawn Mower View Diagrams & Manuals
10673 (270000001-270999999)(2007) Insight Gold Lawn Mower View Diagrams & Manuals
10673 (260000001-260999999)(2006) Insight Gold Lawn Mower View Diagrams & Manuals
10682 (270000001-270999999)(2007) Insight Lawn Mower View Diagrams & Manuals
10682 (260000001-260999999)(2006) Insight Lawn Mower View Diagrams & Manuals
10684 (260000001-260999999)(2006) Insight Lawn Mower View Diagrams & Manuals
10684 (250000001-250999999)(2005) Insight Lawn Mower View Diagrams & Manuals
10684C (270000001-270999999)(2007) Insight Lawn Mower View Diagrams & Manuals
10684C (260000001-260999999)(2006) Insight Lawn Mower View Diagrams & Manuals
10684C (250000001-250999999)(2005) Insight Lawn Mower View Diagrams & Manuals
10685 (270000001-270999999)(2007) Insight Lawn Mower View Diagrams & Manuals
10685 (260000001-260999999)(2006) Insight Lawn Mower View Diagrams & Manuals
10685 (250000001-250999999)(2005) Insight Lawn Mower View Diagrams & Manuals
10686 (270000001-270999999)(2007) Insight Lawn Mower View Diagrams & Manuals
10686 (260000001-260999999)(2006) Insight Lawn Mower View Diagrams & Manuals
10686 (250000001-250999999)(2005) Insight Lawn Mower View Diagrams & Manuals
10686C (260000001-260999999)(2006) Insight Lawn Mower View Diagrams & Manuals
10687 (260000001-260999999)(2006) Insight Lawn Mower View Diagrams & Manuals
10695 (270000001-270999999)(2007) Insight Gold Lawn Mower View Diagrams & Manuals
10695 (260000001-260999999)(2006) Insight Gold Lawn Mower View Diagrams & Manuals
10695 (250000001-250999999)(2005) Insight Gold Lawn Mower View Diagrams & Manuals
10696 (260000001-260999999)(2006) Insight Gold Lawn Mower View Diagrams & Manuals
10696 (250000001-250999999)(2005) Insight Gold Lawn Mower View Diagrams & Manuals
10696C (260000001-260999999)(2006) Insight Gold Lawn Mower View Diagrams & Manuals
10696C (250000001-250999999)(2005) Insight Gold Lawn Mower View Diagrams & Manuals
10697 (260000001-260999999)(2006) Insight Gold Lawn Mower View Diagrams & Manuals
10697 (250000001-250999999)(2005) Insight Gold Lawn Mower View Diagrams & Manuals
10761B (5900001-5999999)(1995) Lawnmower View Diagrams & Manuals
10762B (5900001-5999999)(1995) Lawnmower View Diagrams & Manuals
10995 (270000001-270999999)(2007) Insight Gold Lawn Mower View Diagrams & Manuals
10995 (260000001-260999999)(2006) Insight Gold Lawn Mower View Diagrams & Manuals
10997 (270000001-270999999)(2007) Insight Gold Lawn Mower View Diagrams & Manuals
10997 (260000001-260999999)(2006) Insight Gold Lawn Mower View Diagrams & Manuals
11001 (7900001-7999999)(1997) Side Discharge Mower View Diagrams & Manuals
11001B (69000001-69999999)(1996) Lawnmower View Diagrams & Manuals
11003 (9900001-9999999)(1999) 53Cm Lawnmower View Diagrams & Manuals
11003 (8900001-8999999)(1998) 53Cm Lawnmower View Diagrams & Manuals
22241 (7900001-7999999)(1997) Side Discharge Mower View Diagrams & Manuals
22243 (270000001-270999999)(2007) Commercial Side-Discharge Lawnmower View Diagrams & Manuals
22243 (260000001-260999999)(2006) Commercial Side-Discharge Lawnmower View Diagrams & Manuals
22243 (250000001-250999999)(2005) Commercial Side-Discharge Lawnmower View Diagrams & Manuals
22261 (240000001-240999999)(2004) Side-Discharge Lawnmower View Diagrams & Manuals
22261 (230000001-230999999)(2003) Side-Discharge Lawnmower View Diagrams & Manuals
22261 (220000001-220999999)(2002) Side-Discharge Lawnmower View Diagrams & Manuals
22261 (210000001-210999999)(2001) Side-Discharge Lawnmower View Diagrams & Manuals
22261 (200000001-200999999)(2000) Side-Discharge Lawnmower View Diagrams & Manuals
22261 (9900001-9999999)(1999) Side-Discharge Lawnmower View Diagrams & Manuals
22261 (8900001-8999999)(1998) Side Discharge Lawnmower View Diagrams & Manuals
10415 (5900001-5999999)(1995) Gold Series Lawnmower Lawn Mower View Diagrams & Manuals
10761B (4900001-4999999)(1994) Lawnmower Lawn Mower View Diagrams & Manuals
Show More Compatible Models
This item works with the following types of products:
- Lawn Mower Parts
Customer Part Reviews ?
Average Rating (out of 5):
Click to filter by ratings:
5 stars
1
4 stars
0
3 stars
0
2 stars
0
1 stars
1
< PREV
- 1
Good Part!
The part was exactly as i ordered, it fit perfectly and even arrived a day earlier than expected. Great Job!
Thannks
Guest -
September 19, 2019
Verified Purchase
part fit
paid for expedited shipping ( 3-4 days) did not receive part for 9 days
Guest -
June 7, 2019
Verified Purchase
t
t
t -
t days ago
Verified Purchase
eReplacementParts Team
t
Questions & Answers ?
Our customer Service team is at the ready daily to answer your part and product questions.

Ask our Team
We have a dedicated staff with decades of collective experience in helping customers just like you purchase parts to repair their products.
Does this fit my product?Questions & Answers for Pinion
No questions have been asked yet
Customer Repair Instructions ?
All our customer repair instructions are solicited directly from other customers just like you who have purchased and replaced this exact part.
Pinion was strip out
Alfred - December 21, 2015
👍 3 of 4 people found this instruction helpful
Tool Type
Lawn Mower
Difficulty
Easy
Time
Less than 15 minutes
Tools Used
Screwdriver, Socket set
Parts Used
Disassembled trans box .Removed pulley and removed pinion and replaced with new one. Then replaced trans box.
Did you find this story helpful?
Thanks for voting and helping fellow customers!
Gear box gear broke
Tim - June 3, 2021
Tool Type
Lawn Mower
Difficulty
Hard
Time
More than 2 hours
Tools Used
Screwdriver, Pliers, Socket set, Wrench Set
1. Had to take rear wheels, and all shafts off wheels { watch half moon keys and springs under}. mark R/L sides. remove gear box
2 take gear box apart
2 a , Had to clean out old grease , clean up gear box
3 take pinion gear out{ can put socket on both ends to unscrew}
4 Didn't have to replace ring gear
5. put grease in gear box , put gear box together
6 reinstall gear box.
7. taking gear box out of mower was hardest part, I watch u-tube 1st ,Kinda made it easier.
8
Did you find this story helpful?
Thanks for voting and helping fellow customers!
Transmission drive failure.
Harold - August 20, 2018
Tool Type
Lawn Mower
Difficulty
Medium
Time
1-2 hours
Tools Used
Screwdriver, Pliers, Socket set, Wrench Set, Bench vice, punches, snap ring pliers, axle grease
Parts Used
Remove belt cover and cable and drive belt. Remove front wheels. Remove gear drives from each wheel by removing snap ring and washers. Remove height adjuster and wheel bearing. Remove belt pulley. Remove transmission cover and housing. Recommend careful inspection of bushing. Bearings and all hardware. Best to have a full tear down before placing parts order. Will probably need bushing and bearings when replacing ring and pinion. Remove axle, place in a vice and drive out pin using a punch. Do the same for the pinion bearing and wheel bearing if replacing. Be sure to pack new bearing with grease. Reverse everything to reassemble. Be sure to grease the transmission. Each wheel gear is stamped with a L and R. Pay attention or you get the drive direction reversed and you'll be taking it apart again.
Did you find this story helpful?
Thanks for voting and helping fellow customers!
When the self propel handle was grasped the self propel function did not work
Thomas - April 12, 2018
Tool Type
Lawn Mower
Difficulty
Medium
Time
30-60 minutes
Tools Used
Socket set, Wrench Set, Small putty knife
Parts Used
Removed plastic cover over self propel belt
Detached activation cable and removed drive belt from self propel gear box
Removed bolt holding left front wheel
Removed C clips holding left front drive gear to drive shaft, washers and gear. Note the direction that the gear is installed in, where C clips and washers are installed and metal piece inserted into drive shaft.
Removed two bolts attaching left front gear drive plate to mower deck and slid off drive shaft
Removed four bolts holding cover on self propel drive gear box (after cleaning off grass etc.)
Removed self propel ring gear, drive shaft and gear box bushings from gear box
Put deep socket on pinion gear attachment nut inside gear box and wrench on bolt on other end of pinion shaft holding drive pulley on pinion, removed pinion bolt and removed pinion. Note location of washers and spacer
Removed worn left output shaft bushing
Lubricated output shaft with heavy automotive wheel bearing grease
Replaced pinion and left output shaft bushing
Installed self propel ring gear, bushings and drive shafts
Packed self propel gear box with heavy automotive wheel bearing grease
Installed gear box cover, drive plate and drive gear
Lubricated wheel bearing with spray grease and replaced wheel
Replaced
Did you find this story helpful?
Thanks for voting and helping fellow customers!
Self propel drive went out.
Kim - August 15, 2017
Tool Type
Lawn Mower
Difficulty
Medium
Time
30-60 minutes
Tools Used
Screwdriver, Pliers, Socket set, Wrench Set, Nutdriver, Adjustable Wrench, Hammer
1. Removed the blade.
2. Removed the drive cable from the transmission.
3. Removed the drive belt.
4. Removed the belt cover.
5. Removed the transmission.
6. Removed the drive pulley.
7. Removed the pinion gear.
8. Removed the pinion gear bearing.
9. Put the new parts in and reassembled the unit. All fit perfectly.
2. Removed the drive cable from the transmission.
3. Removed the drive belt.
4. Removed the belt cover.
5. Removed the transmission.
6. Removed the drive pulley.
7. Removed the pinion gear.
8. Removed the pinion gear bearing.
9. Put the new parts in and reassembled the unit. All fit perfectly.
Did you find this story helpful?
Thanks for voting and helping fellow customers!
Drive gears worn out.
Roger - June 30, 2017
Tool Type
Lawn Mower
Difficulty
Medium
Time
1-2 hours
Tools Used
Screwdriver, Pliers, Socket set, Wrench Set, Nutdriver
1.Got Toro manual for drive system on line.
2.Disassembled drive system by removing front axle and removing gears from gear box.
3.Ordered gears and gasket from ereplacementparts.
4.Reassembled, greased gear box and axle assembly. Works great.
2.Disassembled drive system by removing front axle and removing gears from gear box.
3.Ordered gears and gasket from ereplacementparts.
4.Reassembled, greased gear box and axle assembly. Works great.
Did you find this story helpful?
Thanks for voting and helping fellow customers!
Rear wheel drive grinding ,stil not working right
Joseph - May 2, 2017
Tool Type
Lawn Mower
Difficulty
Medium
Time
30-60 minutes
Tools Used
Screwdriver, Socket set
Parts Used
Removed rear wheels ,gear worn, replaced both.plastic gear on.Wheels broken replaced wheels.,replaced pinion gear in trans, was able to cut grass.
Did you find this story helpful?
Thanks for voting and helping fellow customers!
Front wheel drive stoped working
Ron - April 21, 2017
Tool Type
Lawn Mower
Difficulty
Medium
Time
1-2 hours
Tools Used
Socket set, Wrench Set
Parts Used
Removed front wheels then gear box
Disassembled the gear box and cleaned it
Replaced wheel shaft bushings and pinion shaft gear
Filled with gear box grease and reassembled and replaced on mower
Disassembled the gear box and cleaned it
Replaced wheel shaft bushings and pinion shaft gear
Filled with gear box grease and reassembled and replaced on mower
Did you find this story helpful?
Thanks for voting and helping fellow customers!
Grinding noise in left wheel, loss of self propel function
Jim - July 24, 2016
👍 2 of 4 people found this instruction helpful
Tool Type
Lawn Mower
Difficulty
Medium
Time
More than 2 hours
Tools Used
Screwdriver, Pliers, Socket set, Nutdriver, Adjustable Wrench
Removed back wheels, gears and axel.
Removed mower blade and belt.
Rebuilt transmission and repackaged with grease.
Reassembled and found an extra spacer. Eventually found it went in between the main engine shaft and the blade's shaft-bracket. If you leave this off then the engine won't turn due to clamping friction of the bracket against the engine's bottom.
After reassembling with all new parts and testing, the left wheel gears still sounded bad (grinding). Read different website forums from 2010-now where some people fixed this design/tolerance issue by adding spacers between the left wheel mount and the mower body. I added those and the grinding went away.
Did you find this story helpful?
Thanks for voting and helping fellow customers!
OEM stands for Original Equipment Manufacturer and means the part you’re buying is sourced directly from the manufacturer who made your product. At eReplacementParts, we sell only genuine OEM parts, guaranteeing the part you’re purchasing is of better design and of higher quality than aftermarket parts.
Our product descriptions are a combination of data sourced directly from the manufacturers who made your product as well as content researched and curated by our content & customer service teams. This content is edited and reviewed internally before being made public to customers.
Our customer service team are at the ready daily to answer your part and product questions. We have a dedicated staff with decades of collective experience in helping customers just like you purchase parts to repair their products.
All our part reviews are solicited directly from other customers who have purchased this exact part. While we moderate these reviews for profanity, offensive language or personally identifiable information, these reviews are posted exactly as submitted and no alterations are made by our team.
All our customer repair instructions are solicited directly from other customers just like you who have purchased and replaced this exact part. While we moderate these reviews for profanity, offensive language or personally identifiable information, these reviews are posted exactly as submitted and no alterations are made by our team.
Based on data from past customer purchasing behaviors, these parts are most commonly purchased together along with the part you are viewing. These parts may be necessary or helpful to replace to complete your current repair.
All our installation videos are created and produced in collaboration with our in-house repair technician, Mark Sodja, who has helped millions of eReplacementParts customers over the last 13 years repair their products. Mark has years of experience in selling and repairing both commercial and residential products with a specialty in gas-powered equipment.
This data is collected from customers who submitted a repair instruction after replacing this exact part. Customers can rate how easy the repair was to complete and how long it took. We aggregate this data to provide a repair rating that allows customers to quickly determine the difficulty and time needed to perform their own repair.