
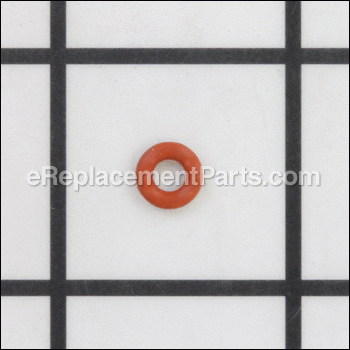
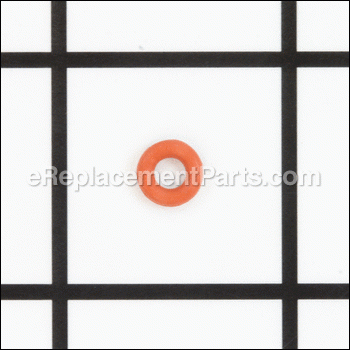
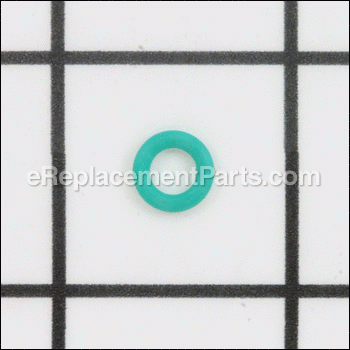


This replacement component is supplied directly from the original equipment manufacturer, it is specially designed for use with Breville espresso makers. It is generally utilized to provide an air-tight seal between connected parts, make sure to refer to the appropriate diagrams of your model for the correct location and application of this hardware. Over time the material may wear out and begin to crack eventually requiring a replacement. Keep in mind this high-quality part is made of durable rubber and is sold individually.
O-ring For Hose Connector SP0001672
OEM part for: Breville
Part Number: SP0001672
$4.99
In Stock
Jump To:
Frequently Purchased Together ?


Compatibility
This part will fit the following 8 machines
Breville
BES860XL Barista Express View Diagrams & Manuals
BES840 Infuser Espresso Machine View Diagrams & Manuals
BES900XL The Dual Boiler View Diagrams & Manuals
BES840XL Infuser Espresso Machine View Diagrams & Manuals
BES870XL The Barista Express View Diagrams & Manuals
BES920XL The Dual Boiler View Diagrams & Manuals
BES920BSXL The Dual Boiler View Diagrams & Manuals
BES920CBXL The Dual Boiler View Diagrams & Manuals
Show More Compatible Models
This item works with the following types of products:
- Espresso Parts
This part replaces obsolete part #: BES900XL/03.40, BES900XL03.40, BES920XL03.40, BES870XL14.4, BES870XL/02.38, BES980XL/06.40, BES870XL/14.4, BES870XL02.38, BES840XL/301, BES860XL/25.8, SP0013834, SP0001589, SP0001821, SP0014272, SP0014271, SP0001599, SP0001636, SP0001565, SP0001555, BES900XL/06.26, BES900XL06.26, BES980XL/06.39, BES900XL/10.8
Questions & Answers ?
Our customer Service team is at the ready daily to answer your part and product questions.

Ask our Team
We have a dedicated staff with decades of collective experience in helping customers just like you purchase parts to repair their products.
Does this fit my product?Questions & Answers for O-ring For Hose Connector
No questions have been asked yet
Customer Repair Instructions ?
All our customer repair instructions are solicited directly from other customers just like you who have purchased and replaced this exact part.
Water leaking out of the lower, left side seam. Steam making process was VERY loud.
Dean - November 26, 2016
👍 2 of 3 people found this instruction helpful
Tool Type
Espresso
Difficulty
Medium
Time
30-60 minutes
Tools Used
Screwdriver, Pliers, Very Small Regular Screwdriver for removing \\
1. Loosened top cover
2. Removed back cover
3. Pulled "keeper clips" off of the appropriate tube end fittings.
4. Removed appropriate teflon tubes.
5. Pulled "O-rings" out of appropriate fittings receiving the tubes I was changing.
6. Put new "O-rings" into the appropriate fittings receiving the tubes I was changing.
7. Put new teflon tubes into the fittings, one end at a time, and put the "keeper clips" back in to hold the teflon tubes in place. It was a little tricky to get the "O-rings" to seat properly and get the teflon tube worked down into the fitting deep enough to get the "keeper rings" back on.
8. Replaced back cover.
9. Replaced top cover.
10. Enjoy a MUCH quieter steam making process with NO LEAKS.
Did you find this story helpful?
Thanks for voting and helping fellow customers!
Leaking water from high pressure hoses to boiler and pump.
Gerald - August 25, 2022
Tool Type
Espresso
Difficulty
Easy
Time
15-30 minutes
Tools Used
Screwdriver, Pliers
Parts Used
Removed screws from the top, Back and bottom. Removed the top and back of espresso machine. pulled retaining clips , remover hoses and old o rings and replaced with new o rings. Reversed process and put espresso machine back together.
Did you find this story helpful?
Thanks for voting and helping fellow customers!
leak
Felix - July 22, 2020
Tool Type
Espresso
Difficulty
Easy
Time
15-30 minutes
Tools Used
Screwdriver, Pliers
replaced
items
items
Did you find this story helpful?
Thanks for voting and helping fellow customers!
Solenoid wasn't performingoing correctly and making a loud buzzing noise (other than the normal noise they make)
Richard - December 13, 2018
Tool Type
Espresso
Difficulty
Medium
Time
30-60 minutes
Tools Used
Screwdriver, Needle nose pliers
1. Remove screws to remove back and top, some are behind hole plugs. The body has plastic
clamps along back sides, be careful unclamping them. Have the top off and use a flashlight and
look down the inside back sides to see the clamps. The clamps are part of the back and the
sides of the unit, male and female. Underneath the front top are screws as well keeping the top
on.
2. Unplug the wires going to both solenoids
3. Remove clamps to release water lines going to solenoid. Don't loose rubber o-rings that are on
the end of those lines
4. Unscrew the the 2 screws holding the bracket of the solenoid group
5. Replace the solenoid group on its on bracket and then the above steps in reverse
Did you find this story helpful?
Thanks for voting and helping fellow customers!
Blowing GFI circuit breaker due to leaking o-ring gasket
Jeffrey - July 10, 2018
Tool Type
Espresso
Difficulty
Medium
Time
30-60 minutes
Tools Used
Screwdriver, Pliers, Wire brush (Dremel tool attachment)
The repair was on a Breville BES900XL Espresso Machine:
1. Released top and back panels.
2. Observed signs of prior water/steam leakage.
3. Ran the unit to determine the location of the leak. The leak origin was a connection on the side of the steam boiler that led to the steam pump. The location was about 1/4 down the side of the steam boiler, right above the location of the steam boiler's temperature sensor.
4. Let the unit cool off.
5. Removed clips on each end of the tube that was leaking (steam boiler - 1/4 down on side above the temperature sensor).
6. Removed the hose connections at both ends.
7. Manually de-scaled the two ends of the hose connections; used a wire brush attachment on a dremmel tool to descale the inside port on the steam boiler and the outer ferrule ends of the tube.
8. Put new o-rings on the two ends of the tube, re-inserted the tube ends into their sockets and re-installed the retaining clips.
9. Ran the unit to ensure that the repair was not leaking.
10. Reassembled the back and top panels.
Did you find this story helpful?
Thanks for voting and helping fellow customers!
Low to no pressure trying to pull a shot and making very loud noise on BES870XL
Susan - January 14, 2018
👍 0 of 1 people found this instruction helpful
Tool Type
Espresso
Difficulty
Medium
Time
1-2 hours
Tools Used
Screwdriver, Pliers, Pick
Did you find this story helpful?
Thanks for voting and helping fellow customers!
OEM stands for Original Equipment Manufacturer and means the part you’re buying is sourced directly from the manufacturer who made your product. At eReplacementParts, we sell only genuine OEM parts, guaranteeing the part you’re purchasing is of better design and of higher quality than aftermarket parts.
Our product descriptions are a combination of data sourced directly from the manufacturers who made your product as well as content researched and curated by our content & customer service teams. This content is edited and reviewed internally before being made public to customers.
Our customer service team are at the ready daily to answer your part and product questions. We have a dedicated staff with decades of collective experience in helping customers just like you purchase parts to repair their products.
All our part reviews are solicited directly from other customers who have purchased this exact part. While we moderate these reviews for profanity, offensive language or personally identifiable information, these reviews are posted exactly as submitted and no alterations are made by our team.
All our customer repair instructions are solicited directly from other customers just like you who have purchased and replaced this exact part. While we moderate these reviews for profanity, offensive language or personally identifiable information, these reviews are posted exactly as submitted and no alterations are made by our team.
Based on data from past customer purchasing behaviors, these parts are most commonly purchased together along with the part you are viewing. These parts may be necessary or helpful to replace to complete your current repair.
All our installation videos are created and produced in collaboration with our in-house repair technician, Mark Sodja, who has helped millions of eReplacementParts customers over the last 13 years repair their products. Mark has years of experience in selling and repairing both commercial and residential products with a specialty in gas-powered equipment.
This data is collected from customers who submitted a repair instruction after replacing this exact part. Customers can rate how easy the repair was to complete and how long it took. We aggregate this data to provide a repair rating that allows customers to quickly determine the difficulty and time needed to perform their own repair.