
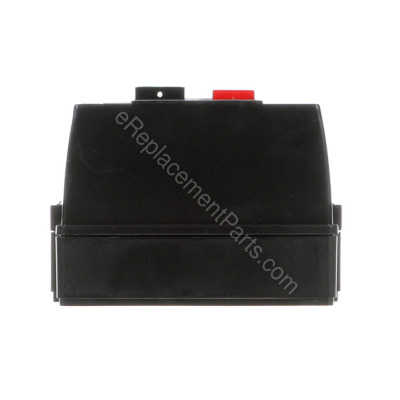


This on/off switch is an authentic OEM replacement part sourced directly from the manufacturer. It is compatible with multiple models of Powermatic saws. This switch contains the on/off function, overload, and mag starter in it for safety purposes. It is sold individually, and it requires a screwdriver to install.
On/off Switch (3hp 1ph. 230 Vo 6816292
OEM part for: Powermatic
Part Number: 6816292
$250.40
In Stock
Compatibility
This part will fit the following 2 machines
Powermatic
66 10-Inch Table Saw View Diagrams & Manuals
27 Spindle Shaper View Diagrams & Manuals
This item works with the following types of products:
- Saw Parts
- Table Saw Parts
- Shaper Parts
Customer Part Reviews ?
Average Rating (out of 5):
Click to filter by ratings:
5 stars
0
4 stars
1
3 stars
0
2 stars
0
1 stars
0
< PREV
- 1
Worked great
The motor starter switch, upon arrival, and was in good condition but was more than I wanted to install myself. I hired an electrician friend to install the switch and was glad I did. The interior wiring had changed slightly but was no problem for someone who understood what to check and change. I’m pleased.
Guest -
May 14, 2022
Verified Purchase
t
t
t -
t days ago
Verified Purchase
eReplacementParts Team
t
Questions & Answers ?
Our customer Service team is at the ready daily to answer your part and product questions.

Ask our Team
We have a dedicated staff with decades of collective experience in helping customers just like you purchase parts to repair their products.
Does this fit my product?Questions & Answers for On/off Switch (3hp 1ph. 230 Vo
How do I tell if my 22o saw is single phase or 3 phase
michael
for model number powermatic table saw 66
asked on 2024-01-03
Hi Michael,
Thank you for your question. Your Powermatic model 66 is a 220 Volt, 3 phase table saw. Single phase table saw motors use start windings, start switches, and capacitors and they draw more power. 3-phase table saw motors do not use these and use less power. We hope this helps!
eReplacementParts Team January 03, 2024
I bought my saw used. they other owner put a light switch to replace the on off switch. how do i hook up the new switch when i by it from you?
Mike
for model number Powermatic model 66
asked on 2023-12-06
Hi Mike,
Thank you for your question. Here are some instructions, that a customer posted on our website that should help you with your repair; First disconnect the power and remove the cover. There are two screws, one top and one on the bottom. Loosen the lugs for the input and the output cables. There are a total of 6. Then mark where each of the leads go (take a picture). Pull the cables through the chassis access holes. Then loosen the strain release clamps. Then remove the assembly from the saw by unscrewing the two screws that are located behind where the cover screws were located. Mount the new part to the saw using the removed screws. Install the strain reliefs on the new unit and thread the cables into the unit. Connect the wires like they were originally configured. Replace the cover and reconnect the power. We hope this helps!
eReplacementParts Team December 06, 2023
I am looking for the switch that slides on to the front of the NHD magnetic contactor that the green button engages when you push it. I had to change the magnetic contactor on my powermatic 66 and I accidentally purchased a 24 volt coil instead of a 220 volt coil so when I pushed the button it blew out the switch. I have a 220 volt contactor now, but I need the switch. I can send a photo of the part I need to help my explanation a little better. Any assistance you can provide would be greatly appreciated as I have been down 3 months on this saw over a stupid $3 button. Cheers,Victor
Victor
for model number 66 TA SAW
asked on 2023-11-03
Hi Victor,
Thank you for your question. The part number for the switch is 6816292. We hope this helps!
eReplacementParts Team November 03, 2023
Can I buy the internal green button only
Joe
for model number 6816292 switch
asked on 2023-10-26
Hi Joe,
Thank you for your question. The green button is only sold with the switch. We hope this helps!
eReplacementParts Team October 26, 2023
Customer Repair Instructions ?
All our customer repair instructions are solicited directly from other customers just like you who have purchased and replaced this exact part.
Switch went bad
Robert - September 3, 2017
👍 3 of 3 people found this instruction helpful
Tool Type
Table Saw
Difficulty
Medium
Time
30-60 minutes
Tools Used
Screwdriver, Socket set
Parts Used
Removed the front of the switch cover and made a wiring diagram.
Then remove the rest of the switch from the saw and disconnected the wires
Connected the wires to the new switch and mounted it on the saw
Then remove the rest of the switch from the saw and disconnected the wires
Connected the wires to the new switch and mounted it on the saw
Did you find this story helpful?
Thanks for voting and helping fellow customers!
Would not stay running after releasing the on button
Roger - July 30, 2020
👍 1 of 1 people found this instruction helpful
Tool Type
Table Saw
Difficulty
Easy
Time
15-30 minutes
Tools Used
Screwdriver
Parts Used
Disconnect power
Remove the cover. Two screws one top and bottom
Loosen the lugs for the input and output cables a total of 6.
Mark where each of the leads go (take a picture)
Pull cables through chassis access holes. Have to loosen strain release clamps
Remove assembly from saw by unscrewing the two screws that are located behind where the cover screws were located.
Mount the new part to the saw using the removed screws.
Install the strain reliefs on the new unit and thread the cables into the unit
Connect the wires like they were originally configured.
Replace cover. Connect power. Enjoy
Did you find this story helpful?
Thanks for voting and helping fellow customers!
Switch broke after 14 years of professional use.
Todd - November 29, 2017
Tool Type
Table Saw
Difficulty
Easy
Time
15-30 minutes
Tools Used
Screwdriver, Adjustable Wrench
Parts Used
Unplug power cord! Open cover on old switch, took photo. To help remember exactly how it was wired. loosened all inside wires coming in and going to motor. Unscrewed starter box from saw. Install supply or line on top of saw, as it is easier. Install load wires to motor. Reinstall cover, plug back in.
Did you find this story helpful?
Thanks for voting and helping fellow customers!
Bad switch
Patrick - January 3, 2017
Tool Type
Table Saw
Difficulty
Medium
Time
15-30 minutes
Tools Used
Screwdriver, Nutdriver
Parts Used
Remove and replace.
Did you find this story helpful?
Thanks for voting and helping fellow customers!
OEM stands for Original Equipment Manufacturer and means the part you’re buying is sourced directly from the manufacturer who made your product. At eReplacementParts, we sell only genuine OEM parts, guaranteeing the part you’re purchasing is of better design and of higher quality than aftermarket parts.
Our product descriptions are a combination of data sourced directly from the manufacturers who made your product as well as content researched and curated by our content & customer service teams. This content is edited and reviewed internally before being made public to customers.
Our customer service team are at the ready daily to answer your part and product questions. We have a dedicated staff with decades of collective experience in helping customers just like you purchase parts to repair their products.
All our part reviews are solicited directly from other customers who have purchased this exact part. While we moderate these reviews for profanity, offensive language or personally identifiable information, these reviews are posted exactly as submitted and no alterations are made by our team.
All our customer repair instructions are solicited directly from other customers just like you who have purchased and replaced this exact part. While we moderate these reviews for profanity, offensive language or personally identifiable information, these reviews are posted exactly as submitted and no alterations are made by our team.
Based on data from past customer purchasing behaviors, these parts are most commonly purchased together along with the part you are viewing. These parts may be necessary or helpful to replace to complete your current repair.
All our installation videos are created and produced in collaboration with our in-house repair technician, Mark Sodja, who has helped millions of eReplacementParts customers over the last 13 years repair their products. Mark has years of experience in selling and repairing both commercial and residential products with a specialty in gas-powered equipment.
This data is collected from customers who submitted a repair instruction after replacing this exact part. Customers can rate how easy the repair was to complete and how long it took. We aggregate this data to provide a repair rating that allows customers to quickly determine the difficulty and time needed to perform their own repair.