
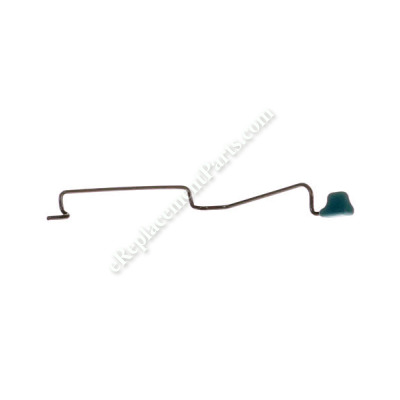


It is a genuine Makita lever that is supplied by the original manufacturer for use with finishing sanders. This lever is a special part which helps to secure a sandpaper sheet. If the lever is damaged, this will provide an identical replacement for the original component that was installed on a new unit. To ensure to the exact location and the proper application of this component, refer to the owner's manual and the appropriate diagram of your specific model. One durable metal lever with a plastic grip is included. A screwdriver will be needed to remove and reattach the sanding pad to perform this repair.
Lever Cpl., B04556k 162259-8
OEM part for: Makita
Part Number: 162259-8
$3.99
In Stock
Jump To:
Frequently Purchased Together ?


Compatibility
This part will fit the following 2 machines
Makita
BO4556 14000OPM Finishing Sander View Diagrams & Manuals
BO4556K Sander View Diagrams & Manuals
This item works with the following types of products:
- Sander Parts
Repair Videos ?
Watch the Repair Video for
Lever Cpl., B04556k

Articles:
|
Learn how to quickly replace bent or broken levers on a Makita finishing sander....
January 12, 2015
|

Customer Part Reviews ?
Average Rating (out of 5):
Click to filter by ratings:
5 stars
1
4 stars
0
3 stars
0
2 stars
0
1 stars
0
< PREV
- 1
Received the exact part I wanted
Delivery to my forwarding address was quick and on schedule and package was intact. The Lever is exactly what I wanted and, though I have not yet actually installed it, since I encountered some difficulty in removing the center screw in my Sander, I am confident that it will fit and work when I do. And, in that regard. the guidelines for replacing the Lever on the eReplacementParts website are very useful and instructive. Thanks. The service you provide is excellent.
Alcid -
August 18, 2019
Verified Purchase
t
t
t -
t days ago
Verified Purchase
eReplacementParts Team
t
Questions & Answers ?
Our customer Service team is at the ready daily to answer your part and product questions.

Ask our Team
We have a dedicated staff with decades of collective experience in helping customers just like you purchase parts to repair their products.
Does this fit my product?Questions & Answers for Lever Cpl., B04556k
No questions have been asked yet
Customer Repair Instructions ?
All our customer repair instructions are solicited directly from other customers just like you who have purchased and replaced this exact part.
Clip to hold paper broke and the pad was worn out
ANDREA - August 30, 2018
Tool Type
Sander
Difficulty
Easy
Time
Less than 15 minutes
Tools Used
Screwdriver
1. Remove old clips with a phillips screwdriver.
2. Install new clips with screwdriver
3. Remove old pad with screwdriver
4. Install new pad with screwdriver
2. Install new clips with screwdriver
3. Remove old pad with screwdriver
4. Install new pad with screwdriver
Did you find this story helpful?
Thanks for voting and helping fellow customers!
Noisy at first, then seized.
Donald - April 28, 2017
Tool Type
Sander
Difficulty
Easy
Time
15-30 minutes
Tools Used
Screwdriver, Drifts and hammer to remove and install bearing.
Removed 4 screws holding sanding pad,
Removed screw that retains eccentric to motor shaft.
Removed bottom plate carefully so as to not lose pins, o-rings or cushions.
Drove out old bearing with socket used as drift.
Installed new bearing with drift and hammer.
Reversed disassembly to reassemble sander.
Removed screw that retains eccentric to motor shaft.
Removed bottom plate carefully so as to not lose pins, o-rings or cushions.
Drove out old bearing with socket used as drift.
Installed new bearing with drift and hammer.
Reversed disassembly to reassemble sander.
Did you find this story helpful?
Thanks for voting and helping fellow customers!
Sanding pad worn down and lever clips lost grip.
Ricky - April 25, 2017
Tool Type
Sander
Difficulty
Easy
Time
Less than 15 minutes
Tools Used
Screwdriver
Easily done, Step 1, remove 4 screws from base of sanding pad. Step 2, remove 2 set screws on lever clips, removing old lever clips and replace with new clips and set screws. Step 3, align new sanding pad with screw holes and replace screws. This is a very easy and simple replacement, at a great price and saved buying a new sander.
Did you find this story helpful?
Thanks for voting and helping fellow customers!
OEM stands for Original Equipment Manufacturer and means the part you’re buying is sourced directly from the manufacturer who made your product. At eReplacementParts, we sell only genuine OEM parts, guaranteeing the part you’re purchasing is of better design and of higher quality than aftermarket parts.
Our product descriptions are a combination of data sourced directly from the manufacturers who made your product as well as content researched and curated by our content & customer service teams. This content is edited and reviewed internally before being made public to customers.
Our customer service team are at the ready daily to answer your part and product questions. We have a dedicated staff with decades of collective experience in helping customers just like you purchase parts to repair their products.
All our part reviews are solicited directly from other customers who have purchased this exact part. While we moderate these reviews for profanity, offensive language or personally identifiable information, these reviews are posted exactly as submitted and no alterations are made by our team.
All our customer repair instructions are solicited directly from other customers just like you who have purchased and replaced this exact part. While we moderate these reviews for profanity, offensive language or personally identifiable information, these reviews are posted exactly as submitted and no alterations are made by our team.
Based on data from past customer purchasing behaviors, these parts are most commonly purchased together along with the part you are viewing. These parts may be necessary or helpful to replace to complete your current repair.
All our installation videos are created and produced in collaboration with our in-house repair technician, Mark Sodja, who has helped millions of eReplacementParts customers over the last 13 years repair their products. Mark has years of experience in selling and repairing both commercial and residential products with a specialty in gas-powered equipment.
This data is collected from customers who submitted a repair instruction after replacing this exact part. Customers can rate how easy the repair was to complete and how long it took. We aggregate this data to provide a repair rating that allows customers to quickly determine the difficulty and time needed to perform their own repair.