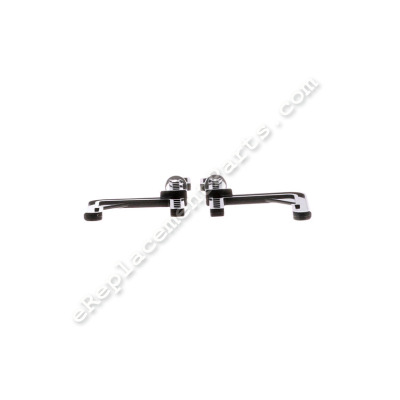
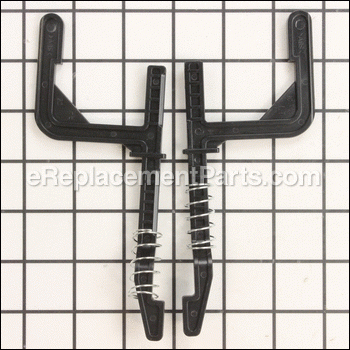
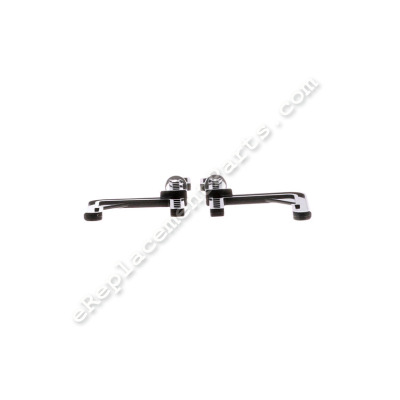
These are the right and left elevator levers for a variety of vacuum models. These levers are responsible for adjusting the height of the vacuum and its brush to suit different floor types, levels, and cleaning requirements. Crafted from high-quality OEM plastic, this pair of levers is sold individually and includes two levers and necessary springs. As these levers are made of plastic, they can break under excessive stress, use, or when clogged with dirt and debris. If broken, noticeable signs include difficulty in raising or lowering the vacuum, being stuck in place, or failure to pick up dirt effectively. To replace these levers, a Philips-head and flat-head screwdriver are all that is needed. Begin by carefully disassembling your vacuum, unscrewing the screws around the chassis, and removing the top to access its interior. Once the top portion is removed, unscrew and remove the motor cover or any obstructing part that blocks access to the lever(s). If necessary, remove the carry handle and/or brush roll to access the levers. The levers are located on each side of the vacuum interior and can be carefully removed by prying them out with a flathead screwdriver. Replace the levers, then reassemble the top portion, carry handle, and brush roll of the vacuum.
Left & Right Elevator Lever B-200-0010
OEM part for: Bissell
Part Number: B-200-0010
Jump To:
Frequently Purchased Together ?
Compatibility
This part will fit the following 32 machines
Bissell
This item works with the following types of products:
- Vacuum Parts
Customer Part Reviews ?
- 1
Questions & Answers ?
Our customer Service team is at the ready daily to answer your part and product questions.

Ask our Team
We have a dedicated staff with decades of collective experience in helping customers just like you purchase parts to repair their products.
Does this fit my product?Questions & Answers for Left & Right Elevator Lever
Customer Repair Instructions ?
All our customer repair instructions are solicited directly from other customers just like you who have purchased and replaced this exact part.
I loaned the vacuum to a friend, and it came back with parts broken. I have no idea why.
Tool Type
Vacuum
Difficulty
Easy
Time
15-30 minutes
Tools Used
Screwdriver
2. Replaced the top housing.
3. No special requirements for replacing the pivot arm retainer assemblies. Philips head screwdriver to remove the broken parts and install the new ones
Did not pump water for scrubber and brush did not wirk
Tool Type
Vacuum
Difficulty
Medium
Time
30-60 minutes
Tools Used
Screwdriver, Socket set
1. Removed outside housing
2. Removed brush and broken belt
3. Cleaned housing and brush
4. Replace broken brush riser
5. Reinstalled brush belt and brush
6. Installed new pump belt
7. Reassembled outer housing
8. Job complete and runs like new
Elevator was broken
Tool Type
Vacuum
Difficulty
Easy
Time
Less than 15 minutes
Tools Used
Screwdriver
Parts Used
Broken plastic working parts
Tool Type
Vacuum
Difficulty
Hard
Time
More than 2 hours
Tools Used
Screwdriver, Pliers, Power Drill, Socket set
Pump assembly end broke off that run the brush.
Tool Type
Vacuum
Difficulty
Medium
Time
30-60 minutes
Tools Used
Screwdriver, Pliers
1. Remove 6 screws for top half
2. Remove brush retainer screws
3. Remove screws and hoses from pump
OEM stands for Original Equipment Manufacturer and means the part you’re buying is sourced directly from the manufacturer who made your product. At eReplacementParts, we sell only genuine OEM parts, guaranteeing the part you’re purchasing is of better design and of higher quality than aftermarket parts.
Our product descriptions are a combination of data sourced directly from the manufacturers who made your product as well as content researched and curated by our content & customer service teams. This content is edited and reviewed internally before being made public to customers.
Our customer service team are at the ready daily to answer your part and product questions. We have a dedicated staff with decades of collective experience in helping customers just like you purchase parts to repair their products.
All our part reviews are solicited directly from other customers who have purchased this exact part. While we moderate these reviews for profanity, offensive language or personally identifiable information, these reviews are posted exactly as submitted and no alterations are made by our team.
All our customer repair instructions are solicited directly from other customers just like you who have purchased and replaced this exact part. While we moderate these reviews for profanity, offensive language or personally identifiable information, these reviews are posted exactly as submitted and no alterations are made by our team.
Based on data from past customer purchasing behaviors, these parts are most commonly purchased together along with the part you are viewing. These parts may be necessary or helpful to replace to complete your current repair.
All our installation videos are created and produced in collaboration with our in-house repair technician, Mark Sodja, who has helped millions of eReplacementParts customers over the last 13 years repair their products. Mark has years of experience in selling and repairing both commercial and residential products with a specialty in gas-powered equipment.
This data is collected from customers who submitted a repair instruction after replacing this exact part. Customers can rate how easy the repair was to complete and how long it took. We aggregate this data to provide a repair rating that allows customers to quickly determine the difficulty and time needed to perform their own repair.

