
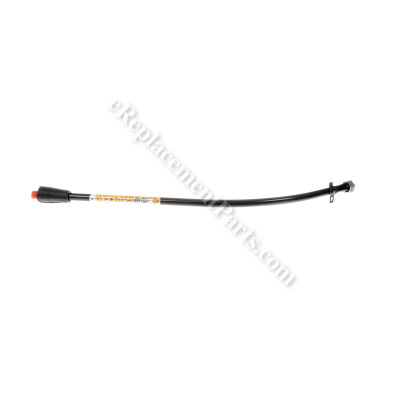


This is a genuine manufacturer-approved component which is specially made for use with Weed Eater gas trimmers. It is an identical replacement for a missing or a faulty lower shaft that was installed on a new unit. The assembly contains the flexible driveshaft which helps to rotate the cutting head. Please make sure to refer to the appropriate diagrams of your model for the correct location and application of this part. Keep in mind this high-quality lower shaft is made of durable materials and is sold as an individual item.
Kit, Shaft Lower 581494907
OEM part for: Weed Eater, Poulan
Part Number: 581494907
$54.78
In Stock
Compatibility
This part will fit the following 4 machines
Weed Eater
FX26SC Gas Trimmer View Diagrams & Manuals
FX26SCE Gas Trimmer View Diagrams & Manuals
W25CFK (967184401) Trimmer View Diagrams & Manuals
Poulan
W25CBK (967184001)(2012-11) Trimmers And Edgers View Diagrams & Manuals
This item works with the following types of products:
- Trimmer Parts
This part replaces obsolete part #: 545008066, 581494904
Customer Part Reviews ?
Average Rating (out of 5):
Click to filter by ratings:
5 stars
8
4 stars
1
3 stars
0
2 stars
0
1 stars
0
< PREV
- 1
Hard to find parts
Very fast service
john -
September 4, 2023
Verified Purchase
Right Part, Easy install
The original lower shaft snapped off during use. This new one was ordered, arrived quickly, and screwed into place in a few seconds. I reused the trimmer head and guard, which both bolted straight onto the new shaft with ease. Now it works great and we are back to WeedEater-ing the weeds! Thanks eReplacement Parts.
Guest -
August 9, 2021
Verified Purchase
great customer service
I called, they had the exact part. Steve talked me thru what I needed to do and all went just like it was supposed too.
I will definitely use these guys again. I went to a repair shop first for my problem, they weren't sure they could get the part... what a joke on they're part.
Guest -
September 4, 2020
Verified Purchase
Excellent assistance
The part arrived timely and fit perfectly
Guest -
July 29, 2020
Verified Purchase
fast service quality parts
made wife happy got her weedeater going again
scott -
April 29, 2020
Verified Purchase
Great part
This was a good replacement part for my weed eater
Guest -
August 19, 2019
Verified Purchase
Exactly what I needed!
Part was easy to replace and worked perfectly!
Guest -
June 27, 2019
Verified Purchase
Easy repair
Worked fine
Guest -
May 2, 2019
Verified Purchase
Weedeater Feather Lite
Part was exactly what I needed no missing pieces. Shipping took forever though
Guest -
July 13, 2020
Verified Purchase
t
t
t -
t days ago
Verified Purchase
eReplacementParts Team
t
Questions & Answers ?
Our customer Service team is at the ready daily to answer your part and product questions.

Ask our Team
We have a dedicated staff with decades of collective experience in helping customers just like you purchase parts to repair their products.
Does this fit my product?Questions & Answers for Kit, Shaft Lower
No questions have been asked yet
Customer Repair Instructions ?
All our customer repair instructions are solicited directly from other customers just like you who have purchased and replaced this exact part.
The head of the lower part of the shaft of my trimmer snapped wear the protective guard fastens to the shaft!
Silas - July 1, 2016
👍 4 of 5 people found this instruction helpful
Tool Type
Trimmer
Difficulty
Easy
Time
Less than 15 minutes
Tools Used
Screwdriver, Adjustable Wrench
Parts Used
I simply took the new part and placed it on to my upper existing shaft. Then attached the guard and cutting head to it.
Did you find this story helpful?
Thanks for voting and helping fellow customers!
Lower shaft assembly not working
Terrence - June 5, 2016
👍 2 of 2 people found this instruction helpful
Tool Type
Trimmer
Difficulty
Easy
Time
15-30 minutes
Tools Used
Socket set
Parts Used
Remove all of the parts from the old shaft, then unscrew the lower shaft from the upper shaft. Screw on the new lower shaft, then put all the parts on the new shaft assembly.
Did you find this story helpful?
Thanks for voting and helping fellow customers!
bearing siezed up in lower shaft/
Ed - May 21, 2020
Tool Type
Trimmer
Difficulty
Easy
Time
15-30 minutes
Tools Used
Socket set, Wrench Set, torx bit
Remove torx screws that fasten upper shaft to body of trimmer.
Separate lower shaft from upper shaft.
Remove string head from lower shaft and install on new lower shaft.
Install new upper shaft into body of trimmer, note notch on upper assembly and slot in trimmer housing as the alignment point.
Install new lower shaft assembly along with drive cable into upper shaft assembly, aligning the upper and lower shaft assembly with the notch on each piece. You may need to slightly turn the stringer head left or right so that the square end of the drive cable seats into the couple inside the drive end of the trimmer assembly (at the business end of the engine). Once seated correctly, you should feel resistance from the compression of the engine as you try turning the trimmer string head, and you will be able to tighten the two halves of the coupler sleeve. Do not try forcing the two shaft halves together. Try again to seat the drive cable simply by rocking the stringer head back and forth until you feel the square end of cable seat into the coupler on the end of the engine inside the trimmer housing.
Tighten the torx screws on the trimmer housing and tighten the coupler that holds the upper and lower shaft assembly together.
Install the handle from your old upper shaft assembly onto the new upper shaft assembly, just above the coupler at your preferred location, most comfortable to your reach and grip during operation of the unit.
For safety, and to test without starting, disconnect the spark plug wire, pull the start rope, and observe stringer head. If the stringer head turns without issue, cable should be seated properly, and the unit is ready for use.
Did you find this story helpful?
Thanks for voting and helping fellow customers!
Head of weedeater would freewheel. Occasionally, the machine would screeching halt.
Terieon - September 17, 2016
👍 2 of 4 people found this instruction helpful
Tool Type
Trimmer
Difficulty
Easy
Time
Less than 15 minutes
Tools Used
, Vice Grip
Parts Used
Unscrewed lower shaft.
Used vice grips on lower shaft to unscrew head off.
Remove shaft.
Removed orange tab.
Installed new shaft.
Used vice grips at bottom of shaft to screw head on the new shaft.
Used vice grips on lower shaft to unscrew head off.
Remove shaft.
Removed orange tab.
Installed new shaft.
Used vice grips at bottom of shaft to screw head on the new shaft.
Did you find this story helpful?
Thanks for voting and helping fellow customers!
OEM stands for Original Equipment Manufacturer and means the part you’re buying is sourced directly from the manufacturer who made your product. At eReplacementParts, we sell only genuine OEM parts, guaranteeing the part you’re purchasing is of better design and of higher quality than aftermarket parts.
Our product descriptions are a combination of data sourced directly from the manufacturers who made your product as well as content researched and curated by our content & customer service teams. This content is edited and reviewed internally before being made public to customers.
Our customer service team are at the ready daily to answer your part and product questions. We have a dedicated staff with decades of collective experience in helping customers just like you purchase parts to repair their products.
All our part reviews are solicited directly from other customers who have purchased this exact part. While we moderate these reviews for profanity, offensive language or personally identifiable information, these reviews are posted exactly as submitted and no alterations are made by our team.
All our customer repair instructions are solicited directly from other customers just like you who have purchased and replaced this exact part. While we moderate these reviews for profanity, offensive language or personally identifiable information, these reviews are posted exactly as submitted and no alterations are made by our team.
Based on data from past customer purchasing behaviors, these parts are most commonly purchased together along with the part you are viewing. These parts may be necessary or helpful to replace to complete your current repair.
All our installation videos are created and produced in collaboration with our in-house repair technician, Mark Sodja, who has helped millions of eReplacementParts customers over the last 13 years repair their products. Mark has years of experience in selling and repairing both commercial and residential products with a specialty in gas-powered equipment.
This data is collected from customers who submitted a repair instruction after replacing this exact part. Customers can rate how easy the repair was to complete and how long it took. We aggregate this data to provide a repair rating that allows customers to quickly determine the difficulty and time needed to perform their own repair.