
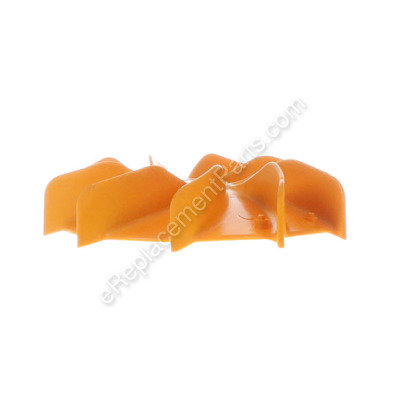


This is a Genuine Manufacturer Approved replacement part designed for Handheld Gas Powered Blowers. This part installs in the blower housing and attaches to the crankshaft of the engine. This item is made out Plastic with a Metal Bushing in the middle.
Impeller Kit 580780901
OEM part for: Poulan, Weed Eater, Craftsman, Husqvarna
Part Number: 580780901
$8.54
In Stock
Compatibility
This part will fit the following 57 machines
Poulan
BVM200VS (Type 1) Gas Blower View Diagrams & Manuals
BVM200VS (Type 2) Gas Blower View Diagrams & Manuals
BVM210VS (Type1) Pro Gas Blower View Diagrams & Manuals
BVM210VS (Type2) Pro Gas Blower View Diagrams & Manuals
BVM200C Gas Blower View Diagrams & Manuals
BVM200FE Gas Blower View Diagrams & Manuals
PPB430VS (Type1) Pro Leaf Blower View Diagrams & Manuals
PPB430VS (Type2) Pro Leaf Blower View Diagrams & Manuals
SM210VS (Type1) Pro Leaf Blower View Diagrams & Manuals
SM210VS (Type2) Pro Leaf Blower View Diagrams & Manuals
P200C Gas Powered Blower View Diagrams & Manuals
BVM210FA (2012-10) Blowers View Diagrams & Manuals
Weed Eater
VS2000BV Handheld Blower View Diagrams & Manuals
Craftsman
358794770 Gas Blower View Diagrams & Manuals
358794650 25Cc 210Mph / 450 Cfm Gas Blower View Diagrams & Manuals
358794600 25Cc 200 Mph / 430 Cfm Gas Blower View Diagrams & Manuals
358794780 Blower View Diagrams & Manuals
358794765 Blower View Diagrams & Manuals
358794774 Blower View Diagrams & Manuals
358794741 Blower View Diagrams & Manuals
358794773 Blower View Diagrams & Manuals
944518250 Blower View Diagrams & Manuals
944518252 Blower View Diagrams & Manuals
358794700 Blower View Diagrams & Manuals
358794701 Blower View Diagrams & Manuals
358794702 Blower View Diagrams & Manuals
358794703 Blower View Diagrams & Manuals
358794704 Blower View Diagrams & Manuals
358794730 Blower View Diagrams & Manuals
358794731 Blower View Diagrams & Manuals
358794732 Blower View Diagrams & Manuals
358794733 Blower View Diagrams & Manuals
358794740 Blower View Diagrams & Manuals
358794742 Blower View Diagrams & Manuals
358794743 Blower View Diagrams & Manuals
358794744 Blower View Diagrams & Manuals
358794750 Blower View Diagrams & Manuals
358794751 Blower View Diagrams & Manuals
358794760 Blower View Diagrams & Manuals
358794761 Blower View Diagrams & Manuals
358794762 Blower View Diagrams & Manuals
358794763 Blower View Diagrams & Manuals
358794764 Blower View Diagrams & Manuals
358794771 Blower View Diagrams & Manuals
358794772 Blower View Diagrams & Manuals
358794775 Blower View Diagrams & Manuals
358794776 Blower View Diagrams & Manuals
358794781 Blower View Diagrams & Manuals
Husqvarna
BVM200VS (2009-03) Blower View Diagrams & Manuals
BVM200VS (545103471) (2009-03) Blower View Diagrams & Manuals
BVM210VS (2009-03) Blower View Diagrams & Manuals
GBV325 (2010-07) 952715704 Blower View Diagrams & Manuals
GBV345 (2010-05) Blower View Diagrams & Manuals
P325 (2010-04) Blower View Diagrams & Manuals
PPB430VS (2009-03) Blower View Diagrams & Manuals
SM210VS (2009-03) Blower View Diagrams & Manuals
VS2000BV (952711922) (2009-04) Handheld Trimmer View Diagrams & Manuals
Show More Compatible Models
This item works with the following types of products:
- Blower Parts
This part replaces obsolete part #: 545113601
Customer Part Reviews ?
Average Rating (out of 5):
Click to filter by ratings:
5 stars
8
4 stars
0
3 stars
1
2 stars
0
1 stars
2
< PREV
- 1
- 2
Great price and fast shipping
Part fit as it should and easy fast repair with a great price
Guest -
April 19, 2022
Verified Purchase
Fast delivery of the correct part
Nice going! Fast delivery, correct part. Easy repair. I just don't know why it was called a "kit" when there was really only one (1) part. Was there supposed to be something else delivered with the impeller?; because I got nothing else....
Guest -
November 5, 2021
Verified Purchase
Blower impeller
The part work perfect.arrive on time. Very happy
Daniel -
March 17, 2021
Verified Purchase
part
it was exactly what was ordered and it worked
Guest -
November 23, 2020
Verified Purchase
Was easy and works like new!
Was easy and works like new
Guest -
November 20, 2020
Verified Purchase
EASY REPAIR
PERFECT CONDITION
Guest -
November 14, 2019
Verified Purchase
Easy Repair, great result.
The part fit perfectly, my leaf blower/vac is now blowing and sucking like new.
Guest -
October 14, 2019
Verified Purchase
Great part
Exact replacement part. Worked great. Thanks
Lester -
June 26, 2019
Verified Purchase
Great parts
The problem is I order my parts
On May 25. I didnt get it on till jun 4
Guest -
June 9, 2020
Verified Purchase
Damage
Arrived in a week. Hole was warped, did not fit perfect. Need to buy another type.
Guest -
May 29, 2020
Verified Purchase
eReplacementParts Team
Thank you for your review. We have emailed you in regards to this issue. We look forward to hearing from you.
t
t
t -
t days ago
Verified Purchase
eReplacementParts Team
t
Questions & Answers ?
Our customer Service team is at the ready daily to answer your part and product questions.

Ask our Team
We have a dedicated staff with decades of collective experience in helping customers just like you purchase parts to repair their products.
Does this fit my product?Questions & Answers for Impeller Kit
I was just wondering if this part will fit on my Husqvarna 125B handheld blower
Nicolas
for model number 125B Husqvarna
asked on 2023-12-19
Hello Nicolas, thank you for your question. No. The correct part is Impeller 581449402. Thank you and have a great day.
eReplacementParts Team December 19, 2023
what is the diameter?
jose
for model number 580780901
asked on 2023-10-31
Hello Jose, Thank you for your inquiry. We show the diameter of this part as approximately 6.5 inches. We hope this helps.
eReplacementParts Team October 31, 2023
Customer Repair Instructions ?
All our customer repair instructions are solicited directly from other customers just like you who have purchased and replaced this exact part.
Impeller shot
William - April 8, 2016
👍 2 of 2 people found this instruction helpful
Tool Type
Blower
Difficulty
Medium
Time
1-2 hours
Tools Used
Wrench Set, allen wrenchs
Parts Used
Remove blower cover it has allen screws, remove bolt on the old impeller, bolt on the new impeller.
Did you find this story helpful?
Thanks for voting and helping fellow customers!
Blower would start with ease when cold and ran with no problem however when the unit was shut down, it would not restart until the unit was cold.
Kenneth - November 20, 2015
👍 1 of 1 people found this instruction helpful
Tool Type
Blower
Difficulty
Easy
Time
1-2 hours
Tools Used
Socket set, Torx drivers
Separate the casing halves and replace the impeller. remove the engine from the right casing half and replace the coil set the air gap on the coil with brass tappet gauges. Reassembled the casing halves and engine installing the switch before I buttoned it up.
Did you find this story helpful?
Thanks for voting and helping fellow customers!
excessive vibration
Chandler - March 25, 2022
Tool Type
Blower
Difficulty
Easy
Time
15-30 minutes
Tools Used
Screwdriver, Wrench Set, Torx bit screwdriver
Parts Used
1- removed all fasteners in impeller side of the body or shell.
2- lift the shell to expose the impeller
3- secure the impeller for removal:
a-remove spark plug and stuff rope into the cylinder to immobilize the piston
b-put on a glove to protect your hand and have a friend or yourself hold the impeller steady
4- use a socket and ratchet to break the nut that retains the impeller loose
5- remove and replace the impeller
6- tighten the new impeller down while holding it secure(since the required torque is unknown, some blue thread locker is a good idea)
7- continue reassembly opposite the disassembly instructions
Did you find this story helpful?
Thanks for voting and helping fellow customers!
Nothing! It was a perfect fit.
Paul - May 24, 2020
Tool Type
Blower
Difficulty
Easy
Time
30-60 minutes
Tools Used
Screwdriver, Wrench Set, torx screwdriver
Parts Used
Removed 8 Torx screws. Removed impeller nut, removed
impeller. Reversed procedure to install new impeller received from you.
Tested ...... worked as advertised ! ! ! !
Thank you.
PS: Pricing of impeller was reasonable
impeller. Reversed procedure to install new impeller received from you.
Tested ...... worked as advertised ! ! ! !
Thank you.
PS: Pricing of impeller was reasonable
Did you find this story helpful?
Thanks for voting and helping fellow customers!
The impeller was damaged and needed to be replaced
Dale - March 18, 2020
Tool Type
Blower
Difficulty
Easy
Time
Less than 15 minutes
Tools Used
Screwdriver, Socket set
Parts Used
Found instructions on YouTube
Removed the housing screws and opened the blower
Removed the impeller nut and pulled off the old impeller
Installed the new impeller and nut
Reinstalled the housing and tested the blower
Removed the housing screws and opened the blower
Removed the impeller nut and pulled off the old impeller
Installed the new impeller and nut
Reinstalled the housing and tested the blower
Did you find this story helpful?
Thanks for voting and helping fellow customers!
Wouldn't blow, blower fan hub stripped out
Lester - June 28, 2019
Tool Type
Blower
Difficulty
Medium
Time
15-30 minutes
Tools Used
Pliers, Wrench Set, metric allen wrench
Parts Used
Took side cover off, removed old fan and nut, removed old fan blade hub, installed new fan blade, tightened nut, reinstalled fan cover, put blower tube back on.
Did you find this story helpful?
Thanks for voting and helping fellow customers!
Blower would not run or start on anything but full throttle. even with full carburetor kit, gas lines, filters, and spark plug new.
Joshua - May 3, 2019
Tool Type
Blower
Difficulty
Medium
Time
1-2 hours
Tools Used
Screwdriver, Pliers, Power Drill, Socket set, Allen wrench set, torx bits T20 and T25.
Piston ring --
1. Take air filter cover off
2. Take carburetor and gaskets off.
3. Spark Plug remove
4. Take motor housing plastic off.
5. Take off torx bolts for crank case cover and motor head/cylinder.
6. Remove old ring from piston( keep piston on rod and crank shaft.
7. put new ring on / put cylinder head back on.
Moved to impeller install---
1. large amount of case screws with allen head use a power driver.
2. use socket lodged in crank case to brace( so the motor does not spin) when removing impeller nut.
3. Install and tighten down impeller.
4. reinstall all case screws and crank case torks screws.
Too finish all---
reinstall all plastic covers including adding new missing air box cover.(without choke sticker)
Did you find this story helpful?
Thanks for voting and helping fellow customers!
impeller had a broken blade.
Gary - April 20, 2019
Tool Type
Blower
Difficulty
Medium
Time
30-60 minutes
Tools Used
Screwdriver, Socket set, Adjustable Wrench
Parts Used
ordered in new impeller which was the right one thanks to you people .
Did you find this story helpful?
Thanks for voting and helping fellow customers!
Impeller was worn out and the fuel filter needed a change
Peter - March 15, 2018
Tool Type
Blower
Difficulty
Easy
Time
15-30 minutes
Tools Used
Screwdriver, Power Drill, Socket set, Wrench Set, Nutdriver
Parts Used
Impeller: Removed the cowling screws and the spark plug, loosened the impeller nut and exchanged the old with the new. Replace cowling.
Fuel filter was fished out of the tank with a stiff wire, then old one pulled off and the new pushed on.
Fuel filter was fished out of the tank with a stiff wire, then old one pulled off and the new pushed on.
Did you find this story helpful?
Thanks for voting and helping fellow customers!
leaf blower vac bag wore out and impeller had many broken vanes
Bruce - November 11, 2017
Tool Type
Blower
Difficulty
Medium
Time
30-60 minutes
Tools Used
Socket set, Hex-head screwdriver with long shaft
1. Removed nozzle & bag, slid bag off and slid the new bag on & remounted - easy.
2. Removed hex head screws around the entire body of the unit and popped off the side away from the gas tank and electronics.( I had to buy a hex-driver with a 4" shaft)
3. Sprayed WD-40, had my spouse hold the impeller while I loosened the center nut. I couldn't loosen it alone. - medium
4. Re-set the hardware and nut on the new impeller, remounted it and put the outer body back together. - easy
Did you find this story helpful?
Thanks for voting and helping fellow customers!
Load More Install Stories
OEM stands for Original Equipment Manufacturer and means the part you’re buying is sourced directly from the manufacturer who made your product. At eReplacementParts, we sell only genuine OEM parts, guaranteeing the part you’re purchasing is of better design and of higher quality than aftermarket parts.
Our product descriptions are a combination of data sourced directly from the manufacturers who made your product as well as content researched and curated by our content & customer service teams. This content is edited and reviewed internally before being made public to customers.
Our customer service team are at the ready daily to answer your part and product questions. We have a dedicated staff with decades of collective experience in helping customers just like you purchase parts to repair their products.
All our part reviews are solicited directly from other customers who have purchased this exact part. While we moderate these reviews for profanity, offensive language or personally identifiable information, these reviews are posted exactly as submitted and no alterations are made by our team.
All our customer repair instructions are solicited directly from other customers just like you who have purchased and replaced this exact part. While we moderate these reviews for profanity, offensive language or personally identifiable information, these reviews are posted exactly as submitted and no alterations are made by our team.
Based on data from past customer purchasing behaviors, these parts are most commonly purchased together along with the part you are viewing. These parts may be necessary or helpful to replace to complete your current repair.
All our installation videos are created and produced in collaboration with our in-house repair technician, Mark Sodja, who has helped millions of eReplacementParts customers over the last 13 years repair their products. Mark has years of experience in selling and repairing both commercial and residential products with a specialty in gas-powered equipment.
This data is collected from customers who submitted a repair instruction after replacing this exact part. Customers can rate how easy the repair was to complete and how long it took. We aggregate this data to provide a repair rating that allows customers to quickly determine the difficulty and time needed to perform their own repair.