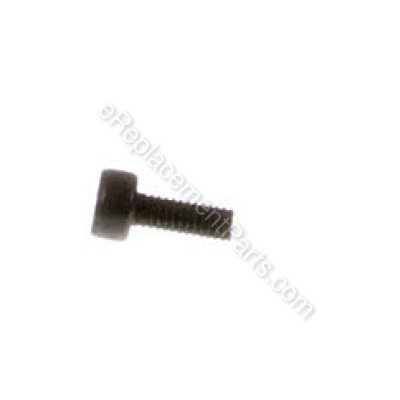
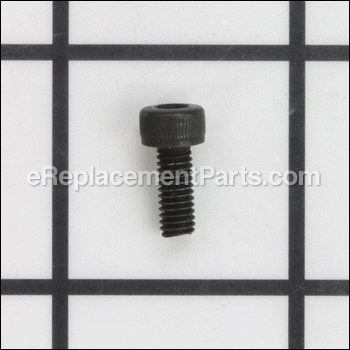


Genuine Makita replacement part sourced from original equipment manufacturer designed for use with a variety of power tools. This is a piece of standard hardware with multiple applications based on your tool. Please check diagrams for correct use. This hex socket bolt is sold individually. Requires an allen wrench/hex key to secure this bolt.
Hex. Socket Head Bolt M4x10 922112-8
OEM part for: Makita
Part Number: 922112-8
$5.19
In Stock
Jump To:
Frequently Purchased Together ?


Compatibility
This part will fit the following 68 machines
Makita
BO5001 Random Orbit Sander View Diagrams & Manuals
JS1600 Metal Shear View Diagrams & Manuals
AF501 Pneumatic Nailer View Diagrams & Manuals
BO5000 Sander View Diagrams & Manuals
M432 Jig Saw View Diagrams & Manuals
EM2650LH 4-Stroke String Trimmer View Diagrams & Manuals
XRJ01 18V LXT Lithium-Ion Cordless Compact Recipro Saw Kit View Diagrams & Manuals
XRJ01Z 18V LXT Cordless Compact Recipro Saw View Diagrams & Manuals
EN5550SH 22-Inch 25.4 Cc Mm4 Double-Sided Hedge Trimmer View Diagrams & Manuals
ME246.4 25.4 Cc Mm4 4-Stroke Engine Telescoping Pole Pruner View Diagrams & Manuals
CS-246.4CBC 25.4cc 4-Stroke Couple Shaft String Trimmer View Diagrams & Manuals
MS-256.4 C 25.4 Cc Mm4 4-Stroke Engine String Trimmer View Diagrams & Manuals
EN5950SH 24-Inch 25.4 Cc Mm4 4-Stroke Engine Double-Sided Hedge Trimmer View Diagrams & Manuals
EE2650H 25.4 Cc Mm4 4-Stroke Engine Edger View Diagrams & Manuals
MS245.4C 24.5cc 4-Stroke String Trimmer View Diagrams & Manuals
PE-254.4 25.4 Cc Mm4 4-Stroke Engine Edger View Diagrams & Manuals
EX2650LH 25.4 Cc Mm4 4-Stroke Couple Shaft Power Head View Diagrams & Manuals
EY2650H25H 25.4 Cc Mm4 4-Stroke Engine Telescoping Pole Pruner View Diagrams & Manuals
EM2650UH 25.4 Cc Mm4 4-Stroke Engine Brush Cutter View Diagrams & Manuals
MH-246.4DS 24-Inch 25.4 Cc Mm4 4-Stroke Engine Double-Sided Hedge Trimmer View Diagrams & Manuals
EN4951SH 20-Inch 25.4 Cc Mm4 4-Stroke Engine Short-Shaft Articulating Hedge Trimmer View Diagrams & Manuals
EN4950H 20-Inch 25.4 Cc Mm4 4-Stroke Engine Articulating Hedge Trimmer View Diagrams & Manuals
MS-335.4C 33.5cc 4-Stroke String Trimmmer View Diagrams & Manuals
PB-251.4 24.5 Cc Mm4 4-Stroke Engine Blower View Diagrams & Manuals
EN7350SH 30-Inch 25.4 Cc Mm4 4-Stroke Engine Single-Sided Hedge Trimmer View Diagrams & Manuals
CS-246.4C 25.4cc 4-Stroke Couple Shaft Power Head View Diagrams & Manuals
EM2652LHN 25.4 Cc Mm4 4-Stroke Engine String Trimmer View Diagrams & Manuals
4300BA Saw View Diagrams & Manuals
BHX2500 (Type 2) Blower View Diagrams & Manuals
BPT350 (Type 1) Misc View Diagrams & Manuals
BPT350 (Type 2) Misc View Diagrams & Manuals
BPT350 (Type 3) Misc View Diagrams & Manuals
BPT350Z (Type 1) Misc View Diagrams & Manuals
BPT350Z (Type 2) Misc View Diagrams & Manuals
BPT350Z (Type 3) Misc View Diagrams & Manuals
EB7650TH (Type 2) Blower View Diagrams & Manuals
EBH253L (Type 3) Grass Trimmer View Diagrams & Manuals
EN4950H (Type 1) Grass Trimmer View Diagrams & Manuals
EN4950H (Type 2) Grass Trimmer View Diagrams & Manuals
EN5950SH (Type 1) Grass Trimmer View Diagrams & Manuals
EN5950SH (Type 2) Grass Trimmer View Diagrams & Manuals
ER2650LH Grass Trimmer View Diagrams & Manuals
EY2650H25H (Type 1) Saw View Diagrams & Manuals
EY2650H25H (Type 2) Saw View Diagrams & Manuals
EY2650H25H (Type 3) Saw View Diagrams & Manuals
GN900SE (Type 1) Misc View Diagrams & Manuals
GN900SE (Type 2) Misc View Diagrams & Manuals
GN900S (Type 1) Misc View Diagrams & Manuals
GN900S (Type 2) Misc View Diagrams & Manuals
JS1600 (Type 2) Misc View Diagrams & Manuals
JS1600 (Type 3) Misc View Diagrams & Manuals
JS1602 Misc View Diagrams & Manuals
JV2000 Saw View Diagrams & Manuals
LXTP01 (Type 1) Saw View Diagrams & Manuals
LXTP01 (Type 2) Saw View Diagrams & Manuals
LXTP01Z1 (Type 1) Saw View Diagrams & Manuals
LXTP01Z1 (Type 2) Saw View Diagrams & Manuals
LXTP01Z (Type 1) Saw View Diagrams & Manuals
LXTP01Z (Type 2) Saw View Diagrams & Manuals
PB2504 Blower View Diagrams & Manuals
RJ03R1 Saw View Diagrams & Manuals
RJ03Z Saw View Diagrams & Manuals
TP03Z Misc View Diagrams & Manuals
XNB01 Misc View Diagrams & Manuals
XNB01Z Misc View Diagrams & Manuals
XRJ01T Saw View Diagrams & Manuals
XTP01Z Misc View Diagrams & Manuals
XTP02Z Misc View Diagrams & Manuals
Show More Compatible Models
This item works with the following types of products:
- Sander Parts
- Shear Parts
- Nailer Parts
- Jig saw Parts
- Saw Parts
- Trimmer Parts
Questions & Answers ?
Our customer Service team is at the ready daily to answer your part and product questions.

Ask our Team
We have a dedicated staff with decades of collective experience in helping customers just like you purchase parts to repair their products.
Does this fit my product?Questions & Answers for Hex. Socket Head Bolt M4x10
No questions have been asked yet
Customer Repair Instructions ?
All our customer repair instructions are solicited directly from other customers just like you who have purchased and replaced this exact part.
The hook and loop pad of the random orbit sander would no longer hold the sandpaper.
David - February 23, 2016
Tool Type
Sander
Difficulty
Medium
Time
15-30 minutes
Tools Used
Screwdriver, allen wrench
For this particular sander, there are only three screws to remove for replacement of the 196905-1 hook-and-loop pad. One is in the center of the pad. You have to pry out a little felt pad from the center of the hook-and-loop to get to the first screw. I wedged a screwdriver into the fins of the cooling fan to hold the pad from turning while loosening the screw. With that screw removed, the hook and loop pad together with its backing plate comes right off. Turn the pad over and on its back side and remove the two Phillips head screws to separate the hook and loop pad from the metal backing plate. These two screws also hold the sealed ball bearing in place. These screws are installed with a thread-locking compound, and will probably be damaged by removal. On mine, one screw twisted off and the on other the threads looked partly stripped. Thinking back, it does make sense that they would be installed with some type of thread-locking compound, since sanders do definitely vibrate. While you have the backing plate off, check the sealed ball bearing in the center. On mine the bearing was starting to feel just a little bit rough, so I ordered an new one along with the other parts. Suggestion: Lay out the parts in order immediately after disassembly and take a photo with your cell phone so you can be absolutely certain to get everything back together in the same order. Reassembly is a pretty straightforward reversal of the disassembly process. The bearing is a tight fit. If you don't have a press you can use a large vise to press it into the backing plate. if you don't have a large enough vise, you can using a socket that matches the outside diameter of the bearing to tap it in very carefully with a hammer. Don't hammer directly on the bearing and be sure to keep it lined up straight. Don't force it if it starts to go crooked. Back off and start again. Be sure to use some strong Loctite or equivalent on the two screws holding the hook-and-loop pad to the backing plate.
Did you find this story helpful?
Thanks for voting and helping fellow customers!
OEM stands for Original Equipment Manufacturer and means the part you’re buying is sourced directly from the manufacturer who made your product. At eReplacementParts, we sell only genuine OEM parts, guaranteeing the part you’re purchasing is of better design and of higher quality than aftermarket parts.
Our product descriptions are a combination of data sourced directly from the manufacturers who made your product as well as content researched and curated by our content & customer service teams. This content is edited and reviewed internally before being made public to customers.
Our customer service team are at the ready daily to answer your part and product questions. We have a dedicated staff with decades of collective experience in helping customers just like you purchase parts to repair their products.
All our part reviews are solicited directly from other customers who have purchased this exact part. While we moderate these reviews for profanity, offensive language or personally identifiable information, these reviews are posted exactly as submitted and no alterations are made by our team.
All our customer repair instructions are solicited directly from other customers just like you who have purchased and replaced this exact part. While we moderate these reviews for profanity, offensive language or personally identifiable information, these reviews are posted exactly as submitted and no alterations are made by our team.
Based on data from past customer purchasing behaviors, these parts are most commonly purchased together along with the part you are viewing. These parts may be necessary or helpful to replace to complete your current repair.
All our installation videos are created and produced in collaboration with our in-house repair technician, Mark Sodja, who has helped millions of eReplacementParts customers over the last 13 years repair their products. Mark has years of experience in selling and repairing both commercial and residential products with a specialty in gas-powered equipment.
This data is collected from customers who submitted a repair instruction after replacing this exact part. Customers can rate how easy the repair was to complete and how long it took. We aggregate this data to provide a repair rating that allows customers to quickly determine the difficulty and time needed to perform their own repair.