
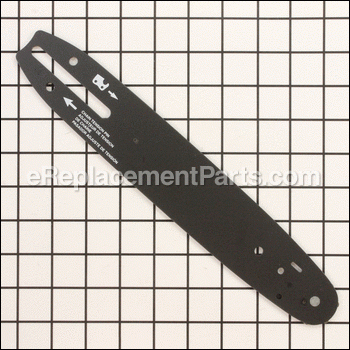
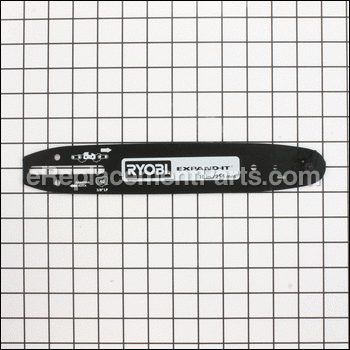
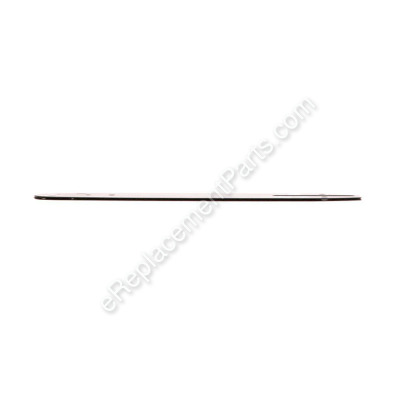


This is a 10 Inch Bar.
Guide Bar 671834023
OEM part for: Ryobi, Homelite
Part Number: 671834023
$24.11
In Stock
Jump To:
Frequently Purchased Together ?

Compatibility
This part will fit the following 36 machines
Ryobi
RY52001 Pruner / Trimmer View Diagrams & Manuals
RY52001A Pruner / Trimmer View Diagrams & Manuals
RY52002 Pruner / Trimmer View Diagrams & Manuals
RY52002A Pruner / Trimmer View Diagrams & Manuals
RY52003 Gas Pruner View Diagrams & Manuals
RY52003A Gas Pruner View Diagrams & Manuals
RY52004 30cc Gas Pruner View Diagrams & Manuals
RY52004A Gas Pruner View Diagrams & Manuals
RY52014 TP30 Gas Pruner View Diagrams & Manuals
RY52502 Gas Pruner View Diagrams & Manuals
RY52504 Gas Pruner View Diagrams & Manuals
RY52903 Gas Pruner View Diagrams & Manuals
RY52905 Gas Pruner View Diagrams & Manuals
P542 Chainsaw View Diagrams & Manuals
RY15520 Pruner Attachment View Diagrams & Manuals
RY52604 Gas Pruner View Diagrams & Manuals
P545 Chain Saw View Diagrams & Manuals
RY52907 Gas Pruner TP26 View Diagrams & Manuals
TP26 TP26 Gas Pruner View Diagrams & Manuals
RY52502 (TP30) Gas Pruner View Diagrams & Manuals
RY52002A (PC30) Pruner/Trimmer View Diagrams & Manuals
RY52604 (TP26) Gas Pruner View Diagrams & Manuals
RY52004 (TP30) 30cc Gas Pruner View Diagrams & Manuals
RY52903 (TP30) Gas Pruner View Diagrams & Manuals
RY52001A (PC30) Pruner/Trimmer View Diagrams & Manuals
RY52003A (TP30) Gas Pruner View Diagrams & Manuals
RY52905 (TP30) Gas Pruner View Diagrams & Manuals
RY52504 (TP30) Gas Pruner View Diagrams & Manuals
RY52907 (TP26) Gas Pruner View Diagrams & Manuals
RY52001 (PC30) Pruner/Trimmer View Diagrams & Manuals
RY52003 (TP30) Gas Pruner View Diagrams & Manuals
RY52002 (PC30) Pruner/Trimmer View Diagrams & Manuals
RY52004A (TP30) Gas Pruner View Diagrams & Manuals
RYPRN33 (090112021) Expand-It Pruner Attachment View Diagrams & Manuals
Homelite
UT15520A Trimmer View Diagrams & Manuals
UT15520 Expand-It Pruner View Diagrams & Manuals
Show More Compatible Models
This item works with the following types of products:
- Pruner Parts
- Trimmer Parts
- Chain Saw Parts
- Saw Parts
This part replaces obsolete part #: 671834005, UP08687, 983872001, 671834007, 671834006, 671834008, 983872002
Customer Part Reviews ?
Average Rating (out of 5):
Click to filter by ratings:
5 stars
4
4 stars
0
3 stars
0
2 stars
0
1 stars
1
< PREV
- 1
guide bar replacment
exact same as original. received with no delays.
Guest -
May 6, 2021
Verified Purchase
Ryobi guide bar
Bar arrived on time and was an exact replacement part
Guest -
April 6, 2020
Verified Purchase
Great response.
Received item in two days. Incredible. Thank you so much.
Guest -
November 15, 2019
Verified Purchase
Part was great, however wrong...
The part was quick shipped, looked great, and was affordable. However it was the wrong part for my saw. Return process was easy and fast, although the web link did not work but sending an email got almost an instant response and returned an rma. I would definately buy here again. Thank you
Guest -
September 4, 2019
Verified Purchase
disappointment
I received the wrong part. I ordered a bar and chain for a 16" Ryobi. Instead I received a bar and chain for a 10"? This comes after I received the wrong belt size for a Husquavarna drive belt. In trying to return, I call the 1 800 number while at work. Of course, I am prompted that I need my order number and that I should log on to the website for return procedures. After spending approximately $100 in two orders with wrong products, I have just decided that I no longer need to order anything from eReplacementParts and shared my frustration with two friends whom were looking for parts for their equipment. Its not worth it!! Best to pay a few extra dollars to local merchant and get what I need!
Guest -
November 14, 2019
Verified Purchase
t
t
t -
t days ago
Verified Purchase
eReplacementParts Team
t
Questions & Answers ?
Our customer Service team is at the ready daily to answer your part and product questions.

Ask our Team
We have a dedicated staff with decades of collective experience in helping customers just like you purchase parts to repair their products.
Does this fit my product?Questions & Answers for Guide Bar
Is this a 18 inch bar. I WANT TO BUY A 18 INCH BAR FOR MY RYOBI CHAIN SAW MODEL #3818.DO YOU HAVE ONE THAT WILL FIT IT?
Charles
for model number RY3818
asked on 2022-03-11
Hello Charles, Thank you for contacting us. We have researched the model you have provided and have found the part you are looking for is Part Number:312655001. If you need help placing an order, customer service is open 7 days a week. Please feel free to give us a call. We look forward to hearing from you!
eReplacementParts Team March 11, 2022
Customer Repair Instructions ?
All our customer repair instructions are solicited directly from other customers just like you who have purchased and replaced this exact part.
Bent guide bar
Gene - June 15, 2016
👍 3 of 3 people found this instruction helpful
Tool Type
Pruner
Difficulty
Easy
Time
Less than 15 minutes
Tools Used
Screwdriver, Adjustable Wrench
Parts Used
Loosen the tension on the blade. Remove the bar clamp assembly. Lift blade out of the old bar and from around the sprocket, then remove the old bar. Install the new bar, then place the blade around the sprocket and in the saw bar. Install the bar clamp assembly, then tighten the blade to the proper tension.
Did you find this story helpful?
Thanks for voting and helping fellow customers!
Guide bar worn
Rodney - August 1, 2017
👍 2 of 2 people found this instruction helpful
Tool Type
Pruner
Difficulty
Easy
Time
Less than 15 minutes
Tools Used
Screwdriver, Socket set
Parts Used
Loosened the tension on the chain and bar
Removed the bar clamp
Removed the chain from the bar and sprocket
Removed the the worn bar
Installed the new bar, then the chain
Put the bar clamp back on
Adjusted the tension on the bar and chain
Removed the bar clamp
Removed the chain from the bar and sprocket
Removed the the worn bar
Installed the new bar, then the chain
Put the bar clamp back on
Adjusted the tension on the bar and chain
Did you find this story helpful?
Thanks for voting and helping fellow customers!
Blade wore out on the saw.
Charles - July 30, 2017
👍 1 of 1 people found this instruction helpful
Tool Type
Pruner
Difficulty
Easy
Time
15-30 minutes
Tools Used
Adjustable Wrench
Parts Used
Took the old blade off and installed the new blade.
Did you find this story helpful?
Thanks for voting and helping fellow customers!
Sprocket and guide bar broke
jorge - September 5, 2016
👍 1 of 1 people found this instruction helpful
Tool Type
Pruner
Difficulty
Easy
Time
Less than 15 minutes
Tools Used
Screwdriver, Socket set
Parts Used
Removed the nut with a socket set then, removed the sprocket and guide bar and with a screwdriver remove a secure spacer and replaced all.
Did you find this story helpful?
Thanks for voting and helping fellow customers!
Worn out guide bar on pruner.
Charles - June 12, 2016
👍 1 of 1 people found this instruction helpful
Tool Type
Pruner
Difficulty
Easy
Time
Less than 15 minutes
Tools Used
Screwdriver, Wrench Set
Parts Used
Remove the tension from the blade. Remove the bar clamp assembly and the bar plate guide. Remove the chain from the bar and remove the worn bar. Install the new bar place the chain around the sprocket and in the bar. Place the bar plate guide and the bar clamp assembly. Adjust the blade to its proper tension.
Did you find this story helpful?
Thanks for voting and helping fellow customers!
Chain and bar were worn
Peter - July 20, 2016
👍 1 of 1 people found this instruction helpful
Tool Type
Pruner
Difficulty
Medium
Time
15-30 minutes
Tools Used
Screwdriver, Socket set
Parts Used
1. Took off the nut and washer holding on cover
2. Removed chain and bar
3. Installed new bar
4. Installed new chain
5. Put cover back on and tightened nut
6. Adjust chain tension
2. Removed chain and bar
3. Installed new bar
4. Installed new chain
5. Put cover back on and tightened nut
6. Adjust chain tension
Did you find this story helpful?
Thanks for voting and helping fellow customers!
Needed new bar and sprocket
Roger - April 18, 2016
👍 1 of 1 people found this instruction helpful
Tool Type
Pruner
Difficulty
Easy
Time
Less than 15 minutes
Tools Used
Screwdriver, Wrench Set
Parts Used
Simple just remove chain and bar. Remove the clip for the sprocket remove sprocket install new sprocket. Install sprocket clip. Then install bar and chain. Set chain tension. Tighten nut that holds bar in place.
Did you find this story helpful?
Thanks for voting and helping fellow customers!
Guide bar sprocket was bound, and would not permit chain to move.
Garnett - December 30, 2021
Tool Type
Pruner
Difficulty
Easy
Time
Less than 15 minutes
Tools Used
Screwdriver, Used the chain removal tool and a screwdriver
Parts Used
Using the chain removal tool, I removed the cover, chain and bar and reassembled using the new bar.
Did you find this story helpful?
Thanks for voting and helping fellow customers!
Sprocket and guide bar worn.
Mark - August 26, 2021
Tool Type
Pruner
Difficulty
Easy
Time
Less than 15 minutes
Tools Used
Screwdriver, Wrench Set
Parts Used
Removed 5/8" head nut. Removed cover and old bar and chain. Removed snap ring on old sprocket. Installed new sprocket, snap ring, new bar and chain. Reinstalled cover and adjusted chain and tightened 5/8" head nut.
Did you find this story helpful?
Thanks for voting and helping fellow customers!
Had replaced the chain with a substitute brand. The drive links cut deep grooves into the drive sprocket. When the bar finally wore out I couldn't find the parts available locally to make the repairs
Gregory - June 15, 2021
Tool Type
Pruner
Difficulty
Easy
Time
30-60 minutes
Tools Used
Screwdriver, Adjustable Wrench
Removed the nut that holds the cover and bar in place. Slightly loosen the chain tension screw. Remove the "C" clip and the chain deflector from the drive shaft. Lift the bar and chain off of the housing. Remove the drive sprocket from the shaft. Clean the housing and cover. Install the new drive sprocket on the shaft. Install the chain on the bar in the proper direction. (Proper direction is indiated on bar and on housing cover.) Place the bar and chain on the cover stud, with the drive links of the chain in the drive sprocket grooves, and the hole in the bar onto the tensioner tang. Install the chain deflector and "C" clip on the drive shaft. Install the cover and the nut onto the housing stud hand tight. Properly tension the chain with the tension adjusting screw. Tighten the nut on the housing stud to secure the bar and cover in place. There is a small hole at the outer end of the bar where the internal chain sprocket in the bar is located. An occasional few drops of oil on both sides will help prolong the life of the bar.
Did you find this story helpful?
Thanks for voting and helping fellow customers!
Load More Install Stories
OEM stands for Original Equipment Manufacturer and means the part you’re buying is sourced directly from the manufacturer who made your product. At eReplacementParts, we sell only genuine OEM parts, guaranteeing the part you’re purchasing is of better design and of higher quality than aftermarket parts.
Our product descriptions are a combination of data sourced directly from the manufacturers who made your product as well as content researched and curated by our content & customer service teams. This content is edited and reviewed internally before being made public to customers.
Our customer service team are at the ready daily to answer your part and product questions. We have a dedicated staff with decades of collective experience in helping customers just like you purchase parts to repair their products.
All our part reviews are solicited directly from other customers who have purchased this exact part. While we moderate these reviews for profanity, offensive language or personally identifiable information, these reviews are posted exactly as submitted and no alterations are made by our team.
All our customer repair instructions are solicited directly from other customers just like you who have purchased and replaced this exact part. While we moderate these reviews for profanity, offensive language or personally identifiable information, these reviews are posted exactly as submitted and no alterations are made by our team.
Based on data from past customer purchasing behaviors, these parts are most commonly purchased together along with the part you are viewing. These parts may be necessary or helpful to replace to complete your current repair.
All our installation videos are created and produced in collaboration with our in-house repair technician, Mark Sodja, who has helped millions of eReplacementParts customers over the last 13 years repair their products. Mark has years of experience in selling and repairing both commercial and residential products with a specialty in gas-powered equipment.
This data is collected from customers who submitted a repair instruction after replacing this exact part. Customers can rate how easy the repair was to complete and how long it took. We aggregate this data to provide a repair rating that allows customers to quickly determine the difficulty and time needed to perform their own repair.