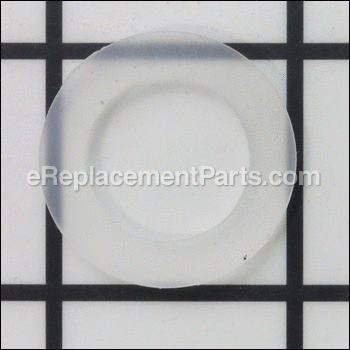
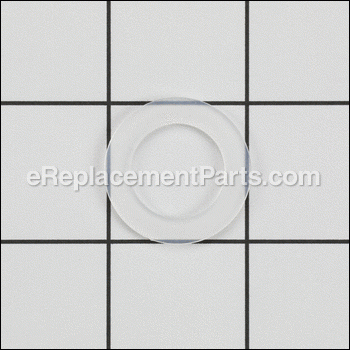
Gasket, Tank Inlet- Silicone 01201.0000
Part Number: 01201.0000
Leaves our warehouse within
7 - 12 business days
7 - 12 business days
Product Information
Description:
| This is a manufacturer sourced replacement part designed for use with Bunn tea/coffee brewers. This is one of the seals for the tank. Over time it will shrink, become brittle and crack allowing for leaks. At that time it should be replaced. It is made out of silicone and it is sold individually. Replacing this item you would need screwdriver. |
Frequently Purchased With
Compatibility
the 35 compatible machines
This part is compatible with the following machines:
BUNN
FMD-1 (S.N. FMD0013000 and After) Fresh Mix Dispenser
FMD-2 (S.N. FMD0013000 and After) Fresh Mix Dispenser
H5 Element Hot Water Equipment
H5M Hot Water Equipment
OHW Hot Water Equipment
SRU Coffee Brewer
U3A (S.N. U300004095 and After) Coffee Brewer
TB3Q (S.N. TU00020000 and Before) Iced Tea Brewer
TB3Q (S.N. TU00020000 and After) Iced Tea Brewer
A10 Coffee Brewer With Warmer
A10A Coffee Brewer With Warmer
CRT5 Coffee Brewer with Warmer
CRTF5 Coffee Brewer with Warmer
C (Series) Automatic Coffee Brewer With Warmers
CT (Series) Automatic Coffee Brewer With Warmers
CWTF (Series) Automatic Coffee Brewer With Warmers
CW (Series) Automatic Coffee Brewer With Warmers
H5E Hot Water Equipment
H5X Hot Water Equipment
OHWA Hot Water Equipment
TB3Q-LP (S.N. TU00020000 and After) Iced Tea Brewer
TB3Q-LP (S.N. TU00020000 and Before) Iced Tea Brewer
TU3Q-EZ Iced Tea Brewer
TU3Q Iced Tea Brewer
U3 (Series) Coffee Brewer
VLPF Coffee Brewer With Warmer
VP17 (Series) Coffee Brewer With Warmer
VPR (29999.0000-39065.0000) Coffee Brewer With Warmer
VPR-APS (29999.0000-39065.0000) Coffee Brewer With Warmer
VPR-TC (29999.0000-39065.0000) Coffee Brewer With Warmer
VPR (S.N. VPR0270000 and Before) Coffee Brewer With Warmer
VPS (Without Lighted Switch) Coffee Brewer With Warmer
VPS (With Lighted Switch) Coffee Brewer With Warmer
SRUA (Series) Coffee Brewer
VP17-2 Pourover Coffee Brewer with Warmer
Products Compatibility
This item works with the following types of products:
- • Coffee Maker
- • Tea Maker
Questions & Answers for Gasket, Tank Inlet- Silicone
No questions have been asked yet
Repair Instructions: Submitted by Customers Like You
9 of 9 people found this instruction helpful
Tool Type:
Tea Maker
Repair Difficulty:
Easy
Time Spent Repairing:
Less than 15 minutes
Tools Used:
Screwdriver, Pliers, Socket set
Reason for repair, coffee pot leaked when pouring water in the top to make coffee.
Take off top with screw driver unscrew part where water funnel through and old repalce gaskets, reverse order and put back together very simple and quick no more leak .
Did you find this story helpful?
Thanks for voting and helping fellow customers!
1 of 1 people found this instruction helpful
Tool Type:
Coffee Maker
Repair Difficulty:
Medium
Time Spent Repairing:
15-30 minutes
Tools Used:
Screwdriver, Pliers, Nutdriver
Top Tank Seal Leaking
***UNPLUG COFFEE MAKER***
Remove (qty-2) Phillips screws in Top LID (reservoir cover)
Remove (qty-4) Phillips screws under top (reservoir)
Remove (qty-6) hex nut screws from Tank Top
Remove Diffuser Head
Remove 1/2" nut and washer.(on diffuser tube)
Carefully Lift tank lid with internal components still attached
Remove OLD tank gasket seal and Replace with new tank gasket seal
Re-assemble and check for leaks..(MAY NEED TO ADD Tank Inlet Gasket) to ensure seal.
Did you find this story helpful?
Thanks for voting and helping fellow customers!
1 of 1 people found this instruction helpful
Tool Type:
Coffee Maker
Parts Used:
Repair Difficulty:
Medium
Time Spent Repairing:
More than 2 hours
Tools Used:
Screwdriver, Pliers, Nutdriver
Thermal fuse
1. Removed top and water pan.
2. Tested for reason it would not heat.
3. Determined it was thermal fuse.
4. Took tank heating element out and cleaned.
5. Ordered parts.
6. Received parts and reassembled.
7. Works great.
8. New coffee maker 600 dollars fixed for under 30.
2. Tested for reason it would not heat.
3. Determined it was thermal fuse.
4. Took tank heating element out and cleaned.
5. Ordered parts.
6. Received parts and reassembled.
7. Works great.
8. New coffee maker 600 dollars fixed for under 30.
Did you find this story helpful?
Thanks for voting and helping fellow customers!
Tool Type:
Coffee Maker
Repair Difficulty:
Easy
Time Spent Repairing:
15-30 minutes
Tools Used:
Screwdriver, Adjustable Wrench
leaking and not heating well
replaced tank inlet gasket and thermostat. Easy replacement
Did you find this story helpful?
Thanks for voting and helping fellow customers!
Tool Type:
Coffee Maker
Repair Difficulty:
Easy
Time Spent Repairing:
15-30 minutes
Tools Used:
Screwdriver, Wrench Set, Nutdriver
Leak when filling
Unscrewed lid
Note tiny clip are loose on lip
Pulled out water tank with 7/8 socket
Pulled out old seal and replaced
Pulled out thermostat and cut off old grommet
Slid new grommet on and pushed back in
Screwed top back on mindful of little clips
Note tiny clip are loose on lip
Pulled out water tank with 7/8 socket
Pulled out old seal and replaced
Pulled out thermostat and cut off old grommet
Slid new grommet on and pushed back in
Screwed top back on mindful of little clips
Did you find this story helpful?
Thanks for voting and helping fellow customers!
Tool Type:
Coffee Maker
Parts Used:
Repair Difficulty:
Easy
Time Spent Repairing:
Less than 15 minutes
Tools Used:
Screwdriver
tank inlet gasket had cracked with age and was allowing water poured in for making coffee to leak into the rest of the coffee maker and come out from under the coffee maker.
1. Removed the one screw holding the cover of the coffee maker in place.
2. Removed the cover of the coffee maker
3. Removed water tray holder screw
3. Removed the water tray
4. Removed the old gasket and put new gasket in place
5. Put water tray back in coffee maker and installed holder screw
6. Put cover in place and secured with screw
7. Plugged coffee maker in, added water and made coffee (no leaks now)
No special tools necessary and took less than 15 minutes to repair.
Did you find this story helpful?
Thanks for voting and helping fellow customers!
Tool Type:
Coffee Maker
Parts Used:
Repair Difficulty:
Easy
Time Spent Repairing:
Less than 15 minutes
Tools Used:
Socket set
Leak
Unbolted the water catch tray from the top of the tank. Replaced washer and replaced the tray.
Did you find this story helpful?
Thanks for voting and helping fellow customers!
Tool Type:
Coffee Maker
Parts Used:
Repair Difficulty:
Easy
Time Spent Repairing:
15-30 minutes
Tools Used:
Screwdriver
leaking
took pot apart and replaced washer
Did you find this story helpful?
Thanks for voting and helping fellow customers!
Tool Type:
Coffee Maker
Parts Used:
Repair Difficulty:
Easy
Time Spent Repairing:
30-60 minutes
Tools Used:
Screwdriver
tank inlet gasket & thermostat replacement
Remove old parts and inserted new parts
Did you find this story helpful?
Thanks for voting and helping fellow customers!
Tool Type:
Coffee Maker
Repair Difficulty:
Easy
Time Spent Repairing:
15-30 minutes
Tools Used:
Screwdriver, Wrench Set
Old thermostat was failed open
1. Unplug coffee maker from power source.
2. Remove front cover.
3. Remove top cover, unplug warmer connectiion and set top aside.
4. Remove tank inlet tray to provide access to top of water tank.
5. Pull thermostat bulb and silicone seal from the top of the water tank.
6. Behind front cover, disconnect two electrical leads from the thermostat.
7. Remove two mounting screws from thermostat mounting bracket.
8. Guide old thermostat bulb through case and remove old thermostat.
9. Feed new thermostat bulb through case and submerse into the water tank, put silicone seal in place.
10. Mount new thermostat and secure screws.
11. Reconnect electrical leads to the thermostat.
12. Replace tank inlet gasket and reinstall the tank inlet tray.
13. Reconnect the top warmer connections and reinstall top,
14. Replace front cover.
15. Plug it in and try it out. (I did the try it out before I put it all back together just in case there was another problem. I was also able to see there was no leak between the inlet tray and the tank.)
Did you find this story helpful?
Thanks for voting and helping fellow customers!
show more
Reviews
7 Reviews
Average Rating (out of 5):
Click to filter by ratings:
5 stars
6
4 stars
0
3 stars
0
2 stars
1
1 stars
0
< PREV
- 1
Easy repair
Was just as ordered and arrived in a timely fashion
Guest -
February 27, 2023
Verified Purchase
Easy fix
Easy fix. came in good condition
Thanks
Guest -
November 14, 2019
Verified Purchase
Parts fit good
You guys are the best. What is great about your company is that I can look at the diagrams myself to make sure I have the right part. I am tired of dealing with the idiots at the parts counter who do have a clue about anything and couldn't find it if they did. THANK YOU!
Guest -
August 21, 2019
Verified Purchase
worked great
quick shipping
Guest -
July 1, 2019
Verified Purchase
Easy repair
Gasket works and fits perfectly...
Mark -
June 26, 2019
Verified Purchase
shopping experience
Ereplacementparts did a great job of accepting and processing my order and getting it shipped out right away. I received my replacement part in a few days.
Thanks Ereplacement
Bill
Guest -
May 24, 2019
Verified Purchase
Great parts... horrible customer service!
Paid for and was charged for expedited shipping. One item was "special order" so the entire lot was detained. Two day shipping became three weeks. Was told half of the shipping cost would be credited... still waiting.
Guest -
September 3, 2019
Verified Purchase
Verified Purchase
eReplacementParts Team
< PREV
- 1
Product Information

