
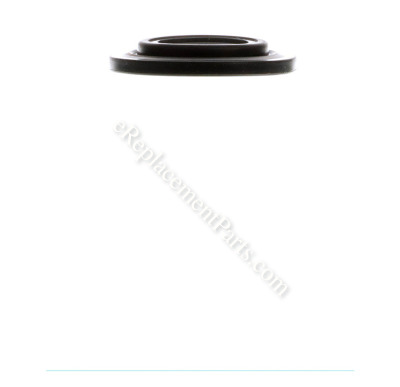


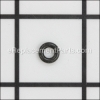
This is a genuine Delonghi product. This Gasket is used on many models of Delonghi espresso makers. The Gasket is made of a high temp silicone and is used to create a seal between the diffuser and the filters. If water, steam, or coffee leaks out of the filter while brewing then this part should be replaced. To replace this Gasket first remove the diffuser by removing the screw. Then, gently pull the old gasket off. Clean the area with a damp cloth. Install the new Gasket and reinstall the diffuser.
Gasket 7313285849
OEM part for: DeLonghi
Part Number: 7313285849
$8.32
In Stock
Jump To:
Frequently Purchased Together ?


Compatibility
This part will fit the following 21 machines
DeLonghi
ECO310BK Coffee Maker View Diagrams & Manuals
EC155 Cappuccino Maker View Diagrams & Manuals
EC270 Coffee Maker View Diagrams & Manuals
EC460 Cappuccino Maker View Diagrams & Manuals
EC702 Coffee Maker View Diagrams & Manuals
EC220CD Coffee Maker View Diagrams & Manuals
EC330 Coffee Maker View Diagrams & Manuals
ECO310BK Icona Pump Espresso Machine View Diagrams & Manuals
EC270 (132103085) Espresso Pump View Diagrams & Manuals
EC330 (132106032) Espresso Pump View Diagrams & Manuals
ECO310W (0132106089) Icona Manual Espresso Machine View Diagrams & Manuals
BCO430 Cappuccino Espresso And Coffee Maker View Diagrams & Manuals
BAR18 (132103076) Espresso Pump View Diagrams & Manuals
EC460 (132104080) Espresso Maker View Diagrams & Manuals
EC155 Espresso Coffee Maker View Diagrams & Manuals
EC140BEXC (132103072) Espresso Coffee Maker View Diagrams & Manuals
EC220CD (132151070) 15-Bar Pump Driven Espresso Maker View Diagrams & Manuals
BCO430BM Cappuccino Espresso And Coffee Maker View Diagrams & Manuals
EC702 (132154017) Espresso/Cappuccino Maker View Diagrams & Manuals
BCO432 (132510002) Family Espresso Machine View Diagrams & Manuals
ECO310R (0132106088) Icona Manual Espresso Machine View Diagrams & Manuals
Show More Compatible Models
This item works with the following types of products:
- Coffee Maker Parts
This part replaces obsolete part #: 5332140900
Customer Part Reviews ?
Average Rating (out of 5):
Click to filter by ratings:
5 stars
9
4 stars
1
3 stars
0
2 stars
0
1 stars
0
< PREV
- 1
Exact part, easy to use parts list.
Fast delivery, thank-you! Easy to do business with.
Guest -
May 7, 2023
Verified Purchase
easy repair part fit perfect.Thanks
part ok. thanks
Guest -
March 16, 2023
Verified Purchase
Easy Repair
Arrived quickly, fit perfect
Miguel -
June 12, 2022
Verified Purchase
Perfect
Buying parts Fromm you allow me to save money.After I fix something last for long time like new.Thanks
Hector -
March 29, 2022
Verified Purchase
Just what I needed
Wasn’t sure I’d find parts for my machine. This was a perfect match and arrived quickly. My espresso machine is back to running like new!
Guest -
August 14, 2021
Verified Purchase
Great part
Awesome, very quickly
Guest -
September 8, 2020
Verified Purchase
easy repair
good product easy to manipulate
Guest -
October 2, 2019
Verified Purchase
Life saver
Item was perfect, did not know it was available until I saw it in your site, now I can return to buy with extreme confidence.
Guest -
August 24, 2019
Verified Purchase
Easy repair
Great condition
Guest -
May 8, 2019
Verified Purchase
Easy Repair/Shipping Cost High
Even I was able to remove the old gasket and replace it in just a few minutes. The part came quickly and it has worked very well--no leaks when I get my espressos and lattes. The shipping costs seemed a little high, though, almost 2x the cost of the gasket. All in all, I am pleased that I decided to get a replacement part for < $10 instead of paying > $300...
Lew -
July 6, 2023
Verified Purchase
t
t
t -
t days ago
Verified Purchase
eReplacementParts Team
t
Questions & Answers ?
Our customer Service team is at the ready daily to answer your part and product questions.

Ask our Team
We have a dedicated staff with decades of collective experience in helping customers just like you purchase parts to repair their products.
Does this fit my product?Questions & Answers for Gasket
No questions have been asked yet
Customer Repair Instructions ?
All our customer repair instructions are solicited directly from other customers just like you who have purchased and replaced this exact part.
Espresso machine leaked around filter when making coffee.
Lew - July 8, 2023
👍 1 of 1 people found this instruction helpful
Tool Type
Coffee Maker
Difficulty
Easy
Time
15-30 minutes
Tools Used
Screwdriver
Parts Used
1. Unplugged machine & made sure there was no water left in the basket
2. Unscrewed and then removed the metal filter from the leaking gasket
3. Used screwdriver to "wedge" out the old gasket
4. Put in new gasket and screwed the metal filter back in place
2. Unscrewed and then removed the metal filter from the leaking gasket
3. Used screwdriver to "wedge" out the old gasket
4. Put in new gasket and screwed the metal filter back in place
Did you find this story helpful?
Thanks for voting and helping fellow customers!
Pump failed
Gil - April 28, 2018
👍 1 of 1 people found this instruction helpful
Tool Type
Coffee Maker
Difficulty
Easy
Time
15-30 minutes
Tools Used
Screwdriver, Star screw driver set -
The hardest part was reaching three screws which secure the top of the machine. It requires a star drive. All of the other screws are small Phillips heads. After you remove those and two on the back, the top will lift right off.
I promise, everything is very intuitive. Unplug the hoses by simply pulling on them, remove the pump by wiggling it off its rubber mounts and unscrew the water valve connected to the pump the pump. Replace those with the new ones and reverse the process.
I chose to change a few of the other little pieces of tubing, simply because I was under the covers - super simple and cheap.
I also replaced the spring and valve on the head (where the water comes out) to ensure that the new pump didn't overwhelm an old valve.
This pump works perfectly in our Delonghi EC702, it actually is an improvement over the original one. With these parts changed, we have a completely new machine!
Thanks eReplacement for the super fast service and clear parts catalog!
Did you find this story helpful?
Thanks for voting and helping fellow customers!
Gasket had broken
Judy - December 10, 2016
👍 2 of 3 people found this instruction helpful
Tool Type
Coffee Maker
Difficulty
Easy
Time
Less than 15 minutes
Tools Used
Screwdriver
Parts Used
Remove the diffuser, then what is left of the gasket.
Place the new gasket in and the diffuser.
Place the new gasket in and the diffuser.
Did you find this story helpful?
Thanks for voting and helping fellow customers!
Leaking water around coffee grinds
Michael - July 6, 2017
👍 1 of 2 people found this instruction helpful
Tool Type
Coffee Maker
Difficulty
Hard
Time
1-2 hours
Tools Used
Screwdriver, Pliers, Nutdriver
Parts Used
1. remove the base
2. disconnect the water hoses
3. disconnect the electrical wires
4. remove coffee steaming components
5. replace coffee grinds holder gasket
6. put everything back together using pictures to make sure placement was correct on wiring.
2. disconnect the water hoses
3. disconnect the electrical wires
4. remove coffee steaming components
5. replace coffee grinds holder gasket
6. put everything back together using pictures to make sure placement was correct on wiring.
Did you find this story helpful?
Thanks for voting and helping fellow customers!
The gasket failed and the water would not flow through the coffee.
Paulino - March 20, 2017
👍 1 of 2 people found this instruction helpful
Tool Type
Coffee Maker
Difficulty
Easy
Time
15-30 minutes
Tools Used
Screwdriver, Pliers
Parts Used
1. Unscrewed the center screw.
2. Removed the metal strainer and them removed the gasket in pieces with the spatula.
3. Saved little spring loaded valve until my gasket arrived.
4. Then put the rubber gasket in place and screwed in the valve with the threaded plastic part.
5. Finally attached the metal strainer with the screw.
2. Removed the metal strainer and them removed the gasket in pieces with the spatula.
3. Saved little spring loaded valve until my gasket arrived.
4. Then put the rubber gasket in place and screwed in the valve with the threaded plastic part.
5. Finally attached the metal strainer with the screw.
Did you find this story helpful?
Thanks for voting and helping fellow customers!
OEM stands for Original Equipment Manufacturer and means the part you’re buying is sourced directly from the manufacturer who made your product. At eReplacementParts, we sell only genuine OEM parts, guaranteeing the part you’re purchasing is of better design and of higher quality than aftermarket parts.
Our product descriptions are a combination of data sourced directly from the manufacturers who made your product as well as content researched and curated by our content & customer service teams. This content is edited and reviewed internally before being made public to customers.
Our customer service team are at the ready daily to answer your part and product questions. We have a dedicated staff with decades of collective experience in helping customers just like you purchase parts to repair their products.
All our part reviews are solicited directly from other customers who have purchased this exact part. While we moderate these reviews for profanity, offensive language or personally identifiable information, these reviews are posted exactly as submitted and no alterations are made by our team.
All our customer repair instructions are solicited directly from other customers just like you who have purchased and replaced this exact part. While we moderate these reviews for profanity, offensive language or personally identifiable information, these reviews are posted exactly as submitted and no alterations are made by our team.
Based on data from past customer purchasing behaviors, these parts are most commonly purchased together along with the part you are viewing. These parts may be necessary or helpful to replace to complete your current repair.
All our installation videos are created and produced in collaboration with our in-house repair technician, Mark Sodja, who has helped millions of eReplacementParts customers over the last 13 years repair their products. Mark has years of experience in selling and repairing both commercial and residential products with a specialty in gas-powered equipment.
This data is collected from customers who submitted a repair instruction after replacing this exact part. Customers can rate how easy the repair was to complete and how long it took. We aggregate this data to provide a repair rating that allows customers to quickly determine the difficulty and time needed to perform their own repair.