
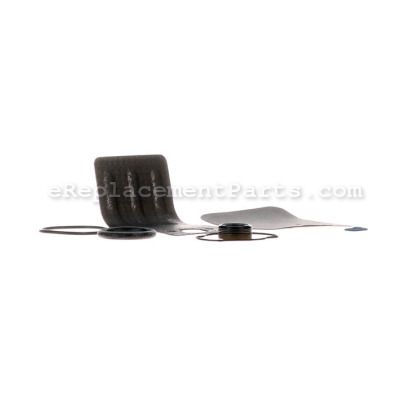


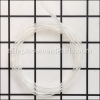
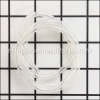
This is a genuine OEM rebuild kit used on gas blowers. This kit contains the muffler shield, carburetor gasket, carburetor adapter gasket, cylinder base gasket and crankshaft gasket. If your engine runs sluggish or it dies shortly after starting it, you may need to replace some of the gaskets.
Replacing these items you would need a screwdriver and pliers.
Gasket Kit 545081832
OEM part for: Poulan, Weed Eater, Husqvarna
Part Number: 545081832
$18.68
In Stock
Jump To:
Product Description ?
- Classification: Part
- Weight: 0.04 lbs.
- Shipping: Ships Worldwide
Frequently Purchased Together ?


Compatibility
This part will fit the following 22 machines
Poulan
BVM200VS (Type 1) Gas Blower View Diagrams & Manuals
BVM200VS (Type 2) Gas Blower View Diagrams & Manuals
BVM210VS (Type1) Pro Gas Blower View Diagrams & Manuals
BVM210VS (Type2) Pro Gas Blower View Diagrams & Manuals
BVM200C Gas Blower View Diagrams & Manuals
BVM200FE Gas Blower View Diagrams & Manuals
PPB430VS (Type1) Pro Leaf Blower View Diagrams & Manuals
PPB430VS (Type2) Pro Leaf Blower View Diagrams & Manuals
SM210VS (Type1) Pro Leaf Blower View Diagrams & Manuals
SM210VS (Type2) Pro Leaf Blower View Diagrams & Manuals
P200C Gas Powered Blower View Diagrams & Manuals
BVM210FA (2012-10) Blowers View Diagrams & Manuals
Weed Eater
VS2000BV Handheld Blower View Diagrams & Manuals
Husqvarna
BVM200VS (2009-03) Blower View Diagrams & Manuals
BVM200VS (545103471) (2009-03) Blower View Diagrams & Manuals
BVM210VS (2009-03) Blower View Diagrams & Manuals
GBV325 (2010-07) 952715704 Blower View Diagrams & Manuals
GBV345 (2010-05) Blower View Diagrams & Manuals
P325 (2010-04) Blower View Diagrams & Manuals
PPB430VS (2009-03) Blower View Diagrams & Manuals
SM210VS (2009-03) Blower View Diagrams & Manuals
VS2000BV (952711922) (2009-04) Handheld Trimmer View Diagrams & Manuals
Show More Compatible Models
This item works with the following types of products:
- Blower Parts
Customer Part Reviews ?
Average Rating (out of 5):
Click to filter by ratings:
5 stars
4
4 stars
1
3 stars
0
2 stars
0
1 stars
0
< PREV
- 1
worked perfectly
right parts for my Poulan blower BVM200VS
Steve -
March 14, 2023
Verified Purchase
Repair part piston
Leaf blower working now. Fast &great service
Guest -
August 19, 2021
Verified Purchase
Gasket kit
Needed the kit for my leaf blower. I have bought items here before and did my search for what I needed and they had it so I ordered it. Shipping was a little slow but it was expected due to the Covid19 virus. Parts were exactly what I needed.
Guest -
May 27, 2020
Verified Purchase
Gasket repair
I was very surprised that it arrived very quickly. It was in good condition.
Guest -
February 28, 2020
Verified Purchase
parts
the only thing i did not like is the shipping was high for a little part.
Guest -
February 10, 2020
Verified Purchase
t
t
t -
t days ago
Verified Purchase
eReplacementParts Team
t
Questions & Answers ?
Our customer Service team is at the ready daily to answer your part and product questions.

Ask our Team
We have a dedicated staff with decades of collective experience in helping customers just like you purchase parts to repair their products.
Does this fit my product?Questions & Answers for Gasket Kit
No questions have been asked yet
Customer Repair Instructions ?
All our customer repair instructions are solicited directly from other customers just like you who have purchased and replaced this exact part.
Ran fine for 1 -2 mins, then lost power. Let it cool completely off and it would start and run fine. Had previously taken apart, cleaned ring groove, put back together, and same thing.
Robert - January 29, 2019
👍 1 of 1 people found this instruction helpful
Tool Type
Blower
Difficulty
Medium
Time
30-60 minutes
Tools Used
Screwdriver, Pliers, Nutdriver, Torx #25 bit, Allen wrenches-4mm and 5mm
Parts Used
I had already taken this unit apart 2 or 3 times to clean everything, so by the time I replaced the ring/gaskets, it was a fairly easy task. The new ring seemed to be a lot tighter fit. Cylinder/piston showed no abnormal signs of wear, although I did use some Scotch Brite to remove the glaze from the cylinder wall. After replacing ring and reinserting the piston, I squirted some oil inside the spark plug opening and manually ran the piston up and down to seat the ring. At first the piston was difficult to move, but after running it up/down several times, it moved freely and with good compression. I then removed any excess oil, and put it all back together minus he muffler and it fired right up and ran fine. Put the muffler on and ran for several minutes. Runs very good now.
Did you find this story helpful?
Thanks for voting and helping fellow customers!
Running erratically and hard to start
john - September 1, 2017
👍 1 of 1 people found this instruction helpful
Tool Type
Blower
Difficulty
Medium
Time
30-60 minutes
Tools Used
Screwdriver, Pliers, Socket set, Wrench Set, Nutdriver, Fuel mixture adjustment tool
Parts Used
1. Replaced gasket between cylinder and crankcase, carb, crankcase and intake gasket.
2 Cylinder was leaking air because the 2 screws had loosened.
3 . After gasket replacement necessary to readjust mixture screws. Run both hi and lo screws in all the way and back out 1.5 turns. Then made additional adjustments until blower accelerated without hesitation and idled properly
2 Cylinder was leaking air because the 2 screws had loosened.
3 . After gasket replacement necessary to readjust mixture screws. Run both hi and lo screws in all the way and back out 1.5 turns. Then made additional adjustments until blower accelerated without hesitation and idled properly
Did you find this story helpful?
Thanks for voting and helping fellow customers!
Carb junked up from ethanol gas
Paul - January 19, 2017
👍 1 of 1 people found this instruction helpful
Tool Type
Blower
Difficulty
Easy
Time
15-30 minutes
Tools Used
, Hex tool
Remove the air filter cover
Remove the air filter
Remove the fuel lines and throttle from the carburetor
Remove the screws that hold the filter base and carburetor on
Replace the carburetor and the gasket
Install the parts in the reverse of disassembly
Remove the air filter
Remove the fuel lines and throttle from the carburetor
Remove the screws that hold the filter base and carburetor on
Replace the carburetor and the gasket
Install the parts in the reverse of disassembly
Did you find this story helpful?
Thanks for voting and helping fellow customers!
Engine lacked power and would only stay running at 1/2 choke and only for a short time
Roger - September 9, 2019
Tool Type
Blower
Difficulty
Medium
Time
15-30 minutes
Tools Used
Screwdriver, torx screwdriver
removed air filter, no tool
removed torx screws with torx screwdriver.
removed fuel lines with fingers.
removed throttle linkage with hands,
remove carburetor.
reverse procedure.
misdiagnoised, needed to replace partially sheared woodriff key in the flywheel. Now runs great
removed torx screws with torx screwdriver.
removed fuel lines with fingers.
removed throttle linkage with hands,
remove carburetor.
reverse procedure.
misdiagnoised, needed to replace partially sheared woodriff key in the flywheel. Now runs great
Did you find this story helpful?
Thanks for voting and helping fellow customers!
Would not start
Ken - May 29, 2019
Tool Type
Blower
Difficulty
Medium
Time
30-60 minutes
Tools Used
Pliers, Socket set, Wrench Set, Dremel tool with wire brush for piston cleaning.
Parts Used
Disassembled motor. Cylinder ring had carbon buildup and was not functional. One Cylinder head bolt broke and head gasket blown. Therefore lacked compression and not get gas. Repacked those parts and the gas line and fuel filter. Runs well now.
Did you find this story helpful?
Thanks for voting and helping fellow customers!
No compression
Robert - March 24, 2019
Tool Type
Blower
Difficulty
Easy
Time
1-2 hours
Tools Used
Screwdriver, Wrench Set, Asorted allens/Torx, Philips
1. pull apart housing, remove carb, tank, fan, spark plug, remove engine
2. Remove cylinder head bolts, the remove cylinder head
3. Remove block end cap to remove rod and piston assembly
4.If O-rings/gaskets usable, reassemble in reverse after oiling (2-cyc) all surfaces/moving parts
2. Remove cylinder head bolts, the remove cylinder head
3. Remove block end cap to remove rod and piston assembly
4.If O-rings/gaskets usable, reassemble in reverse after oiling (2-cyc) all surfaces/moving parts
Did you find this story helpful?
Thanks for voting and helping fellow customers!
Bad gasket
James - February 10, 2019
Tool Type
Blower
Difficulty
Easy
Time
Less than 15 minutes
Tools Used
Screwdriver, Nutdriver
Parts Used
removed air cleaner and carb and replaced gasket.
Did you find this story helpful?
Thanks for voting and helping fellow customers!
Blower would not start after running out of gas
Francis - January 13, 2018
Tool Type
Blower
Difficulty
Medium
Time
30-60 minutes
Tools Used
, allen wrenches, spark plug wrench
Parts Used
Blower ran out of gas and upon refueling, would not start. Initially thought possible dirt at the bottom of the fuel tank ended up in the carburetor. Replaced the carburetor, the fuel filter, and the (original) spark plug but the blower still would not start. Did an Internet search and learned problem may be a loose or broken cylinder bolt. Found one of the two cylinder bolts had broken just below the allen head. Removed the broken (threaded) portion of the cylinder bolt from the engine block. Replaced the cylinder gasket and installed a new cylinder bolt and the blower started on the third pull and ran like new.
Did you find this story helpful?
Thanks for voting and helping fellow customers!
It would not start. The piston wring was burned and compressed inside the groove
G. - December 9, 2017
Tool Type
Blower
Difficulty
Easy
Time
15-30 minutes
Tools Used
Nutdriver, Alen wrench
Parts Used
I purchased the blower at an auction. Did not know why it wouldn’t start so I took it apart and saw that the piston wring was burned and compressed inside the piston groove. That’s why it had no compression. So I replaced the ring and gaskets, put it back together and it ran great.
Did you find this story helpful?
Thanks for voting and helping fellow customers!
Worn out gaskets.
Randell - October 17, 2017
Tool Type
Blower
Difficulty
Easy
Time
30-60 minutes
Tools Used
Screwdriver, Socket set, Wrench Set, Allen Wrench set
Parts Used
Took apart and replaced the gaskets.
Did you find this story helpful?
Thanks for voting and helping fellow customers!
Load More Install Stories
OEM stands for Original Equipment Manufacturer and means the part you’re buying is sourced directly from the manufacturer who made your product. At eReplacementParts, we sell only genuine OEM parts, guaranteeing the part you’re purchasing is of better design and of higher quality than aftermarket parts.
Our product descriptions are a combination of data sourced directly from the manufacturers who made your product as well as content researched and curated by our content & customer service teams. This content is edited and reviewed internally before being made public to customers.
Our customer service team are at the ready daily to answer your part and product questions. We have a dedicated staff with decades of collective experience in helping customers just like you purchase parts to repair their products.
All our part reviews are solicited directly from other customers who have purchased this exact part. While we moderate these reviews for profanity, offensive language or personally identifiable information, these reviews are posted exactly as submitted and no alterations are made by our team.
All our customer repair instructions are solicited directly from other customers just like you who have purchased and replaced this exact part. While we moderate these reviews for profanity, offensive language or personally identifiable information, these reviews are posted exactly as submitted and no alterations are made by our team.
Based on data from past customer purchasing behaviors, these parts are most commonly purchased together along with the part you are viewing. These parts may be necessary or helpful to replace to complete your current repair.
All our installation videos are created and produced in collaboration with our in-house repair technician, Mark Sodja, who has helped millions of eReplacementParts customers over the last 13 years repair their products. Mark has years of experience in selling and repairing both commercial and residential products with a specialty in gas-powered equipment.
This data is collected from customers who submitted a repair instruction after replacing this exact part. Customers can rate how easy the repair was to complete and how long it took. We aggregate this data to provide a repair rating that allows customers to quickly determine the difficulty and time needed to perform their own repair.