
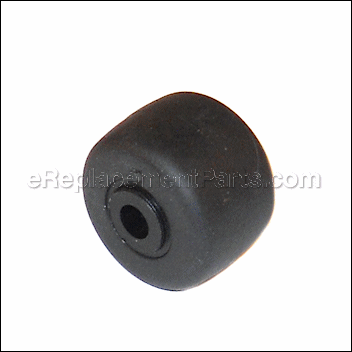
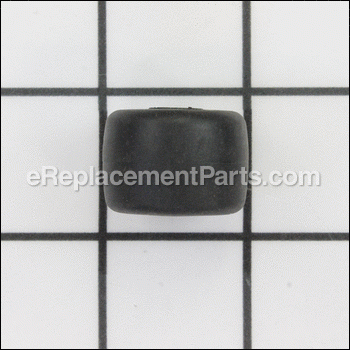
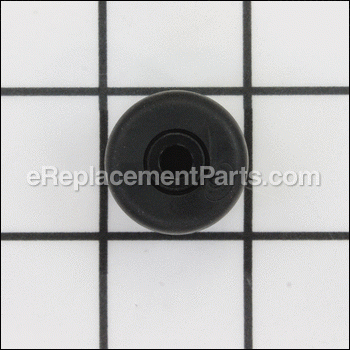

This replacement front wheel is an authentic Oreck item that is specially designed for the upright vacuums. It is secured in front of the brush roller allowing for easy and effortless transportation. Please note that this durable plastic wheel is sold individually and the rear wheels and the hardware to secure these parts are all sold separately. You will need a screwdriver to complete this repair.
Front Wheel O-7570901
OEM part for: Oreck, Hoover
Part Number: O-7570901
$8.02
Usually ships in 7 - 12 business days
7 - 12 business days
Jump To:
Frequently Purchased Together ?


Compatibility
This part will fit the following 60 machines
Oreck
XL2800HAY 2000 Upright Vacuum Series View Diagrams & Manuals
XL2400RS 2000 Upright Vacuum Series View Diagrams & Manuals
U2420RSQ 2000 Upright Vacuum Series View Diagrams & Manuals
XL2330HS 2000 Upright Vacuum Series View Diagrams & Manuals
XL2330RS 2000 Upright Vacuum Series View Diagrams & Manuals
U2330RD 2000 Upright Vacuum Series View Diagrams & Manuals
U2740RD 2000 Upright Vacuum Series View Diagrams & Manuals
XL2200RS 2000 Upright Vacuum Series View Diagrams & Manuals
U2200RD 2000 Upright Vacuum Series View Diagrams & Manuals
XL2300RS 2000 Upright Vacuum Series View Diagrams & Manuals
XL2310RS 2000 Upright Vacuum Series View Diagrams & Manuals
U2310RSF 2000 Upright Vacuum Series View Diagrams & Manuals
U2310RD 2000 Upright Vacuum Series View Diagrams & Manuals
XL2000HH 2000 Upright Vacuum Series View Diagrams & Manuals
XL2100HH 2000 Upright Vacuum Series View Diagrams & Manuals
U2000HH 2000 Upright Vacuum Series View Diagrams & Manuals
XL2000RH 2000 Upright Vacuum Series View Diagrams & Manuals
XL2100RH 2000 Upright Vacuum Series View Diagrams & Manuals
XL2090RHM 2000 Upright Vacuum Series View Diagrams & Manuals
XL2070RH 2000 Upright Vacuum Series View Diagrams & Manuals
XL2090RSM 2000 Upright Vacuum Series View Diagrams & Manuals
XL2000RS 2000 Upright Vacuum Series View Diagrams & Manuals
XL2100RS 2000 Upright Vacuum Series View Diagrams & Manuals
U2250RS Classic Series View Diagrams & Manuals
XL3600HH 3000 Upright Series Vacuum View Diagrams & Manuals
XL3600RH 3000 Upright Series Vacuum View Diagrams & Manuals
XL3610HH 3000 Upright Series Vacuum View Diagrams & Manuals
U3700HH 3000 Upright Series Vacuum View Diagrams & Manuals
U3710HH 3000 Upright Series Vacuum View Diagrams & Manuals
U3770HH Silver Series Upright Vacuum View Diagrams & Manuals
U3771HH Silver Series Upright Vacuum View Diagrams & Manuals
U3760HH 3000 Series Vacuum View Diagrams & Manuals
U3720HG 3000 Series Vacuum View Diagrams & Manuals
U3720HR 3000 Series Vacuum View Diagrams & Manuals
XL3640HH 3000 Series Vacuum View Diagrams & Manuals
U3640RH 3000 Series Vacuum View Diagrams & Manuals
XL3800H2B 3000 Series Vacuum View Diagrams & Manuals
XL3900H2B 3000 Series Vacuum View Diagrams & Manuals
XL3910H2B 3000 Series Vacuum View Diagrams & Manuals
U3980H2B 3000 Series Vacuum View Diagrams & Manuals
U3990H2B 3000 Series Vacuum View Diagrams & Manuals
U4080H2B 4000 Series Upright Vacuum View Diagrams & Manuals
U4080H2R 4000 Series Upright Vacuum View Diagrams & Manuals
U4080H2Y 4000 Series Upright Vacuum View Diagrams & Manuals
U4070H2L 4000 Series Upright Vacuum View Diagrams & Manuals
U4090H2B 4000 Series Upright Vacuum View Diagrams & Manuals
U4090H2G 4000 Series Upright Vacuum View Diagrams & Manuals
U4090H2T 4000 Series Upright Vacuum View Diagrams & Manuals
U4090H2P 4000 Series Upright Vacuum View Diagrams & Manuals
U4490HH 4000 Series Upright Vacuum View Diagrams & Manuals
U4120H2B Intellashield Upright Vacuum View Diagrams & Manuals
U4120H2P Intellashield Upright Vacuum View Diagrams & Manuals
U4120H2R Intellashield Upright Vacuum View Diagrams & Manuals
U4150H2R Intellashield Gold Series Vacuum View Diagrams & Manuals
U4150H2P Intellashield Gold Series Vacuum Parts View Diagrams & Manuals
U4151H2G Intellashield Gold Series Vacuum Parts View Diagrams & Manuals
U2000EB 8lb. Upright Vacuum Cleaner View Diagrams & Manuals
U4140 Upright Vacuum View Diagrams & Manuals
U2000RB-1 Upright Endurolife V-Belt Vacuum View Diagrams & Manuals
Hoover
CH51012 Commercial Vacuum View Diagrams & Manuals
Show More Compatible Models
This item works with the following types of products:
- Vacuum Parts
This part replaces obsolete part #: 75709-01
Customer Part Reviews ?
Average Rating (out of 5):
Click to filter by ratings:
5 stars
0
4 stars
0
3 stars
1
2 stars
0
1 stars
0
< PREV
- 1
Good parts fast service
Parts were shipped promptly and quality at fair price. Unfortunately it was not the part I needed.
Guest -
April 11, 2023
Verified Purchase
t
t
t -
t days ago
Verified Purchase
eReplacementParts Team
t
Questions & Answers ?
Our customer Service team is at the ready daily to answer your part and product questions.

Ask our Team
We have a dedicated staff with decades of collective experience in helping customers just like you purchase parts to repair their products.
Does this fit my product?Questions & Answers for Front Wheel
No questions have been asked yet
Customer Repair Instructions ?
All our customer repair instructions are solicited directly from other customers just like you who have purchased and replaced this exact part.
Wheels worn out on my Oreck Silver vacuum.
Stewart - December 5, 2018
Tool Type
Vacuum
Difficulty
Medium
Time
15-30 minutes
Tools Used
Screwdriver, Pliers, drift (punch) (2)
Do not try to pry the axles out from the bottom. Instead, take the bottom off by removing four countersunk screws. Notice that there is a small hole at the high spot in the mound into which the axle is held. Insert a very small drift (punch) into the hole. You may have to use a small nail with the point filed off if you do not have a proper size drift. Place the bottom of the machine that you have removed with the wheels facing down but without the wheels touching a support. Strike the drift with a small hammer with the drift inserted into the hole and touching the axle. Once one end of the axle is driven down you may turn the bottom over and gently pry and pull the axle out with a long-nosed pliers. Do not damage the splines at the end of each axle.
Put the new wheel on the axle and push it downward with your finger. Next take a drift slightly smaller than the diameter of the axle and tap the axle down until it bottoms out in its holder. Support the bottom of the machine on your lap or on a folded towel so you do not crack the plastic.
Put the new wheel on the axle and push it downward with your finger. Next take a drift slightly smaller than the diameter of the axle and tap the axle down until it bottoms out in its holder. Support the bottom of the machine on your lap or on a folded towel so you do not crack the plastic.
Did you find this story helpful?
Thanks for voting and helping fellow customers!
OEM stands for Original Equipment Manufacturer and means the part you’re buying is sourced directly from the manufacturer who made your product. At eReplacementParts, we sell only genuine OEM parts, guaranteeing the part you’re purchasing is of better design and of higher quality than aftermarket parts.
Our product descriptions are a combination of data sourced directly from the manufacturers who made your product as well as content researched and curated by our content & customer service teams. This content is edited and reviewed internally before being made public to customers.
Our customer service team are at the ready daily to answer your part and product questions. We have a dedicated staff with decades of collective experience in helping customers just like you purchase parts to repair their products.
All our part reviews are solicited directly from other customers who have purchased this exact part. While we moderate these reviews for profanity, offensive language or personally identifiable information, these reviews are posted exactly as submitted and no alterations are made by our team.
All our customer repair instructions are solicited directly from other customers just like you who have purchased and replaced this exact part. While we moderate these reviews for profanity, offensive language or personally identifiable information, these reviews are posted exactly as submitted and no alterations are made by our team.
Based on data from past customer purchasing behaviors, these parts are most commonly purchased together along with the part you are viewing. These parts may be necessary or helpful to replace to complete your current repair.
All our installation videos are created and produced in collaboration with our in-house repair technician, Mark Sodja, who has helped millions of eReplacementParts customers over the last 13 years repair their products. Mark has years of experience in selling and repairing both commercial and residential products with a specialty in gas-powered equipment.
This data is collected from customers who submitted a repair instruction after replacing this exact part. Customers can rate how easy the repair was to complete and how long it took. We aggregate this data to provide a repair rating that allows customers to quickly determine the difficulty and time needed to perform their own repair.