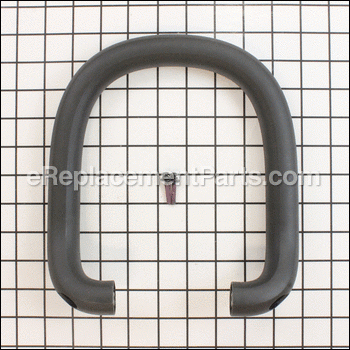

This is a genuine Ryobi replacement part that has been sourced from the original manufacturer to be used with hedge trimmers. The front handle assembly attaches to the housing assembly. This item is used to provide a grip to stably operate the hedge trimmer. This part is sold as an individual replacement part.
Front Handle Assembly 311130001
OEM part for: Ryobi
Part Number: 311130001
$7.50
In Stock
Jump To:
Frequently Purchased Together ?

Compatibility
This part will fit the following 2 machines
Ryobi
RY24602 Hedge Trimmer View Diagrams & Manuals
RY40601 Hedge Trimmer View Diagrams & Manuals
This item works with the following types of products:
- Hedge Trimmer Parts
- Trimmer Parts
Customer Part Reviews ?
Average Rating (out of 5):
Click to filter by ratings:
5 stars
2
4 stars
0
3 stars
0
2 stars
0
1 stars
0
< PREV
- 1
Happy Customer
Easy fix, great to know you have parts for my Ryobi tools.
Guest -
July 10, 2023
Verified Purchase
Perfect Fit
Part was an exact replacement.
Guest -
November 4, 2021
Verified Purchase
t
t
t -
t days ago
Verified Purchase
eReplacementParts Team
t
Questions & Answers ?
Our customer Service team is at the ready daily to answer your part and product questions.

Ask our Team
We have a dedicated staff with decades of collective experience in helping customers just like you purchase parts to repair their products.
Does this fit my product?Questions & Answers for Front Handle Assembly
No questions have been asked yet
Customer Repair Instructions ?
All our customer repair instructions are solicited directly from other customers just like you who have purchased and replaced this exact part.
Broken handle and guard plate
Mark - June 22, 2023
Tool Type
Hedge Trimmer
Difficulty
Easy
Time
Less than 15 minutes
Tools Used
Screwdriver, N/A
Parts Used
Removed old parts replaced with new. The handle came with screws although it wasn’t listed in the original pic so I bought two extra that I have a ms spares now lol.
Did you find this story helpful?
Thanks for voting and helping fellow customers!
The handle flexed till it broke
william - December 6, 2017
Tool Type
Hedge Trimmer
Difficulty
Medium
Time
1-2 hours
Tools Used
Screwdriver
Cut the handle off with wire cutters. Because screws were stripped.
Note with the handle cut away the head of the screw could be grasped by priers and twisted out.Biggest time spent was buying correct screw driver. Once in hand.
Realized the position of the handled determined by the male / female of the handle and permanent attachment on the clippers adjusted to what wanted.
The screwing on took less than 10 minutes.
Did you find this story helpful?
Thanks for voting and helping fellow customers!
Some one placed a very heavy box on it using a fork lift
Janice - August 20, 2017
Tool Type
Hedge Trimmer
Difficulty
Easy
Time
15-30 minutes
Tools Used
Power Drill
Parts Used
Just removed screws from broken handle and screwed the new one on
Did you find this story helpful?
Thanks for voting and helping fellow customers!
Handle broke on both sides near the base.
Gary - May 14, 2017
Tool Type
Hedge Trimmer
Difficulty
Easy
Time
Less than 15 minutes
Tools Used
, Torx T-15 driver
Parts Used
1. With help I identified and purchased the tool needed to remove the mounting screws (that would be a good bit of information to have available...) it wasn't a common allen wrench or a phillips head driver.
2. Removed the old handle by removing the mounting screws.
3. Installed the new handle with the old mounting screws, saving the ones that came with the handle.
2. Removed the old handle by removing the mounting screws.
3. Installed the new handle with the old mounting screws, saving the ones that came with the handle.
Did you find this story helpful?
Thanks for voting and helping fellow customers!
handle broken off on one side
James - November 27, 2015
Tool Type
Hedge Trimmer
Difficulty
Easy
Time
Less than 15 minutes
Tools Used
Screwdriver
Parts Used
There were just two screws, one on each end of the handle, and I had a ratchet drive screw driver set. Once I had the right bit it was easy. The screws turn stiffly so a decent wrist is needed. Once the screws are out just take the old handle off and put the new one on. Then put the screws back in using the ratchet drive screwdriver. It was easy.
Did you find this story helpful?
Thanks for voting and helping fellow customers!
OEM stands for Original Equipment Manufacturer and means the part you’re buying is sourced directly from the manufacturer who made your product. At eReplacementParts, we sell only genuine OEM parts, guaranteeing the part you’re purchasing is of better design and of higher quality than aftermarket parts.
Our product descriptions are a combination of data sourced directly from the manufacturers who made your product as well as content researched and curated by our content & customer service teams. This content is edited and reviewed internally before being made public to customers.
Our customer service team are at the ready daily to answer your part and product questions. We have a dedicated staff with decades of collective experience in helping customers just like you purchase parts to repair their products.
All our part reviews are solicited directly from other customers who have purchased this exact part. While we moderate these reviews for profanity, offensive language or personally identifiable information, these reviews are posted exactly as submitted and no alterations are made by our team.
All our customer repair instructions are solicited directly from other customers just like you who have purchased and replaced this exact part. While we moderate these reviews for profanity, offensive language or personally identifiable information, these reviews are posted exactly as submitted and no alterations are made by our team.
Based on data from past customer purchasing behaviors, these parts are most commonly purchased together along with the part you are viewing. These parts may be necessary or helpful to replace to complete your current repair.
All our installation videos are created and produced in collaboration with our in-house repair technician, Mark Sodja, who has helped millions of eReplacementParts customers over the last 13 years repair their products. Mark has years of experience in selling and repairing both commercial and residential products with a specialty in gas-powered equipment.
This data is collected from customers who submitted a repair instruction after replacing this exact part. Customers can rate how easy the repair was to complete and how long it took. We aggregate this data to provide a repair rating that allows customers to quickly determine the difficulty and time needed to perform their own repair.