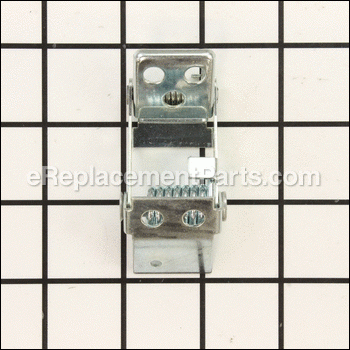

Abrasive Inboard Fastener 21-1172
OEM part for: Jet
Part Number: 21-1172
$39.29
Usually ships in 7 - 12 business days
7 - 12 business days
Jump To:
Frequently Purchased Together ?


Compatibility
This part will fit the following 6 machines
Jet
10-20 Plus (628900) Drum Sander View Diagrams & Manuals
16-32 Plus (629004K) Sander View Diagrams & Manuals
22-44 Plus Sander View Diagrams & Manuals
22-44 (Pro 3) Drum Sander View Diagrams & Manuals
22-44OSC Oscillating Drum Sander View Diagrams & Manuals
628900-10-20 62890010-20 Drum Sander Parts View Diagrams & Manuals
Show More Compatible Models
This item works with the following types of products:
- Sander Parts
Customer Part Reviews ?
Average Rating (out of 5):
Click to filter by ratings:
5 stars
2
4 stars
1
3 stars
0
2 stars
0
1 stars
0
< PREV
- 1
Unbelievable
Such a great Company , I have ordered so many different parts for so many different pcs of machinery , Never have I been let down .
Guest -
September 14, 2021
Verified Purchase
Perfect match
Quick delivery, easy to ordee
Guest -
March 31, 2020
Verified Purchase
Sander repair
Part was correct. Only question I have is why wouldn't you send a new screw with the part?
Guest -
July 20, 2021
Verified Purchase
t
t
t -
t days ago
Verified Purchase
eReplacementParts Team
t
Questions & Answers ?
Our customer Service team is at the ready daily to answer your part and product questions.

Ask our Team
We have a dedicated staff with decades of collective experience in helping customers just like you purchase parts to repair their products.
Does this fit my product?Questions & Answers for Abrasive Inboard Fastener
How to take drum out of older JET 16-32. Need to replace inboard paper holder. Will new holder fit older machine?
John
asked on 2023-03-18
Hi John,
That is a great question. Before removing the drum from your Jet sander, please unplug it from the electrical outlet. To remove the sander drum from the sander, start by raising the drum to the highest position. Remove the 4 socket head screws and carefully lift out the drum with the coupling attached. If you have any questions, please let us know. We look forward to hearing from you!
eReplacementParts Team March 18, 2023
Customer Repair Instructions ?
All our customer repair instructions are solicited directly from other customers just like you who have purchased and replaced this exact part.
The part to grip the abrasive broke
Jeffrey - December 22, 2015
👍 19 of 19 people found this instruction helpful
Tool Type
Sander
Difficulty
Hard
Time
30-60 minutes
Tools Used
Screwdriver, Pliers, Wrench Set, Nutdriver
Parts Used
The design of this machine is such that it is not only difficult to regularly install the abrasive but VERY hard to replace this part, which should never be able to fail so easily. The location of the hold down clamp is almost impossible to reach and remove without dismantling the machine but I did it. The nut, which secures the clamp, is hidden in the roller, and is very small but I used a needle nose pliers (I have small hands or this would not have worked). Just getting the part to set within the roller took time.
Ordering and receiving the replacement part was a breeze.
Jeff
Ordering and receiving the replacement part was a breeze.
Jeff
Did you find this story helpful?
Thanks for voting and helping fellow customers!
Inboard fastener broke
BRUCE - October 10, 2016
👍 9 of 9 people found this instruction helpful
Tool Type
Sander
Difficulty
Medium
Time
30-60 minutes
Tools Used
Screwdriver, Wrench Set
Parts Used
I had to remove the drum which was pretty easy. Just unscrew some screws to take off the back cover then remove the screws that hold the left side cover and pull the assembly out. My fingers are to big to get at the small nut holding the fastener so had to go this way. The rest was easy just used a small box wrench & small Philips screwdriver. All in all took about 45 minutes. I wasted about 10 minutes trying to undo without removing the drum. So unless you have tiny fingers just go ahead and remove the drum.
Did you find this story helpful?
Thanks for voting and helping fellow customers!
Aluminum rivet on the inboard abrasive fastner broke
Andrew - September 22, 2016
👍 8 of 8 people found this instruction helpful
Tool Type
Sander
Difficulty
Hard
Time
30-60 minutes
Tools Used
Screwdriver, Power Drill, Scew extractor
Parts Used
1. Remove screw and nut holding fastner to drum. Note screw can be very tight, I ended up stripping it and having to drill it out.
2. Remove old unit noting orientation and position
3.Bend new unit inside and try to align the hole on the fastner unit to the hole in the drum. This is the most frustrating part as there is little room to work with.
4. Secure new unit with screw and nut.
2. Remove old unit noting orientation and position
3.Bend new unit inside and try to align the hole on the fastner unit to the hole in the drum. This is the most frustrating part as there is little room to work with.
4. Secure new unit with screw and nut.
Did you find this story helpful?
Thanks for voting and helping fellow customers!
I broke the inboard fastener on my Jet drum sander so I had to replace it. Getting a replacement from Ereplacement parts was simple and cheap.
William - September 13, 2017
👍 6 of 7 people found this instruction helpful
Tool Type
Sander
Difficulty
Hard
Time
30-60 minutes
Tools Used
Screwdriver
Parts Used
Had to remove the broke fastener, which was easy enough. But putting in the new one was a little tricky because the screw is maybe 5mm. And your mounting it somewhat blindly because the part goes inside the drum. But you just have to be patient and make sure the screw goes in straight so you don't strip the threads.
Did you find this story helpful?
Thanks for voting and helping fellow customers!
Spring broke on inboard abrasive fastener
STEVEN - February 22, 2017
👍 3 of 3 people found this instruction helpful
Tool Type
Sander
Difficulty
Medium
Time
30-60 minutes
Tools Used
Screwdriver, Pliers
Remove inboard abrasive fastener. Lock nut was stripped so I replaced all three parts.
The most difficult part of repair was collapsing the spring while attaching with lock nut and screw. I used a 90 degree pliers to hold lock nut while collapsing the spring. Overall repair went well.
The most difficult part of repair was collapsing the spring while attaching with lock nut and screw. I used a 90 degree pliers to hold lock nut while collapsing the spring. Overall repair went well.
Did you find this story helpful?
Thanks for voting and helping fellow customers!
Inboard fastener became to weak to hold the paper.
Jess - January 15, 2019
👍 2 of 2 people found this instruction helpful
Tool Type
Sander
Difficulty
Medium
Time
30-60 minutes
Tools Used
Screwdriver, Pliers, Power Drill, Wrench Set
Remove the drum housing by removing the four bolts which hold attach it to the motor.
Secure the motor.
Remove philips head screw. If stripped, which it probably will be, drill it out and replace with the new one.
Align and install.
This tool design is not very good. The inboard fastener spring weakens easily, is a pain in the ass to install that end of the paper, and a bigger pain to replace. Not hard, just tedious, unless you have the hands of a child.
Did you find this story helpful?
Thanks for voting and helping fellow customers!
nothing
john - December 26, 2018
👍 1 of 1 people found this instruction helpful
Tool Type
Sander
Difficulty
Easy
Time
Less than 15 minutes
Tools Used
Screwdriver
Parts Used
installed the one screw that holds the fastener in place.
Did you find this story helpful?
Thanks for voting and helping fellow customers!
Paper fastener was broken
Joe - October 30, 2018
👍 1 of 1 people found this instruction helpful
Tool Type
Sander
Difficulty
Medium
Time
15-30 minutes
Tools Used
Screwdriver, 90 degree needle nose plier
Parts Used
Held the part inside the drum with 90 degree pliers and attached the screws
Did you find this story helpful?
Thanks for voting and helping fellow customers!
Broke the fastener trying to use the holding tool
Kurt - September 17, 2018
👍 1 of 1 people found this instruction helpful
Tool Type
Sander
Difficulty
Medium
Time
1-2 hours
Tools Used
Screwdriver, Pliers
Parts Used
Did you find this story helpful?
Thanks for voting and helping fellow customers!
Broke springs on fasteners
Steve - September 8, 2018
👍 1 of 1 people found this instruction helpful
Tool Type
Sander
Difficulty
Easy
Time
15-30 minutes
Tools Used
Screwdriver
Loosened and removed old fasteners with screw driver and replaced with new ones. Simple and easy repair. New ones work great.
Did you find this story helpful?
Thanks for voting and helping fellow customers!
Load More Install Stories
OEM stands for Original Equipment Manufacturer and means the part you’re buying is sourced directly from the manufacturer who made your product. At eReplacementParts, we sell only genuine OEM parts, guaranteeing the part you’re purchasing is of better design and of higher quality than aftermarket parts.
Our product descriptions are a combination of data sourced directly from the manufacturers who made your product as well as content researched and curated by our content & customer service teams. This content is edited and reviewed internally before being made public to customers.
Our customer service team are at the ready daily to answer your part and product questions. We have a dedicated staff with decades of collective experience in helping customers just like you purchase parts to repair their products.
All our part reviews are solicited directly from other customers who have purchased this exact part. While we moderate these reviews for profanity, offensive language or personally identifiable information, these reviews are posted exactly as submitted and no alterations are made by our team.
All our customer repair instructions are solicited directly from other customers just like you who have purchased and replaced this exact part. While we moderate these reviews for profanity, offensive language or personally identifiable information, these reviews are posted exactly as submitted and no alterations are made by our team.
Based on data from past customer purchasing behaviors, these parts are most commonly purchased together along with the part you are viewing. These parts may be necessary or helpful to replace to complete your current repair.
All our installation videos are created and produced in collaboration with our in-house repair technician, Mark Sodja, who has helped millions of eReplacementParts customers over the last 13 years repair their products. Mark has years of experience in selling and repairing both commercial and residential products with a specialty in gas-powered equipment.
This data is collected from customers who submitted a repair instruction after replacing this exact part. Customers can rate how easy the repair was to complete and how long it took. We aggregate this data to provide a repair rating that allows customers to quickly determine the difficulty and time needed to perform their own repair.