
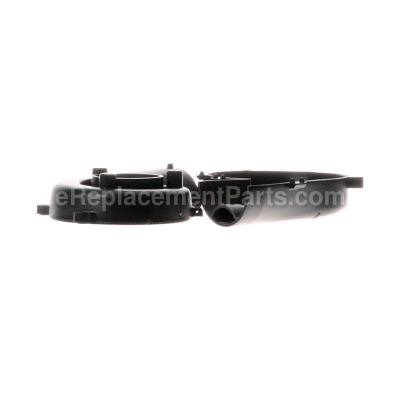


This is a genuine manufacturer sourced replacement part designed for use with Dewalt planers. This fan housing helps to direct the dust and it also houses the fan. It is made out of plastic and this set includes two (2) pieces of the housing. Please note the hardware and the fan are sold separately.
To complete this repair you will need a screwdriver.
Fan Housing Set 5140103-77
OEM part for: DeWALT
Part Number: 5140103-77
$67.41
In Stock
Jump To:
Product Description ?
- Classification: Part
- Weight: 0.49 lbs.
- Shipping: Ships Worldwide
Frequently Purchased Together ?


Compatibility
This part will fit the following 2 machines
DeWALT
DW735 Type 1 13 inch Planer View Diagrams & Manuals
DW735X Type 1 13" Planer View Diagrams & Manuals
This item works with the following types of products:
- Planer Parts
This part replaces obsolete part #: 5140011-71
Repair Videos ?
Watch the Repair Video for
Fan Housing Set

Articles:
|
Step-by-step instructions for removing and installing the fan housing on your DeWALT planer....
December 12, 2017
|

Customer Part Reviews ?
Average Rating (out of 5):
Click to filter by ratings:
5 stars
8
4 stars
0
3 stars
0
2 stars
0
1 stars
0
< PREV
- 1
Very easy repair. Please perfect fit.
Arrived quickly, part was a perfect fit. Works like new.
Guest -
September 23, 2023
Verified Purchase
Nice job eReplacementParts!
You are going to find that using eReplacementParts is easier than trying to get your boss to give you the day off! My parts were in stock and shipping was fast! I will be using you again, Thank You!
Guest -
August 2, 2023
Verified Purchase
Fast shipping
Ordered this product, fast shipping, very satisfied.
Guest -
June 17, 2021
Verified Purchase
Great service got the right part first try
My planner is running great again. Right parts I needed and were in excellant condition
Guest -
November 30, 2020
Verified Purchase
Great part
The fan housing was a perfect fit and it was delivered in a very timely manner.
Guest -
March 16, 2020
Verified Purchase
Easy repair
Works great!!
Guest -
January 13, 2020
Verified Purchase
Terrific service.
The fan housing set I ordered for my planer fit perfectly. Great product and great service.
Micheal -
November 8, 2019
Verified Purchase
Easy to replace!
fan Housing arrived in just a couple of days and planer is now back up and working great!
Steve -
July 9, 2019
Verified Purchase
t
t
t -
t days ago
Verified Purchase
eReplacementParts Team
t
Questions & Answers ?
Our customer Service team is at the ready daily to answer your part and product questions.

Ask our Team
We have a dedicated staff with decades of collective experience in helping customers just like you purchase parts to repair their products.
Does this fit my product?Questions & Answers for Fan Housing Set
Does the fan housing have a warranty?
Michael
for model number Dw735x
asked on 2023-12-01
Hello Michael, Thank you for writing. If you are not satisfied with your purchase for any reason, you can return your item within 90 days for a full refund of the product price. We hope this helps!
eReplacementParts Team December 01, 2023
Customer Repair Instructions ?
All our customer repair instructions are solicited directly from other customers just like you who have purchased and replaced this exact part.
Dust shroud and fan housing set broke due impact from machine falling
Sacha - May 15, 2016
👍 6 of 6 people found this instruction helpful
Tool Type
Planer
Difficulty
Easy
Time
15-30 minutes
Tools Used
Screwdriver, Socket set, Tongue and groove joint pliers and allen wrench
The repair was very straight forward. Once the cutterhead cover was removed, all parts were easily accessible with the right tools. In fact, it took more time to assess the job than the actual replacing of the parts.
The tongue and groove joint plier was used to hold the fan and lock the shaft while tightening the lock nut that secures it. In retrospect, and automotive oil filter wrench (The type that uses a rubber strap to hold the filter) would do a better job without risking damage to the fan.
I must note that the replacement fan housing is slightly different than the original. There were no spring clips to hold the two halves together. It simplified the process and works as well as the original.
Thanks!
Did you find this story helpful?
Thanks for voting and helping fellow customers!
Sawdust accumulated inside
Jon - May 24, 2018
👍 2 of 2 people found this instruction helpful
Tool Type
Planer
Difficulty
Medium
Time
15-30 minutes
Tools Used
Screwdriver, Pliers, Socket set, Strap wrench
Parts Used
1. Removed cover and (black plastic) exhaust extension from rear panel.
2. Removed clips holding fan housing together exposing fan wheel. Removed 1st half.
3. Made a strap wrench from old fan belt and vice grips to remove fan wheel.
4. Removed two screws securing inner 2nd half of old fan housing set.
5. Robbed round exhaust pipe clip from old and install in in new inner fan housing clip.
6. Replaced inner half with new inner half fan housing securing with screws.
7. Reinstalled original fan wheel reusing homemade strap wrench..
8. Replaced outer half of new fan housing. Secured with original clips.
9. Reinstalled exhaust extension and cover.
Did you find this story helpful?
Thanks for voting and helping fellow customers!
fan howsing worn out leaked sawdust inside machine
ROBERT - September 26, 2023
Tool Type
Planer
Difficulty
Medium
Time
15-30 minutes
Tools Used
Screwdriver, Socket set, allenwrenchs
took howsing and fan off replaced replaced with new unit and works great
Did you find this story helpful?
Thanks for voting and helping fellow customers!
Had a cracked dust shroud and fan cover
Richard - February 13, 2023
Tool Type
Planer
Difficulty
Medium
Time
30-60 minutes
Tools Used
Screwdriver, Adjustable Wrench, Poor design to take the fan blade off. Should be Allen wrenc
Had to call Dewalt because of poor design. To remove the fan you have to use large channel locks to pull the nut off. The fan is plastic so you have to be gentle not to break it. Dewalt should’ve installed an Allen wrench key inside the shaft told her she had to remove the nut. You have to have the right length screwdriver to get inside that area to remove the second half of the fan blade cover. And the clips that hold it together are in accessible and very tough to snap down.
Did you find this story helpful?
Thanks for voting and helping fellow customers!
Wood chunk destroyed fan housing for dust extraction
Bob - May 9, 2022
Tool Type
Planer
Difficulty
Easy
Time
Less than 15 minutes
Tools Used
, Hex key
Parts Used
Watched your YouTube video!
Super easy
Super easy
Did you find this story helpful?
Thanks for voting and helping fellow customers!
Saw dust accumulating inside the planer
Don - March 5, 2022
Tool Type
Planer
Difficulty
Medium
Time
15-30 minutes
Tools Used
Screwdriver, Pliers, Socket set
Parts Used
Removed old fan housing and fan. Then installed ne unit.
Did you find this story helpful?
Thanks for voting and helping fellow customers!
Bearing went on my DeWalt planer
Paul - March 6, 2022
Tool Type
Planer
Difficulty
Medium
Time
1-2 hours
Tools Used
Screwdriver, Pliers, Socket set, Bearing puller
Had to remove motor and housing from machine to remove the damaged bearing . I would not have been able to remove bearing without the bearing puller I bought.
Did you find this story helpful?
Thanks for voting and helping fellow customers!
Broken plastic
Jon - December 1, 2021
Tool Type
Planer
Difficulty
Easy
Time
Less than 15 minutes
Tools Used
Screwdriver, None
Parts Used
Easy
Did you find this story helpful?
Thanks for voting and helping fellow customers!
Dust shroud and fan housing got destroyed with wood splinters getting caught in the fan.
Frederick - March 8, 2021
Tool Type
Planer
Difficulty
Easy
Time
30-60 minutes
Tools Used
Screwdriver, Pliers
With your online video.
Did you find this story helpful?
Thanks for voting and helping fellow customers!
Dust was collecting inside the planer even with an external vacuum attached.
Paul - February 5, 2021
Tool Type
Planer
Difficulty
Easy
Time
15-30 minutes
Tools Used
Screwdriver, Pliers, Socket set, Wrench Set
Parts Used
Followed instructions provided.
Most difficult part was moving the spring clips from the old to the new fan housing.
The spring clips are quite stiff and I needed a pair of needle-nose pliers to pry the
springs off the old housing without ruining them. Make sure the springs are in the
correct position BEFORE screwing the back half of the housing to the motor frame
otherwise you won't be able to snap the front half of the housing in place.
Repair went well and after a short test, the planer was dust free.
Did you find this story helpful?
Thanks for voting and helping fellow customers!
Load More Install Stories
OEM stands for Original Equipment Manufacturer and means the part you’re buying is sourced directly from the manufacturer who made your product. At eReplacementParts, we sell only genuine OEM parts, guaranteeing the part you’re purchasing is of better design and of higher quality than aftermarket parts.
Our product descriptions are a combination of data sourced directly from the manufacturers who made your product as well as content researched and curated by our content & customer service teams. This content is edited and reviewed internally before being made public to customers.
Our customer service team are at the ready daily to answer your part and product questions. We have a dedicated staff with decades of collective experience in helping customers just like you purchase parts to repair their products.
All our part reviews are solicited directly from other customers who have purchased this exact part. While we moderate these reviews for profanity, offensive language or personally identifiable information, these reviews are posted exactly as submitted and no alterations are made by our team.
All our customer repair instructions are solicited directly from other customers just like you who have purchased and replaced this exact part. While we moderate these reviews for profanity, offensive language or personally identifiable information, these reviews are posted exactly as submitted and no alterations are made by our team.
Based on data from past customer purchasing behaviors, these parts are most commonly purchased together along with the part you are viewing. These parts may be necessary or helpful to replace to complete your current repair.
All our installation videos are created and produced in collaboration with our in-house repair technician, Mark Sodja, who has helped millions of eReplacementParts customers over the last 13 years repair their products. Mark has years of experience in selling and repairing both commercial and residential products with a specialty in gas-powered equipment.
This data is collected from customers who submitted a repair instruction after replacing this exact part. Customers can rate how easy the repair was to complete and how long it took. We aggregate this data to provide a repair rating that allows customers to quickly determine the difficulty and time needed to perform their own repair.