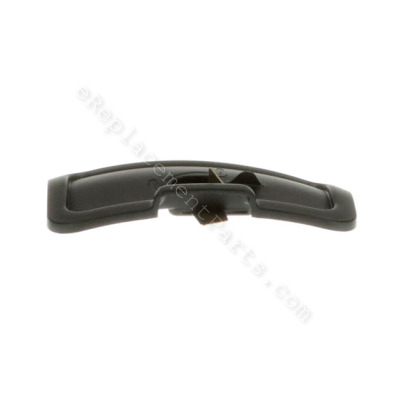


It is a genuine OEM replacement part that is specially manufactured for use with toro and Lawn Boy walk-behind lawn mowers. This discharge door assembly is mounted on the side of the lawn mower deck to prevent the grass from shooting out. It is used to keep the grass under the deck either for mulching or bagging depending on your set up. It is a complete assembly which includes the durable plastic door and the metal hinge mechanism that is used to secure it to the deck.
Discharge Door 106-8376
OEM part for: Toro, Lawn Boy
Part Number: 106-8376
$14.74
In Stock
Jump To:
Frequently Purchased Together ?


Compatibility
This part will fit the following 278 machines
Toro
20003 (250000001-250999999)(2005) Lawn Mower View Diagrams & Manuals
20003 (260000001-260999999)(2006) Lawn Mower View Diagrams & Manuals
20005 (250000001-250999999)(2005) Lawn Mower View Diagrams & Manuals
20005 (260000001-260999999)(2006) Lawn Mower View Diagrams & Manuals
20008 (230000001-230999999)(2003) Lawn Mower View Diagrams & Manuals
20008 (240000001-240999999)(2004) Lawn Mower View Diagrams & Manuals
20009 (220000001-220999999)(2002) Lawn Mower View Diagrams & Manuals
20009 (230000001-230999999)(2003) Lawn Mower View Diagrams & Manuals
20009 (240000001-240999999)(2004) Lawn Mower View Diagrams & Manuals
20009 (250000001-250999999)(2005) Lawn Mower View Diagrams & Manuals
20009 (260000001-260999999)(2006) Lawn Mower View Diagrams & Manuals
20009 (270000001-270999999)(2007) Lawn Mower View Diagrams & Manuals
20012 (220000001-220300000)(2002) Lawn Mower View Diagrams & Manuals
20012 (220300001-220999999)(2002) Lawn Mower View Diagrams & Manuals
20012 (230000001-230999999)(2003) Lawn Mower View Diagrams & Manuals
20012 (240000001-240999999)(2004) Lawn Mower View Diagrams & Manuals
20012 (250000001-250999999)(2005) Lawn Mower View Diagrams & Manuals
20012 (260000001-260999999)(2006) Lawn Mower View Diagrams & Manuals
20013 (220000001-220300000)(2002) Lawn Mower View Diagrams & Manuals
20013 (220300001-220999999)(2002) Lawn Mower View Diagrams & Manuals
20013 (230000001-230999999)(2003) Lawn Mower View Diagrams & Manuals
20013 (240000001-240999999)(2004) Lawn Mower View Diagrams & Manuals
20013 (250000001-250999999)(2005) Lawn Mower View Diagrams & Manuals
20013 (260000001-260999999)(2006) Lawn Mower View Diagrams & Manuals
20014 (220000001-220300000)(2002) Lawn Mower View Diagrams & Manuals
20014 (220300001-220999999)(2002) Lawn Mower View Diagrams & Manuals
20014 (230000001-230999999)(2003) Lawn Mower View Diagrams & Manuals
20016 (220000001-220300000)(2002) Lawn Mower View Diagrams & Manuals
20016 (220300001-220999999)(2002) Lawn Mower View Diagrams & Manuals
20016 (230000001-230999999)(2003) Lawn Mower View Diagrams & Manuals
20016 (240000001-240999999)(2004) Lawn Mower View Diagrams & Manuals
20016 (250000001-250999999)(2005) Lawn Mower View Diagrams & Manuals
20016 (260000001-260999999)(2006) Lawn Mower View Diagrams & Manuals
20017 (220000001-220300000)(2002) Lawn Mower View Diagrams & Manuals
20017 (220300001-220999999)(2002) Lawn Mower View Diagrams & Manuals
20017 (230000001-230999999)(2003) Lawn Mower View Diagrams & Manuals
20017 (240000001-240999999)(2004) Lawn Mower View Diagrams & Manuals
20017 (250000001-250999999)(2005) Lawn Mower View Diagrams & Manuals
20017 (260000001-260999999)(2006) Lawn Mower View Diagrams & Manuals
20018 (220000001-220300000)(2002) Lawn Mower View Diagrams & Manuals
20018 (220300001-220999999)(2002) Lawn Mower View Diagrams & Manuals
20018 (230000001-230999999)(2003) Lawn Mower View Diagrams & Manuals
20019 (230000001-230999999)(2003) Lawn Mower View Diagrams & Manuals
20031 (240000001-240999999)(2004) Lawn Mower View Diagrams & Manuals
20041 (250000001-250999999)(2005) Lawn Mower View Diagrams & Manuals
20047 (260000001-260999999)(2006) Lawn Mower View Diagrams & Manuals
20049 (250000001-250999999)(2005) Lawn Mower View Diagrams & Manuals
20051 (240000001-240999999)(2004) Lawn Mower View Diagrams & Manuals
20064 (270000001-270999999)(2007) Lawn Mower View Diagrams & Manuals
20064 (280000001-280070155)(2008) Lawn Mower View Diagrams & Manuals
20064 (280070156-280999999)(2008) Lawn Mower View Diagrams & Manuals
20065 (270000001-270999999)(2007) Lawn Mower View Diagrams & Manuals
20065 (280000001-280072441)(2008) Lawn Mower View Diagrams & Manuals
20065 (280072442-280999999)(2008) Lawn Mower View Diagrams & Manuals
20066 (270000001-270999999)(2007) Lawn Mower View Diagrams & Manuals
20066 (280000001-280999999)(2008) Lawn Mower View Diagrams & Manuals
20067 (270000001-270999999)(2007) Lawn Mower View Diagrams & Manuals
20067 (280000001-280999999)(2008) Lawn Mower View Diagrams & Manuals
20068 (280000001-280999999)(2008) Lawn Mower View Diagrams & Manuals
20069 (270000001-270999999)(2007) Lawn Mower View Diagrams & Manuals
20070 (260000001-260999999)(2006) Lawn Mower View Diagrams & Manuals
20071 (270000001-270999999)(2007) Lawn Mower View Diagrams & Manuals
20071A (270000001-270999999)(2007) Lawn Mower View Diagrams & Manuals
20072 (270000001-270999999)(2007) Lawn Mower View Diagrams & Manuals
20072A (270000001-270999999)(2007) Lawn Mower View Diagrams & Manuals
20073 (270000001-270999999)(2007) Lawn Mower View Diagrams & Manuals
20073A (270000001-270999999)(2007) Lawn Mower View Diagrams & Manuals
20074 (270000001-270999999)(2007) Lawn Mower View Diagrams & Manuals
20074A (270000001-270999999)(2007) Lawn Mower View Diagrams & Manuals
20075 (270000001-270999999)(2007) Lawn Mower View Diagrams & Manuals
20076 (270000001-270999999)(2007) Lawn Mower View Diagrams & Manuals
20076A (270000001-270999999)(2007) Lawn Mower View Diagrams & Manuals
20079 (260000001-260999999)(2006) Lawn Mower View Diagrams & Manuals
20086 (280000001-280011041)(2008) Lawn Mower View Diagrams & Manuals
20086 (280011042-280999999)(2008) Lawn Mower View Diagrams & Manuals
20087 (280000001-280009000)(2008) Lawn Mower View Diagrams & Manuals
20087 (280009001-280999999)(2008) Lawn Mower View Diagrams & Manuals
20089 (280000001-280999999)(2008) Lawn Mower View Diagrams & Manuals
20094 (270000001-270999999)(2007) Lawn Mower View Diagrams & Manuals
20096 (270000001-270999999)(2007) Lawn Mower View Diagrams & Manuals
20098 (270000001-270999999)(2007) Lawn Mower View Diagrams & Manuals
20110 (280000001-280001676)(2008) Lawn Mower View Diagrams & Manuals
20110 (290000001-290999999)(2009) Lawn Mower View Diagrams & Manuals
20111 (280000001-280001951)(2008) Lawn Mower View Diagrams & Manuals
20111 (280001952-280999999)(2008) Lawn Mower View Diagrams & Manuals
20111 (290000001-290999999)(2009) Lawn Mower View Diagrams & Manuals
20112 (280000001-280999999)(2008) Lawn Mower View Diagrams & Manuals
20112 (290000001-290999999)(2009) Lawn Mower View Diagrams & Manuals
20113 (280000001-280999999)(2008) Lawn Mower View Diagrams & Manuals
20113 (290000001-290999999)(2009) Lawn Mower View Diagrams & Manuals
20192 (290000001-290999999)(2009) Lawn Mower View Diagrams & Manuals
20192 (310000001-310999999)(2010) Lawn Mower View Diagrams & Manuals
20194 (290000001-290999999)(2009) Lawn Mower View Diagrams & Manuals
20197 (310000001-310999999)(2010) Lawn Mower View Diagrams & Manuals
20655 (270000001-270999999)(2007) Lawn Mower View Diagrams & Manuals
20655 (280000001-280999999)(2008) Lawn Mower View Diagrams & Manuals
20655 (290000001-290999999)(2009) Lawn Mower View Diagrams & Manuals
20655 (240000001-240999999)(2004) Lawn Mower View Diagrams & Manuals
20655 (250000001-250999999)(2005) Lawn Mower View Diagrams & Manuals
20655 (260000001-260999999)(2006) Lawn Mower View Diagrams & Manuals
20656 (270000001-270999999)(2007) Lawn Mower View Diagrams & Manuals
20656 (280000001-280999999)(2008) Lawn Mower View Diagrams & Manuals
20656 (290000001-290999999)(2009) Lawn Mower View Diagrams & Manuals
20656 (240000001-240999999)(2004) Lawn Mower View Diagrams & Manuals
20656 (250000001-250999999)(2005) Lawn Mower View Diagrams & Manuals
20656 (260000001-260999999)(2006) Lawn Mower View Diagrams & Manuals
20658 (280000001-280999999)(2008) Lawn Mower View Diagrams & Manuals
20658 (290000001-290999999)(2009) Lawn Mower View Diagrams & Manuals
20192 (311000001-311999999) Lawn Mower View Diagrams & Manuals
20197 (311000001-311999999) Lawn Mower View Diagrams & Manuals
20897 (400000000-999999999) 53cm Super Bagger Lawn Mower View Diagrams & Manuals
20897 (311000001-311999999) 53cm Super Bagger Lawn Mower, 2011 View Diagrams & Manuals
20897 (312000001-312999999) 53cm Super Bagger Lawn Mower, 2012 View Diagrams & Manuals
20897 (313000001-313999999) 53cm Super Bagger Lawn Mower, 2013 View Diagrams & Manuals
20897 (314000001-314999999) 53cm Super Bagger Lawn Mower, 2014 View Diagrams & Manuals
20897 (315000001-315999999) 53cm Super Bagger Lawn Mower, 2015 View Diagrams & Manuals
20897 (3160000001-316999999) 53cm Super Bagger Lawn Mower, 2016 View Diagrams & Manuals
20899 (400000000-999999999) 53cm Super Bagger Lawn Mower View Diagrams & Manuals
20899 (310000001-310999999) 53cm Super Bagger Lawn Mower, 2010 View Diagrams & Manuals
20899 (311000001-311999999) 53cm Super Bagger Lawn Mower, 2011 View Diagrams & Manuals
20899 (312000001-312999999) 53cm Super Bagger Lawn Mower, 2012 View Diagrams & Manuals
20899 (313000001-313999999) 53cm Super Bagger Lawn Mower, 2013 View Diagrams & Manuals
20899 (314000001-314999999) 53cm Super Bagger Lawn Mower, 2014 View Diagrams & Manuals
20899 (315000001-315999999) 53cm Super Bagger Lawn Mower, 2015 View Diagrams & Manuals
20899 (316000001-316999999) 53cm Super Bagger Lawn Mower, 2016 View Diagrams & Manuals
20990 (313000001-313999999) 53cm Recycler Lawn Mower, 2013 View Diagrams & Manuals
20995 (290000001-290999999) 53cm Recycler Lawn Mower, 2009 View Diagrams & Manuals
20995 (310000001-310999999) 53cm Recycler Lawn Mower, 2010 View Diagrams & Manuals
20995 (311000001-311999999) 53cm Recycler Lawn Mower, 2011 View Diagrams & Manuals
20995 (312000001-312999999) 53cm Recycler Lawn Mower, 2012 View Diagrams & Manuals
20995 (313000001-313999999) 53cm Recycler Lawn Mower, 2013 View Diagrams & Manuals
20995 (314000001-314999999) 53cm Recycler Lawn Mower, 2014 View Diagrams & Manuals
20996 (290000001-290999999) 53cm Recycler Lawn Mower, 2009 View Diagrams & Manuals
20996 (310000001-310999999) 53cm Recycler Lawn Mower, 2010 View Diagrams & Manuals
20996 (311000001-311999999) 53cm Recycler Lawn Mower, 2011 View Diagrams & Manuals
20996 (312000001-312999999) 53cm Recycler Lawn Mower, 2012 View Diagrams & Manuals
20996 (313000001-313999999) 53cm Recycler Lawn Mower, 2013 View Diagrams & Manuals
20996 (314000001-314999999) 53cm Recycler Lawn Mower, 2014 View Diagrams & Manuals
20996 (315000001-315999999) 53cm Recycler Lawn Mower, 2015 View Diagrams & Manuals
20996 (316000001-316999999) 53cm Recycler Lawn Mower, 2016 View Diagrams & Manuals
20997 (310000001-310999999) 53cm Recycler Lawn Mower, 2010 View Diagrams & Manuals
20997 (311000001-311999999) 53cm Recycler Lawn Mower, 2011 View Diagrams & Manuals
20999 (311000001-311999999) 53cm Recycler Lawn Mower, 2011 View Diagrams & Manuals
20999 (312000001-312999999) 53cm Recycler Lawn Mower, 2012 View Diagrams & Manuals
20999 (313000001-313999999) 53cm Recycler Lawn Mower, 2013 View Diagrams & Manuals
20999 (314000001-314999999) 53cm Recycler Lawn Mower, 2014 View Diagrams & Manuals
20999 (315000001-315999999) 53cm Recycler Lawn Mower, 2015 View Diagrams & Manuals
20999 (316000001-316999999) 53cm Recycler Lawn Mower, 2016 View Diagrams & Manuals
22155 (290000001-290999999) Commercial 21in Lawn Mower, 2009 View Diagrams & Manuals
22155 (310000001-310999999) Commercial 21in Lawn Mower, 2010 View Diagrams & Manuals
22155 (311000001-311999999) Commercial 21in Lawn Mower, 2011 View Diagrams & Manuals
22155 (312000001-312999999) Commercial 21in Lawn Mower, 2012 View Diagrams & Manuals
22155 (313000001-313999999) Commercial 21in Lawn Mower, 2013 View Diagrams & Manuals
22156 (290000001-290999999) Commercial 21in Lawn Mower, 2009 View Diagrams & Manuals
22156 (310000001-310999999) Commercial 21in Lawn Mower, 2010 View Diagrams & Manuals
22156 (311000001-311999999) Commercial 21in Lawn Mower, 2011 View Diagrams & Manuals
22156 (312000001-312999999) Commercial 21in Lawn Mower, 2012 View Diagrams & Manuals
22156 (313000001-313999999) Commercial 21in Lawn Mower, 2013 View Diagrams & Manuals
22156TE (310000001-310001000) Commercial 53cm Lawn Mower, 2010 View Diagrams & Manuals
22156TE (310001001-310999999) Commercial 53cm Lawn Mower, 2010 View Diagrams & Manuals
22186TE (311000001-311999999) Commercial 53cm Lawn Mower, 2011 View Diagrams & Manuals
22186TE (312000001-312999999) Commercial 53cm Lawn Mower, 2012 View Diagrams & Manuals
22186TE (313000001-313999999) Commercial 53cm Lawn Mower, 2013 View Diagrams & Manuals
22186TE (314000001-314999999) Commercial 53cm Lawn Mower, 2014 View Diagrams & Manuals
22270 (270000001-270999999) 21in Commercial Lawn Mower, 2007 View Diagrams & Manuals
22270 (280000001-280999999) 21in Commercial Lawn Mower, 2008 View Diagrams & Manuals
22270 (290000001-290999999) 21in Commercial Lawn Mower, 2009 View Diagrams & Manuals
22271 (270000001-270999999) 21in Commercial Lawn Mower, 2007 View Diagrams & Manuals
22271 (280000001-280999999) 21in Commercial Lawn Mower, 2008 View Diagrams & Manuals
22271 (290000001-290999999) 21in Commercial Lawn Mower, 2009 View Diagrams & Manuals
20897 (400000000-400999999) 20897, 53cm Super Bagger Lawn Mower, (Sn 400000000-400999999) View Diagrams & Manuals
20899 (400000000-400999999) 20899, 53cm Super Bagger Lawn Mower, (Sn 400000000-400999999) View Diagrams & Manuals
22155 (290000001-290999999)(2009) Commercial 21in Lawn Mower View Diagrams & Manuals
22155 (310000001-310999999)(2010) Commercial 21in Lawn Mower View Diagrams & Manuals
22155 (311000001-311999999)(2011) Commercial 21in Lawn Mower View Diagrams & Manuals
22155 (312000001-312999999)(2012) Commercial 21in Lawn Mower View Diagrams & Manuals
22155 (313000001-313999999)(2013) Commercial 21in Lawn Mower View Diagrams & Manuals
22156 (290000001-290999999)(2009) Commercial 21in Lawn Mower View Diagrams & Manuals
22156 (310000001-310999999)(2010) Commercial 21in Lawn Mower View Diagrams & Manuals
22156 (311000001-311999999)(2011) Commercial 21in Lawn Mower View Diagrams & Manuals
22156 (312000001-312999999)(2012) Commercial 21in Lawn Mower View Diagrams & Manuals
22156 (313000001-313999999)(2013) Commercial 21in Lawn Mower View Diagrams & Manuals
22156TE (310000001-310001000)(2010) Commercial 53cm Lawn Mower View Diagrams & Manuals
22156TE (310001001-310999999)(2010) Commercial 53cm Lawn Mower View Diagrams & Manuals
22186TE (311000001-311999999)(2011) Commercial 53cm Lawn Mower View Diagrams & Manuals
22186TE (312000001-312999999)(2012) Commercial 53cm Lawn Mower View Diagrams & Manuals
22186TE (313000001-313999999)(2013) Commercial 53cm Lawn Mower View Diagrams & Manuals
22186TE (314000001-314999999)(2014) Commercial 53cm Lawn Mower View Diagrams & Manuals
Lawn Boy
10662 (290000001-290999999)(2009) Insight Lawn Mower View Diagrams & Manuals
10662 (280000001-280999999)(2008) Insight Lawn Mower View Diagrams & Manuals
10665 (290000001-290999999)(2009) Insight Lawn Mower View Diagrams & Manuals
10665 (280000001-280999999)(2008) Insight Lawn Mower View Diagrams & Manuals
10665C (290000001-290999999)(2009) Insight Lawn Mower View Diagrams & Manuals
10666 (280000001-280999999)(2008) Insight Lawn Mower View Diagrams & Manuals
10666C (290000001-290999999)(2009) Insight Lawn Mower View Diagrams & Manuals
10666C (280000001-280999999)(2008) Insight Lawn Mower View Diagrams & Manuals
10670C (280000001-280999999)(2008) Insight Lawn Mower View Diagrams & Manuals
10670C (270000001-270999999)(2007) Insight Lawn Mower View Diagrams & Manuals
10671 (290000001-290999999)(2009) Insight Lawn Mower View Diagrams & Manuals
10671 (280000001-280999999)(2008) Insight Lawn Mower View Diagrams & Manuals
10671 (270000001-270004299)(2007) Insight Lawn Mower View Diagrams & Manuals
10671 (270004300-270999999)(2007) Insight Lawn Mower View Diagrams & Manuals
10671 (260000001-260999999)(2006) Insight Lawn Mower View Diagrams & Manuals
10671 (250000001-250999999)(2005) Insight Lawn Mower View Diagrams & Manuals
10672 (280000001-280999999)(2008) Insight Gold Lawn Mower View Diagrams & Manuals
10672 (270000001-270999999)(2007) Insight Gold Lawn Mower View Diagrams & Manuals
10672 (260000001-260999999)(2006) Insight Gold Lawn Mower View Diagrams & Manuals
10672 (250000001-250999999)(2005) Insight Gold Lawn Mower View Diagrams & Manuals
10673 (280000001-280999999)(2008) Insight Gold Lawn Mower View Diagrams & Manuals
10673 (270000001-270999999)(2007) Insight Gold Lawn Mower View Diagrams & Manuals
10673 (260000001-260999999)(2006) Insight Gold Lawn Mower View Diagrams & Manuals
10682 (280000001-280999999)(2008) Insight Lawn Mower View Diagrams & Manuals
10682 (270000001-270999999)(2007) Insight Lawn Mower View Diagrams & Manuals
10682 (260000001-260999999)(2006) Insight Lawn Mower View Diagrams & Manuals
10683 (280000001-280999999)(2008) Insight Lawn Mower View Diagrams & Manuals
10683 (270000001-270999999)(2007) Insight Lawn Mower View Diagrams & Manuals
10683 (260000001-260999999)(2006) Insight Lawn Mower View Diagrams & Manuals
10683 (250000001-250999999)(2005) Insight Lawn Mower View Diagrams & Manuals
10684 (260000001-260999999)(2006) Insight Lawn Mower View Diagrams & Manuals
10684 (250000001-250999999)(2005) Insight Lawn Mower View Diagrams & Manuals
10684C (290000001-290999999)(2009) Insight Lawn Mower View Diagrams & Manuals
10684C (280000001-280999999)(2008) Insight Lawn Mower View Diagrams & Manuals
10684C (270000001-270999999)(2007) Insight Lawn Mower View Diagrams & Manuals
10684C (260000001-260999999)(2006) Insight Lawn Mower View Diagrams & Manuals
10684C (250000001-250999999)(2005) Insight Lawn Mower View Diagrams & Manuals
10685 (280000001-280999999)(2008) Insight Lawn Mower View Diagrams & Manuals
10685 (270000001-270999999)(2007) Insight Lawn Mower View Diagrams & Manuals
10685 (260000001-260999999)(2006) Insight Lawn Mower View Diagrams & Manuals
10685 (250000001-250999999)(2005) Insight Lawn Mower View Diagrams & Manuals
10686 (270000001-270999999)(2007) Insight Lawn Mower View Diagrams & Manuals
10686 (260000001-260999999)(2006) Insight Lawn Mower View Diagrams & Manuals
10686 (250000001-250999999)(2005) Insight Lawn Mower View Diagrams & Manuals
10686C (260000001-260999999)(2006) Insight Lawn Mower View Diagrams & Manuals
10687 (260000001-260999999)(2006) Insight Lawn Mower View Diagrams & Manuals
10694 (270000001-270999999)(2007) Insight Gold Lawn Mower View Diagrams & Manuals
10694 (260000001-260999999)(2006) Insight Gold Lawn Mower View Diagrams & Manuals
10694 (250000001-250999999)(2005) Insight Gold Lawn Mower View Diagrams & Manuals
10695 (270000001-270999999)(2007) Insight Gold Lawn Mower View Diagrams & Manuals
10695 (260000001-260999999)(2006) Insight Gold Lawn Mower View Diagrams & Manuals
10695 (250000001-250999999)(2005) Insight Gold Lawn Mower View Diagrams & Manuals
10696 (260000001-260999999)(2006) Insight Gold Lawn Mower View Diagrams & Manuals
10696 (250000001-250999999)(2005) Insight Gold Lawn Mower View Diagrams & Manuals
10696C (260000001-260999999)(2006) Insight Gold Lawn Mower View Diagrams & Manuals
10696C (250000001-250999999)(2005) Insight Gold Lawn Mower View Diagrams & Manuals
10697 (260000001-260999999)(2006) Insight Gold Lawn Mower View Diagrams & Manuals
10697 (250000001-250999999)(2005) Insight Gold Lawn Mower View Diagrams & Manuals
10765 (290000001-290999999)(2009) Insight Platinum Lawn Mower View Diagrams & Manuals
10765 (280000001-280999999)(2008) Insight Platinum Lawn Mower View Diagrams & Manuals
10780 (270000001-270999999)(2007) Insight Platinum Lawn Mower View Diagrams & Manuals
10785 (270000001-270999999)(2007) Insight Platinum Lawn Mower View Diagrams & Manuals
10795 (290000001-290999999)(2009) Insight Platinum Lawn Mower View Diagrams & Manuals
10795 (280000001-280999999)(2008) Insight Platinum Lawn Mower View Diagrams & Manuals
10795 (270000001-270999999)(2007) Insight Platinum Lawn Mower View Diagrams & Manuals
10796 (280000001-280999999)(2008) Insight Platinum Lawn Mower View Diagrams & Manuals
10796 (270000001-270999999)(2007) Insight Platinum Lawn Mower View Diagrams & Manuals
10797 (270000001-270999999)(2007) Insight Platinum Lawn Mower View Diagrams & Manuals
10995 (270000001-270999999)(2007) Insight Gold Lawn Mower View Diagrams & Manuals
10995 (260000001-260999999)(2006) Insight Gold Lawn Mower View Diagrams & Manuals
10996 (311000001-311999999)(2011) Insight Lawn Mower View Diagrams & Manuals
10996 (310000001-310999999)(2010) Insight Lawn Mower View Diagrams & Manuals
10996 (290000601-290999999)(2009) Insight Lawn Mower View Diagrams & Manuals
10996 (290000001-290000600)(2009) Insight Lawn Mower View Diagrams & Manuals
10996 (280000001-280999999)(2008) Insight Lawn Mower View Diagrams & Manuals
10997 (270000001-270999999)(2007) Insight Gold Lawn Mower View Diagrams & Manuals
10997 (260000001-260999999)(2006) Insight Gold Lawn Mower View Diagrams & Manuals
10998 (311000001-311999999)(2011) Insight Lawn Mower View Diagrams & Manuals
10998 (310000001-310999999)(2010) Insight Lawn Mower View Diagrams & Manuals
10998 (290000180-290999999)(2009) Insight Lawn Mower View Diagrams & Manuals
10998 (290000001-290000179)(2009) Insight Lawn Mower View Diagrams & Manuals
10998 (280000001-280999999)(2008) Insight Lawn Mower View Diagrams & Manuals
22270 (290000001-290999999)(2009) 21In Commercial Lawn Mower View Diagrams & Manuals
22270 (280000001-280999999)(2008) 21In Commercial Lawn Mower View Diagrams & Manuals
22270 (270000001-270999999)(2007) 21In Commercial Lawn Mower View Diagrams & Manuals
22271 (290000001-290999999)(2009) 21In Commercial Lawn Mower View Diagrams & Manuals
22271 (280000001-280999999)(2008) 21In Commercial Lawn Mower View Diagrams & Manuals
22271 (270000001-270999999)(2007) 21In Commercial Lawn Mower View Diagrams & Manuals
10996 (312000001-312999999)(2012) Insight Lawn Mower View Diagrams & Manuals
10998 (312000001-312999999)(2012) Insight Lawn Mower View Diagrams & Manuals
Show More Compatible Models
This item works with the following types of products:
- Lawn Mower Parts
This part replaces obsolete part #: 106-8339, 105-3027
Customer Part Reviews ?
Average Rating (out of 5):
Click to filter by ratings:
5 stars
6
4 stars
1
3 stars
0
2 stars
0
1 stars
0
< PREV
- 1
Simply easy
Easy, easy, easy. To select the part-order the part and receive the correct part.
Guest -
October 19, 2023
Verified Purchase
your instructions made it easy to replace
works great now
Guest -
June 27, 2022
Verified Purchase
Perfect fit
Received part in a timely manner. Great fit and easy to put on mower.
Guest -
August 18, 2020
Verified Purchase
easy repair
Excellent easy repair 5 minutes took me longer to open packaging
Guest -
August 5, 2020
Verified Purchase
Discharge door
Part arrived in a timely manner, installing was pretty easy, just what I needed.
Guest -
July 4, 2019
Verified Purchase
Easy Repair
Good replacement for the old one.
Guest -
June 22, 2019
Verified Purchase
As advertised
Part delivered fast, as advertised! Instructions on how to replace torsion spring not included, item detail says torsion spring included but was not-confusing! Overall good experience but needs a little tweaking.
Guest -
September 29, 2020
Verified Purchase
t
t
t -
t days ago
Verified Purchase
eReplacementParts Team
t
Questions & Answers ?
Our customer Service team is at the ready daily to answer your part and product questions.

Ask our Team
We have a dedicated staff with decades of collective experience in helping customers just like you purchase parts to repair their products.
Does this fit my product?Questions & Answers for Discharge Door
No questions have been asked yet
Customer Repair Instructions ?
All our customer repair instructions are solicited directly from other customers just like you who have purchased and replaced this exact part.
Discharge door broke and would not hold the discharge chute in place.
JACK - August 3, 2016
👍 12 of 14 people found this instruction helpful
Tool Type
Lawn Mower
Difficulty
Hard
Time
30-60 minutes
Tools Used
Pliers, Power Drill, Wrench Set, None
Parts Used
1. Removed old door by removing screws from mower deck.
2. Most difficult was the removal and re-installation of the spring assembly for the door. Had to remove old rod and spring, which as easy as slid out as one end of old door had broken off. Difficulty was re-assembly of the springs and installation of the rod. Had to use multiple vise grips to hold one end of spring under tension while re-inserting the rod. Took several attempts before finishing. In my opinion, the door should have been sent complete with the springs and rod attached to it would have been an easy unbolt and re-bolt installation.
3. Removed old rod and springs.
4. Used vise grips to hold spring in tension while trying to insert the rod. Took several attempts before successful.
Did you find this story helpful?
Thanks for voting and helping fellow customers!
discharge chute broke
robert - June 27, 2022
Tool Type
Lawn Mower
Difficulty
Medium
Time
15-30 minutes
Tools Used
Screwdriver, Pliers, Socket set
Parts Used
followed your instructions and replaced part
Did you find this story helpful?
Thanks for voting and helping fellow customers!
Missing side shoot
Phil - July 9, 2020
Tool Type
Lawn Mower
Difficulty
Easy
Time
Less than 15 minutes
Tools Used
Pliers
Flip up old side shoot
Remove rod
Put spring on new side shoot
Line up on mower
Insert rod
Remove rod
Put spring on new side shoot
Line up on mower
Insert rod
Did you find this story helpful?
Thanks for voting and helping fellow customers!
The door lock was broken
Eugene - June 23, 2019
Tool Type
Lawn Mower
Difficulty
Easy
Time
Less than 15 minutes
Tools Used
Power Drill
Parts Used
Bought a new door and the metal mount. Put the new one on and done.
Did you find this story helpful?
Thanks for voting and helping fellow customers!
Discharge Door Damaged from years of use.
Arnold - June 27, 2018
Tool Type
Lawn Mower
Difficulty
Easy
Time
Less than 15 minutes
Tools Used
Pliers, Nutdriver, Drift.
Parts Used
Removed the two holding self-tapping screw/bolts, pushed out the retaining shaft and removed the holding spring, reversed procedure maintaining the proper placement of the spring and reinstall on the mower housing.
Did you find this story helpful?
Thanks for voting and helping fellow customers!
Discharge door broken
Daniel - June 9, 2018
Tool Type
Lawn Mower
Difficulty
Easy
Time
30-60 minutes
Tools Used
Screwdriver, Pliers, Socket set, Small hammer or brass mallet.
Parts Used
The anchor bracket carriage bolts wanted to turn in the square hole of the anchor bracket, so I chopped off the nuts with my pneumatic hand held cut off tool. I went to the hardware store and got 2 new carriage bolts and bolted the anchor bracket in loosely . I aligned the cover ,spring and tapped the shaft into place. Then I tied the door open and reached in and tightened the lock nuts. After doing that one i can cut my time down 20 min. . Most of my time was setting up. running a air hose up to the patio , digging out my tools going to the hardware store.
Did you find this story helpful?
Thanks for voting and helping fellow customers!
Switch housing assembly broke. Discharge door assembly did not lock
David - May 11, 2018
Tool Type
Lawn Mower
Difficulty
Medium
Time
30-60 minutes
Tools Used
Pliers, Nutdriver
Switch house-
1. Snip the cable ties
2. Follow the wires on the existing switch. Route the new wires alongside the old ones. The cowling slides into a notch and doesn't need any tools. Remove the old wires. Attach the grounding wire. Plug in the other wire.
3. Attach the switch. Do not over tighten the bolt.
4. Put on new cable ties.
Discharge door-
1. Tilt the mower on its side. Air filter should be up in the air, not near the ground. Otherwise you'll spill gas into it.
2. Unbolt two screws and put them in a safe place. It's easiest to do the next steps inside the house where you have flat surfaces.
3. Take the door off. Note the position of the spring arms- one goes on the outside and the other presses against the spring. It helps to take a picture of the spring position of the inside.
4. Pull the bolt out from the spring with needle nose pliers. It pulls out easily.
5. Slide the spring into place in the door assembly. Place the other end over the bracket, creating tension on the bracket..
6. Start sliding the bolt back, through the door, into the bracket and then into the spring. Press the exposed end of the bolt on a hard flat surface to slide it in the rest of the way. This is a lot easier than trying to hold the spring in place with clamps.
7. Finish pushing the bolt into place with pliers.
8. Go back outside. Put the door assembly into position. Tilt the mower up from the front to insert the screws. This cannot be done by tilting the mower on its side (hard lesson)
9. You're done. Total time, if I had to do this again, would be <15 minutes including cleanup.
Did you find this story helpful?
Thanks for voting and helping fellow customers!
Discharge Door Broke
Roy - June 27, 2016
👍 0 of 4 people found this instruction helpful
Tool Type
Lawn Mower
Difficulty
Easy
Time
Less than 15 minutes
Tools Used
Screwdriver, Socket set
Parts Used
Simple, just removed the old door and attached the new one.
Did you find this story helpful?
Thanks for voting and helping fellow customers!
OEM stands for Original Equipment Manufacturer and means the part you’re buying is sourced directly from the manufacturer who made your product. At eReplacementParts, we sell only genuine OEM parts, guaranteeing the part you’re purchasing is of better design and of higher quality than aftermarket parts.
Our product descriptions are a combination of data sourced directly from the manufacturers who made your product as well as content researched and curated by our content & customer service teams. This content is edited and reviewed internally before being made public to customers.
Our customer service team are at the ready daily to answer your part and product questions. We have a dedicated staff with decades of collective experience in helping customers just like you purchase parts to repair their products.
All our part reviews are solicited directly from other customers who have purchased this exact part. While we moderate these reviews for profanity, offensive language or personally identifiable information, these reviews are posted exactly as submitted and no alterations are made by our team.
All our customer repair instructions are solicited directly from other customers just like you who have purchased and replaced this exact part. While we moderate these reviews for profanity, offensive language or personally identifiable information, these reviews are posted exactly as submitted and no alterations are made by our team.
Based on data from past customer purchasing behaviors, these parts are most commonly purchased together along with the part you are viewing. These parts may be necessary or helpful to replace to complete your current repair.
All our installation videos are created and produced in collaboration with our in-house repair technician, Mark Sodja, who has helped millions of eReplacementParts customers over the last 13 years repair their products. Mark has years of experience in selling and repairing both commercial and residential products with a specialty in gas-powered equipment.
This data is collected from customers who submitted a repair instruction after replacing this exact part. Customers can rate how easy the repair was to complete and how long it took. We aggregate this data to provide a repair rating that allows customers to quickly determine the difficulty and time needed to perform their own repair.