eReplacementParts.com
877-346-4815
Powermate Parts

Diode 0034843.01

OEM part for: Powermate

Part Number: 0034843.01


Install
Videos!
Diode - 0034843.01:Powermate 360 View
Diode - 0034843.01:PowermateDiode - 0034843.01:PowermateDiode - 0034843.01:Powermate 360 View
In Stock
Order within the next 6 hours and your part ships today!
Easy 30-60 minutes (5 rated repairs)?
OEM: Original Equipment Manufacturer ?
Powermate
Does this d-block d-md-none fit my product?

Product Description ?

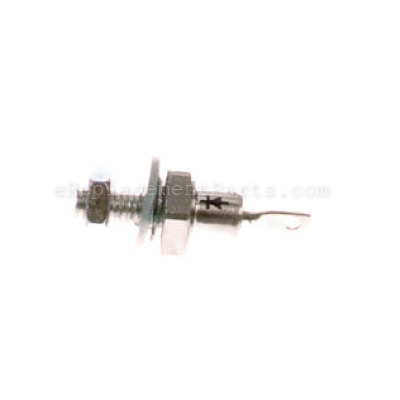
This diode in your generator is an electrical one-way valve, converting alternating current (AC) into direct current (DC) for a stable and reliable power output. It is usually positioned near the stator and endbell. If the diode malfunctions or gets damaged, you might notice issues like inconsistent power output or voltage fluctuations when using electrical devices. A simple multimeter test can determine its functionality, where a proper diode should allow current in one direction and block it in the other. If it fails the test or shows signs of damage, replacement is recommended. For replacement, remove the rear power cover. Carefully detach the old diodes and cut each wire close to where it was soldered to the diodes. Strip about a quarter-inch of insulation from both wire ends and solder them to new diodes. Reattach the new diodes to the power cover. While performing the replacement, you can also add grease to the roller bearing and clean the area where the brushes make contact on the armature. Finally, replace the old carbon brushes with new ones, ensure all wires are properly connected, and reinstall the power cover onto the generator body. It is important to note that this OEM replacement part is sold separately from the carbon brushes, the capacitor, and any accompanying hardware.

  • Classification: Part
  • Weight: 0.02 lbs.
  • Shipping: Ships Worldwide

Frequently Purchased Together ?

Compatibility

This part will fit the following 99 machines

Powermate

PM0545005 Generator View Diagrams & Manuals
PM0545402 Generator View Diagrams & Manuals
PM0557501 Generator View Diagrams & Manuals
PM0558023.01 Generator View Diagrams & Manuals
PMC523202 Generator View Diagrams & Manuals
PL0542200 Generator View Diagrams & Manuals
PL0544000 Generator View Diagrams & Manuals
PL0544200 Generator View Diagrams & Manuals
PL0544302 Generator View Diagrams & Manuals
PL0545305 Generator View Diagrams & Manuals
PL0545000 Generator View Diagrams & Manuals
PL0563505 Generator View Diagrams & Manuals
PM0542000 Generator View Diagrams & Manuals
PM0542200 Generator View Diagrams & Manuals
PM0544000 Generator View Diagrams & Manuals
PM0544003 Generator View Diagrams & Manuals
PM0544020 Generator View Diagrams & Manuals
PM0544200 Generator View Diagrams & Manuals
PM0544302.01 Generator View Diagrams & Manuals
PM0544502 Generator View Diagrams & Manuals
PM0545000 Generator View Diagrams & Manuals
PM0545303 Generator View Diagrams & Manuals
PM0545305 Generator View Diagrams & Manuals
PM0545323 Generator View Diagrams & Manuals
PM0563503 Generator View Diagrams & Manuals
PM0563505 Generator View Diagrams & Manuals
PM0474203 Generator View Diagrams & Manuals
PM0474603.01 Generator View Diagrams & Manuals
PM0477022 Generator View Diagrams & Manuals
PM0478022 Generator View Diagrams & Manuals
PM0463300 Generator View Diagrams & Manuals
PM0476503.17 Generator View Diagrams & Manuals
PM0476504 Generator View Diagrams & Manuals
PM0495501.01 Generator View Diagrams & Manuals
PM0495501.17 Generator View Diagrams & Manuals
PM0495502 Generator View Diagrams & Manuals
PM0496504.17 Generator View Diagrams & Manuals
PM0496504.18 Generator View Diagrams & Manuals
PM0508622 Generator View Diagrams & Manuals
PM0524000.01 Generator View Diagrams & Manuals
PM0524000 Generator View Diagrams & Manuals
PM0525002 Generator View Diagrams & Manuals
PM0525202.02 Generator View Diagrams & Manuals
PM0525202.03 Generator View Diagrams & Manuals
PM0454024 Generator View Diagrams & Manuals
PM0454025 Generator View Diagrams & Manuals
PM0455024 Generator View Diagrams & Manuals
PM0455025 Generator View Diagrams & Manuals
PM0473003 Generator View Diagrams & Manuals
PM0473503 Generator View Diagrams & Manuals
PM0474603 Generator View Diagrams & Manuals
PM0475003 Generator View Diagrams & Manuals
PM0477023 Generator View Diagrams & Manuals
PM0502500 Generator View Diagrams & Manuals
PM0503300 Generator View Diagrams & Manuals
PM0504202 Generator View Diagrams & Manuals
PM0504222 Generator View Diagrams & Manuals
PM0504602 Generator View Diagrams & Manuals
PM0524020 Generator View Diagrams & Manuals
PM0524202 Generator View Diagrams & Manuals
PM0524302 Generator View Diagrams & Manuals
PM0524604 Generator View Diagrams & Manuals
PM0524702 Generator View Diagrams & Manuals
PM0525000 Generator View Diagrams & Manuals
PM0525020 Generator View Diagrams & Manuals
PM0525302 Generator View Diagrams & Manuals
PM0525402.17 Generator View Diagrams & Manuals
PM0525402 Generator View Diagrams & Manuals
PM0534502 Generator View Diagrams & Manuals
PM0535202.02 Generator View Diagrams & Manuals
PM0535202.04 Generator View Diagrams & Manuals
PM0536503.17 Generator View Diagrams & Manuals
PM0558023 Generator View Diagrams & Manuals
PM0505602 Generator View Diagrams & Manuals
PM0505622 Generator View Diagrams & Manuals
PM0522000 Generator View Diagrams & Manuals
PM0555523 Generator View Diagrams & Manuals
PM0557523.9 Generator View Diagrams & Manuals
PM0535202.01 Generator View Diagrams & Manuals
PC0464500 Generator View Diagrams & Manuals
PC049650317 Generator View Diagrams & Manuals
PC049650318 Generator View Diagrams & Manuals
PC049650417 Generator View Diagrams & Manuals
PC049650418 Generator View Diagrams & Manuals
PC052530205 Generator View Diagrams & Manuals
PC053520202 Generator View Diagrams & Manuals
PC0545007 Generator View Diagrams & Manuals
PC0545009 Generator View Diagrams & Manuals
PC055552301 Generator View Diagrams & Manuals
PC05575238 Generator View Diagrams & Manuals
PL0473503 Generator View Diagrams & Manuals
PL0477023 Gen Vantage 7kw Ic La Generator View Diagrams & Manuals
PL049650417 Generator View Diagrams & Manuals
PL052320217 Generator View Diagrams & Manuals
PL0524302 Generator View Diagrams & Manuals
PL0524604 Generator View Diagrams & Manuals
PL052520202 Generator View Diagrams & Manuals
PL053520202 Generator View Diagrams & Manuals
PL0563503 Generator View Diagrams & Manuals
Show More Compatible Models
Don't see yours? Try searching our site for :

This item works with the following types of products:

  • Generator Parts

This part replaces obsolete part #: 003484301SRV

Customer Part Reviews ?

2.5
Average Rating (out of 5):
2 Reviews
Click to filter by ratings:
5 stars
0
4 stars
1
3 stars
0
2 stars
0
1 stars
1
  • Highest Rating
  • Most Recent
< PREV
  • 1
NEXT >
  • Necessary part to help clean up sine waves
    Since two are required for my Coleman generator. One is for the negative sine wave and the other is for the positive sine wave. Along with the capacitor, it helps clean up the power output so it can replicate your power you receive your supplier. It is time to service the generator side of my generator. My generator is not giving any trouble and still works nearly as good as it did when it was new 20 years ago. Since I have to take the end bell off my generator to service the bearing, that would the best time to do some preventive maintenance on it. The exact part(s) are very necessary to keep electrical output problems from occurring. Thanks to ereplacementparts.com for having the parts I needed to complete my service on my generator.
    Guest - July 11, 2019 Verified Purchase
    Electrically opposite diode from what I needed.......
    Found another supplier that had this model of diodes mixed in with older stock. They were able to pick through and get me the ones I needed. The part number on the package was the same for both models of diodes. The only way to tell was to look at the polarity symbol on each diode.
    Guest - August 4, 2019 Verified Purchase
    t
    t
    t - t days ago Verified Purchase
    eReplacementParts Team
    t

    Questions & Answers ?

    Our customer Service team is at the ready daily to answer your part and product questions.

    photo of team member
    Ask our Team

    We have a dedicated staff with decades of collective experience in helping customers just like you purchase parts to repair their products.

    Does this fit my product?

    Questions & Answers for Diode


    No questions have been asked yet

    Customer Repair Instructions ?

    All our customer repair instructions are solicited directly from other customers just like you who have purchased and replaced this exact part.

    Easy 30-60 minutes (5 rated repairs)?

    Coleman Powermate Generator Model 542000 stopped making 110v power

    Louis - August 12, 2016
    👍 10 of 10 people found this instruction helpful
    Tool Type

    Generator

    Difficulty

    Easy

    Time

    30-60 minutes

    Tools Used

    Screwdriver, Socket set, soldering gun and solder

    Removed generator rear power cover with #11 socket wrench and #11 box end wrench "4 bolts"
    Removed both diodes with small socket wrench and snipped each wire close to diodes solder connection. "Diodes are threaded through bottom of power cover"
    Stripped about 1/4 inch from both wire ends and soldered to both new diodes and installed the new diodes back onto the power cover with the original nuts.
    While the cover was off added grease to the roller bearing and cleaned the smooth area where the brushes make contact on the exposed armature.
    with a small flat blade screwdriver, removed both old brushes at the front side of the power cover and replaced with new ones.
    Be sure that (all wires are firmly attached to their connections) and reinstalled the power cover to the generator body.
    This has repaired the loss of power production for this Generator.
    Did you find this story helpful?
    Thanks for voting and helping fellow customers!

    Wasn't generating electricity

    steve - May 10, 2018
    👍 3 of 3 people found this instruction helpful
    Tool Type

    Generator

    Difficulty

    Easy

    Time

    30-60 minutes

    Tools Used

    Socket set, Wrench Set

    Removed the front of the winding housing and replaced the old diodes. Work great now.
    Did you find this story helpful?
    Thanks for voting and helping fellow customers!

    No output unless field windings were externally excited at every use

    roy - October 14, 2016
    👍 2 of 2 people found this instruction helpful
    Tool Type

    Generator

    Difficulty

    Easy

    Time

    15-30 minutes

    Tools Used

    Socket set, Wrench Set, soldering gun

    I have been a industrial maintenance person for more years than I care to admit. Having a basic idea of how a generator works, I took my Milwaukee plug in drill and coupled it nose to nose with my Dewalt 18 volt battery drill using the hex of a screw driving bit. with the Milwaukee plugged into the generator and After generator was started, drive the Milwaukee with the Dewalt momentarily squeeze the Milwaukee to excite the field. Generator would function until you turned it off. Disassemble the end bell reviled both diodes burnt off at the connecting wire. My ohm meter verified both diodes were open. A search found replacement parts sight with new ones very reasonable. was a obvious replacement task. after installing the 2 drill operation was required one more time. Unit puts out power upon startup as it should now. Out of curiosity I checked voltage at the brushes while the unit was running and producing. The field current was 116 volts dc. The diodes were there for the dc part. I am assuming the capacitor just stores enough current to start the field initially after shut down. Oh well she works like a champ with the parts I obtained from this sight
    Did you find this story helpful?
    Thanks for voting and helping fellow customers!

    Diodes

    Richard - June 3, 2018
    👍 1 of 1 people found this instruction helpful
    Tool Type

    Generator

    Difficulty

    Easy

    Time

    15-30 minutes

    Tools Used

    Socket set, Wrench

    Removed the four 7/16 Bolts remove the cover from the end remove wires replaced diodes repeated same process.
    Did you find this story helpful?
    Thanks for voting and helping fellow customers!

    Generator wasn't working due to drowning.

    Allen - December 26, 2015
    👍 2 of 3 people found this instruction helpful
    Tool Type

    Generator

    Difficulty

    Medium

    Time

    30-60 minutes

    Tools Used

    Screwdriver, Socket set, Wrench Set

    Tested outlets. No power.
    Removed end plate from generator.
    Looked at brushes, worn but ok.
    Tested diodes. Both were bad.
    Attempted to order parts from original manufacturer, Not available.
    Thought of ereplacement parts.
    They didn't have them either, but put on back-order.
    Received parts in two weeks.
    Installed, but still no power.
    Arced the brushes briefly with 6 volt current.
    Tested outlets with multimeter.
    Beautiful 120 volt output, just as required.
    Plugged in electric tools to verify.
    Good as new.

    Did you find this story helpful?
    Thanks for voting and helping fellow customers!

    OEM stands for Original Equipment Manufacturer and means the part you’re buying is sourced directly from the manufacturer who made your product. At eReplacementParts, we sell only genuine OEM parts, guaranteeing the part you’re purchasing is of better design and of higher quality than aftermarket parts.

    Our product descriptions are a combination of data sourced directly from the manufacturers who made your product as well as content researched and curated by our content & customer service teams. This content is edited and reviewed internally before being made public to customers.

    Our customer service team are at the ready daily to answer your part and product questions. We have a dedicated staff with decades of collective experience in helping customers just like you purchase parts to repair their products.

    All our part reviews are solicited directly from other customers who have purchased this exact part. While we moderate these reviews for profanity, offensive language or personally identifiable information, these reviews are posted exactly as submitted and no alterations are made by our team.

    All our customer repair instructions are solicited directly from other customers just like you who have purchased and replaced this exact part. While we moderate these reviews for profanity, offensive language or personally identifiable information, these reviews are posted exactly as submitted and no alterations are made by our team.

    Based on data from past customer purchasing behaviors, these parts are most commonly purchased together along with the part you are viewing. These parts may be necessary or helpful to replace to complete your current repair.

    All our installation videos are created and produced in collaboration with our in-house repair technician, Mark Sodja, who has helped millions of eReplacementParts customers over the last 13 years repair their products. Mark has years of experience in selling and repairing both commercial and residential products with a specialty in gas-powered equipment.

    This data is collected from customers who submitted a repair instruction after replacing this exact part. Customers can rate how easy the repair was to complete and how long it took. We aggregate this data to provide a repair rating that allows customers to quickly determine the difficulty and time needed to perform their own repair.

    eReplacementParts.com
    7174 South 400 West
    Suite 5
    Midvale, UT 84047
    visa mastercard discover american express PayPal