


• This cord guard is a genuine Makita replacement part and is sold individually.
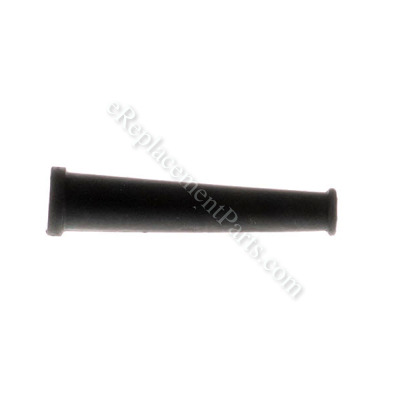
• Cord guards, also called cord protectors, are designed to slide onto your cord and fit securely at the end, where it’s firm rubber will protect the base of the cord from getting bent and pinched, which can expose the wires and become a safety hazard.
• This cord guard will fit cords for the tools listed under the “Compatible Tools” listing. It is not guaranteed to fit any other cords.
Cord Guard 682503-2
OEM part for: Makita
Part Number: 682503-2
$3.99
In Stock
Jump To:
Product Description ?
- Classification: Part
- Weight: 0.01 lbs.
- Shipping: Ships Worldwide
Frequently Purchased Together ?


Compatibility
This part will fit the following 48 machines
Makita
9227C Sander View Diagrams & Manuals
9005BZ Grinder View Diagrams & Manuals
6906 Impact Wrench View Diagrams & Manuals
LS0711Z Miter Saw View Diagrams & Manuals
9005B Grinder View Diagrams & Manuals
HR2010 Rotary Hammer View Diagrams & Manuals
JN1601 Nibbler View Diagrams & Manuals
JR3020 Reciprocating Saw View Diagrams & Manuals
PC1100 Concrete Planer View Diagrams & Manuals
DA6300 Angle Drill View Diagrams & Manuals
HK1810 Scraper View Diagrams & Manuals
HM0810B Demolition Hammer View Diagrams & Manuals
HK0500 Scraper View Diagrams & Manuals
HM1211B Demolition Hammer View Diagrams & Manuals
HR2511 Rotary Hammer View Diagrams & Manuals
HR3851 Rotary Hammer View Diagrams & Manuals
JR3030 Recirocating Saw View Diagrams & Manuals
906H Die Grinder View Diagrams & Manuals
JR3030T Reciprocating Saw View Diagrams & Manuals
410 Dust Collector View Diagrams & Manuals
9404 Belt Sander View Diagrams & Manuals
9902 Belt Sander View Diagrams & Manuals
9903 Belt Sander View Diagrams & Manuals
9920 Belt Sander View Diagrams & Manuals
1002BA Curved Base Planer View Diagrams & Manuals
5044B Circular Saw View Diagrams & Manuals
HM1211 Demolition Hammer View Diagrams & Manuals
HR1821 Rotary Hammer View Diagrams & Manuals
LS0714 Four Pole Slide Compound Miter Saw View Diagrams & Manuals
4131 Metal Cutting Saw View Diagrams & Manuals
9227CY Sander / Polisher View Diagrams & Manuals
3601B Router View Diagrams & Manuals
DA6301 1/2" Angle Drill View Diagrams & Manuals
UH6570 25" Electric Hedge Trimmer View Diagrams & Manuals
UH5570 22-Inch Electric Hedge Trimmer View Diagrams & Manuals
HT-365 25-Inch Electric Hedge Trimmer View Diagrams & Manuals
3600H Misc View Diagrams & Manuals
4100NH3ZX Saw View Diagrams & Manuals
5044KB Saw View Diagrams & Manuals
9105 Grinder View Diagrams & Manuals
9227C (Type 2) Sander View Diagrams & Manuals
9227CZ (Type 2) Sander View Diagrams & Manuals
DA6300 (Type 2) Drill View Diagrams & Manuals
HM0810 Misc View Diagrams & Manuals
HR3850B Misc View Diagrams & Manuals
JN3201 Misc View Diagrams & Manuals
JS3201 Misc View Diagrams & Manuals
SR2300 Saw View Diagrams & Manuals
Show More Compatible Models
This item works with the following types of products:
- Sander Parts
- Grinder Parts
- Impact Wrench Parts
- Miter Saw Parts
- Saw Parts
- Rotary Hammer Parts
- Nibbler Parts
- Reciprocating Saw Parts
- Planer Parts
- Drill Parts
- Demolition Hammer Parts
- Circular Saw Parts
- Pole Saw Parts
- Polisher Parts
- Router Parts
- Hedge Trimmer Parts
- Trimmer Parts
Repair Videos ?
Watch the Repair Video for
Cord Guard

Articles:
|
Step-by-step instructions for removing and installing the cord protector on your Makita power scraper....
July 02, 2018
|

Customer Part Reviews ?
Average Rating (out of 5):
Click to filter by ratings:
5 stars
3
4 stars
0
3 stars
0
2 stars
0
1 stars
0
< PREV
- 1
Perfect fit. Easy to install.
Perfect fit. Easy to install.
Guest -
May 31, 2023
Verified Purchase
Exact fit.
Very good quality
Ramon -
October 30, 2020
Verified Purchase
Makita
Parts worked great, thanks
Guest -
May 16, 2020
Verified Purchase
t
t
t -
t days ago
Verified Purchase
eReplacementParts Team
t
Questions & Answers ?
Our customer Service team is at the ready daily to answer your part and product questions.

Ask our Team
We have a dedicated staff with decades of collective experience in helping customers just like you purchase parts to repair their products.
Does this fit my product?Questions & Answers for Cord Guard
No questions have been asked yet
Customer Repair Instructions ?
All our customer repair instructions are solicited directly from other customers just like you who have purchased and replaced this exact part.
old and needed a few parts refreshed
Travis - January 1, 2021
Tool Type
Drill
Difficulty
Easy
Time
15-30 minutes
Tools Used
Screwdriver, Pliers, Power Drill, wire strippers
replaced all items above that I check marked
Did you find this story helpful?
Thanks for voting and helping fellow customers!
No longer had electricity going to drill motor
Peter - October 1, 2020
Tool Type
Electric Drill
Difficulty
Easy
Time
15-30 minutes
Tools Used
Screwdriver, Pliers, wire connectors, wire strippers
Removed drill handle (containing switch) from drill body
Identified wiring scheme
Cut each wire pair, but left some of the departing plug wire attached to the switch wires to ensure correct rewiring with new plug.
After double checking correct wiring pair, cut off the rest of old cord wire on each pair and stripped the two connecting wires
Crimped connected each new cord wire to the correct drill switch wire
Packed wires carefully into drill handle and installed the 6 screws to reattach switch handle to drill body
Did you find this story helpful?
Thanks for voting and helping fellow customers!
Cord broken and frayed
Rick - February 23, 2018
Tool Type
Grinder
Difficulty
Easy
Time
Less than 15 minutes
Tools Used
Screwdriver, Pliers, Wire cutter
Parts Used
1. Took screws out of handle to split handle in half.
2. Unscrewed old cord connections and measured against new cord.
3. Cut to length and crimped on new fasteners.
4. Attached new fasteners to connections and replaced handle.
2. Unscrewed old cord connections and measured against new cord.
3. Cut to length and crimped on new fasteners.
4. Attached new fasteners to connections and replaced handle.
Did you find this story helpful?
Thanks for voting and helping fellow customers!
Trigger lock on my grinder is visibly broken. Also replace cracked electrical cord.
Barry - December 17, 2017
Tool Type
Grinder
Difficulty
Easy
Time
Less than 15 minutes
Tools Used
Screwdriver, #2 Phillips & Torx 25 tools
Parts Used
I removed 5 screws to remove cover. Remove 2 screws that hold down the cord to the other side of the cover. Remove 2 screws that hold the electrical clips on the trigger, slide the new cord guard onto the new power cord.Replace old cord by installing the new electrical cord and attaching the 2 electrical clips to the new trigger. Attach the 2 screws that hold down the electrical cord to the cover. Align the electrical cords to fit so they will not interfere with placement of the other side of the cover. Install the 5 screws and I am done.
Did you find this story helpful?
Thanks for voting and helping fellow customers!
Replace cord on grinder 15 year old Makita 9005 B grinder, my favorite grinder
Wayne - October 29, 2017
Tool Type
Grinder
Difficulty
Easy
Time
15-30 minutes
Tools Used
Screwdriver, Pliers, Pliers, crimping tool
Parts Used
Removed side panel removed cord, by unscrewing it from switch. Then crimped on 2 wire terminals and the screwed the cord to the switch. Slid on cord guard. Screwed side panel back on. job done, the 9005 B Makita grinder is easy to repair . Wayne T.
Did you find this story helpful?
Thanks for voting and helping fellow customers!
Sander was intermittent in operation.
Scott - October 12, 2017
Tool Type
Sander
Difficulty
Easy
Time
15-30 minutes
Tools Used
Screwdriver, Wire stripper
1. Opened up the case.
2. Disconnected the old cord.
3. Removed insulation on the new cord.
4. Installed the new cord.
5. Closed the case.
2. Disconnected the old cord.
3. Removed insulation on the new cord.
4. Installed the new cord.
5. Closed the case.
Did you find this story helpful?
Thanks for voting and helping fellow customers!
The cord was bad and the handle was broken.
Mabrey - July 1, 2017
Tool Type
Grinder
Difficulty
Easy
Time
15-30 minutes
Tools Used
Screwdriver
Parts Used
1. Removed screws from the handle assembly.
2. Removed the old cord.
3. Replaced the cord guard and the new cord onto the switch.
4. Installed the switch and the cord into the handle half.
5. Screwed the other half of the handle to the first half.
6. Installed the complete handle assembly to the grinder.
2. Removed the old cord.
3. Replaced the cord guard and the new cord onto the switch.
4. Installed the switch and the cord into the handle half.
5. Screwed the other half of the handle to the first half.
6. Installed the complete handle assembly to the grinder.
Did you find this story helpful?
Thanks for voting and helping fellow customers!
Cord old and cracked. Replaced brushes as a matter of general principle while apart
John - January 3, 2017
Tool Type
Grinder
Difficulty
Easy
Time
15-30 minutes
Tools Used
Screwdriver, Eyelets for end of wires and crimp tool
Parts Used
1. Unscrew handle housing from motor housing
2. Separate handle housing
3. Remove cord and boot
4. Install electrical eyelets on new cord for connection to switch.
5. Install cord
6. Assemble housing.
7. Remove brush cap screws and install new brushes (very easy) (can be done with out disassembly of housings)
2. Separate handle housing
3. Remove cord and boot
4. Install electrical eyelets on new cord for connection to switch.
5. Install cord
6. Assemble housing.
7. Remove brush cap screws and install new brushes (very easy) (can be done with out disassembly of housings)
Did you find this story helpful?
Thanks for voting and helping fellow customers!
Brushes wore out. Cord wore out.
Trey - December 23, 2016
Tool Type
Grinder
Difficulty
Easy
Time
15-30 minutes
Tools Used
Screwdriver, Pliers, Wire stripper and crimpers. Small pick
Parts Used
1. Remove screws on right side of handle.
2. Remove clamp (2 screws) holding cord. Note orientation for cord guard and power cord
3. Remove two screws connecting power cord
4. Place cord guard over new power cord, crimp on ring terminals, reinstall in reverse order.
Replace carbon brushes
1. Remove brush retainer caps
2. Use small pic to ease out brush, note orientation, replace with new brush kit CB-124, replace retaining caps
3. Inspect overall condition of grinder, if all is good, plug in and test.
Did you find this story helpful?
Thanks for voting and helping fellow customers!
OEM stands for Original Equipment Manufacturer and means the part you’re buying is sourced directly from the manufacturer who made your product. At eReplacementParts, we sell only genuine OEM parts, guaranteeing the part you’re purchasing is of better design and of higher quality than aftermarket parts.
Our product descriptions are a combination of data sourced directly from the manufacturers who made your product as well as content researched and curated by our content & customer service teams. This content is edited and reviewed internally before being made public to customers.
Our customer service team are at the ready daily to answer your part and product questions. We have a dedicated staff with decades of collective experience in helping customers just like you purchase parts to repair their products.
All our part reviews are solicited directly from other customers who have purchased this exact part. While we moderate these reviews for profanity, offensive language or personally identifiable information, these reviews are posted exactly as submitted and no alterations are made by our team.
All our customer repair instructions are solicited directly from other customers just like you who have purchased and replaced this exact part. While we moderate these reviews for profanity, offensive language or personally identifiable information, these reviews are posted exactly as submitted and no alterations are made by our team.
Based on data from past customer purchasing behaviors, these parts are most commonly purchased together along with the part you are viewing. These parts may be necessary or helpful to replace to complete your current repair.
All our installation videos are created and produced in collaboration with our in-house repair technician, Mark Sodja, who has helped millions of eReplacementParts customers over the last 13 years repair their products. Mark has years of experience in selling and repairing both commercial and residential products with a specialty in gas-powered equipment.
This data is collected from customers who submitted a repair instruction after replacing this exact part. Customers can rate how easy the repair was to complete and how long it took. We aggregate this data to provide a repair rating that allows customers to quickly determine the difficulty and time needed to perform their own repair.