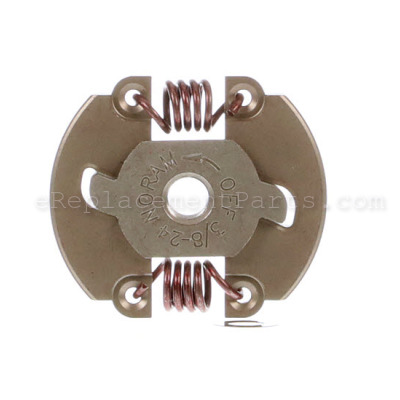


Clutch With Washer 753-1238
Part Number: 753-1238
Order within the next 9 hours
and your part ships today!
and your part ships today!
Product Information
Description:
| This is a genuine item that is supplied by the original equipment manufacturer for use with trimmers. The metal clutch goes between the clutch drum and the clutch washer. It helps to spin the cutting head and the flex shaft. It may require a screwdriver and a hammer for installation. This clutch is available as an individual replacement part and comes with a washer. |
Frequently Purchased With


Compatibility
the 131 compatible machines
This part is compatible with the following machines:
Ryobi
510r (21AK510G034) Tiller
510r (21BK515G034) Tiller
650r (41AN650G034) Handheld Trimmer
825r (41AD825A034) Handheld Trimmer
825r (41AD825A734) Handheld Trimmer
825r (41CD825A034) Handheld Trimmer
875r (41AD875A034) Handheld Trimmer
875r (41AD875A734) Handheld Trimmer
510r (21BK515G034) Tiller
650r (41AN650G034) Handheld Trimmer
825r (41AD825A034) Handheld Trimmer
825r (41AD825A734) Handheld Trimmer
825r (41CD825A034) Handheld Trimmer
875r (41AD875A034) Handheld Trimmer
875r (41AD875A734) Handheld Trimmer
875r (41BD875A034) Handheld Trimmer
875r (41CD875A034) Handheld Trimmer
890 (41CD890A034) Handheld Trimmer
890r (41AD890A034) Handheld Trimmer
890r (41AD890A734) Handheld Trimmer
890r (41BD890A034) Handheld Trimmer
890r (41CD890A034) Handheld Trimmer
890r (41CD890G034) Handheld Trimmer
875r (41CD875A034) Handheld Trimmer
890 (41CD890A034) Handheld Trimmer
890r (41AD890A034) Handheld Trimmer
890r (41AD890A734) Handheld Trimmer
890r (41BD890A034) Handheld Trimmer
890r (41CD890A034) Handheld Trimmer
890r (41CD890G034) Handheld Trimmer
MTD
MP425 (41AD425C095) String Trimmer
MP425 (41BD425C995) String Trimmer
MP426CS (41AD426G995) String Trimmer
MTD14421AA144R978 (2009) Tiller
MP475 (41AD475C095) String Trimmer
41AD26OG900 Handheld Trimmer
41AD26CC900 Handheld Trimmer
41AD26SC900 Handheld Trimmer
41BD26SC900 Handheld Trimmer
41CD26SC900 Handheld Trimmer
875R (2004) Gas Trimmer 41AD875A734
650R (41AN650G034) Trimmer
825R (41AD825A034) Trimmer
825R (41AD825A734 2004) Trimmer
825R (41CD825A034) Trimmer
875R (41AD875A034) Trimmer
875R (41CD875A034) Trimmer
875R (41BD875A034) Trimmer
890 (41CD890A034 2004) Trimmer
890R (41AD890A034) Trimmer
890R (41AD890A734 2004) Trimmer
890R (41BD890A034) Trimmer
890R (41CD890A034) Trimmer
890R (41CD890G034) Trimmer
21AA144R978 (2009) Tiller
Troy-Bilt
21AT144R766 (2004) Tiller/Edger
21AT144R766 (2005) Tiller/Edger
21AT144R966 (2005) Tiller/Edger
21BA144R966 (2007) TB144 Cultivator
21BA144R966 (2008) TB144 Cultivator
21CA144R966 (2009) TB144 Cultivator
21AA144R966 (2006) TB144 Cultivator
TB26CO (41AD26OG966) Gas Trimmer
TB26TB (41ADT2BC066) Gas Trimmer
TB26TB (41ADT2BC966) Gas Trimmer
TB415CS (41BDT41G966) Gas Trimmer
TB475SS (41ADT47C711) Gas Trimmer
TB475SS (41ADT47C766) Gas Trimmer
TB475SS (41ADT47C966) Gas Trimmer
TB475SS (41BDT47C063) Gas Trimmer
TB490BC (41ADT49C063) Gas Trimmer
TB490BC (41ADT49C711) Gas Trimmer
TB490BC (41ADT49C966) Gas Trimmer
TB490BC (41BDT49C063) Gas Trimmer
TB490BC (41BDT49C966) Gas Trimmer
TB514CS (41ADT51G966) Gas Trimmer
TB525CS (41ADT52C711) Gas Trimmer
TB525CS (41BDT52C966) Gas Trimmer
TB525CS (Horse)(41ADT52C966) Gas Trimmer
TB525ET (41ADT5EC966) Gas Trimmer
TB575SS (41ADT57C711) Gas Trimmer
TB575SS (Big Red)(41ADT57C966) Gas Trimmer
TB590BC (41ADT59C711) Gas Trimmer
TB590BC (41ADT59C966) Gas Trimmer
TB425CS (41ADT42C063) Gas Trimmer
TB425CS (41ADT42C711) Gas Trimmer
TB425CS (41ADT42C766) Gas Trimmer
TB425CS (41ADT42C966) Gas Trimmer
TB475SS (41ADT47C063) Gas Trimmer
21BA144R966 (TB144) (2009) Cultivator
21CA144R966 (TB144) (2009) Cultivator
TB146EC (21AK146G966) (2010) Tiller
TB539ES (41CDT53C966) 4-Cycle Gas Trimmer
TB539ES (41DDT53C966) 4-Cycle Gas Trimmer
TB525ES (41DDT52C966) Trimmer
TB575SS (41BDT57C966) Trimmer
TB539E Trimmer
21AK146G966 (TB146EC) Tiller
41ADT52C966 (TB525CS) Horse Horse Handheld Gas Trimmer
41ADT57C966 (TB575SS) Big Red Big Red Handheld Gas Trimmer
25B-304-766 (TBE304) Edger
25B-516-766 (TB516EC)(2018) Edger
Yard Man
YM141 (21A-141R901) Tiller
YM21SS (41AD26SC701) Trimmer
YM26CO (41AD26OG701) Trimmer
YM26SS (41AD26SC401) Trimmer
YM26SS (41AD26SC901) Trimmer
YM26BC (41AD26BC401) Trimmer
YM26BC (41AD26BC701) Trimmer
YM26BC (41AD26BC901) Trimmer
YM21SS (41AD26SC701) Trimmer
YM26CO (41AD26OG701) Trimmer
YM26SS (41AD26SC401) Trimmer
YM26SS (41AD26SC901) Trimmer
YM26BC (41AD26BC401) Trimmer
YM26BC (41AD26BC701) Trimmer
YM26BC (41AD26BC901) Trimmer
YM26CO (41AD26OG401) Trimmer
YM26CO (41AD26OG901) Trimmer
YM26CS (41AD26CC401) Trimmer
YM26CS (41AD26CC701) Trimmer
YM26CS (41AD26CC901) Trimmer
YM21SS 41ad26sc701 Gas String Trimmer
YM260CO 41ad26og701 Gas String Trimmer
YM141 21a-141r901 Tiller
YM26CO (41AD26OG901) Trimmer
YM26CS (41AD26CC401) Trimmer
YM26CS (41AD26CC701) Trimmer
YM26CS (41AD26CC901) Trimmer
YM21SS 41ad26sc701 Gas String Trimmer
YM260CO 41ad26og701 Gas String Trimmer
YM141 21a-141r901 Tiller
Bolens
Cub Cadet
CC4025 (41ADC42C712) (2005) Gas String Trimmer
CC4075 (41ADC47C712) Gas String Trimmer
CC4090 (41ADC49C712) (2005) Gas String Trimmer
CC4025 (41ADC42C712) (2006) Gas String Trimmer
CC5075SS (41AD575C910) (2006) Gas String Trimmer
CC5090BC (41AD590C910) (2006) Gas String Trimmer
CC4125 (41ADC42C912) (2007) Gas String Trimmer
CC4175 (41ADC47C912) (2007) Gas String Trimmer
CC5075SS (41AD575C910) (2007) Gas String Trimmer
CC5090BC (41AD590C910) (2007) Gas String Trimmer
CC4125 (41ADC42C912) (2008) Gas String Trimmer
CC4175 (41BDC47C712) (2008) Gas String Trimmer
CC5075SS (41AD575C912) (2008) Gas String Trimmer
CC5090BC (41AD590C912, 41AD590C710, 41AD590C910) (2008) Gas String Trimmer
CC4125 (41BDC42C712) (2009) Gas String Trimmer
CC4175 (41BDC47C712) (2009) 41BDC47C Gas String Trimmer
CC5090BC (41AD590C910) (2009) Gas String Trimmer
GC145 (21BK145G912) (2010) 21BK145G Tiller
CC4175 (41BDC47C912, 41BDC47C709) (2010) 41BDC47C Gas String Trimmer
CC5090 (41AD590C910, 41AD590C709) (2010) 41AD590C Gas String Trimmer
GC145 (21BK145G912) (2011) 21BK145G Tiller
ST4125 (41BDC42C912) (2011) 41BDC42C Gas String Trimmer
ST4175 (41CDC47C912) (2011) 41CDC47C912 Gas String Trimmer
Products Compatibility
This item works with the following types of products:
- • Cultivator
- • Edger
- • Trimmer
Repair Guides
![]()

Watch the Repair Video for
Clutch With Washer

Articles:
|
This article explains how to remove the clutch from most line and string trimmers. Tips are provided for removing tricky...
October 21, 2009
|

|
Step-by-step instructions for removing and installing the clutch on your Troy-Bilt trimmer....
July 30, 2018
|

Questions & Answers for Clutch With Washer
No questions have been asked yet
Repair Instructions: Submitted by Customers Like You
11 of 15 people found this instruction helpful
Tool Type:
Trimmer
Repair Difficulty:
Medium
Time Spent Repairing:
30-60 minutes
Tools Used:
Screwdriver, Hammer
Worn out clutch drum and clutch
Removed the spark plug, then inserted a length of rope into the cylinder with a few inches remaining outside of the cylinder. This is to stop the engine from rotating when removing the drum and clutch. Then remove the clutch cover. Insert a torx driver into the clutch drum and remove it. The use a screwdriver and hammer to hit the edge of the clutch to loosen it from the shaft. Remove the clutch and install the new one. Then install the new clutch drum and clutch cover. Then remove the rope from the cylinder and replace the spark plug
Did you find this story helpful?
Thanks for voting and helping fellow customers!
1 of 1 people found this instruction helpful
Tool Type:
Trimmer
Repair Difficulty:
Medium
Time Spent Repairing:
15-30 minutes
Tools Used:
Screwdriver, Power Drill, Socket set, Wrench Set, Nutdriver
Clutch spring broken. Boom wire broken
I took off the boom, clutch housing, unscrew the bolt in the center of the clutch drum. Then, with a hammer and a drift released the clutch by hitting it counter-clockwise. I had to tap the hole in the boom so that I could screw bake the throttle control and shut off switch.
Did you find this story helpful?
Thanks for voting and helping fellow customers!
Tool Type:
Edger
Repair Difficulty:
Easy
Time Spent Repairing:
15-30 minutes
Tools Used:
Screwdriver, Torx screwdriver
Clutch came apart and dug into the starter pull rope housing and melted housing plastic.
Installed new cover. Attached all screws.
Then the spacer.
Attached to mower frame.
Attached clutch (have to put rope in cylinder so you can tighten screw)
Attached clutch cover.
Then all parts to finish, idler pulley, belt, drive pulley, covers, blade bearings and blade.
Need to take notes, or pictures or place parts in order how you took them off to get it al back in order and with the right screws.
Did you find this story helpful?
Thanks for voting and helping fellow customers!
Tool Type:
Trimmer
Parts Used:
Repair Difficulty:
Medium
Time Spent Repairing:
30-60 minutes
Tools Used:
Power Drill, Torx driver, parachute cord
Clutch failed..string was always spinning, even at idle
I watched your YouTube video and did it exactly as you showed.
Disassemble shaft
Remove clutch cover
Remove spark plug
Shoved a bunch of parachute cord into the head thru the spark plug hole to stop the cylinder from moving..make sure to leave enough to pull it out when you are done.
Unscrew clutch cover using torx driver
Unscrew clutch from shaft..( this is where you need the parachute cord in the cylinder)
Screw new clutch on.
Screw clutch cover on
Reassemble shaft, and clutch guard
Put spark plug and wire back on.
That's it.
My clutch spring was broke
Did you find this story helpful?
Thanks for voting and helping fellow customers!
Tool Type:
Trimmer
Parts Used:
Repair Difficulty:
Easy
Time Spent Repairing:
15-30 minutes
Tools Used:
Socket set, Torx bits
Clutch was broken
Followed the supplied directions on how to remove and install the new clutch.
I had two problems. One, aligning the drive shafts, that took several tries. The second problem, I some how managed to break the gas line. I had to order a new line. Replacing the gas line seemed harder than replacing the clutch. I also took the carburetor apart and cleaned it. I really did not know what I was doing. But, I did not have anything to loose.
My normal mechanic said the trimmer was not worth repairing. It has been in the garage for years, waiting on me to try to repair. I am glad I did not listen to the repair man. The trimmer worked like a charm.
Did you find this story helpful?
Thanks for voting and helping fellow customers!
Tool Type:
Trimmer
Repair Difficulty:
Easy
Time Spent Repairing:
15-30 minutes
Tools Used:
Screwdriver
Trimmer head not spinning
I followed the instructions others had posted above and the repair could not have been easer. Saved my 4-cycle trimmer for less than $100 and that including buying a full set of torx screwdrivers (because why only buy the one you need!).
Did you find this story helpful?
Thanks for voting and helping fellow customers!
Reviews
8 Reviews
Average Rating (out of 5):
Click to filter by ratings:
5 stars
8
4 stars
0
3 stars
0
2 stars
0
1 stars
0
< PREV
- 1
Successful Repair
Really appreciate the informative diagnostic info provided to repair the slipping weedwhacker. Part arrived quickly, and was easy to install with the on line instruction video. Thanks!
Guest -
January 30, 2021
Verified Purchase
Very satisfied!
Part was exactly as ordered and was the same as original part. Shipping was fast even with COVID 19 delays. Very satisfied!
Guest -
May 19, 2020
Verified Purchase
Great service
I’ve been receiving excellent service and parts spot-on from y’all for many years now. I’ve repeatedly told my friends about the service and site they have been telling others.
Your magnets are a great reminder to call E-Replacement first.
Thanks 😊
Guest -
May 1, 2020
Verified Purchase
Perfect
Arrived in time and worked perfectly
Guest -
April 23, 2020
Verified Purchase
Replacement clutch
Item was a direct replacement. Installation was as easy as described. Machine is like new again. Price was fair. A+
Guest -
September 17, 2019
Verified Purchase
Weed whacker clutch
Worked great running like a charm thankyou
Guest -
July 20, 2019
Verified Purchase
Every part was as described , thumbs up
Easy repair, smooth fix, parts were not that expensive as compared to a new trimmer thanks great job
Guest -
July 10, 2019
Verified Purchase
Exactly what I ordered
Product was well described with accurate picture. Fast shipping and reasonable prices.
Guest -
June 5, 2019
Verified Purchase
Verified Purchase
eReplacementParts Team
< PREV
- 1
Product Information
Repair Guides
![]()
Watch the Repair Video for
Clutch With Washer
Articles:
|
This article explains how to remove the clutch from most line and string trimmers. Tips are provided for removing tricky...
October 21, 2009
|
|
Step-by-step instructions for removing and installing the clutch on your Troy-Bilt trimmer....
July 30, 2018
|