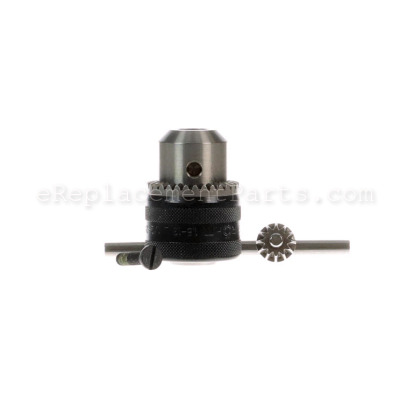
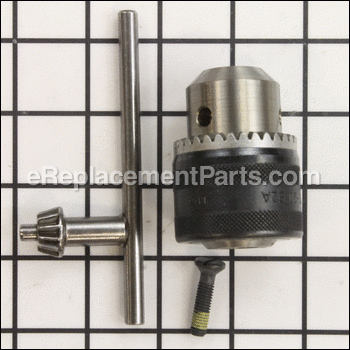
This is an authentic OEM sourced replacement part which is specially designed for use with Milwaukee electric drills. It can be used on reversing drills of matching capacities and threaded spindles. The chuck allows a user to secure a drill bit. The ratcheting action clicks the jaws tightly into place for reduced bit slippage. If your drill's bit retention is suffering, the rotation feels stiff, or the chuck has seized up entirely, a new chuck should fix the problem. This high-quality component is made of durable metal and is sold individually. Keep in mind it includes the screw to secure it and the #48-66-2110 Chuck Key that allows you to tighten and loosen the jaws. Note, this keyed chuck has a 1/2 inch capacity with a 1/2 inch - 20 thread.
Chuck 48-66-5185
OEM part for: Milwaukee
Part Number: 48-66-5185
Jump To:
Product Description ?
- 1/2 in. capacity, keyed chuck
- 1/2 in. - 20 thread
- Chuck key included
- Classification: Accessory
- Weight: 0.90 lbs.
- Shipping: Ships Worldwide
Frequently Purchased Together ?
Compatibility
This part will fit the following 7 machines
Milwaukee
This item works with the following types of products:
- Drill Parts
- Electric Drill Parts
- Hammer Drill Parts
Repair Videos ?
|
This article explains steps for how to remove threaded-on chucks and taper-fit drill chucks, as well as steps for removi...
September 18, 2009
|
|
Broken gearboxes and sticky chuck screws can make removing a drill chuck difficult. This article explains the tricks you...
August 12, 2010
|
Customer Part Reviews ?
- 1
Questions & Answers ?
Our customer Service team is at the ready daily to answer your part and product questions.

Ask our Team
We have a dedicated staff with decades of collective experience in helping customers just like you purchase parts to repair their products.
Does this fit my product?Questions & Answers for Chuck
Customer Repair Instructions ?
All our customer repair instructions are solicited directly from other customers just like you who have purchased and replaced this exact part.
Broken chuck
Tool Type
Hammer Drill
Difficulty
Easy
Time
Less than 15 minutes
Tools Used
Screwdriver, Allen wrench, and hammer
Parts Used
Chuck needed replace, would not tighten
Tool Type
Hammer Drill
Difficulty
Easy
Time
15-30 minutes
Tools Used
Screwdriver, 1/2 inch allen wrench, rubber hammer
Parts Used
Then put an allen wrench in Chuck and hit
with hammer, and removed the Chuck.
Put new Chuck on .
The chuck on my half inch hammer would not open all the way
Tool Type
Electric Drill
Difficulty
Easy
Time
15-30 minutes
Tools Used
Screwdriver
Parts Used
Broken gear ring
Tool Type
Hammer Drill
Difficulty
Medium
Time
Less than 15 minutes
Tools Used
Screwdriver, Cut off wheel
Jammed chuck
Tool Type
Hammer Drill
Difficulty
Medium
Time
15-30 minutes
Tools Used
Screwdriver, Pliers, Slip joint pliars
Threaded on new chuck and inserted the left handed screw
The bit came lose when drilling.
Tool Type
Hammer Drill
Difficulty
Easy
Time
Less than 15 minutes
Tools Used
Screwdriver, Allen key, table vise, hammer.
Parts Used
chuck was broke
Tool Type
Hammer Drill
Difficulty
Easy
Time
15-30 minutes
Tools Used
Screwdriver, Wrench Set
Parts Used
screw
CHUCK WORN OUT
Tool Type
Hammer Drill
Difficulty
Easy
Time
Less than 15 minutes
Tools Used
Screwdriver, Wrench Set, VISE
Parts Used
No variable speed control. Chuck gear ring broken.
Tool Type
Hammer Drill
Difficulty
Easy
Time
15-30 minutes
Tools Used
Screwdriver, Allen wrench to remove chuck. Wrench to hold motor from spin
Parts Used
Remove machine screw from inside church (reverse thread), using 1/4" screwdriver.
Tighten chuck onto Allen wrench. Strike Allen wrench sharply with light hammer to loosen Chuck (regular threaded).
Reverse procedure to reassemble.
To replace switch
Remove screws (phillips) holding body halves together, ( one screw is located underneath rubber palm cushion.
Remove 4 torx screws holding gear head to body.
Pry body halves apart.
Note position of wires.
Remove wires by inserting small pick in slot to release wire.
Replace wires.
Reverse procedure to reassemble.
Chuck was worn out.
Tool Type
Hammer Drill
Difficulty
Medium
Time
Less than 15 minutes
Tools Used
Screwdriver, Wrench Set, A punch and a rubber mallet
Parts Used
2. Broke the old chuck loose with a mallet and punch to remove it.
3. Screwed on the new chuck.
4. Put in the new retaining screw and tightened it.
OEM stands for Original Equipment Manufacturer and means the part you’re buying is sourced directly from the manufacturer who made your product. At eReplacementParts, we sell only genuine OEM parts, guaranteeing the part you’re purchasing is of better design and of higher quality than aftermarket parts.
Our product descriptions are a combination of data sourced directly from the manufacturers who made your product as well as content researched and curated by our content & customer service teams. This content is edited and reviewed internally before being made public to customers.
Our customer service team are at the ready daily to answer your part and product questions. We have a dedicated staff with decades of collective experience in helping customers just like you purchase parts to repair their products.
All our part reviews are solicited directly from other customers who have purchased this exact part. While we moderate these reviews for profanity, offensive language or personally identifiable information, these reviews are posted exactly as submitted and no alterations are made by our team.
All our customer repair instructions are solicited directly from other customers just like you who have purchased and replaced this exact part. While we moderate these reviews for profanity, offensive language or personally identifiable information, these reviews are posted exactly as submitted and no alterations are made by our team.
Based on data from past customer purchasing behaviors, these parts are most commonly purchased together along with the part you are viewing. These parts may be necessary or helpful to replace to complete your current repair.
All our installation videos are created and produced in collaboration with our in-house repair technician, Mark Sodja, who has helped millions of eReplacementParts customers over the last 13 years repair their products. Mark has years of experience in selling and repairing both commercial and residential products with a specialty in gas-powered equipment.
This data is collected from customers who submitted a repair instruction after replacing this exact part. Customers can rate how easy the repair was to complete and how long it took. We aggregate this data to provide a repair rating that allows customers to quickly determine the difficulty and time needed to perform their own repair.


