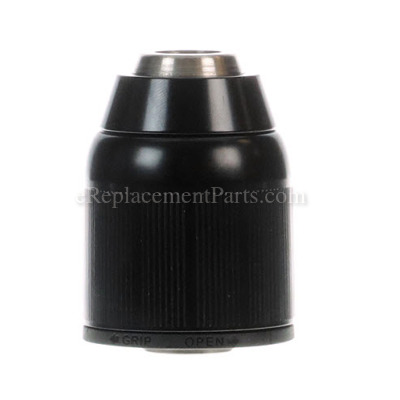


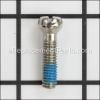
This drill chuck assembly is specially designed for use with Milwaukee compact driver drills. Its purpose is to secure drill bits. It is a keyless chuck that allows for quick and easy bit swap. The ratcheting action clicks the jaws tightly into place for reduced bit slippage. If your drill's bit retention is suffering, the rotation feels stiff, or the chuck has seized up entirely, a new chuck should fix the problem. Please note the screw used to secure this chuck it is sold separately.
To complete this simple repair you should only need a screwdriver.
• Make sure the unit is unplugged
• Remove the chuck retaining screw
• Remove old chuck and secure the new one
• Tighten the chuck retaining screw
• Test the tool
Chuck Assembly 42-66-0900
OEM part for: Milwaukee
Part Number: 42-66-0900
$33.50
In Stock
Jump To:
Product Description ?
- Classification: Part
- Weight: 0.57 lbs.
- Shipping: Ships Worldwide
Frequently Purchased Together ?
Compatibility
This part will fit the following 8 machines
Milwaukee
2601-20 (SER B28A) 1/2" Compact Driver Drill View Diagrams & Manuals
2601-22 (SER B28A) 1/2" Compact Driver Drill View Diagrams & Manuals
2601-20 (B28B) 1/2" Compact Driver Drill View Diagrams & Manuals
2601-20 (B28C) 1/2" Compact Driver Drill View Diagrams & Manuals
2601-20 (SER B28D) 1/2" Compact Driver Drill View Diagrams & Manuals
2601-059 (SER D36A) 1/2" Compact Driver Drill View Diagrams & Manuals
2601-059 (SER D36C) 1/2" Compact Driver Drill View Diagrams & Manuals
2601-21 1/2" Compact Driver Drill View Diagrams & Manuals
Show More Compatible Models
This item works with the following types of products:
- Drill Parts
This part replaces obsolete part #: 48-66-1275
Repair Videos ?


Articles:
|
This article explains steps for how to remove threaded-on chucks and taper-fit drill chucks, as well as steps for removi...
September 18, 2009
|

|
Broken gearboxes and sticky chuck screws can make removing a drill chuck difficult. This article explains the tricks you...
August 12, 2010
|

Customer Part Reviews ?
Average Rating (out of 5):
Click to filter by ratings:
5 stars
7
4 stars
0
3 stars
0
2 stars
0
1 stars
0
< PREV
- 1
Easy, inexpensive fix
Part arrived in a few days and was easy to install. Works great!!
Guest -
March 14, 2024
Verified Purchase
Perfect fit
Customer service is very helpful. Exactly what I needed in finding my needs..
Support is a perfect fit.
Guest -
May 29, 2023
Verified Purchase
Great part, fit like the original.
Drill chuck was an easy repair, and solved my problem. Drill like new again!!
Guest -
April 15, 2022
Verified Purchase
The part was great, the video even better
The part was perfect and arrived quickly. The replacement process was a bit complicated but the site's video was step by step, had great tips, and countered misinformation on other repair video sites.
Guest -
September 8, 2021
Verified Purchase
EASY ORDER, GOOD REPAIR AND RECEIVED FAST
BRAND NEW CONDITION AND MADE MY DRILL LIKE NEW
Guest -
August 21, 2020
Verified Purchase
Milwaukee drill chuck replacement
My old drill cruck jammed and I could not fix it. I watched your YouTube video on how to replace a drill chuck and it looked easy. The.replacement chuck you sent it to me appears to be an original Milwaukee part, and removing the old chuck and installing the new one was as easy as it looked on the video. Your price was competitive, and the cruck arrived on the predicted date. Life is good.
Guest -
July 29, 2019
Verified Purchase
worked as expected
arrived on time a, fit perfectly
Guest -
April 22, 2019
Verified Purchase
t
t
t -
t days ago
Verified Purchase
eReplacementParts Team
t
Questions & Answers ?
Our customer Service team is at the ready daily to answer your part and product questions.

Ask our Team
We have a dedicated staff with decades of collective experience in helping customers just like you purchase parts to repair their products.
Does this fit my product?Questions & Answers for Chuck Assembly
No questions have been asked yet
Customer Repair Instructions ?
All our customer repair instructions are solicited directly from other customers just like you who have purchased and replaced this exact part.
The chuck don't close very well
Francisco - January 31, 2016
👍 6 of 6 people found this instruction helpful
Tool Type
Cordless Drill
Difficulty
Easy
Time
15-30 minutes
Tools Used
Screwdriver, Allen wrench, hammer
Parts Used
I watched the ereplacement video on You Tube. It made replacing the chuck much easier than I though it would be. I copied it for those that need to see it.
https://www.youtube.com/watch?v=usC8unA5RiA
https://www.youtube.com/watch?v=usC8unA5RiA
Did you find this story helpful?
Thanks for voting and helping fellow customers!
Serations inside chuck were worn out allowing drill bits to stop while drilling
Melvin - September 30, 2022
Tool Type
Cordless Drill
Difficulty
Easy
Time
15-30 minutes
Tools Used
Screwdriver, allen wrench
Parts Used
I first removed the screw that was at the bottom of the drill chuck. Which is a left handed thread. I then took a 3/8th allen wrench and put the short end where the drill bit would normally go. I then took a rubber mallot and hit the long end of the allen wrench to break the drill chuck loose. The threads on the chuck are right handed. It broke loose and all I had to do is unscrew it. The only other thing I did was put locktite on the screw I took out and put the left handed screw back in. It works fine now. Just to clarify the left handed screw is removed from the center of the drill chuck with the chuck opened all the way and the screw takes a large phillips screwdriver to remove it
Did you find this story helpful?
Thanks for voting and helping fellow customers!
The chuck broke internally and had to be replaced.
Vernon - July 16, 2022
Tool Type
Cordless Drill
Difficulty
Easy
Time
Less than 15 minutes
Tools Used
Screwdriver, Adjustable Wrench
Parts Used
I followed the ereplacement video and unscrewed the old chuck and screwed on the new. The video was very helpful.
Did you find this story helpful?
Thanks for voting and helping fellow customers!
Chuck would not turn
Richard - October 9, 2019
Tool Type
Cordless Drill
Difficulty
Medium
Time
30-60 minutes
Tools Used
Screwdriver, Power Drill, Socket set, Wrench Set
Had to drill out screw that held chuck
Did you find this story helpful?
Thanks for voting and helping fellow customers!
Chuck screw broke
Michael - August 30, 2019
Tool Type
Cordless Drill
Difficulty
Easy
Time
Less than 15 minutes
Tools Used
Screwdriver
Removed old chuck screw, replaced the chuck and screw and all is well.
Did you find this story helpful?
Thanks for voting and helping fellow customers!
broken sleeve,bad chuck assemly
THANH - May 3, 2019
Tool Type
Impact Driver
Difficulty
Easy
Time
Less than 15 minutes
Tools Used
Power Drill
Parts Used
removed old one and put the new one. Less than 10 min., done
Did you find this story helpful?
Thanks for voting and helping fellow customers!
Chuck Assembly was wobbling, Brush Card Assembly was bad it was smoking, added bit holder and belt hook
Jeremy - February 14, 2018
Tool Type
Cordless Drill
Difficulty
Easy
Time
15-30 minutes
Tools Used
Screwdriver, Allen wrench and hammer soldering gun
Removed Chuck Assembly screw with screwdriver and put allen wrench in Chuck Assembly put drill in low gear smacked allen wrench with hammer Chuck Assembly came right off.
Removed back of drill for Brush Card Assembly then opened drill shell unsoldered two wires from trigger soldered in the two wires on the new Brush Card Assembly reassembled drill shell put new Chuck Assembly on in reverse order, added Belt Hook with one Pan Head Screw and bit holder with one Pan Head Screw.
Removed back of drill for Brush Card Assembly then opened drill shell unsoldered two wires from trigger soldered in the two wires on the new Brush Card Assembly reassembled drill shell put new Chuck Assembly on in reverse order, added Belt Hook with one Pan Head Screw and bit holder with one Pan Head Screw.
Did you find this story helpful?
Thanks for voting and helping fellow customers!
Chuck hard to turn
Fred - November 18, 2017
Tool Type
Cordless Drill
Difficulty
Easy
Time
30-60 minutes
Tools Used
Screwdriver, Adjustable Wrench, Channel lock, large Allen wrench
Parts Used
Clamped drill to worktable. Used large channel locks to open sticky chuck. Removed left hand threaded screw (right to loosen) from inside chuck opening. Used channel lock pliers to lock a large allen wrench in chuck. Used adjustable wrench to grab allen wrench and unscrew chuck. Install new chuck.
Did you find this story helpful?
Thanks for voting and helping fellow customers!
The chuck wouldn't tighten past halfway down.
Leslie - January 26, 2017
Tool Type
Cordless Drill
Difficulty
Easy
Time
Less than 15 minutes
Tools Used
Power Drill, Allen Wrench, Hammer
1. Secure the drill in a vice.
2. Unscrew the retaining Phillips screw located inside the chuck by gently using the impact drill. The screw is left handed.
3. Secure an 3/8" Allen wrench in the chuck.
4. Quickly hit the Allen wrench and the chuck unscrewed from the drill.
5. Screw the new chuck on the drill.
6. Tighten the left handed screw securely inside the chuck.
7. Job completed.
Did you find this story helpful?
Thanks for voting and helping fellow customers!
Chuck was bad
Ernie - July 12, 2016
Tool Type
Cordless Drill
Difficulty
Easy
Time
Less than 15 minutes
Tools Used
Screwdriver, Large allen wrench
1. Removed reverse thread lock screw
2. Used large Allen wrench to break chuck loose
3. Reversed process to install new chuck
2. Used large Allen wrench to break chuck loose
3. Reversed process to install new chuck
Did you find this story helpful?
Thanks for voting and helping fellow customers!
Load More Install Stories
OEM stands for Original Equipment Manufacturer and means the part you’re buying is sourced directly from the manufacturer who made your product. At eReplacementParts, we sell only genuine OEM parts, guaranteeing the part you’re purchasing is of better design and of higher quality than aftermarket parts.
Our product descriptions are a combination of data sourced directly from the manufacturers who made your product as well as content researched and curated by our content & customer service teams. This content is edited and reviewed internally before being made public to customers.
Our customer service team are at the ready daily to answer your part and product questions. We have a dedicated staff with decades of collective experience in helping customers just like you purchase parts to repair their products.
All our part reviews are solicited directly from other customers who have purchased this exact part. While we moderate these reviews for profanity, offensive language or personally identifiable information, these reviews are posted exactly as submitted and no alterations are made by our team.
All our customer repair instructions are solicited directly from other customers just like you who have purchased and replaced this exact part. While we moderate these reviews for profanity, offensive language or personally identifiable information, these reviews are posted exactly as submitted and no alterations are made by our team.
Based on data from past customer purchasing behaviors, these parts are most commonly purchased together along with the part you are viewing. These parts may be necessary or helpful to replace to complete your current repair.
All our installation videos are created and produced in collaboration with our in-house repair technician, Mark Sodja, who has helped millions of eReplacementParts customers over the last 13 years repair their products. Mark has years of experience in selling and repairing both commercial and residential products with a specialty in gas-powered equipment.
This data is collected from customers who submitted a repair instruction after replacing this exact part. Customers can rate how easy the repair was to complete and how long it took. We aggregate this data to provide a repair rating that allows customers to quickly determine the difficulty and time needed to perform their own repair.