

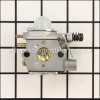
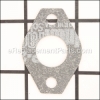
Carburetor O-ring 753-06185
Part Number: 753-06185
Leaves our warehouse within
7 - 12 business days
7 - 12 business days
Product Information
Description:
| This is a manufacturer approved O-Ring designed for lawn and garden equipment. This is the O-Ring that provides an Air Tight seal between Carburetor and Cylinder Head. If doing maintenance on carburetor it is recommended to replace the O-Ring instead of re-using the old one. Over time rings and seals tend to dry out and would no longer provide proper seal compromising engines performance. |
Frequently Purchased With


Compatibility
the 150+ compatible machines
This part is compatible with the following machines:
Bolens
BL110 (41AD110G965) Trimmer
41BD110G965 (BL 110) Handheld String Trimmer
41BD160G965 (BL 160) Handheld String Trimmer
BL160 (41AD160G965) Trimmer
BL160 (41BD160G965) Trimmer
41BD110G965 (BL 110) Handheld String Trimmer
41BD160G965 (BL 160) Handheld String Trimmer
BL160 (41AD160G965) Trimmer
BL160 (41BD160G965) Trimmer
MTD
41AD160G965 Handheld Trimmer
41AD251G900 Handheld Trimmer
41AD260G900 Handheld Trimmer
MS2550 (41ADZ20C768) Trimmer
MS2550 (41BDZ20C768) Trimmer
M2510 (41ADZ03C758) 2-Cycle Gas Trimmer
M2500 (41ADZ01C758,) Gas Trimmer
MS2560 (41BDZ22C768) Gas String Trimmer
BL110 41CD120G965 Gas String Trimmer
BL160 41CD170G965 Gas String Trimmer
21AK125G799 (316.240320)(2012) Tiller
21AK125G799 (316.240320)(2014) Tiller
41AS99MS799 Blower
41BS2BVG799 Blower
41BS2HBC799 Blower
41ADZ34C799 Trimmer
41ADZ50C799 Trimmer
41ADZ51C799 Trimmer
41AD322C799 Trimmer
41AD326C799 Trimmer
41AD330C799 Trimmer
41AD336C799 Trimmer
41AD380C799 Trimmer
41AD386C799 Trimmer
41AD396C799 Trimmer
41AD730C799 Trimmer
41AD780C799 Trimmer
41ADY20C799 Trimmer
41ADY22C799 Trimmer
41ADY23C799 Trimmer
41ADY24C799 Trimmer
41ADZ11G799 Trimmer
41ADZ12G799 Trimmer
41ADZ14C799 Trimmer
41ADZ20C799 Trimmer
41ADZ20C899 (C459) Trimmer
41ADZ22C799 Trimmer
41ADZ23C799 Trimmer
41ADZ24C799 Trimmer
41ADZ2CC799 (316.794450)(2012) Trimmer
41ADZ32C799 Trimmer
Troy-Bilt
TB80EC (41ADT80C966) Trimmer
TB32EC (41ADZ32C766) Trimmer
TB32EC (41ADZ33C766) Trimmer
TB32EC (41BDZ32C766) Trimmer
TB32EC (41ADZ32C766) Trimmer
TB32EC (41ADZ33C766) Trimmer
TB32EC (41BDZ32C766) Trimmer
Craftsman
41AS2BVG799 2-Cycle 27Cc Handheld Blower/Vac W/Speed Start
316711200 Trimmer
316711020 Trimmer
316791020 Trimmer
316795860 Trimmer
316711021 Trimmer
316711022 Trimmer
316711170 Trimmer
316711190 Trimmer
316711191 Trimmer
316711201 Trimmer
316711370 Trimmer
316711470 Trimmer
316711471 Trimmer
316791080 Trimmer
316791081 Trimmer
316990080 Trimmer
31699010 Trimmer
316990110 Trimmer
316715860 Trimmer
316791150 Trimmer
316791151 Trimmer
316791160 Trimmer
316791190 Trimmer
316791191 Trimmer
316791200 Trimmer
316791201 Trimmer
316794450 Trimmer
316795861 Trimmer
316990100 Trimmer
316794720 Blower
316240320 Tiller
316711023 Weedwacker Gas Trimmer
316711171 Trimmer
316711192 Trimmer
316711193 Line Trimmers/weedwackers, Gas
316711202 Weedwacker Gas Trimmer
316711390 Trimmer
316725860 Brushcutter And Trimmer Attachment
316731200 Brush Cutter
316740800 Trimmer
316740820 Trimmer
316740870 Trimmer
316740890 Trimmer
316791600 Blower
316791601 Blower
316791650 Gas Blower
316791770 Blower
316794370 Trimmer
316794460 Trimmer
316794470 Trimmer
Yard Man
YM71SS (41ADY71C901) Trimmer
41BS2BVG901 YM2BV Gas Blower with Vacuum Kit and Bag
41BS2BVG901 YM2BV Gas Blower with Vacuum Kit and Bag
41BS2BVG901 YM2BV Gas Blower with Vacuum Kit and Bag
41BS2BVG901 YM2BV Gas Blower with Vacuum Kit and Bag
Cub Cadet
BC210 (41ADZ22C912) (2012) 41ADZ22C912 Gas String Trimmer
CS202 (41ADZ20C912) (2012) 41ADZ20C912 Gas String Trimmer
BC210 (41ADZ22C912) (2013) 41ADZ22C912 Gas String Trimmer
CC212 (41ADZ21C912) (2013) 41ADZ21C912 Gas String Trimmer
CC212 (41BDZ21C912) (2013) 41BDZ21C912 Gas String Trimmer
CS202 (41ADZ20C912) (2013) 41ADZ20C912 Gas String Trimmer
BC210 (41ADZ22C912) (2014) 41ADZ22C912 Gas String Trimmer
BC280 (41ADZ28C912) (2014) 41ADZ28C912 Gas String Trimmer
SS270 (41ADZ27C912) (2014) 41ADZ27C912 Gas String Trimmer
BC210 (41ADZ22C912) (2015) 41ADZ22C912 Gas String Trimmer
BC280 (41ADZ28C912) (2015) 41ADZ28C912 Gas String Trimmer
SS270 (41ADZ27C812) (2015) 41ADZ27C812 Gas String Trimmer
SS270 (41ADZ27C912) (2015) 41ADZ27C912 Gas String Trimmer
BV228 (2016) 41BS2BVG812 Gas Blower
BV228 (2016) 41CS2BVG812 Gas Blower
Murray
Yard Machines
Products Compatibility
This item works with the following types of products:
- • Blower
- • Trimmer
- • Vacuum
Questions & Answers for Carburetor O-ring
No questions have been asked yet
Repair Instructions: Submitted by Customers Like You
7 of 8 people found this instruction helpful
Tool Type:
Trimmer
Repair Difficulty:
Easy
Time Spent Repairing:
Less than 15 minutes
Tools Used:
Screwdriver, Pliers
Replaced existing carbuertor on a Troy-bilt trimmer.
1) Remove as much of fuel from the fuel tank and fuel lines as possible.
2) Remove the air breather cover and filter element.
3) Remove the two long screws that hold the air breather housing to the carburetor and
trimmer engine head.
4) Using the pliers, carefully use a twisting/pulling action on the two fuel lines that are still
attached to the carburetor to remove them from the carburetor. Pay careful attention to
which port these fuel lines go to.
5) I suggest using new fuel lines as the old ones were brittle and broke or cracked when they were removed from the carburetor. Using your fingers, attach these fuel lines to the new carburetor port as they came off.
6) Place the new carburetor o-ring on the head and carefully seat the carburetor on it, holding the carburetor in place with your fingers.
7) Place the air cleaner gasket on the carburetor and then place the air cleaner housing onto
this gasket. Insert the two long screws through the air cleaner housing, carburetor and into the head. Tighten them making sure you tighten them so as the seat with equal pressure on to the head as to prevent leaks.
8) Add fresh clean fuel, prime the bulb and start it.
Did you find this story helpful?
Thanks for voting and helping fellow customers!
2 of 2 people found this instruction helpful
Tool Type:
Trimmer
Repair Difficulty:
Easy
Time Spent Repairing:
Less than 15 minutes
Tools Used:
Screwdriver
Trimmer would run for 2-3 minutes, low power, little to no throttle response, run only in position 2, then quit running.
Using Screw Driver:
1). Remover air filter cover
2). Removed air filter element
3). Unscrewed two screws holding filter cover and carburetor together.
4). Removed old O-Ring and Gasket.
5). Cleaned and Inspected assembly.
6). Replaced O-Ring and Gaskets
7). Installed both screw through air filet housing and carburetor
8). Threaded screws and torqued to spec.
9). Cleaned and reinstalled filter.
10). Reinstalled filter cover.
11). Started trimmer.
12). Check run in a three positions, power and throttle response. All normal.
Did you find this story helpful?
Thanks for voting and helping fellow customers!
1 of 1 people found this instruction helpful
Tool Type:
Trimmer
Repair Difficulty:
Medium
Time Spent Repairing:
15-30 minutes
Tools Used:
Screwdriver
Out of the box it would only run at almost full choke. It was nearly impossible to start.
1. Removed old carburetor by removing two screws.
2. There are two fuel lines which must be disconnected mark which one goes where.
3. Disconnect the throttle cable remove old carburetor.
4. Remove the old gaskets.
5. Install new gaskets.
6. Reassemble in reverse order.
7. After repair trimmer started without any problem.
8. If you are unsure about doing this repair take pictures of each step so that if you need help you have a record of what you have done.
9. Always purchase any needed gaskets.
Did you find this story helpful?
Thanks for voting and helping fellow customers!
1 of 1 people found this instruction helpful
Tool Type:
Trimmer
Repair Difficulty:
Medium
Time Spent Repairing:
15-30 minutes
Tools Used:
Screwdriver
It would cut off when you gave it gas.
Took old one off and replaced it with the new one. Quick and easy! Make sure to drain the fuel and disconnect the spark plug before starting your repair!
Did you find this story helpful?
Thanks for voting and helping fellow customers!
1 of 1 people found this instruction helpful
Tool Type:
Trimmer
Repair Difficulty:
Medium
Time Spent Repairing:
30-60 minutes
Tools Used:
Screwdriver, Socket set
Weed whacker wouldn't fully start. Would only idle, it would die when turned up.
Removed air filter, removed carburetor screws, replaced seals, replaced carburetor. Reattached screws, reattached air filter.
Did you find this story helpful?
Thanks for voting and helping fellow customers!
Tool Type:
Trimmer
Parts Used:
Repair Difficulty:
Easy
Time Spent Repairing:
15-30 minutes
Tools Used:
Screwdriver, Pliers
Trimmer carb. gasket torn
Remove air filter, carb. empty gas tank, and remove. Replace carb. O-ring, reassemble all parts. Refuel and startup.
Did you find this story helpful?
Thanks for voting and helping fellow customers!
Tool Type:
Trimmer
Parts Used:
Repair Difficulty:
Easy
Time Spent Repairing:
1-2 hours
Tools Used:
Screwdriver, Pliers, Nutdriver, Torx drivers and plug wrench
Changed out the short block. I broke a piston ring.
Used a parts diagram for my trimmer and removed all the pieces then put them back with the diagram as a reference. Timed the coil with a business card.
Did you find this story helpful?
Thanks for voting and helping fellow customers!
Tool Type:
Trimmer
Repair Difficulty:
Medium
Time Spent Repairing:
15-30 minutes
Tools Used:
Screwdriver, Pliers, Adjustable Wrench
Trimmer don't start
Change the sparkplug
Clean the piston
Change the piston rings because one was broken.
Clean the carburator
Clean the piston
Change the piston rings because one was broken.
Clean the carburator
Did you find this story helpful?
Thanks for voting and helping fellow customers!
Tool Type:
Trimmer
Repair Difficulty:
Easy
Time Spent Repairing:
15-30 minutes
Tools Used:
Nutdriver
bad carb.
removed bad carb. replaced with new carb. primed and started and ran right out of the box.
Did you find this story helpful?
Thanks for voting and helping fellow customers!
Tool Type:
Trimmer
Parts Used:
Repair Difficulty:
Easy
Time Spent Repairing:
15-30 minutes
Tools Used:
Screwdriver, Hex keys
Trimmer wouldn't start
1. Removed air filter cover
2. Removed carburetor
3, Cleaned carburetor and replaced O-rings, carburetor gasket and air filter.
4. Replaced spark plug
5. Fresh 40:1 fuel mix added, primed and trimmer started right away.
6. Finely tuned high speed and low speed carb adjustment screws
2. Removed carburetor
3, Cleaned carburetor and replaced O-rings, carburetor gasket and air filter.
4. Replaced spark plug
5. Fresh 40:1 fuel mix added, primed and trimmer started right away.
6. Finely tuned high speed and low speed carb adjustment screws
Did you find this story helpful?
Thanks for voting and helping fellow customers!
show more
Reviews
8 Reviews
Average Rating (out of 5):
Click to filter by ratings:
5 stars
6
4 stars
2
3 stars
0
2 stars
0
1 stars
0
< PREV
- 1
Right part
Worked perfectly
Guest -
July 12, 2022
Verified Purchase
Easy replacement
Fits great! Works great! Runs great!
Thanks
Guest -
October 9, 2021
Verified Purchase
haven't installed yet
I have bought may different parts for both work and home. it was easy to find the parts with the exploited view and made repair simple and cost effective.
I have told many people about your website
Guest -
November 22, 2019
Verified Purchase
Great experience
Just what I wanted in a timely manner.
Guest -
September 9, 2019
Verified Purchase
Great parts - very pleased with the quality!
All the parts I ordered were quality and perfect fits - worked as expected. This is my go to now for replacement parts!!!
Kevin -
September 2, 2019
Verified Purchase
works good and fits perfectly, thanks
The weed eater works great
Guest -
August 8, 2019
Verified Purchase
Easy to work with.
Sent wrong part. Not even close. Was easy to return wrong item but doubled the time to get right part.
Guest -
June 14, 2022
Verified Purchase
Fit perfect, easy repair, inexpensive
Just what I needed. Took a little bit longer to receive than I had originally wanted, but my trimmer is working perfectly again.
Guest -
June 13, 2019
Verified Purchase
Verified Purchase
eReplacementParts Team
< PREV
- 1
Product Information