eReplacementParts.com
877-346-4815
Milwaukee Parts
Repair Parts Home
  
Power Tool Parts
  
Milwaukee Parts
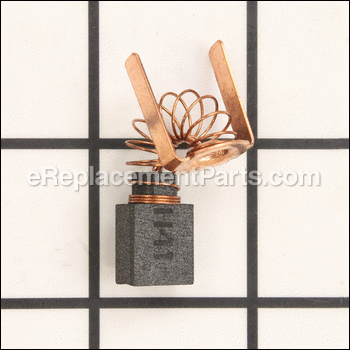
  22-18-0670 Carbon Brush With Spring

Carbon Brush With Spring 22-18-0670

OEM part for: Milwaukee

Part Number: 22-18-0670


Install
Videos!
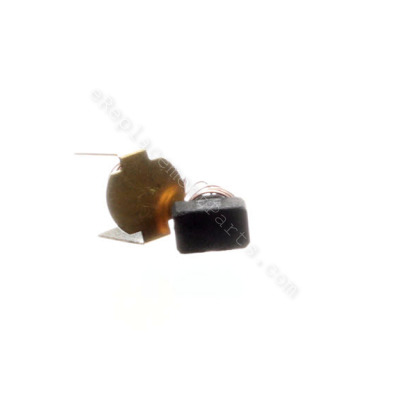
Carbon Brush With Spring - 22-18-0670:Milwaukee 360 View
Carbon Brush With Spring - 22-18-0670:MilwaukeeCarbon Brush With Spring - 22-18-0670:MilwaukeeCarbon Brush With Spring - 22-18-0670:Milwaukee 360 View
In Stock
Order within the next 5 hours and your part ships today!
Medium 30-60 minutes (7 rated repairs)?
OEM: Original Equipment Manufacturer ?
Milwaukee
Does this d-block d-md-none fit my product?

Product Description ?

This is a genuine Milwaukee replacement part, it is sold individually.
2 of these Brushes are required in the tool listed below.
It is always best to replace both brushes, even if only one is worn.

Worn brushes frequently are the cause behind a motor running poorly.
Replacing brushes can fix a motor that’s operating intermittently.
New brushes can restore a motor’s electric braking.

Carbon brushes are one of the most commonly replaced power tool parts. This is because carbon brushes are wear items, meaning that through friction and use they will gradually wear away until they need replacing. Worn brushes are a common causes of intermittent motor function, reduced electric braking and reduced motor power. A worn-out brush will often be worn down near to the wire lead and can be cracked, pitted, or burned. When replacing carbon brushes, be sure to inspect your armature for burns, cracks, or other damage which can indicate larger motor problems.

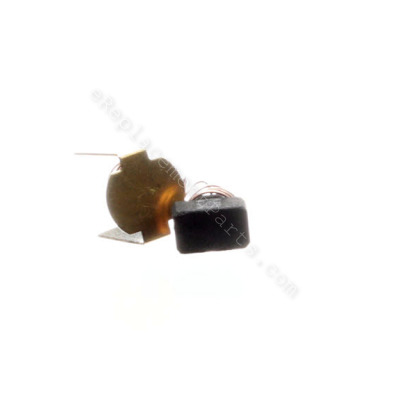
  • Brush: 7/16" x 1/8" x 1/4"nBracket:
  • Classification: Part
  • Weight: 0.01 lbs.
  • Also Known As: Motor Brush With Spring
  • Shipping: Ships Worldwide

Frequently Purchased Together ?

Compatibility

This part will fit the following 51 machines

Milwaukee

4240 (SER 751-1001) Electric Drill View Diagrams & Manuals
4245 (SER 782-1001) Electric Drill View Diagrams & Manuals
4245 (SER 782-2369) Electric Drill View Diagrams & Manuals
6230 (SER 678-26651) 4-3/4 Inch Deep Cut Band Saw View Diagrams & Manuals
6230 (SER 678-31501) 4-3/4 Inch Deep Cut Band Saw View Diagrams & Manuals
6230 (SER 678-32001) 4-3/4 Inch Deep Cut Band Saw View Diagrams & Manuals
6230 (SER 678A) 4-3/4 Inch Deep Cut Band Saw View Diagrams & Manuals
6230 (SER 678B) 4-3/4 Inch Deep Cut Band Saw View Diagrams & Manuals
6230 (SER 678C) 4-3/4 Inch Deep Cut Band Saw View Diagrams & Manuals
6230 (SER 678D) 4-3/4 Inch Deep Cut Band Saw View Diagrams & Manuals
6236 (SER 769-1001) Two Speed Deep Cut Bandsaw View Diagrams & Manuals
6236 (SER 769-1901) Two Speed Deep Cut Bandsaw View Diagrams & Manuals
6236 (SER 769A) Two Speed Deep Cut Bandsaw View Diagrams & Manuals
6236 (SER 769B) Two Speed Deep Cut Bandsaw View Diagrams & Manuals
6236 (SER 769C) Two Speed Deep Cut Bandsaw View Diagrams & Manuals
6236 (SER 769D) Two Speed Deep Cut Bandsaw View Diagrams & Manuals
6236 (SER 769E) Two Speed Deep Cut Bandsaw View Diagrams & Manuals
6236 (SER 769F) Two Speed Deep Cut Bandsaw View Diagrams & Manuals
1675-1 (SER 413-336097) Two Speed Hole Hawg Drill View Diagrams & Manuals
1670-1 (SER 472-23375) Single Speed Hole Hawg Drill View Diagrams & Manuals
1670-1 (SER 472-24725) Single Speed Hole Hawg Drill View Diagrams & Manuals
1670-1 (SER 472-25501) Single Speed Hole Hawg Drill View Diagrams & Manuals
1670-1 (SER 472A) Single Speed Hole Hawg Drill View Diagrams & Manuals
1670-1 (SER 472B) Single Speed Hole Hawg Drill View Diagrams & Manuals
1670-1 (SER 472C) Single Speed Hole Hawg Drill View Diagrams & Manuals
1670-1 (SER 472D) Single Speed Hole Hawg Drill View Diagrams & Manuals
1675-1 (SER 413-314575) Two Speed Hole Hawg Drill View Diagrams & Manuals
1675-1 (SER 413-347251) Two Speed Hole Hawg Drill View Diagrams & Manuals
1675-1 (SER 413A) Two Speed Hole Hawg Drill View Diagrams & Manuals
1675-1 (SER 413B) Two Speed Hole Hawg Drill View Diagrams & Manuals
1675-1 (SER 413C) Two Speed Hole Hawg Drill View Diagrams & Manuals
1675-1 (SER 413D) Two Speed Hole Hawg Drill View Diagrams & Manuals
1678-20 (SER 930A) Electric Drill / Driver View Diagrams & Manuals
1679-01 (SER 915A) Electric Drill / Driver View Diagrams & Manuals
6227 (SER 674A) Bandsaw View Diagrams & Manuals
6225 (SER 457B) Bandsaw View Diagrams & Manuals
6227 (SER 674-23301) Bandsaw View Diagrams & Manuals
6225 (SER 457-222501) Two Speed Band Saw View Diagrams & Manuals
6225 (SER 457-242250) Two Speed Band Saw View Diagrams & Manuals
6225 (SER 457A) Two Speed Band Saw View Diagrams & Manuals
6223 (SER 822A) Band Saw View Diagrams & Manuals
6223 (SER 822B) Band Saw View Diagrams & Manuals
6223 (SER 822C) Band Saw View Diagrams & Manuals
6223 (SER 822D) Band Saw View Diagrams & Manuals
6223 (SER 822E) Band Saw View Diagrams & Manuals
6227 (SER 674-25901) Speed Control Bandsaw View Diagrams & Manuals
6227 (SER 674-27001) Speed Control Bandsaw View Diagrams & Manuals
6227 (SER 674B) Speed Control Bandsaw View Diagrams & Manuals
6227 (SER 674C) Bandsaw View Diagrams & Manuals
1670-1 (SER 472E) Single Speed Hole Hawg Drill View Diagrams & Manuals
1675-1 (SER 413E) Two Speed Hole Hawg Drill View Diagrams & Manuals
Show More Compatible Models
Don't see yours? Try searching our site for :

This item works with the following types of products:

  • Drill Parts
  • Electric Drill Parts
  • Band Saw Parts
  • Saw Parts

Repair Videos ?

Watch the Repair Video for Carbon Brush With Spring
Articles:
Step-by-step instructions for removing and installing the carbon brushes on your Milwaukee Hole Hawg....
March 19, 2018

Customer Part Reviews ?

4.4
Average Rating (out of 5):
5 Reviews
Click to filter by ratings:
5 stars
4
4 stars
0
3 stars
0
2 stars
1
1 stars
0
  • Highest Rating
  • Most Recent
< PREV
  • 1
NEXT >
  • parts as ordered
    good company and great website information for all types of equipment
    Tom - February 11, 2020 Verified Purchase
    Worked fine,easily replaced
    Carbon brush arrived as expected, got my drill up and running quickly, very good experience! Needed to add to an original order,someone helped me and combined the orders, saving on shipping......Very Satisfied!!
    Guest - August 2, 2019 Verified Purchase
    Great part
    We are very pleased with the quality of parts we receive from ereplacement as well as the prompt arrival.
    Michael - May 7, 2019 Verified Purchase
    Fit, Condition, Delivery, Why I bought.
    They are the right ones, undamaged, on time delivery. Bought them so, if mine fail I can immediately get my machine up and running.
    David - May 2, 2019 Verified Purchase
    Patience
    Bought brushes for saw , got wrong ones. Took 10 days WITH expedited shipping. My fault on wrong ones, make sure to order exactly the right ones, still wrong, and takes over a week to get them
    Guest - August 20, 2019 Verified Purchase
    t
    t
    t - t days ago Verified Purchase
    eReplacementParts Team
    t

    Questions & Answers ?

    Our customer Service team is at the ready daily to answer your part and product questions.

    photo of team member
    Ask our Team

    We have a dedicated staff with decades of collective experience in helping customers just like you purchase parts to repair their products.

    Does this fit my product?

    Questions & Answers for Carbon Brush With Spring


    No questions have been asked yet

    Customer Repair Instructions ?

    All our customer repair instructions are solicited directly from other customers just like you who have purchased and replaced this exact part.

    Medium 30-60 minutes (7 rated repairs)?

    the fields in the drill were burn't and the brush holders were melted.

    James - October 24, 2023
    Tool Type

    Electric Drill

    Difficulty

    Medium

    Time

    30-60 minutes

    Tools Used

    Screwdriver, Pliers, torxs set

    The repair is of a milwaukee 1/2" hole hawg.
    1. take handle apart to access the switch and wiring of the fields and brush holders to the switch.
    2. take motor housing rear bonnet off to gain access to fields and brush holders.
    3. remove armature to get access to removing fields.
    4. two screws hold fields in place, removing them and pulling fields from housing noting where field wires go.
    5. you can now take brush holders out. there is a right and a left holder, take note where and the lead that is connected to it.
    6. reverse order to put in new parts and installing brushes.
    7. a lot of times i take pictures to remember where wiring goes and go to manufacturing web site to see exploded view of unit.
    Did you find this story helpful?
    Thanks for voting and helping fellow customers!

    Handle required some modification to fit

    Boehrig - January 27, 2022
    After modifying the handle everything went well.
    Did you find this story helpful?
    Thanks for voting and helping fellow customers!

    Brushes worn out

    Lenny - May 13, 2021
    Tool Type

    Band Saw

    Difficulty

    Easy

    Time

    Less than 15 minutes

    Tools Used

    Screwdriver

    Unplug saw
    Unscrew remove cover for brushes
    Removed old brushes
    Put in new brushes
    Screwed brush cover back on
    Did you find this story helpful?
    Thanks for voting and helping fellow customers!

    Brushes were worn away

    Thomas - December 20, 2019
    Tool Type

    Band Saw

    Difficulty

    Medium

    Time

    30-60 minutes

    Tools Used

    Screwdriver, Sand paper 240 grit

    The brushes that were sent were to wide to
    fit in the brush holders. I had to sand off
    about 1/8” from each side so they would
    fit. Then I had to remove the spring , which
    was too large in diameter and reuse the
    original springs.
    I could not wait to get the right brush-set
    I had a job that needed to be completed.
    The portable band saw works ok.

    Did you find this story helpful?
    Thanks for voting and helping fellow customers!

    Broken case and handle

    Kevin - April 5, 2018
    Followed the very good instructions on the video......step by step, easy........I did have to jump to a different video to figure out the "bushing" replacement in the new case (that should have been mentioned in the case replacement video to make it easier) but it was also easy once I figured it out
    Did you find this story helpful?
    Thanks for voting and helping fellow customers!

    Brush housing got hot and welded together

    DWIGHT - March 16, 2016
    Remove the back cover of the drill, then remove and disconnect the brush holders. Place the new brush holders back in place and connect them. Install back cover of the drill. Install the brushes into the brush holders and screw the new brush caps into the drill housing
    Did you find this story helpful?
    Thanks for voting and helping fellow customers!

    Both, clutches were worn out along with the chuck.

    Todd - November 11, 2015
    Milwaukee Hole Hawg, 413B. Removed the chuck along with the screw in the center. It's reversed threads, tightened up a 3/8 allen wrench in the chuck & hit it with my dead blow hammer. Carefully remove the rear cover, be careful because you need to lift it off and wiggle it evenly straight up. If one of the gears doesn't let loose from the cover just stick your finger in & push down on the gear and pull straight up on the cover until it breaks loose. There's a certain order that everything comes out. Print out the parts sheet so you know what to expect and lay everything out. I carefully cleaned up the parts, removed old grease inside & clean out with solvent.
    Did you find this story helpful?
    Thanks for voting and helping fellow customers!

    OEM stands for Original Equipment Manufacturer and means the part you’re buying is sourced directly from the manufacturer who made your product. At eReplacementParts, we sell only genuine OEM parts, guaranteeing the part you’re purchasing is of better design and of higher quality than aftermarket parts.

    Our product descriptions are a combination of data sourced directly from the manufacturers who made your product as well as content researched and curated by our content & customer service teams. This content is edited and reviewed internally before being made public to customers.

    Our customer service team are at the ready daily to answer your part and product questions. We have a dedicated staff with decades of collective experience in helping customers just like you purchase parts to repair their products.

    All our part reviews are solicited directly from other customers who have purchased this exact part. While we moderate these reviews for profanity, offensive language or personally identifiable information, these reviews are posted exactly as submitted and no alterations are made by our team.

    All our customer repair instructions are solicited directly from other customers just like you who have purchased and replaced this exact part. While we moderate these reviews for profanity, offensive language or personally identifiable information, these reviews are posted exactly as submitted and no alterations are made by our team.

    Based on data from past customer purchasing behaviors, these parts are most commonly purchased together along with the part you are viewing. These parts may be necessary or helpful to replace to complete your current repair.

    All our installation videos are created and produced in collaboration with our in-house repair technician, Mark Sodja, who has helped millions of eReplacementParts customers over the last 13 years repair their products. Mark has years of experience in selling and repairing both commercial and residential products with a specialty in gas-powered equipment.

    This data is collected from customers who submitted a repair instruction after replacing this exact part. Customers can rate how easy the repair was to complete and how long it took. We aggregate this data to provide a repair rating that allows customers to quickly determine the difficulty and time needed to perform their own repair.

    eReplacementParts.com
    7174 South 400 West
    Suite 5
    Midvale, UT 84047
    visa mastercard discover american express PayPal