
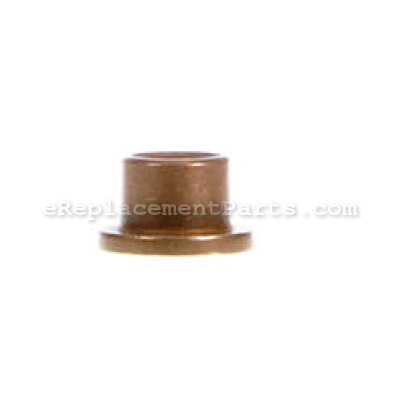


This is an Authentic OEM Sourced replacement part designed for use with Jet Sanders. This part is made out of Metal and it is Sold Separately. Bushing- Oilite helps to secure the Roller and allows it to spin smoothly.
To replace this part you would need Pliers, Screwdriver and a Set of Wrenches.
Oilite Bushing 50-3105
OEM part for: Jet
Part Number: 50-3105
$15.22
Usually ships in 7 - 12 business days
7 - 12 business days
Jump To:
Product Description ?
- Classification: Part
- Weight: 0.02 lbs.
- Shipping: Ships Worldwide
Frequently Purchased Together ?

Compatibility
This part will fit the following 6 machines
Jet
10-20 Plus (628900) Drum Sander View Diagrams & Manuals
16-32 Plus (629004K) Sander View Diagrams & Manuals
22-44 Plus Sander View Diagrams & Manuals
22-44 (Pro 3) Drum Sander View Diagrams & Manuals
22-44OSC Oscillating Drum Sander View Diagrams & Manuals
628900-10-20 62890010-20 Drum Sander Parts View Diagrams & Manuals
Show More Compatible Models
This item works with the following types of products:
- Sander Parts
Customer Part Reviews ?
Average Rating (out of 5):
Click to filter by ratings:
5 stars
6
4 stars
0
3 stars
0
2 stars
0
1 stars
0
< PREV
- 1
Good job
Fit perfect. Thanks
Guest -
August 16, 2023
Verified Purchase
Great parte
Tha was in great conditions
Anonymous -
July 13, 2022
Verified Purchase
Got my parts to fix my jet sander from them
Got it sooner than stated. Terrific experience. They exceeded my expectations.
Chris Larson
Premier Door Services Inc.
Guest -
December 3, 2020
Verified Purchase
glad someone stocks these parts for Jet drum sander
old worn out drum sander needed a few new parts.
Exact fit, no issues.
Guest -
January 29, 2020
Verified Purchase
replaced broken bushing
This bushing was replaced in combination with a bent shaft. Purchased this Jet 16-32 sander at an auction. All fit great and working as it should.
David F. -
August 27, 2019
Verified Purchase
great part, worked great
service was very fast, and everything worked out great
Guest -
July 27, 2019
Verified Purchase
t
t
t -
t days ago
Verified Purchase
eReplacementParts Team
t
Questions & Answers ?
Our customer Service team is at the ready daily to answer your part and product questions.

Ask our Team
We have a dedicated staff with decades of collective experience in helping customers just like you purchase parts to repair their products.
Does this fit my product?Questions & Answers for Oilite Bushing
No questions have been asked yet
Customer Repair Instructions ?
All our customer repair instructions are solicited directly from other customers just like you who have purchased and replaced this exact part.
Oilite bearing wore out on discharge roller on my 10-20 Drum Sander. Basic mechanical skills required.
Victor - March 10, 2016
👍 1 of 1 people found this instruction helpful
Tool Type
Sander
Difficulty
Easy
Time
15-30 minutes
Tools Used
Screwdriver, Wrench Set
Parts Used
Remove roller support arms. Replace Oilite bearings and reassemble.
Did you find this story helpful?
Thanks for voting and helping fellow customers!
Oilite Bushing wore out
clyde - November 22, 2021
Tool Type
Sander
Difficulty
Easy
Time
15-30 minutes
Tools Used
Adjustable Wrench, Small Hammer
Parts Used
removed the bushing and replaced it with the new one.
Did you find this story helpful?
Thanks for voting and helping fellow customers!
Bushing was worn through.
Ronald - September 23, 2021
Tool Type
Sander
Difficulty
Easy
Time
Less than 15 minutes
Tools Used
Socket set
Parts Used
Replaced old bushing with new.
Did you find this story helpful?
Thanks for voting and helping fellow customers!
Original bushing had worn out.
David - December 2, 2019
Tool Type
Sander
Difficulty
Easy
Time
Less than 15 minutes
Tools Used
Socket set
Parts Used
Remove (2) bolts holding the bushing and roller
Remove old bushing and replace with new.
Reassemble bracket, tighten bolts.
Adjust the feed belt tension.
Remove old bushing and replace with new.
Reassemble bracket, tighten bolts.
Adjust the feed belt tension.
Did you find this story helpful?
Thanks for voting and helping fellow customers!
The old bushing was egg shaped from being misaligned.
Mike - August 14, 2019
👍 0 of 1 people found this instruction helpful
Tool Type
Sander
Difficulty
Medium
Time
30-60 minutes
Tools Used
Screwdriver, Wrench Set, Allen wrench
Parts Used
1) Remove the drive belt
2) Loosen alignment screws
3) Remove left and right roller bracket
4) Replace Oilite Bushings located in brackets
5) Reassemble and realign the drive belt.
2) Loosen alignment screws
3) Remove left and right roller bracket
4) Replace Oilite Bushings located in brackets
5) Reassemble and realign the drive belt.
Did you find this story helpful?
Thanks for voting and helping fellow customers!
Polite bushing on conveyer belt roller cracked and needed to be replaced
Randy - December 1, 2018
👍 0 of 1 people found this instruction helpful
Tool Type
Sander
Difficulty
Easy
Time
Less than 15 minutes
Tools Used
Socket set, Wrench Set, Used vise to press new bushing into place.
Parts Used
Removed conveyer belt roller and old bushing then
pressed new bushing into roller bracket. Installed belt and then adjusted belt in all taking about 15 minutes.
pressed new bushing into roller bracket. Installed belt and then adjusted belt in all taking about 15 minutes.
Did you find this story helpful?
Thanks for voting and helping fellow customers!
The original oilite bushing was broken
Paul - September 14, 2018
👍 0 of 1 people found this instruction helpful
Tool Type
Sander
Difficulty
Easy
Time
Less than 15 minutes
Tools Used
Screwdriver
Parts Used
1. Removed the screws so that the tension roller could be removed.
2. Pulled out the broken oilite bushing
3. Installed the new oilite bushing
4. Put the tension roller back.
2. Pulled out the broken oilite bushing
3. Installed the new oilite bushing
4. Put the tension roller back.
Did you find this story helpful?
Thanks for voting and helping fellow customers!
Take up roller bushing worn through.
Christian - May 27, 2018
👍 0 of 1 people found this instruction helpful
Tool Type
Sander
Difficulty
Medium
Time
15-30 minutes
Tools Used
Socket set
Removed and replaced take up roller and brackets. Brackets came with bushings so you don't need to order the bushing if you order the bracket assy.
Did you find this story helpful?
Thanks for voting and helping fellow customers!
Replaced damaged parts of the sander.
Rodney - April 29, 2016
👍 0 of 1 people found this instruction helpful
Tool Type
Sander
Difficulty
Medium
Time
1-2 hours
Tools Used
Screwdriver, Pliers, Socket set, Wrench Set, Nutdriver, Wire cutters, wire strippers
I removed all the damaged parts and replaced them with the newly purchased parts. I used the schematic drawings which made the repair much easier. The machine had to be readjusted so the sander operated properly. All the parts I ordered were shipped together and were packaged to prevent damage during shipment. The parts were exactly what I needed to repair the machine.
Did you find this story helpful?
Thanks for voting and helping fellow customers!
OEM stands for Original Equipment Manufacturer and means the part you’re buying is sourced directly from the manufacturer who made your product. At eReplacementParts, we sell only genuine OEM parts, guaranteeing the part you’re purchasing is of better design and of higher quality than aftermarket parts.
Our product descriptions are a combination of data sourced directly from the manufacturers who made your product as well as content researched and curated by our content & customer service teams. This content is edited and reviewed internally before being made public to customers.
Our customer service team are at the ready daily to answer your part and product questions. We have a dedicated staff with decades of collective experience in helping customers just like you purchase parts to repair their products.
All our part reviews are solicited directly from other customers who have purchased this exact part. While we moderate these reviews for profanity, offensive language or personally identifiable information, these reviews are posted exactly as submitted and no alterations are made by our team.
All our customer repair instructions are solicited directly from other customers just like you who have purchased and replaced this exact part. While we moderate these reviews for profanity, offensive language or personally identifiable information, these reviews are posted exactly as submitted and no alterations are made by our team.
Based on data from past customer purchasing behaviors, these parts are most commonly purchased together along with the part you are viewing. These parts may be necessary or helpful to replace to complete your current repair.
All our installation videos are created and produced in collaboration with our in-house repair technician, Mark Sodja, who has helped millions of eReplacementParts customers over the last 13 years repair their products. Mark has years of experience in selling and repairing both commercial and residential products with a specialty in gas-powered equipment.
This data is collected from customers who submitted a repair instruction after replacing this exact part. Customers can rate how easy the repair was to complete and how long it took. We aggregate this data to provide a repair rating that allows customers to quickly determine the difficulty and time needed to perform their own repair.