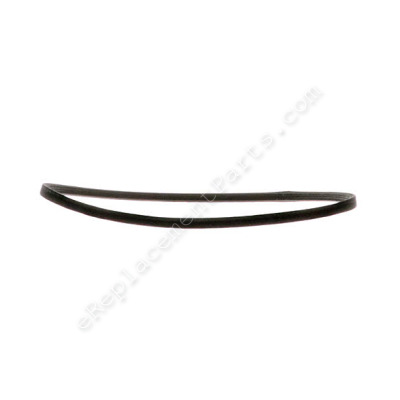


This replacement v-belt is a genuine Toro part. It is supplied directly from original equipment manufacturer for use with walk-behind push lawn mowers. This is the the belt that is attached to the transmission pulley and it helps to drive the unit. It is recommended to clean the pulleys before installing the new belt, this will help to ensure longevity of the new belt. Includes one (1) rubber v-belt per order.
When performing this repair you will need a set of wrenches.
• Remove the belt cover
• Move the belt guard
• Remove the belt
• Install the drive belt
• Reinstall the belt guard
• Reinstall the belt cover
• Adjust the cable and test the mower
Lawn Mower Drive Belt 115-4669
OEM part for: Toro
Part Number: 115-4669
$27.40
In Stock
Jump To:
Product Description ?
- Classification: Part
- Weight: 0.06 lbs.
- Shipping: Ships Worldwide
Frequently Purchased Together ?


Compatibility
This part will fit the following 150 machines
Toro
20332 (290000001-290999999)(2009) Lawn Mower View Diagrams & Manuals
20332 (310000001-310999999)(2010) Lawn Mower View Diagrams & Manuals
20332C (290000001-290999999)(2009) Lawn Mower View Diagrams & Manuals
20332C (310000001-310999999)(2010) Lawn Mower View Diagrams & Manuals
20333 (290000001-290999999)(2009) Lawn Mower View Diagrams & Manuals
20333 (310000001-310999999)(2010) Lawn Mower View Diagrams & Manuals
20333C (310000001-310999999)(2010) Lawn Mower View Diagrams & Manuals
20334 (290000001-290999999)(2009) Lawn Mower View Diagrams & Manuals
20334 (310000001-310999999)(2010) Lawn Mower View Diagrams & Manuals
20334C (290000001-290999999)(2009) Lawn Mower View Diagrams & Manuals
20334C (310000001-310999999)(2010) Lawn Mower View Diagrams & Manuals
20338 (310000001-310999999)(2010) Lawn Mower View Diagrams & Manuals
20352 (290000001-290999999)(2009) Lawn Mower View Diagrams & Manuals
20352 (310000001-310999999)(2010) Lawn Mower View Diagrams & Manuals
20332 (311000001-311999999)(2011) Lawn Mower View Diagrams & Manuals
20332 (312000001 - 312999999) 22in Recycler Lawn Mower View Diagrams & Manuals
20332 (313000001 - 313999999) 22in Recycler Lawn Mower View Diagrams & Manuals
20332 (314000001 - 314200000) 22in Recycler Lawn Mower View Diagrams & Manuals
20332 (314200001 - 314999999) 22in Recycler Lawn Mower View Diagrams & Manuals
20332C (311000001 - 311999999) 22in Recycler Lawn Mower View Diagrams & Manuals
20332C (312000001 - 312999999) 22in Recycler Lawn Mower View Diagrams & Manuals
20332C (313000001 - 313999999) 22in Recycler Lawn Mower View Diagrams & Manuals
20332C (314000001 - 314999999) 22in Recycler Lawn Mower View Diagrams & Manuals
20333 (311000001 - 311999999) 22in Recycler Lawn Mower View Diagrams & Manuals
20333 (312000001 - 312999999) 22in Recycler Lawn Mower View Diagrams & Manuals
20333 (313000001 - 313999999) 22in Recycler Lawn Mower View Diagrams & Manuals
20333 (314000001 - 314200000) 22in Recycler Lawn Mower View Diagrams & Manuals
20333 (314200001 - 314999999) 22in Recycler Lawn Mower View Diagrams & Manuals
20333C (311000001 - 311999999) 22in Recycler Lawn Mower View Diagrams & Manuals
20333C (312000001 - 312999999) 22in Recycler Lawn Mower View Diagrams & Manuals
20334 (311000001 - 311999999) 22in Recycler Lawn Mower View Diagrams & Manuals
20334 (312000001 - 312999999) 22in Recycler Lawn Mower View Diagrams & Manuals
20334 (313000001 - 313999999) 22in Recycler Lawn Mower View Diagrams & Manuals
20334 (314000001 - 314200000) 22in Recycler Lawn Mower View Diagrams & Manuals
20334 (314200001 - 314999999) 22in Recycler Lawn Mower View Diagrams & Manuals
20334C (311000001 - 311999999) 22in Recycler Lawn Mower View Diagrams & Manuals
20334C (312000001 - 312999999) 22in Recycler Lawn Mower View Diagrams & Manuals
20334C (313000001 - 313999999) 22in Recycler Lawn Mower View Diagrams & Manuals
20372 (312000001 - 312999999) 22in Recycler Lawn Mower View Diagrams & Manuals
20372 (313000001 - 313999999) 22in Recycler Lawn Mower View Diagrams & Manuals
20372 (314000001 - 314999999) 22in Recycler Lawn Mower View Diagrams & Manuals
20373 (312000001 - 312999999) 22in Recycler Lawn Mower View Diagrams & Manuals
20373 (313000001 - 313999999) 22in Recycler Lawn Mower View Diagrams & Manuals
20373 (314000001 - 314999999) 22in Recycler Lawn Mower View Diagrams & Manuals
20374 (312000001 - 312999999) 22in Recycler Lawn Mower View Diagrams & Manuals
20374 (313000001 - 313999999) 22in Recycler Lawn Mower View Diagrams & Manuals
20374 (314000001 - 314999999) 22in Recycler Lawn Mower View Diagrams & Manuals
20332 (400000000-999999999) 22in Recycler Lawn Mower View Diagrams & Manuals
20332 (315000001-315999999) 22in Recycler Lawn Mower View Diagrams & Manuals
20332 (316000001-316044999) 22in Recycler Lawn Mower View Diagrams & Manuals
20332 (316045000-316999999) 22in Recycler Lawn Mower View Diagrams & Manuals
20333 (400000000-999999999) 22in Recycler Lawn Mower View Diagrams & Manuals
20333 (315000001-315999999) 22in Recycler Lawn Mower View Diagrams & Manuals
20333 (316000001-316999999) 22in Recycler Lawn Mower View Diagrams & Manuals
20334 (400000000-999999999) 22in Recycler Lawn Mower View Diagrams & Manuals
20334 (315000001-315999999) 22in Recycler Lawn Mower View Diagrams & Manuals
20334 (316000001-316999999) 22in Recycler Lawn Mower View Diagrams & Manuals
20337 (314000001-314999999) 22in Recycler Lawn Mower, 2014 View Diagrams & Manuals
20337 (315000001-315999999) 22in Recycler Lawn Mower, 2015 View Diagrams & Manuals
20337 (316000001-316999999) 22in Recycler Lawn Mower, 2016 View Diagrams & Manuals
20338 (311000001-311999999) Lawn Mower View Diagrams & Manuals
20352 (311000001-311999999) Lawn Mower View Diagrams & Manuals
20352 (312000001-312999999) Lawn Mower View Diagrams & Manuals
20353 (400000000-999999999) 22in Recycler Lawn Mower View Diagrams & Manuals
20353 (315000001-315999999) 22in Recycler Lawn Mower, 2015 View Diagrams & Manuals
20353 (316000001-316003328) 22in Recycler Lawn Mower, 2016 View Diagrams & Manuals
20353 (316003329-316999999) 22in Recycler Lawn Mower, 2016 View Diagrams & Manuals
20372 (400000000-999999999) 22in Recycler Lawn Mower View Diagrams & Manuals
20372 (315000001-315999999) 22in Recycler Lawn Mower View Diagrams & Manuals
20372 (316000001-316999999) 22in Recycler Lawn Mower View Diagrams & Manuals
20373 (315000001-315999999) 22in Recycler Lawn Mower View Diagrams & Manuals
20373 (316000001-316999999) 22in Recycler Lawn Mower View Diagrams & Manuals
20374 (315000001-315999999) 22in Recycler Lawn Mower View Diagrams & Manuals
20374 (316000001-316999999) 22in Recycler Lawn Mower View Diagrams & Manuals
20376 (313000001-313999999) 22in Recycler Lawn Mower, 2013 View Diagrams & Manuals
20792 (400000000-999999999) Lawn Mower View Diagrams & Manuals
20955 (400000000-999999999) 55cm Recycler Lawn Mower View Diagrams & Manuals
20955 (310000001-310999999) 55cm Recycler Lawn Mower, 2010 View Diagrams & Manuals
20955 (311000001-311999999) 55cm Recycler Lawn Mower, 2011 View Diagrams & Manuals
20955 (312000001-312999999) 55cm Recycler Lawn Mower, 2012 View Diagrams & Manuals
20955 (313000001-313999999) 55cm Recycler Lawn Mower, 2013 View Diagrams & Manuals
20955 (314000001-314999999) 55cm Recycler Lawn Mower, 2014 View Diagrams & Manuals
20955 (315000001-315999999) 55cm Recycler Lawn Mower, 2015 View Diagrams & Manuals
20955 (316000001-316999999) 55cm Recycler Lawn Mower, 2016 View Diagrams & Manuals
20956 (400000000-999999999) 55cm Recycler Lawn Mower View Diagrams & Manuals
20956 (310000001-310999999) 55cm Recycler Lawn Mower, 2010 View Diagrams & Manuals
20956 (311000001-311999999) 55cm Recycler Lawn Mower, 2011 View Diagrams & Manuals
20956 (312000001-312999999) 55cm Recycler Lawn Mower, 2012 View Diagrams & Manuals
20956 (313000001-313999999) 55cm Recycler Lawn Mower, 2013 View Diagrams & Manuals
20956 (314000001-314999999) 55cm Recycler Lawn Mower, 2014 View Diagrams & Manuals
20956 (315000001-315999999) 55cm Recycler Lawn Mower, 2015 View Diagrams & Manuals
20956 (316000001-316999999) 55cm Recycler Lawn Mower, 2016 View Diagrams & Manuals
20958 (400000000-999999999) 55cm Recycler Lawn Mower View Diagrams & Manuals
20958 (310000001-310999999) 55cm Recycler Lawn Mower, 2010 View Diagrams & Manuals
20958 (311000001-311999999) 55cm Recycler Lawn Mower, 2011 View Diagrams & Manuals
20958 (312000001-312999999) 55cm Recycler Lawn Mower, 2012 View Diagrams & Manuals
20958 (313000001-313999999) 55cm Recycler Lawn Mower, 2013 View Diagrams & Manuals
20958 (314000001-314999999) 55cm Recycler Lawn Mower, 2014 View Diagrams & Manuals
20958 (315000001-315999999) 55cm Recycler Lawn Mower, 2015 View Diagrams & Manuals
20958 (316000001-316999999) 55cm Recycler Lawn Mower, 2016 View Diagrams & Manuals
20960 (400000000-999999999) 55cm Recycler Lawn Mower View Diagrams & Manuals
20960 (315000001-315999999) 55cm Recycler Lawn Mower, 2015 View Diagrams & Manuals
20960 (316000001-316999999) 55cm Recycler Lawn Mower, 2016 View Diagrams & Manuals
21691 (400000000-999999999) 53cm Super Recycler Lawn Mower View Diagrams & Manuals
21762 (400000000-999999999) 55cm Recycler Lawn Mower View Diagrams & Manuals
21763 (400000000-999999999) 55cm Recycler Lawn Mower View Diagrams & Manuals
21767 (400000000-999999999) 55cm Recycler Lawn Mower View Diagrams & Manuals
21381 (403310300-403342069) Super Recycler Lawn Mower View Diagrams & Manuals
21381 (403342070-999999999) Super Recycler Lawn Mower View Diagrams & Manuals
21381 (402000000-403310299) Super Recycler Lawn Mower View Diagrams & Manuals
20964 (400000000-999999999) 55cm Recycler Lawn Mower View Diagrams & Manuals
20337HD (400000000-404319999) 22in Recycler Lawn Mower View Diagrams & Manuals
21766 (400000000-999999999) 55cm Recycler Lawn Mower View Diagrams & Manuals
21690 (400000000-999999999) 53cm Super Recycler Lawn Mower View Diagrams & Manuals
20337HD (404320000-999999999) 22in Recycler Lawn Mower View Diagrams & Manuals
22in Recycler Lawn Mower View Diagrams & Manuals
20332 (314000001-314200000)(2014) 20332, 22in Recycler Lawn Mower, 2014 (Sn 314000001-314200000) View Diagrams & Manuals
20332C (311000001-311999999)(2011) 20332c, 22in Recycler Lawn Mower, 2011 (Sn 311000001-311999999) View Diagrams & Manuals
20333 (402000000-404319999) 20333, 22in Recycler Lawn Mower, (Sn 402000000-404319999) View Diagrams & Manuals
20333C (311000001-311999999)(2011) 20333c, 22in Recycler Lawn Mower, 2011 (Sn 311000001-311999999) View Diagrams & Manuals
20334 (406577037-999999999) 20334, 22in Recycler Lawn Mower, (Sn 406577037-999999999) View Diagrams & Manuals
20334C (313000001-313999999)(2013) 20334c, 22in Recycler Lawn Mower, 2013 (Sn 313000001-313999999) View Diagrams & Manuals
20337 (401000000-405699999) 20337, 22in Recycler Lawn Mower, (Sn 401000000-405699999) View Diagrams & Manuals
20337HD (405700000-999999999) 20337hd, 22in Recycler Lawn Mower, (Sn 405700000-999999999) View Diagrams & Manuals
20353 (402100000-404399999) 20353, 22in Recycler Lawn Mower, (Sn 402100000-404399999) View Diagrams & Manuals
20372 (312000001-312999999)(2012) 20372, 22in Recycler Lawn Mower, 2012 (Sn 312000001-312999999) View Diagrams & Manuals
20373 (404325000-405999999) 20373, 22in Recycler Lawn Mower, (Sn 404325000-405999999) View Diagrams & Manuals
20374 (400000000-402089999) 20374, 22in Recycler Lawn Mower, (Sn 400000000-402089999) View Diagrams & Manuals
20376 (313000001-313999999)(2013) 20376, 22in Recycler Lawn Mower, 2013 (Sn 313000001-313999999) View Diagrams & Manuals
20382 (402082000-404309999) 20382, Super Recycler Lawn Mower, (Sn 402082000-404309999) View Diagrams & Manuals
20383 (400000000-402081999) 20383, Super Recycler Lawn Mower, (Sn 400000000-402081999) View Diagrams & Manuals
20384 (400000000-402081999) 20384, Super Recycler Lawn Mower, (Sn 400000000-402081999) View Diagrams & Manuals
20792 (401000000-999999999) 20792, 53cm Super Recycler Lawn Mower, (Sn 401000000-999999999) View Diagrams & Manuals
20797 (400000000-400999999) 20797, 53cm Super Recycler Lawn Mower, (Sn 400000000-400999999) View Diagrams & Manuals
20955 (400000000-402099999) 20955, 55cm Recycler Lawn Mower, (Sn 400000000-402099999) View Diagrams & Manuals
20956 (400000000-402099999) 20956, 55cm Recycler Lawn Mower, (Sn 400000000-402099999) View Diagrams & Manuals
20958 (400000000-402199999) 20958, 55cm Recycler Lawn Mower, (Sn 400000000-402199999) View Diagrams & Manuals
20960 (402100000-999999999) 20960, 55cm Recycler Lawn Mower, (Sn 402100000-999999999) View Diagrams & Manuals
21382 (400000000-407799999) 21382, Super Recycler Lawn Mower, (Sn 400000000-407799999) View Diagrams & Manuals
21383 (400000000-999999999) 21383, Super Recycler Lawn Mower, (Sn 400000000-999999999) View Diagrams & Manuals
21385 (400000000-999999999) 21385, Super Recycler Lawn Mower, (Sn 400000000-999999999) View Diagrams & Manuals
21386 (407800000-409176090) 21386, Super Recycler Lawn Mower, (Sn 407800000-409176090) View Diagrams & Manuals
21387 (405700000-407799999) 21387, Super Recycler Lawn Mower, (Sn 405700000-407799999) View Diagrams & Manuals
21388 (400000000-408899999) 21388, 60v 21in Super Recycler Lawn Mower, (Sn 400000000-408899999) View Diagrams & Manuals
21388T (400000000-409319999) 21388t, 60v 21in Super Recycler Lawn Mower, (Sn 400000000-409319999) View Diagrams & Manuals
21389 (400000000-999999999) 21389, Super Recycler Lawn Mower, (Sn 400000000-999999999) View Diagrams & Manuals
21691 (400000000-405599999) 21691, 53cm Super Recycler Lawn Mower, (Sn 400000000-405599999) View Diagrams & Manuals
21762 (400000000-405499999) 21762, 55cm Recycler Lawn Mower, (Sn 400000000-405499999) View Diagrams & Manuals
21763 (400000000-405559500) 21763, 55cm Recycler Lawn Mower, (Sn 400000000-405559500) View Diagrams & Manuals
21764 (400000000-999999999) 21764, 55cm Recycler Lawn Mower, (Sn 400000000-999999999) View Diagrams & Manuals
Show More Compatible Models
This item works with the following types of products:
- Lawn Mower Parts
Customer Part Reviews ?
Average Rating (out of 5):
Click to filter by ratings:
5 stars
21
4 stars
1
3 stars
1
2 stars
0
1 stars
0
< PREV
- 1
- 2
- 3
Transmission & Belt = New Toro Personal Pace Mower
The parts arrived promptly, reviewed a few install videos from you tube, repair start to finish was about 1 hour as I cleaned and lubed all bolts, washers, axles, etc. Works like new again!
Guest -
October 4, 2023
Verified Purchase
Exactly what we needed!
Saved us from buying a new mower. Found the exact part we needed easily. Good price, quick shipping. Thanks so much!
Guest -
June 1, 2023
Verified Purchase
Belt replacement
The replacement belt was just as described. It fit snugly and mower works good as new. Thanks again for the quick replacement belt to keep mowing when other places were a week or more getting it.
Guest -
November 5, 2022
Verified Purchase
Still in Packaging
Package was in perfect condition, part appears to be brand new. As my current belt still appears to be in good condition, am saving this new one forehwn it becomes needed.
Guest -
June 29, 2022
Verified Purchase
Replace transmission drive belt
New belt, replacement requires breakdown instructions. Perfect fit and function.
Guest -
December 30, 2021
Verified Purchase
J
Thank You much for excellent service on getting my parts. ( drive cable n drive belt ) lawn mower works great again. Looking forward too doing business with you're company again. Rickey D Smith
Guest -
August 12, 2021
Verified Purchase
Worked as expected.
Raimund -
August 11, 2021
Verified Purchase
New belt
Right part, right price, right on time. Forgot how sweet this mower is
Guest -
May 27, 2021
Verified Purchase
Great service fast shipping
The parts I ordered for my toro mower were delivered on time and accurate.
Guest -
May 24, 2021
Verified Purchase
Right part
The operator was very helpful, found the correct part. It was delivered quickly and was easily installed. Thanks
Guest -
April 24, 2021
Verified Purchase
t
t
t -
t days ago
Verified Purchase
eReplacementParts Team
t
Questions & Answers ?
Our customer Service team is at the ready daily to answer your part and product questions.

Ask our Team
We have a dedicated staff with decades of collective experience in helping customers just like you purchase parts to repair their products.
Does this fit my product?Questions & Answers for Lawn Mower Drive Belt
What are the dimensions of the drive belt with Part Number 115-4669? It appears that this belt is for the mower with model number 21381.
Dean
for model number 21381 21-inch super recycler
asked on 2023-12-22
Hello Dean, thank you for your inquiry. The belt dimensions are 3/8" X33 1/4". Yes. This is the correct drive belt for model 21381. We hope this helps.
eReplacementParts Team December 22, 2023
Is the 2 belts in the 22in recycler lawnmower the same size
Ricky
for model number 20353
asked on 2023-10-31
Hi Ricky, Thank you for writing. The Drive Belt is approximately 3/8" x 33" and the V-Belt is approximately 3/8" x 32". We hope this helps!
eReplacementParts Team October 31, 2023
Customer Repair Instructions ?
All our customer repair instructions are solicited directly from other customers just like you who have purchased and replaced this exact part.
The lawn mower was no longer self propelled
Michael - June 27, 2016
👍 7 of 9 people found this instruction helpful
Tool Type
Lawn Mower
Difficulty
Medium
Time
1-2 hours
Tools Used
Pliers, Socket set, Wrench Set, grease gun
1. Figured out how to take the drive transmission out.
a. Removed the handle, plastic and metal shrouds underneath,
b. Removed the drive wheels and metal side plates holding the transmission.
c. Loosened the belt guide at the engine.
d. Removed the drive belt.
e. Removed the transmission from the side plates. Detach from the control cable.
2. Install the new drive belt around the engine pulley, Tighten the belt guide.
3. Do the reverse of the dis-assembly. Grease all rotating parts
4. Start lawn mower and check operation.
Did you find this story helpful?
Thanks for voting and helping fellow customers!
Transmission stopped pulling on my Toro personal pace walk behind mower
Alan - April 28, 2016
👍 4 of 4 people found this instruction helpful
Tool Type
Lawn Mower
Difficulty
Medium
Time
1-2 hours
Tools Used
Screwdriver, Socket set, Wrench Set, Spring clip pliers
Found easy to follow repair instructions on U Tube. followed the step by step instructions. Very easy, just took me a little extra time than the experts seeing how I don't do this kind of repairs every day. Replacement parts from Ereplacement parts .com came very quickly and I will certainly use them again.
Did you find this story helpful?
Thanks for voting and helping fellow customers!
A stick got wedged in the drive belts and caused them to cross and chew themselves up
Gerald - July 15, 2019
👍 1 of 1 people found this instruction helpful
Tool Type
Lawn Mower
Difficulty
Medium
Time
30-60 minutes
Tools Used
Screwdriver, Socket set, Wrench Set
Parts Used
1. Took the plastic covers off the belts
2. Looked on you tube and found a video
3. Disconnected the tension spring on front drive so the transmission could be rotated to access the pulley guide screws
4 removed the guide and took the belt off the pulleys. MOTE : the screws on the belt guides are square drive and all the others are star drive!
5 Took the blade off and removed the belts from the drive pulleys
6. Removed one rear wheel and disconnected the tension spring so I could rotate the rear trans mission down to access the pulls guide.
7 Removed belt and replaced with a new one and put it on the drive pulls on the blade shaft.
8 reinstalled the tension springs
9 Put the rear wheel back on and adjusted the drive cable tension to be sure the belts were in position
10. Replaced the plastic guards
11. Watch the You tube videos I found several
Did you find this story helpful?
Thanks for voting and helping fellow customers!
bad drive belt
DALE - April 19, 2019
👍 1 of 1 people found this instruction helpful
Tool Type
Lawn Mower
Difficulty
Medium
Time
1-2 hours
Tools Used
Screwdriver, Socket set
Parts Used
removed rear wheel assembly
Did you find this story helpful?
Thanks for voting and helping fellow customers!
Lawn Mower drive belt needed to be repaired
Mark - April 19, 2018
👍 1 of 1 people found this instruction helpful
Tool Type
Lawn Mower
Difficulty
Easy
Time
30-60 minutes
Tools Used
Socket set
Parts Used
1.Watched U -tube instructional video. This is great but need to watch if the model changed.
2. Loosened the required bolts
3. Disassembled housing
4. Installed replacement belt
5. Reassembled.
6. Took it for a test drive
2. Loosened the required bolts
3. Disassembled housing
4. Installed replacement belt
5. Reassembled.
6. Took it for a test drive
Did you find this story helpful?
Thanks for voting and helping fellow customers!
Drive belt broke
Stephen - June 6, 2016
👍 2 of 3 people found this instruction helpful
Tool Type
Lawn Mower
Difficulty
Easy
Time
15-30 minutes
Tools Used
Screwdriver, Socket set
Parts Used
1. Remove belt cover
2. Remove rear blade guard ( this allows the transmission to rotate forward for belt installation)
3. Install new belt
4. Put back together
2. Remove rear blade guard ( this allows the transmission to rotate forward for belt installation)
3. Install new belt
4. Put back together
Did you find this story helpful?
Thanks for voting and helping fellow customers!
Drive belt was squealing, losing self propel
Wayne - June 21, 2022
Tool Type
Lawn Mower
Difficulty
Medium
Time
30-60 minutes
Tools Used
Socket set
Parts Used
remove blade
remove blade mount
remove belt guard
remove rear portion housing
remove pulley guard
remove old belt
install new belt
reassemble
remove blade mount
remove belt guard
remove rear portion housing
remove pulley guard
remove old belt
install new belt
reassemble
Did you find this story helpful?
Thanks for voting and helping fellow customers!
Self propel would not engage.
William - August 31, 2021
Tool Type
Lawn Mower
Difficulty
Easy
Time
30-60 minutes
Tools Used
Screwdriver, Pliers, Socket set, Wrench Set, Snap Ring pliers.
Followed instructions on the video.
Did you find this story helpful?
Thanks for voting and helping fellow customers!
Blade belt broke and self propelled part wasn’t working well
Michael - August 16, 2021
Tool Type
Lawn Mower
Difficulty
Medium
Time
30-60 minutes
Tools Used
Screwdriver, Pliers, Socket set, Wrench Set
Watched a YouTube video on how to take mower apart. So I at least had some idea of how to get the covers off. Took it all apart put the new belts on and put it back together works great.
Did you find this story helpful?
Thanks for voting and helping fellow customers!
Drive belt was worn beyond usable specs
John - June 17, 2021
Tool Type
Lawn Mower
Difficulty
Easy
Time
15-30 minutes
Tools Used
Socket set, torque wrench
Parts Used
1. removed spark plug wire
2. blocked mower blade and removed mounting bolt
4. removed rear wheel of mower
3. removed drive belt housing pieces
4. disconnected drive cable
5. removed worn belt and replaced with the new belt
6. reconnected drive cable
7. reinstalled drive belt housing pieces
8. reinstalled rear wheel
9. reinstalled mower blade and torqued to specs
10. reinstalled spark plug wire
Did you find this story helpful?
Thanks for voting and helping fellow customers!
Load More Install Stories
OEM stands for Original Equipment Manufacturer and means the part you’re buying is sourced directly from the manufacturer who made your product. At eReplacementParts, we sell only genuine OEM parts, guaranteeing the part you’re purchasing is of better design and of higher quality than aftermarket parts.
Our product descriptions are a combination of data sourced directly from the manufacturers who made your product as well as content researched and curated by our content & customer service teams. This content is edited and reviewed internally before being made public to customers.
Our customer service team are at the ready daily to answer your part and product questions. We have a dedicated staff with decades of collective experience in helping customers just like you purchase parts to repair their products.
All our part reviews are solicited directly from other customers who have purchased this exact part. While we moderate these reviews for profanity, offensive language or personally identifiable information, these reviews are posted exactly as submitted and no alterations are made by our team.
All our customer repair instructions are solicited directly from other customers just like you who have purchased and replaced this exact part. While we moderate these reviews for profanity, offensive language or personally identifiable information, these reviews are posted exactly as submitted and no alterations are made by our team.
Based on data from past customer purchasing behaviors, these parts are most commonly purchased together along with the part you are viewing. These parts may be necessary or helpful to replace to complete your current repair.
All our installation videos are created and produced in collaboration with our in-house repair technician, Mark Sodja, who has helped millions of eReplacementParts customers over the last 13 years repair their products. Mark has years of experience in selling and repairing both commercial and residential products with a specialty in gas-powered equipment.
This data is collected from customers who submitted a repair instruction after replacing this exact part. Customers can rate how easy the repair was to complete and how long it took. We aggregate this data to provide a repair rating that allows customers to quickly determine the difficulty and time needed to perform their own repair.