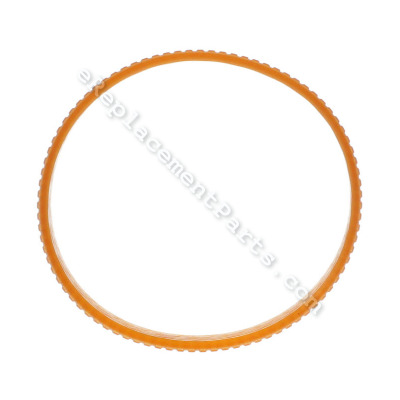
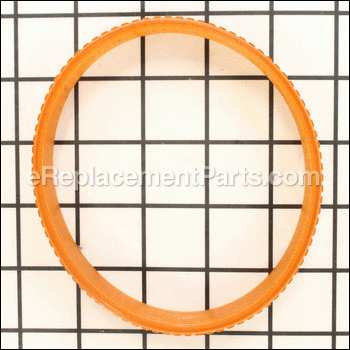
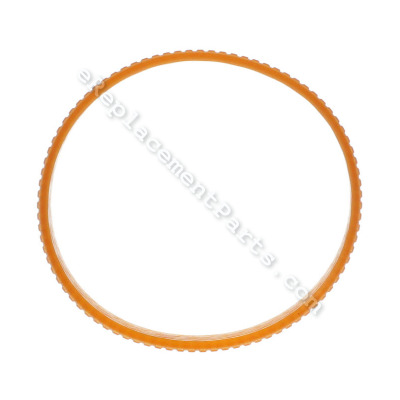
This is a genuine DeWalt replacement part. Package includes one belt designed for easy installation.
• Belt Width – 7/8"
• Belt Length – 14"
rn
rnClean the pulleys off before putting the new belt on to ensure top performance and longevity with your new belt. Inspect belts periodically and replace when worn to maintain peak performance.
Belt 429962-08
OEM part for: DeWALT
Part Number: 429962-08
Jump To:
Product Description ?
- Classification: Part
- Weight: 0.01 lbs.
- Shipping: Ships Worldwide
Frequently Purchased Together ?
Compatibility
This part will fit the following 3 machines
DeWALT
This item works with the following types of products:
- Planer Parts
Repair Videos ?
|
Step-by-step instructions for removing and installing the drive belt on your DeWALT planer....
January 29, 2018
|
Customer Part Reviews ?
- 1
Questions & Answers ?
Our customer Service team is at the ready daily to answer your part and product questions.

Ask our Team
We have a dedicated staff with decades of collective experience in helping customers just like you purchase parts to repair their products.
Does this fit my product?Questions & Answers for Belt
Customer Repair Instructions ?
All our customer repair instructions are solicited directly from other customers just like you who have purchased and replaced this exact part.
Belt worn
Tool Type
Planer
Difficulty
Medium
Time
Less than 15 minutes
Tools Used
Screwdriver
Parts Used
2- Removed the elevation screw on the side of the belt
3- Put the belt into some boiling water for a minute to softening it a little bit(no more than one minute)
4 Put 3 threads in on the smaller pulley, and started with one on the big pulley on the second belt you'll need to use the screw driver (make sure it doesn't have any sharp edges)
5 Started turning the pulley by very little increments until all the belt was in both pulleys
6 Put the elevation screw and top of the planner back on
this belt fits perfectly
The drive belt got burned due to trying to shave too much wood. After hearing up too much it snapped before I could shut the motor down.
Tool Type
Planer
Difficulty
Medium
Time
15-30 minutes
Tools Used
Screwdriver, Nutdriver
2. Removed the motor housing.
3. Removed old belt.
4. Started new belt on the larger driver pulley.
5. Stretched the belt with a large screwdriver and started it on the smaller drive pulley.
6. Rotated pulleys to feed belt onto the smaller drive pulley.
7. Once the belt was "started" on both pulleys, used the screwdriver to help get the belt positioned completely on the pulleys.
8. No.7 required several times to get everything aligned correctly.
9. Replaced blade cover and tightened 2 bolts.
10. Replaced motor housing and tightened 4 bolts.
11. Replaced thickness crank and secured with new screw.
Broken belt and switch
Tool Type
Planer
Difficulty
Easy
Time
15-30 minutes
Tools Used
Screwdriver
Parts Used
To replace the belt, remove the side cover removed and then work the belt over the pulleys.
A little difficult but it did stretch enough.
Broken drive belt
Tool Type
Planer
Difficulty
Medium
Time
15-30 minutes
Tools Used
Screwdriver
Parts Used
Drive belt failed on desalt planer
Tool Type
Planer
Difficulty
Hard
Time
30-60 minutes
Tools Used
Screwdriver, Pliers, Requires boiling water to stretch the belt. Metric Allen wre
Parts Used
2. Removed damaged belt.
3. Belt would not go on pulleys. Heated in boiling water for various lengths of time. Finally, after boiling for about 10 minutes belt stretched enough- with help of screwdriver- to get on edge of pulleys. Used pliers to move belt over into all the groves.
4. Tested- works perfectly.
belt melted
Tool Type
Planer
Difficulty
Medium
Time
More than 2 hours
Tools Used
Screwdriver, Pliers, Socket set
Parts Used
Drive belt broke
Tool Type
Planer
Difficulty
Easy
Time
15-30 minutes
Tools Used
Screwdriver, Allen wrenches
Parts Used
Belt pulley nut came off and lost on its own.
Tool Type
Planer
Difficulty
Easy
Time
15-30 minutes
Tools Used
, Allen wrench
belt broke
Tool Type
Planer
Difficulty
Medium
Time
15-30 minutes
Tools Used
Screwdriver, Wrench Set
Parts Used
Driving belt worn out
Tool Type
Planer
Difficulty
Hard
Time
15-30 minutes
Tools Used
Screwdriver, Monkey wrench
Parts Used
2) Squeeze the new belt onto pulleys as instructed on readily available U-tube video.
3) Found out that job takes three hands: the belt is extremely tight and you have very little room to move it onto the appropriate grooves. Tried to loosen it in hot water to no avail.
4) Job done after much squeezing, twisting and groaning. But I would do it myself again with a helping hand at my side.
OEM stands for Original Equipment Manufacturer and means the part you’re buying is sourced directly from the manufacturer who made your product. At eReplacementParts, we sell only genuine OEM parts, guaranteeing the part you’re purchasing is of better design and of higher quality than aftermarket parts.
Our product descriptions are a combination of data sourced directly from the manufacturers who made your product as well as content researched and curated by our content & customer service teams. This content is edited and reviewed internally before being made public to customers.
Our customer service team are at the ready daily to answer your part and product questions. We have a dedicated staff with decades of collective experience in helping customers just like you purchase parts to repair their products.
All our part reviews are solicited directly from other customers who have purchased this exact part. While we moderate these reviews for profanity, offensive language or personally identifiable information, these reviews are posted exactly as submitted and no alterations are made by our team.
All our customer repair instructions are solicited directly from other customers just like you who have purchased and replaced this exact part. While we moderate these reviews for profanity, offensive language or personally identifiable information, these reviews are posted exactly as submitted and no alterations are made by our team.
Based on data from past customer purchasing behaviors, these parts are most commonly purchased together along with the part you are viewing. These parts may be necessary or helpful to replace to complete your current repair.
All our installation videos are created and produced in collaboration with our in-house repair technician, Mark Sodja, who has helped millions of eReplacementParts customers over the last 13 years repair their products. Mark has years of experience in selling and repairing both commercial and residential products with a specialty in gas-powered equipment.
This data is collected from customers who submitted a repair instruction after replacing this exact part. Customers can rate how easy the repair was to complete and how long it took. We aggregate this data to provide a repair rating that allows customers to quickly determine the difficulty and time needed to perform their own repair.

