


Genuine Bostitch replacement part, this item is sold individually.
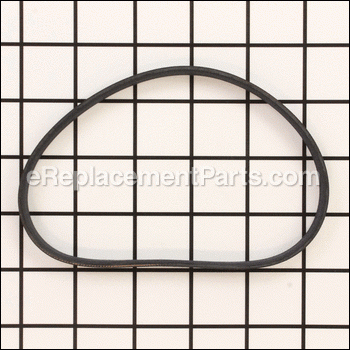
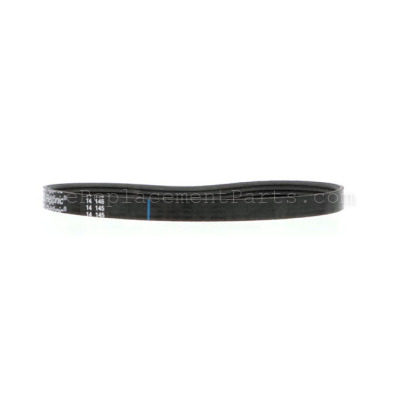
The purpose of this Belt is to run the compressor, to build up air in the compressor tank.
It is attached to the crankshaft and to the shaft of the motor.
This is a serpentine belt, meaning it has ridges on the inside of the belt to match up with the parts that drive it.
It measures 3/8" wide and approximately 15" in circumference.
Belt AB-9075316
OEM part for: Bostitch
Part Number: AB-9075316
$36.24
In Stock
Jump To:
Product Description ?
- Classification: Part
- Weight: 0.01 lbs.
- Shipping: Ships Worldwide
Frequently Purchased Together ?

Compatibility
This part will fit the following 2 machines
Bostitch
CAP2000P-OF Type 0 Air Compressor View Diagrams & Manuals
CAP1512-OF (Type 0) Air Compressor View Diagrams & Manuals
This item works with the following types of products:
- Compressor Parts
Customer Part Reviews ?
Average Rating (out of 5):
Click to filter by ratings:
5 stars
2
4 stars
0
3 stars
0
2 stars
0
1 stars
0
< PREV
- 1
Belt
Good product
Guest -
November 16, 2021
Verified Purchase
thanks
every things fine
Guest -
September 30, 2019
Verified Purchase
t
t
t -
t days ago
Verified Purchase
eReplacementParts Team
t
Questions & Answers ?
Our customer Service team is at the ready daily to answer your part and product questions.

Ask our Team
We have a dedicated staff with decades of collective experience in helping customers just like you purchase parts to repair their products.
Does this fit my product?Questions & Answers for Belt
No questions have been asked yet
Customer Repair Instructions ?
All our customer repair instructions are solicited directly from other customers just like you who have purchased and replaced this exact part.
Broken belt on Bostitch compressor
Craig - May 22, 2016
👍 7 of 8 people found this instruction helpful
Tool Type
Compressor
Difficulty
Medium
Time
1-2 hours
Tools Used
Screwdriver, Power Drill, Socket set, drill with screw driver bits
Parts Used
Remove plastic cover from compressor unbolt motor from tank place motor in bench vice be careful not to damage the motor in vice don't over tighten loosen piston arm screw then take large flat nose screw driver and slowly pry off arm work the screw driver around in different positions it may be a little hard to pry off . Remember it is aluminum arm it can brake! Once off move arm to side and put belt on small motor pulley first then take belt and place on bottom of big pulley, place big screw driver and put it between the motor pulley and the wall of the motor to help keep the belt on the motor pulley then with the other hand turn the pulley working the belt onto the big pulley without pinching your fingers, after belt is on make sure belt is seating correctly on pulley then reassemble the compressor. It may take a few tries. It also helps if you have someone to help you hold the screw driver while you turn the pulley.
Did you find this story helpful?
Thanks for voting and helping fellow customers!
Compressor belt broke
Steve - October 29, 2023
Tool Type
Compressor
Difficulty
Easy
Time
15-30 minutes
Tools Used
Screwdriver, Pliers, Wrench Set
Parts Used
Removed compressor shroud which exposed belt pulleys. Stretched new belt over pulleys and reinstalled compressor shroud. Pretty simple repair and compressor works perfect…
Did you find this story helpful?
Thanks for voting and helping fellow customers!
belt broke on compressor
Patrick - May 27, 2020
Tool Type
Compressor
Difficulty
Medium
Time
15-30 minutes
Tools Used
Screwdriver, Wrench Set
Parts Used
Followed the "ReplacementParts video instructions on YouTube. About 10 minutes. Re-placed the belt - about 15-20 minutes. Done.
Replacement part (belt) - excellent
Video Instructions - excellent
The fact that I didn't have to pay a small engine mechanic about $60 - excellent
That I could do it myself with a little instruction and the compressor works like new - priceless.
Replacement part (belt) - excellent
Video Instructions - excellent
The fact that I didn't have to pay a small engine mechanic about $60 - excellent
That I could do it myself with a little instruction and the compressor works like new - priceless.
Did you find this story helpful?
Thanks for voting and helping fellow customers!
fan broke, stopped compressor from turning, burned belt into.
Tommy - April 29, 2019
Tool Type
Compressor
Difficulty
Medium
Time
1-2 hours
Tools Used
Screwdriver, Pliers, Socket set
Parts Used
removed cover housing [ not easy]
replaced belt [ no adjustment]
replaced fan [ easy]
replaced belt [ no adjustment]
replaced fan [ easy]
Did you find this story helpful?
Thanks for voting and helping fellow customers!
Compressor belt broke.
Robert - August 6, 2017
Tool Type
Compressor
Difficulty
Medium
Time
15-30 minutes
Tools Used
Screwdriver, Nutdriver
Parts Used
Tore down to belt access...changed belt...reassembled....plugged it in and turned on...VIOLA!!
Did you find this story helpful?
Thanks for voting and helping fellow customers!
Belt on Bostitch Compressor broke
MARK - January 18, 2017
Tool Type
Compressor
Difficulty
Hard
Time
1-2 hours
Tools Used
Screwdriver, Socket set
Parts Used
Spent 1 hour removing the outer casing to get to the compressor motor and timing belt. They make it pretty difficult.
Watched a 10 minute you tube on how to remove the compressor arm so I could get the new belt on.
The belt didn't roll on as easy as the You tube made it look. I first tried to get the belt on and thought there was not way the belt I bought was going over the two pulley's. I used my Workmate work bench to try to stretch the belt slightly. Then, I spent about 20-30 minutes on two different days trying to get the belt on to the pulleys. I finally got it to roll on and then worked the two pulleys back and forth until the belt was square.
Lastly, it only took me 10 minutes to put the compressor arm and outer casing back on.
Did you find this story helpful?
Thanks for voting and helping fellow customers!
Belt broken
Brian - February 7, 2017
👍 0 of 1 people found this instruction helpful
Tool Type
Compressor
Difficulty
Medium
Time
15-30 minutes
Tools Used
Screwdriver, Power Drill, Wrench Set
Parts Used
Remove the shroud from around the pump & motor
Loosen the pump bolts
Install the belt around the small and large pulleys
Make sure belt is tight on pulleys, tighten the pump bolts
Replace the shroud
Loosen the pump bolts
Install the belt around the small and large pulleys
Make sure belt is tight on pulleys, tighten the pump bolts
Replace the shroud
Did you find this story helpful?
Thanks for voting and helping fellow customers!
Compressor belt
Ed - August 14, 2016
👍 0 of 1 people found this instruction helpful
Tool Type
Compressor
Difficulty
Medium
Time
30-60 minutes
Tools Used
Screwdriver
Parts Used
1. Remove outer cover
2. Remove gauge cover
3. Loosen pump bolts
4. Install new belt
2. Remove gauge cover
3. Loosen pump bolts
4. Install new belt
Did you find this story helpful?
Thanks for voting and helping fellow customers!
Belt broken on compressor
David - December 28, 2015
👍 1 of 3 people found this instruction helpful
Tool Type
Compressor
Difficulty
Easy
Time
15-30 minutes
Tools Used
Socket set, Nutdriver
Parts Used
Remove outside cover shrouds, internal housing and replace the belt, then reassemble. The two bolts that hold the internal are removable with a 1/4" nut driver.
Did you find this story helpful?
Thanks for voting and helping fellow customers!
OEM stands for Original Equipment Manufacturer and means the part you’re buying is sourced directly from the manufacturer who made your product. At eReplacementParts, we sell only genuine OEM parts, guaranteeing the part you’re purchasing is of better design and of higher quality than aftermarket parts.
Our product descriptions are a combination of data sourced directly from the manufacturers who made your product as well as content researched and curated by our content & customer service teams. This content is edited and reviewed internally before being made public to customers.
Our customer service team are at the ready daily to answer your part and product questions. We have a dedicated staff with decades of collective experience in helping customers just like you purchase parts to repair their products.
All our part reviews are solicited directly from other customers who have purchased this exact part. While we moderate these reviews for profanity, offensive language or personally identifiable information, these reviews are posted exactly as submitted and no alterations are made by our team.
All our customer repair instructions are solicited directly from other customers just like you who have purchased and replaced this exact part. While we moderate these reviews for profanity, offensive language or personally identifiable information, these reviews are posted exactly as submitted and no alterations are made by our team.
Based on data from past customer purchasing behaviors, these parts are most commonly purchased together along with the part you are viewing. These parts may be necessary or helpful to replace to complete your current repair.
All our installation videos are created and produced in collaboration with our in-house repair technician, Mark Sodja, who has helped millions of eReplacementParts customers over the last 13 years repair their products. Mark has years of experience in selling and repairing both commercial and residential products with a specialty in gas-powered equipment.
This data is collected from customers who submitted a repair instruction after replacing this exact part. Customers can rate how easy the repair was to complete and how long it took. We aggregate this data to provide a repair rating that allows customers to quickly determine the difficulty and time needed to perform their own repair.