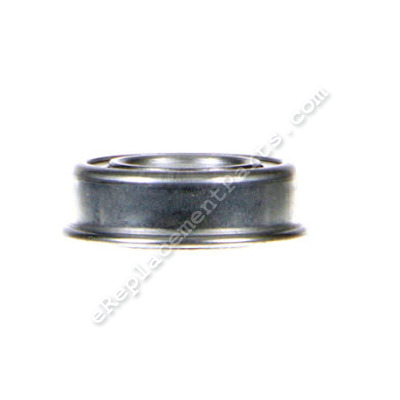


This steel piece is an authentic replacement part manufactured for Snapper tractors and mowers. Ball bearings reduce friction between moving metal parts. Metal fatigue causes wear on ball bearings and they should be replaced regularly. A screwdriver and/or wrench will commonly be needed to remove/replace this part.
Ball Bearing 707608
OEM part for: Snapper, Murray
Part Number: 707608
$9.91
In Stock
Jump To:
Frequently Purchased Together ?


Compatibility
This part will fit the following 694 machines
Murray
Snapper
21351P (80'S) 21" 3.5 Hp Steel Deck Series 1 View Diagrams & Manuals
21351PD (80'S) 21" 3.5 Hp Steel Deck Series 1 View Diagrams & Manuals
21351PS (80'S) 21" 3.5 Hp Steel Deck Series 1 View Diagrams & Manuals
21401P (80'S) 21" 4 Hp Steel Deck Series 1 View Diagrams & Manuals
21401PD (80'S) 21" 4 Hp Steel Deck Series 1 View Diagrams & Manuals
21401PD-2 (80'S) 21" 4 Hp 2 Cycle Steel Deck Series 1 View Diagrams & Manuals
21401PS (80'S) 21" 4 Hp Steel Deck Electric Start Series 1 View Diagrams & Manuals
214X1P (80'S) 21" 4 Hp Steel Deck Series 1 View Diagrams & Manuals
214X1PR (80'S) 21" 4 Hp Robin Steel Deck Series 1 View Diagrams & Manuals
214X1PR-2 (80'S) 21" 4 Hp 2 Cycle Robin Steel Deck Series 1 View Diagrams & Manuals
214X1PS (80'S) 21" 4 Hp Steel Deck Electric Start Series 1 View Diagrams & Manuals
21RX1P (80'S) 21" 4 Hp Robin Steel Deck Series 1 View Diagrams & Manuals
NRP21501 (90'S) 21" 5Hp Steel Deck Recycling Series 1 View Diagrams & Manuals
RP21501 (90'S) 21" 5Hp Steel Deck Recycling Series 1 View Diagrams & Manuals
21355P 21" 3.5 Hp Steel Deck Series 5 View Diagrams & Manuals
21355PD 21" 3.5 Hp Steel Deck Series 5 View Diagrams & Manuals
21405P 21" 4 Hp Steel Deck Series 5 View Diagrams & Manuals
21405P-2 21" 4 Hp 2 Cycle Steel Deck Series 5 View Diagrams & Manuals
21405PD 21" 4 Hp Steel Deck Series 5 View Diagrams & Manuals
21405PD-2 21" 4 Hp 2 Cycle Steel Deck Series 5 View Diagrams & Manuals
21405PDT 21" 4 Hp Steel Deck Series 5 View Diagrams & Manuals
21405PN 21" 4 Hp Steel Deck Series 5 View Diagrams & Manuals
21405PS 21" 5 Hp Steel Deck Electric Start Series 5 View Diagrams & Manuals
21405PT 21" 5 Hp Steel Deck Series 5 View Diagrams & Manuals
214X5P 21" 4 Hp Steel Deck Series 5 View Diagrams & Manuals
214X5P-2 21" 4 Hp 2 Cycle Steel Deck Series 5 View Diagrams & Manuals
214X5PR 21" 4 Hp Robin Steel Deck Series 5 View Diagrams & Manuals
214X5PR-2 21" 4 Hp 2 Cycle Robin Steel Deck Series 5 View Diagrams & Manuals
214X5PS 21" 4 Hp Steel Deck Elecrtic Start Series 5 View Diagrams & Manuals
G21405P 21" 4 Hp Steel Deck European Series 5 View Diagrams & Manuals
G21405PS 21" 4 Hp Steel Deck Electric Start European Series 5 View Diagrams & Manuals
G214X5P-2 21" 4 Hp 2 Cycle Steel Deck European Series 5 View Diagrams & Manuals
CP214012R2 (84424) 21" 4 Hp 2 Cycle Steel Deck Commercial Series 12 View Diagrams & Manuals
CP215512KWV (82408) 21" 5.5 Hp Steel Deck Commercial Series 12 View Diagrams & Manuals
CP216012RV (84646) 21" 6 Hp Steel Deck Commercial Series 12 View Diagrams & Manuals
CP216512RV (82409) 21" 6.5 Hp Steel Deck Commercial Series 12 View Diagrams & Manuals
CP215013KWV (84667) 21" 5 Hp Steel Deck Commercial Series 13 View Diagrams & Manuals
MCRP215014KWV (84323) 21" 5 Hp Steel Deck Commercial "M" Series 14 View Diagrams & Manuals
MCRS215014KWV (84332) 21" 5 Hp Steel Deck Commercial Sw "M" Series 14 View Diagrams & Manuals
MCRP215015KWV (84645) 21" 5 Hp Steel Deck Commercial "M" Series 15 View Diagrams & Manuals
CP214017R2 (84691) 21" 4 Hp 2 Cycle Steel Deck Commercial Series 17 View Diagrams & Manuals
CP215017HV (84907) 21" 5 Hp Steel Deck Commercial Series 17 View Diagrams & Manuals
CP215017KWV (85690) 21" 5 Hp Steel Deck Commercial Series 17 View Diagrams & Manuals
CP215517HV (84908) 21" 5.5 Hp Steel Deck Commercial Series 17 View Diagrams & Manuals
CP216017RV (84692) 21" 6 Hp Steel Deck Commercial Series 17 View Diagrams & Manuals
CP215518HV (80658) 21" 5.5 Hp Steel Deck Commercial Series 18 View Diagrams & Manuals
CP216018KWV (80657) 21" 6 Hp Steel Deck Commercial Series 18 View Diagrams & Manuals
CRP216018KWV (80656) 21" 6 Hp Steel Deck Commercial Series 18 View Diagrams & Manuals
CP215519HV (7800038) 21" 5.5 Tp Steel Deck Commercial Series 19 View Diagrams & Manuals
CP216019KWV (7800037) 21" 6 Tp Steel Deck Commercial Series 19 View Diagrams & Manuals
CP216019KWVFC (7800288) 21" 6 Tp Steel Deck Commercial Series 19 View Diagrams & Manuals
CRP216019KWV (7800036) 21" 6 Tp Steel Deck Commercial Series 19 View Diagrams & Manuals
CP215520HV (7800372) 21" 5.5 Tp Steel Deck Commercial Series 20 View Diagrams & Manuals
CP215520HVFC (7800289) 21" 5.5 Tp Steel Deck Commercial Series 20 View Diagrams & Manuals
CP218520 (7800772) 21" 8.75 Tp Steel Deck Commercial Series 20 View Diagrams & Manuals
CRP218520 (7800764) 21" 8.75 Tp Steel Deck Commercial Series 20 View Diagrams & Manuals
HWPS26600RV Heel Series 0 View Diagrams & Manuals
HWPS26700BV Heel Series 0 View Diagrams & Manuals
SV21P 21" 3.5 Hp Cast Deck Side Discharge Series V View Diagrams & Manuals
V210P 21" 3.5 Hp Cast Deck Side Discharge Series 0 View Diagrams & Manuals
V210P4 21" 4 Hp Cast Deck Side Discharge Series 0 View Diagrams & Manuals
V210PS 21" 3.5 Hp Cast Deck Side Discharge Series 0 View Diagrams & Manuals
V214 (82860) 21" 4 Hp Cast Deck Side Discharge Series V View Diagrams & Manuals
V21P (83053) 21" 3.5 Hp Cast Deck Side Discharge Series V View Diagrams & Manuals
V21P4 21" 4 Hp Cast Deck Side Discharge Series V View Diagrams & Manuals
V21PS 21" 3.5 Hp Cast Deck Side Discharge Series V View Diagrams & Manuals
V21XP 21" 3.5 Hp Cast Deck Side Discharge Series Vx View Diagrams & Manuals
V21XPS 21" 3.5 Hp Cast Deck Side Discharge Series Vx View Diagrams & Manuals
CAP21509R (80325) 21" 5 Hp Cast Deck Side Discharge Commercial Series 9 View Diagrams & Manuals
21500PCR 21" 5 Hp Steel Deck Robin Commercial Series 0 View Diagrams & Manuals
21R00PC 21" 5 Hp Robin Steel Deck Series 0 View Diagrams & Manuals
CP21500KWV (90S) 21" 5 Hp Steel Deck Commercial Series 0 80474 View Diagrams & Manuals
CP21550KWV (90S) 21" 5.5 Hp Steel Deck Commercial Series 0 82369 View Diagrams & Manuals
ECP21400R2 (90S) 21" 4 Hp 2 Cycle Steel Deck Commercial Euro Series 0 80414 View Diagrams & Manuals
DP21357B 21" 3.5 Hp Steel Deck Series 7 View Diagrams & Manuals
DP21407T 21" 4 Hp Steel Deck Series 7 View Diagrams & Manuals
DP21407T-2 21" 4 Hp 2 Cycle Steel Deck Series 7 View Diagrams & Manuals
DP21507B 21" 5 Hp Steel Deck Series 7 View Diagrams & Manuals
DP21507BE 21" 5 Hp Steel Deck Electric Start Series 7 View Diagrams & Manuals
GP21507B 21" 5 Hp Steel Deck European Series 7 View Diagrams & Manuals
GP21507BE 21" 5 Hp Steel Deck European Electric Start Series 7 View Diagrams & Manuals
MP21357B 21" 3.5 Hp Steel Deck Mulching Series 7 View Diagrams & Manuals
MP21507BE 21" 5 Hp Steel Deck Mulching Electric Start Series 7 View Diagrams & Manuals
OP21407T-2 21" 4 Hp 2 Cycle Steel Deck Series 7 View Diagrams & Manuals
OP21507B 21" 5 Hp Steel Deck Series 7 View Diagrams & Manuals
P21357B 21" 3.5 Hp Steel Deck Series 7 View Diagrams & Manuals
P21407R-2 21" 4 Hp 2 Cycle Steel Deck Series 7 View Diagrams & Manuals
P21407T 21" 4 Hp Steel Deck Series 7 View Diagrams & Manuals
P21407T-2 21" 4 Hp 2 Cycle Steel Deck Series 7 View Diagrams & Manuals
P21507B 21" 5 Hp Steel Deck Series 7 View Diagrams & Manuals
P21507BE 21" 5 Hp Steel Deck Electric Start Series 7 View Diagrams & Manuals
PD21357B 21" 3.5 Hp Steel Deck Series 7 View Diagrams & Manuals
RP21357B 21" 3.5 Hp Steel Deck Series 7 View Diagrams & Manuals
RP21407T 21" 4 Hp Steel Deck Series 7 View Diagrams & Manuals
RP21507B 21" 4 Hp Steel Deck Series 7 View Diagrams & Manuals
DP21409B 21" 4 Hp Propelled Steel Deck Series 9 View Diagrams & Manuals
EP21509B 21" 5 Hp Propelled Steel Deck Euro Series 9 View Diagrams & Manuals
EP21509BE 21" 5 Hp Propelled Steel Deck Electric Start Euro Series 9 View Diagrams & Manuals
ECP21500KWV (90S) 21" 5 Hp Steel Deck Commercial Euro Series 0 80513 View Diagrams & Manuals
ECP21550V (90S) 21" 5.5 Hp Steel Deck Commercial Euro Series 0 80415 View Diagrams & Manuals
G21500PC (1" To 7/8" Crank) 21" 5 Hp B&S Steel Deck Comm Euro Series 0 View Diagrams & Manuals
CP21401R2 (90S) 21" 4 Hp 2 Cycle Steel Deck Commercial Series 1 80667 View Diagrams & Manuals
CP21501KWV (90S) 21" 5 Hp Steel Deck Commercial Series 1 80665 View Diagrams & Manuals
ECP21501KWV (90S) 21" 5 Hp Steel Deck Commercial Euro Series 1 80666 View Diagrams & Manuals
CP21402R2 (80903) 21" 4 Hp 2 Cycle Steel Deck Commercial 90SSeries 2 View Diagrams & Manuals
CP21407R2 21" 4 Hp 2 Cycle Steel Deck Commercial Series 7 View Diagrams & Manuals
CP21507B 21" 5 Hp Steel Deck Commercial Series 7 View Diagrams & Manuals
CP21507R 21" 5 Hp Steel Deck Commercial Series 7 View Diagrams & Manuals
CP21557BV 21" 5.5 Hp Steel Deck Commercial Series 7 View Diagrams & Manuals
CVP21507B 21" 5 Hp Cast Deck Side Discharge Commercial Series 7 View Diagrams & Manuals
CVP21507R 21" 5 Hp Cast Deck Side Discharge Commercial Series 7 View Diagrams & Manuals
ECP21407R2 21" 4 Hp 2 Cycle Steel Deck Commercial European Series 7 View Diagrams & Manuals
GPC21507B 21" 5 Hp Steel Deck Commercial European Series 7 View Diagrams & Manuals
GPC21507BV 21" 5 Hp Steel Deck Commercial European Series 7 View Diagrams & Manuals
PC21407R-2 21" 4 Hp 2 Cycle Steel Deck Commercial Series 7 View Diagrams & Manuals
PC21507B 21" 5 Hp Steel Deck Commercial Series 7 View Diagrams & Manuals
PC21507BV 21" 5 Hp Steel Deck Commercial Series 7 View Diagrams & Manuals
PC21507R 21" 5 Hp Steel Deck Commercial Series 7 View Diagrams & Manuals
C21409R-2 21" 4 Hp 2 Cycle Steel Deck Commercial Series 9 View Diagrams & Manuals
C21509R 21" 5 Hp Steel Deck Commercial Series 9 View Diagrams & Manuals
C21559BV (80301) 21" 5.5 Hp Steel Deck Commercial Series 9 View Diagrams & Manuals
CP21409R-2 21" 4 Hp 2 Cycle Steel Deck Commercial Series 9 View Diagrams & Manuals
CP21509R (80304) 21" 5 Hp Steel Deck Commercial Series 9 View Diagrams & Manuals
CP21559BV 21" 5.5 Hp Steel Deck Commercial Series 9 View Diagrams & Manuals
ECP21559BV 21" 5.5 Hp Steel Deck Commercial European Series 9 View Diagrams & Manuals
C216012RV (82409) 21" 6 Hp Steel Deck Commercial Series 12 View Diagrams & Manuals
EP2167517BV (84868) 21" 6.75 Hp Steel Deck European Series 17 View Diagrams & Manuals
EP217017BV (85620) 21" 7 Hp Steel Deck European Series 17 View Diagrams & Manuals
ERP2167517BV (84866) 21" 6.75 Hp Steel Deck European Series 17 View Diagrams & Manuals
ERP217017BV (85619) 21" 7 Hp Steel Deck European Series 17 View Diagrams & Manuals
FRP2167517BV (84693) 21" 6.75 Hp Steel Deck "Air" Recycling Series 17 View Diagrams & Manuals
MRP216017B (84685) 21" 6 Hp Steel Deck "Mr" Series 17 View Diagrams & Manuals
MRP216017BV (84686) 21" 6 Hp Steel Deck "Mr" Series 17 View Diagrams & Manuals
MRP216517B (84752) 21" 6.5 Hp Steel Deck "Mr" Series 17 View Diagrams & Manuals
P215517HC (84906) 21" 5.5 Hp Steel Deck Series 17 View Diagrams & Manuals
P216517B (84324) 21" 6.75 Hp Steel Deck Series 17 View Diagrams & Manuals
P2167517BV (84688) 21" 6.75 Hp Steel Deck Series 17 View Diagrams & Manuals
P2167517BVE (84689) 21" 6.75 Hp Steel Deck Series 17 View Diagrams & Manuals
P217017BV (84956) 21" 7 Hp Steel Deck Series 17 View Diagrams & Manuals
P217017BVE (84957) 21" 7 Hp Steel Deck Series 17 View Diagrams & Manuals
RP215517HC (84905) 21" 5.5 Hp Steel Deck Recycling Series 17 View Diagrams & Manuals
RP2167517BV (84759) 21" 6.75 Hp Steel Deck Recycling Series 17 View Diagrams & Manuals
RP2167517BVE (84865) 21" 6.75 Hp Steel Deck Recycling Series 17 View Diagrams & Manuals
RP217017BV (84958) 21" 7 Hp Steel Deck Series 17 View Diagrams & Manuals
RP217017BVE (84959) 21" 7 Hp Steel Deck Series 17 View Diagrams & Manuals
WMRP216017B (84742) 21" 6 Hp Steel Deck "Mr" Series 17 View Diagrams & Manuals
WMRP216517B (84757) 21" 6.5 Hp Steel Deck "Mr" Series 17 View Diagrams & Manuals
WP216517BV (84863) 21" 6.5 Hp Steel Deck Series 17 View Diagrams & Manuals
EXP21500 Ac Euro Series 0 View Diagrams & Manuals
EXP21500KWV Ac Euro Series 0 View Diagrams & Manuals
EXP21501KWV Ac Euro Series 1 View Diagrams & Manuals
EXP21550E Ac Euro Series 0 View Diagrams & Manuals
EXP21551VE Ac Rear Discharge Cast Deck Elect View Diagrams & Manuals
X21500 Ac Series 0 View Diagrams & Manuals
XP21500 Ac Series 0 View Diagrams & Manuals
XP21500KWV Ac Series 0 View Diagrams & Manuals
XP21550V Ac Series 0 View Diagrams & Manuals
XP21550VE Ac Electric Start View Diagrams & Manuals
AP21507B 21" 5 Hp Cast Deck Side Discharge Series 7 View Diagrams & Manuals
AP21509B 21" 5 Hp Cast Deck Side Discharge Series 9 View Diagrams & Manuals
2135XPS (80'S) 21" 3.5 Hp Steel Deck Electric Start Series X View Diagrams & Manuals
2135XPST (80'S) 21" 3.5 Hp Steel Deck Electric Start Series X View Diagrams & Manuals
2135YP 21" 3.5 Hp Steel Deck Bbc Series Y View Diagrams & Manuals
2140YP 21" 4 Hp Steel Deck Experimental Bbc Series Y View Diagrams & Manuals
214Y1PT 21" 4 Hp Steel Deck Bbc Series Y View Diagrams & Manuals
PB21550V Ropelled 1993 & 4 View Diagrams & Manuals
21402P 21" 4 Hp Steel Deck Series 2 View Diagrams & Manuals
21402PT 21" 4 Hp Steel Deck Series 2 View Diagrams & Manuals
214X2PR 21" 4 Hp Robin Steel Deck Series 2 View Diagrams & Manuals
214X2PR-2 21" 4 Hp 2 Cycle Robin Steel Deck Series 2 View Diagrams & Manuals
21404PB 21" 4 Hp Steel Deck Series 4 View Diagrams & Manuals
21404PT-2 21" 4 Hp 2 Cycle Steel Deck Series 4 View Diagrams & Manuals
214X4PR 21" 4 Hp Robin Steel Deck Series 4 View Diagrams & Manuals
214X4PR-2 21" 4 Hp 2 Cycle Robin Steel Deck Series 4 View Diagrams & Manuals
G21404P 21" 4 Hp Steel Deck Bbc European Series 4 View Diagrams & Manuals
CP21506R 21" 5 Hp Steel Deck Bbc Series 6 View Diagrams & Manuals
P21406T-2 21" 4 Hp 2 Cycle Steel Deck Bbc Series 6 View Diagrams & Manuals
P21506B 21" 5 Hp Steel Deck Bbc Series 6 View Diagrams & Manuals
P21506BE 21" 5 Hp Steel Deck Bbc Series 6 View Diagrams & Manuals
EP21508B 21" 5 Hp Steel Deck European Series 8 View Diagrams & Manuals
P21508 21" 5 Hp Steel Deck Bbc Series 8 View Diagrams & Manuals
P21558BV 21" 5.5 Hp Steel Deck Bbc Series 8 View Diagrams & Manuals
NRP21550E (90'S) 21" 5.5Hp Steel Deck Recycling Electric Start Series 0 View Diagrams & Manuals
ODP21400 (90'S) 21" 4Hp Steel Deck Single Speed Series 0 View Diagrams & Manuals
P21400 (90'S) 21" 4Hp Steel Deck Series 0 View Diagrams & Manuals
P21500 (90's) 21" 5Hp Steel Deck Series 0 View Diagrams & Manuals
P21550 (90'S) 21" 5.5Hp Steel Deck Series 0 View Diagrams & Manuals
P21550V (90'S) 21" 5.5Hp Steel Deck Series 0 View Diagrams & Manuals
P21600 (90'S) 21" 6Hp Steel Deck Series 0 View Diagrams & Manuals
P21600TV (90'S) 21" 6Hp Steel Deck Series 0 View Diagrams & Manuals
RP21400 (90'S) 21" 4Hp Steel Deck Recycling Series 0 View Diagrams & Manuals
RP21500 (90's) 21" 5Hp Steel Deck Recycling Series 0 View Diagrams & Manuals
RP21500E (90'S) 21" 5Hp Steel Deck Recycling Electric Start Series 0 View Diagrams & Manuals
RP21500KWV (90'S) 21"5Hp Steel Deck Recycling Series 0 View Diagrams & Manuals
RP21500T2 (90'S) 21" 5Hp 2 Cycle Steel Deck Recycling Series 0 View Diagrams & Manuals
RP21550 (90'S) 21" 5.5Hp Steel Deck Recycling Series 0 View Diagrams & Manuals
RP21550E (90'S) 21" 5.5Hp Steel Deck Recycling Electric Start Series 0 View Diagrams & Manuals
RP21550V (90'S) 21" 5.5Hp Steel Deck Recycling Series 0 View Diagrams & Manuals
RP21600 (90'S) 21" 6Hp Steel Deck Recycling Series 0 View Diagrams & Manuals
RP21600E (90'S) 21" 6Hp Steel Deck Recycling Electric Start Series 0 View Diagrams & Manuals
ODP21379B 21" 3.75 Hp Single Speed Propelled Steel Deck Series 9 View Diagrams & Manuals
P21509B 21" 5 Hp Propelled Steel Deck Series 9 View Diagrams & Manuals
P21509BE 21" 5 Hp Propelled Steel Deck Electric Start Series 9 View Diagrams & Manuals
P21509T2 21" 5 Hp 2 Cycle Propelled Steel Deck Series 9 View Diagrams & Manuals
P21559BV 21" 5.5 Hp Propelled Steel Deck Series 9 View Diagrams & Manuals
RP21409B 21" 4 Hp Propelled Steel Deck Recycling Series 9 View Diagrams & Manuals
RP21509B 21" 5 Hp Propelled Steel Deck Recycling Series 9 View Diagrams & Manuals
RP21559BV 21" 5.5 Hp Propelled Steel Deck Recycling Series 9 View Diagrams & Manuals
EFRP216012TV 21" 6Hp Steel Deck "Air" Recycling Series 12 View Diagrams & Manuals
EFRP216512TV 21" 6.5Hp Steel Deck "Air" Recycling Series 12 View Diagrams & Manuals
EP216012 21" 6 Hp Steel Deck Series 12 View Diagrams & Manuals
FRP216012 21" 6 Hp Steel Deck "Air" Recycling Series 12 View Diagrams & Manuals
FRP216012E -82401 21" 6 Hp Steel Deck Electric StartSeries 12 View Diagrams & Manuals
FRP216012TV 21" 6 Hp Steel Deck "Air" Recycling Series 12 View Diagrams & Manuals
FRP216512TV 21" 6.5 Hp Steel Deck "Air" Recycling Series 12 View Diagrams & Manuals
NFRP216012 21" 6 Hp Steel Deck Series 12 View Diagrams & Manuals
NFRP216012E -82431 21" 6 Hp Steel Deck "Air" Recycling Electric Start Series 12 View Diagrams & Manuals
NP216012 21" 6 Hp Steel Deck Series 12 View Diagrams & Manuals
NRP215012 21" 5 Hp Steel Deck Recycling Series 12 View Diagrams & Manuals
P216012 21" 6 Hp Steel Deck Series 12 View Diagrams & Manuals
P216012E 21" 6 Hp Steel Deck Electric Start Series 12 View Diagrams & Manuals
P216012TV 21" 6 Hp Steel Deck Series 12 View Diagrams & Manuals
P216512BV 21" 6.5 Hp Steel Deck Series 12 View Diagrams & Manuals
P216512TV 21" 6.5 Hp Steel Deck Series 12 View Diagrams & Manuals
RP215012 21" 5 Hp Steel Deck Recycling Series 12 View Diagrams & Manuals
RP215012T2 21" 5 Hp 2 Cycle Steel Deck Recycling Series 12 View Diagrams & Manuals
RP216012 21" 6 Hp Steel Deck Recycling Series 12 View Diagrams & Manuals
WP216512BV 21" 6.5 Hp Steel Deck Series 12 View Diagrams & Manuals
EMRP216014B 21" 6 Hp Steel Deck European "M" Series 14 View Diagrams & Manuals
MRP216014B 21" 6 Hp Steel Deck "M" Series 14 View Diagrams & Manuals
MRP216014T 21" 6 Hp Steel Deck "M" Series 14 View Diagrams & Manuals
EMRP216015B 21" 6 Hp Steel Deck European "M" Series 15 View Diagrams & Manuals
FRPS216015E -84287 21" 6 Hp Steel Deck Electric StartSeries 15 View Diagrams & Manuals
MRP216015B 21" 6 Hp Steel Deck "M" Series 15 View Diagrams & Manuals
MRP216015BV 21" 6 Hp Steel Deck "M" Series 15 View Diagrams & Manuals
EFRP216516BV 21" 6.5Hp Steel Deck "Air" Recycling European Ser 16 View Diagrams & Manuals
EFRP216516TV 21" 6.5Hp Steel Deck "Air" Recycling European Ser 16 View Diagrams & Manuals
FRP216016 21" 6 Hp Steel Deck "Air" Recycling Series 16 View Diagrams & Manuals
EFRP2167517BV -84695 21" 6.75 Hp Steel Deck "Air" Recycling Euro Series 17 View Diagrams & Manuals
EMRP216017B -84694 21" 6 Hp Steel Deck European "Mr" Series 17 View Diagrams & Manuals
EMRP216517B -80347 21" 6.5 Hp Steel Deck European "Mr" Series 17 View Diagrams & Manuals
P2187519BVE (7800178) 21" 8.75 Tp Steel Deck Series 19 View Diagrams & Manuals
P2187519BVFC (7800286) 21" 8.75 Gt Steel Deck Fc Series 19 View Diagrams & Manuals
RP216019KWV (7800029) 21" 6 Tp Steel Deck Recycling Series 19 View Diagrams & Manuals
RP2167519B (7800027) 21" 6.75 Tp Steel Deck Recycling Series 19 View Diagrams & Manuals
RP2167519BDV (7800066) 21" 6.75 Tp Steel Deck Recycling Series 19 View Diagrams & Manuals
RP2167519BDVFC (7800287) 21" 6.75 Gt Steel Deck Fc Series 19 View Diagrams & Manuals
RP217019BV (7800028) 21" 7 Tp Steel Deck Recycling Series 19 View Diagrams & Manuals
RP217019BVE (7800030) 21" 7 Tp Steel Deck Recycling Series 19 View Diagrams & Manuals
RP2187519BV (7800172) 21" 8.75 Tp Steel Deck Recycling Series 19 View Diagrams & Manuals
RP2187519BVE (7800173) 21" 8.75 Tp Steel Deck Recycling Series 19 View Diagrams & Manuals
EP2187520 (7800686) 21" 8.75Gt Steel Deck European Series 20 View Diagrams & Manuals
EP2187520BV (7800445) 21" 8.75Gt Steel Deck European Series 20 View Diagrams & Manuals
ERP2187520 (7800685) 21" 8.75Gt Steel Deck European Series 20 View Diagrams & Manuals
ERP2187520BV (7800444) 21" 8.75Gt Steel Deck European Series 20 View Diagrams & Manuals
NP2167520B (7800438) 21" 6.75 Tp Steel Deck California Series 20 View Diagrams & Manuals
NP217020B (7800601) 21" 7 Tp Steel Deck California Series 20 View Diagrams & Manuals
NP2187520 (7800692) 21" 8.75 Tp Steel Deck California Series 20 View Diagrams & Manuals
NP2187520BV (7800439) 21" 8.75 Tp Steel Deck California Series 20 View Diagrams & Manuals
P216020KWV (7800557) 21" 6 Tp Steel Deck Series 20 View Diagrams & Manuals
P2167520B (7800429) 21" 6.75 Tp Steel Deck Series 20 View Diagrams & Manuals
P2167520BFC (7800435) 21" 6.75 Tp Steel Deck Fc Series 20 View Diagrams & Manuals
P217020B (7800597) 21" 7 Tp Steel Deck Series 20 View Diagrams & Manuals
P217020BFC (7800599) 21" 7 Tp Steel Deck Fc Series 20 View Diagrams & Manuals
P2172520B (7800842) 21" 7.25 Tp Steel Deck Series 20 View Diagrams & Manuals
P2187520 (7800554) 21" 8.75 Tp Steel Deck Series 20 View Diagrams & Manuals
P2187520BV (7800430) 21" 8.75 Tp Steel Deck Series 20 View Diagrams & Manuals
P2187520BVE (7800432) 21" 8.75 Tp Steel Deck Series 20 View Diagrams & Manuals
P2187520BVFC (7800436) 21" 8.75 Tp Steel Deck Fc Series 20 View Diagrams & Manuals
P2187520E (7800555) 21" 8.75 Tp Steel Deck Electric Start Series 20 View Diagrams & Manuals
P2187520FC (7800691) 21" 8.75 Tp Steel Deck Fc Series 20 View Diagrams & Manuals
RP216020KWV (7800556) 21" 6 Tp Steel Deck Recycling Series 20 View Diagrams & Manuals
RP217020 (7800602) 21" 7 Tp Steel Deck Series 20 View Diagrams & Manuals
RP217020BDV (7800424) 21" 7 Tp Steel Deck Recycling Series 20 View Diagrams & Manuals
RP217020BDVFC (7800433) 21" 7 Tp Steel Deck Recycling Fc Series 20 View Diagrams & Manuals
RP217020FC (7800603) 21" 7 Tp Steel Deck Recycling Fc Series 20 View Diagrams & Manuals
RP2172520 (7800845) 21" 7.25 Tp Steel Deck Recycling Series 20 View Diagrams & Manuals
RP2187520 (7800552) 21" 8.75 Tp Steel Deck Series 20 View Diagrams & Manuals
RP2187520BV (7800425) 21" 8.75 Tp Steel Deck Recycling Series 20 View Diagrams & Manuals
RP2187520BV2N1 (7800492) 21" 8.75 Tp Steel Deck Recycling Series 20 View Diagrams & Manuals
RP2187520BV2N1FC (7800493) 21" 8.75 Tp Steel Deck Recycling Fc Series 20 View Diagrams & Manuals
RP2187520BVE (7800427) 21" 8.75 Tp Steel Deck Recycling Electric Start Series 20 View Diagrams & Manuals
RP2187520E (7800553) 21" 8.75 Tp Steel Deck Recycling Electric Start Series 20 View Diagrams & Manuals
DP21500 90S 21" 5Hp Steel Deck Series 0 View Diagrams & Manuals
EDP21400 90S 21" 4Hp Steel Deck European Series 0 View Diagrams & Manuals
EFRP21600TV 90S 21"6Hp Steel Deck "Air" Recycling Euro Series 0 View Diagrams & Manuals
EP21400 90S 21" 4Hp Steel Deck European Series 0 View Diagrams & Manuals
EP21450 90S 21" 4Hp Steel Deck European Series 0 View Diagrams & Manuals
EP21500 90S 21" 5Hp Steel Deck European Series 0 View Diagrams & Manuals
EP21550 90S 21" 5.5Hp Steel Deck European Series 0 View Diagrams & Manuals
EP21550E 90S 21" 5.5Hp Steel Deck Electric Start European Series 0 View Diagrams & Manuals
EP21600 90S 21" 5Hp Steel Deck European Series 0 View Diagrams & Manuals
FRP21600TV 90S 21" 6Hp Steel Deck "Air" Recycling Series 0 View Diagrams & Manuals
WP2167517BV 84743 21" 6.75 Hp Steel Deck Series 17 View Diagrams & Manuals
WRP216517BE 84920 21" 6.5 Hp Steel Deck Recycling Series 17 View Diagrams & Manuals
WRPS216517B 84921 21" 6.75 Hp Steel Deck Series 17 View Diagrams & Manuals
WRPS216517BE 84922 21" 6.75 Hp Steel Deck Series 17 View Diagrams & Manuals
EMRP216518B 80659 21" 6.5 Hp Steel Deck "Mr" Series 18 View Diagrams & Manuals
EP217018BV 80661 21" 7 Hp Steel Deck Series 18 View Diagrams & Manuals
ERP217018BV 80660 21" 7 Hp Steel Deck Series 18 View Diagrams & Manuals
MR216518B 80458 21" 6.5 Hp Steel Deck "Mr" Series 18 View Diagrams & Manuals
MRP216518B 80496 21" 6.5 Hp Steel Deck "Mr" Series 18 View Diagrams & Manuals
P216518B 80527 21" 6.5 Hp Steel Deck Series 18 View Diagrams & Manuals
P216518KWV 80650 21" 6 Hp Steel Deck Series 18 View Diagrams & Manuals
P217018BV 85699 21" 7 Hp Steel Deck Series 18 View Diagrams & Manuals
RP216518KWV 80585 21" 6 Hp Steel Deck Recycling Series 18 View Diagrams & Manuals
RP217018BV 80526 21" 7 Hp Steel Deck Recycling Series 18 View Diagrams & Manuals
RP217018BVE 80636 21" 7 Hp Steel Deck Recycling Series 18 View Diagrams & Manuals
EP217019BV 7800041 21" 7 Tp Steel Deck Series 19 View Diagrams & Manuals
EP2187519BV 7800250 21" 8.75Gt Steel Deck Series 19 View Diagrams & Manuals
ERP2167519B 7800039 21" 7 Tp Steel Deck Series 19 View Diagrams & Manuals
ERP217019BV 7800040 21" 7 Tp Steel Deck Series 19 View Diagrams & Manuals
ERP2187519BV 7800249 21" 8.75Gt Steel Deck Series 19 View Diagrams & Manuals
NP2167519B 7800134 21" 6.75 Tp Steel Deck California Series 19 View Diagrams & Manuals
NP2187519BV 7800131 21" 8.75 Tp Steel Deck California Series 19 View Diagrams & Manuals
P216019KWV 7800034 21" 6 Tp Steel Deck Series 19 View Diagrams & Manuals
P2167519B 7800032 21" 6.75 Tp Steel Deck Series 19 View Diagrams & Manuals
P2167519BFC 7800285 21" 6.75 Gt Steel Deck Fc Series 19 View Diagrams & Manuals
P217019BV 7800033 21" 7 Tp Steel Deck Series 19 View Diagrams & Manuals
P217019BVE 7800035 21" 7 Tp Steel Deck Series 19 View Diagrams & Manuals
P2187519BV 7800176 21" 8.75 Tp Steel Deck Series 19 View Diagrams & Manuals
CRP216019KWV 7800200 21-In. 6 Tp Steel Deck Commercial Series 19 View Diagrams & Manuals
EP21550E (Series 0)(90's) 21-Inch 5.5hp Steel Deck Electric Start European View Diagrams & Manuals
EP21600 (Series 0)(90's) 21-Inch 5hp Steel Deck European View Diagrams & Manuals
RP21550E (Series 0)(90's) 21-Inch 5.5hp Steel Deck Recycling Electric Start View Diagrams & Manuals
FRP21600TV (Series 0)(90's) 21-Inch 6hp Steel Deck -Inchair-Inch Recycling View Diagrams & Manuals
NRP21550E (Series 0)(90's) 21-Inch 5.5hp Steel Deck Recycling Electric Start View Diagrams & Manuals
ODP21400 (Series 0)(90's) 21-Inch 4hp Steel Deck Single Speed View Diagrams & Manuals
P21400 (Series 0)(90's) 21-Inch 4hp Steel Deck View Diagrams & Manuals
P21500 (Series 0)(90's) 21-Inch 5hp Steel Deck View Diagrams & Manuals
P21550 (Series 0)(90's) 21-Inch 5.5hp Steel Deck View Diagrams & Manuals
P21550V (Series 0)(90's) 21-Inch 5.5hp Steel Deck View Diagrams & Manuals
P21600 (Series 0)(90's) 21-Inch 6hp Steel Deck View Diagrams & Manuals
RP21550V (Series 0)(90's) 21-Inch 5.5hp Steel Deck Recycling View Diagrams & Manuals
P21600TV (Series 0)(90's) 21-Inch 6hp Steel Deck View Diagrams & Manuals
RP21400 (Series 0)(90's) 21-Inch 4hp Steel Deck Recycling View Diagrams & Manuals
RP21500E (Series 0)(90's) 21-Inch 5hp Steel Deck Recycling Electric Start View Diagrams & Manuals
21401PD (Series 1)(80's) 21-Inch 4 Hp Steel Deck View Diagrams & Manuals
21401PD-2 (Series 1)(80's) 21-Inch 4 Hp 2 Cycle Steel Deck View Diagrams & Manuals
21401PS (Series 1)(80's) 21-Inch 4 Hp Steel Deck Electric Start View Diagrams & Manuals
RP21600 (Series 0)(90's) 21-Inch 6hp Steel Deck Recycling View Diagrams & Manuals
RP21600E (Series 0)(90's) 21-Inch 6hp Steel Deck Recycling Electric Start View Diagrams & Manuals
214X1P (Series 1)(80's) 21-Inch 4 Hp Steel Deck View Diagrams & Manuals
214X1PR (Series 1)(80's) 21-Inch 4 Hp Robin Steel Deck View Diagrams & Manuals
214X1PR-2 (Series 1)(80's) 21-Inch 4 Hp 2 Cycle Robin Steel Deck View Diagrams & Manuals
214X1PS (Series 1)(80's) 21-Inch 4 Hp Steel Deck Electric Start View Diagrams & Manuals
2135XPS (Series X)(80's) 21-Inch 3.5 Hp Steel Deck Electric Start View Diagrams & Manuals
2135XPST (Series X)(80's) 21-Inch 3.5 Hp Steel Deck Electric Start View Diagrams & Manuals
214Y1PT (Series Y)(83079) 21-Inch 4 Hp Steel Deck Bbc View Diagrams & Manuals
2140YP (Series Y)(83379) 21-Inch 4 Hp Steel Deck Experimental Bbc View Diagrams & Manuals
214X5PR-2 (Series 5)(83338) 21-Inch 4 Hp 2 Cycle Robin Steel Deck View Diagrams & Manuals
21405PS (Series 5)(83368) 21-Inch 5 Hp Steel Deck Electric Start View Diagrams & Manuals
2135YP (Series Y)(84352) 21-Inch 3.5 Hp Steel Deck Bbc View Diagrams & Manuals
PB21550V (80408)(1993 & 4) 21-Inch 5.5 Hp Steel Deck Bbc Self-Propelled View Diagrams & Manuals
21402PT (Series 2)(83216) 21-Inch 4 Hp Steel Deck View Diagrams & Manuals
21405PT (Series 5)(83688) 21-Inch 5 Hp Steel Deck View Diagrams & Manuals
21402P (Series 2)(83217) 21-Inch 4 Hp Steel Deck View Diagrams & Manuals
G21405P (Series 5)(83748) 21-Inch 4 Hp Steel Deck European View Diagrams & Manuals
G21405PS (Series 5)(83758) 21-Inch 4 Hp Steel Deck Electric Start European View Diagrams & Manuals
G214X5P-2 (Series 5)(83819) 21-Inch 4 Hp 2 Cycle Steel Deck European View Diagrams & Manuals
21405PDT (Series 5)(83898) 21-Inch 4 Hp Steel Deck View Diagrams & Manuals
214X2PR (Series 2)(83237) 21-Inch 4 Hp Robin Steel Deck View Diagrams & Manuals
214X2PR-2 (Series 2)(83437) 21-Inch 4 Hp 2 Cycle Robin Steel Deck View Diagrams & Manuals
21405PD-2 (Series 5)(83908) 21-Inch 4 Hp 2 Cycle Steel Deck View Diagrams & Manuals
214X5P-2 (Series 5)(83918) 21-Inch 4 Hp 2 Cycle Steel Deck View Diagrams & Manuals
21405PN (Series 5)(83928) 21-Inch 4 Hp Steel Deck View Diagrams & Manuals
21404PB (Series 4)(83228) 21-Inch 4 Hp Steel Deck View Diagrams & Manuals
214X4PR (Series 4)(83238) 21-Inch 4 Hp Robin Steel Deck View Diagrams & Manuals
214X4PR-2 (Series 4)(83438) 21-Inch 4 Hp 2 Cycle Robin Steel Deck View Diagrams & Manuals
21405P-2 (Series 5)(83948) 21-Inch 4 Hp 2 Cycle Steel Deck View Diagrams & Manuals
MP21357B (Series 7)(80012) 21-Inch 3.5 Hp Steel Deck Mulching View Diagrams & Manuals
21404PT (Series 4)(83469) 21-Inch 4 Hp 2 Cycle Steel Deck View Diagrams & Manuals
G21404P (Series 4)(83799) 21-Inch 4 Hp Steel Deck Bbc European View Diagrams & Manuals
RP21509B (Series 9)(80298) 21-Inch 5 Hp Propelled Steel Deck Recycling View Diagrams & Manuals
RP21409B (Series 9)(80339) 21-Inch 4 Hp Propelled Steel Deck Recycling View Diagrams & Manuals
ODP21379B (Series 9)(80359) 21-Inch 3.75 Hp Single Speed Propelled Steel Deck View Diagrams & Manuals
P21407T (Series 7)(80025) 21-Inch 4 Hp Steel Deck View Diagrams & Manuals
21351P (Series 1)(80's) 21-Inch 3.5 Hp Steel Deck View Diagrams & Manuals
RP21507B (Series 7)(80061) 21-Inch 4 Hp Steel Deck View Diagrams & Manuals
DP21357B (Series 7)(80062) 21-Inch 3.5 Hp Steel Deck View Diagrams & Manuals
RP21357B (Series 7)(80134) 21-Inch 3.5 Hp Steel Deck View Diagrams & Manuals
DP21407T (Series 7)(80135) 21-Inch 4 Hp Steel Deck View Diagrams & Manuals
DP21407T-2 (Series 7)(80136) 21-Inch 4 Hp 2 Cycle Steel Deck View Diagrams & Manuals
P21407R-2 (Series 7)(80137) 21-Inch 4 Hp 2 Cycle Steel Deck View Diagrams & Manuals
DP21507B (Series 7)(80138) 21-Inch 5 Hp Steel Deck View Diagrams & Manuals
21351PD (Series 1)(80's) 21-Inch 3.5 Hp Steel Deck View Diagrams & Manuals
MP21507BE (Series 7)(80139) 21-Inch 5 Hp Steel Deck Mulching Electric Start View Diagrams & Manuals
CP21506R (Series 6)(80141) 21-Inch 5 Hp Steel Deck Bbc View Diagrams & Manuals
RP21407T (Series 7)(80203) 21-Inch 4 Hp Steel Deck View Diagrams & Manuals
RP21559BV (Series 9)(80388) 21-Inch 5.5 Hp Propelled Steel Deck Recycling View Diagrams & Manuals
P21506B (Series 6)(83220) 21-Inch 5 Hp Steel Deck Bbc View Diagrams & Manuals
P21506BE (Series 6)(83380) 21-Inch 5 Hp Steel Deck Bbc View Diagrams & Manuals
P21406T-2 (Series 6)(83460) 21-Inch 4 Hp 2 Cycle Steel Deck Bbc View Diagrams & Manuals
DP21507BE (Series 7)(80208) 21-Inch 5 Hp Steel Deck Electric Start View Diagrams & Manuals
PD21357B (Series 7)(83020) 21-Inch 3.5 Hp Steel Deck View Diagrams & Manuals
EP21550 (Series 0)(90's) 21-Inch 5.5hp Steel Deck European View Diagrams & Manuals
P21357B (Series 7)(83040) 21-Inch 3.5 Hp Steel Deck View Diagrams & Manuals
OP21407T-2 (Series 7)(83070) 21-Inch 4 Hp 2 Cycle Steel Deck View Diagrams & Manuals
21351PS (Series 1)(80's) 21-Inch 3.5 Hp Steel Deck View Diagrams & Manuals
21RX1P (Series 1)(80's) 21-Inch 4 Hp Robin Steel Deck View Diagrams & Manuals
AP21507B (Series 7)(80244) 21-Inch 5 Hp Cast Deck Side Discharge View Diagrams & Manuals
RP215012 (Series 12)(82395) 21-Inch 5 Hp Steel Deck Recycling View Diagrams & Manuals
AP21509B (Series 9)(80283) 21-Inch 5 Hp Cast Deck Side Discharge View Diagrams & Manuals
V214 (Series V)(82860) 21-Inch 4 Hp Cast Deck Side Discharge View Diagrams & Manuals
SV21P (Series V)(82953) 21-Inch 3.5 Hp Cast Deck Side Discharge View Diagrams & Manuals
V21P (Series V)(83053) 21-Inch 3.5 Hp Cast Deck Side Discharge View Diagrams & Manuals
V21PS (Series V)(83055) 21-Inch 3.5 Hp Cast Deck Side Discharge View Diagrams & Manuals
V21P4 (Series V)(83060) 21-Inch 4 Hp Cast Deck Side Discharge View Diagrams & Manuals
FRP216012 (Series 12)(82396) 21-Inch 6 Hp Steel Deck -Inchair-Inch Recycling View Diagrams & Manuals
P216012TV (Series 12)(82398) 21-Inch 6 Hp Steel Deck View Diagrams & Manuals
FRP216012TV (Series 12)(82399) 21-Inch 6 Hp Steel Deck -Inchair-Inch Recycling View Diagrams & Manuals
RP215012T2 (Series 12)(82400) 21-Inch 5 Hp 2 Cycle Steel Deck Recycling View Diagrams & Manuals
V21XP (Series VX)(83553) 21-Inch 3.5 Hp Cast Deck Side Discharge View Diagrams & Manuals
V21XPS (Series VX)(83555) 21-Inch 3.5 Hp Cast Deck Side Discharge View Diagrams & Manuals
NRP21501 (Series 1)(90 's) 21-Inch 5hp Steel Deck Recycling View Diagrams & Manuals
FRP216012E (Series 12)(82401) 21-Inch 6 Hp Steel Deck (Electric Start) View Diagrams & Manuals
V210P4 (Series 0)(84761) 21-Inch 4 Hp Cast Deck Side Discharge View Diagrams & Manuals
V210P (Series 0)(84853) 21-Inch 3.5 Hp Cast Deck Side Discharge View Diagrams & Manuals
V210PS (Series 0)(84855) 21-Inch 3.5 Hp Cast Deck Side Discharge View Diagrams & Manuals
EP21508B (Series 8)(80287) 21-Inch 5 Hp Steel Deck European View Diagrams & Manuals
NRP215012 (Series 12)(82404) 21-Inch 5 Hp Steel Deck Recycling View Diagrams & Manuals
21401P (Series 1)(80's) 21-Inch 4 Hp Steel Deck View Diagrams & Manuals
NP216012 (Series 12)(82405) 21-Inch 6 Hp Steel Deck View Diagrams & Manuals
P21558BV (Series 8)(80292) 21-Inch 5.5 Hp Steel Deck Bbc View Diagrams & Manuals
P21508 (Series 8)(80293) 21-Inch 5 Hp Steel Deck Bbc View Diagrams & Manuals
EFRP216012TV (Series 12)(82407) 21-Inch 6hp Steel Deck -Inchair-Inch Recycling European View Diagrams & Manuals
RP216012 (Series 12)(82423) 21-Inch 6 Hp Steel Deck Recycling View Diagrams & Manuals
NFRP216012 (Series 12)(82430) 21-Inch 6 Hp Steel Deck View Diagrams & Manuals
CAP21509R (Series 9)(80325) 21-Inch 5 Hp Cast Deck Side Discharge Commercial View Diagrams & Manuals
X21500 (Series 0)(80443) 21-Inch 5 Hp Cast Deck Rear Discharge Jet-Vac View Diagrams & Manuals
NFRP216012E (Series 12)(82431) 21-Inch 6 Hp Steel Deck -Inchair-Inch Recycling Electric Start View Diagrams & Manuals
80414 (Series 0)(ECP21400R2)(90s) 21-Inch 4 Hp 2 Cycle Steel Deck Commercial Euro View Diagrams & Manuals
P216512TV (Series 12)(82538) 21-Inch 6.5 Hp Steel Deck View Diagrams & Manuals
80415 (Series 0)(ECP21550V)(90s) 21-Inch 5.5 Hp Steel Deck Commercial Euro View Diagrams & Manuals
OP21507B (Series 7)(83080) 21-Inch 5 Hp Steel Deck View Diagrams & Manuals
XP21500 (Series 0)(80444) 21-Inch 5 Hp Cast Deck Rear Discharge Jet-Vac View Diagrams & Manuals
XP21550V (Series 0)(80445) 21-Inch 5.5 Hp Cast Deck Rear Discharge Jet-Vac View Diagrams & Manuals
XP21550VE (80446) 21-Inch 5.5 Hp Cast Deck Rear Discharge Jet-Vac Electric Start View Diagrams & Manuals
EXP21500 (Series 0)(80450) 21-Inch 5 Hp Cast Deck Rear Discharge Jet-Vac Euro View Diagrams & Manuals
P21507B (Series 7)(83270) 21-Inch 5 Hp Steel Deck View Diagrams & Manuals
XP21500KWV (Series 0)(80472) 21-Inch 5 Hp Cast Deck Rear Discharge Jet-Vac View Diagrams & Manuals
EXP21501KWV (Series 1)(80498) 21-Inch 5 Hp Cast Deck Rear Discharge Jet-Vac Euro View Diagrams & Manuals
EXP21551VE (80514) 21-Inch 5.5 Hp Jet-Vac Rear Discharge Cast Deck Elect View Diagrams & Manuals
P21507BE (Series 7)(83360) 21-Inch 5 Hp Steel Deck Electric Start View Diagrams & Manuals
EXP21500KWV (Series 0)(80587) 21-Inch 5 Hp Cast Deck Rear Discharge Jet-Vac Euro View Diagrams & Manuals
EXP21550E (Series 0) 21-Inch 5.5 Hp Cast Deck Rear Discharge Jet-Vac Euro View Diagrams & Manuals
RP21500KWV (Series 0)(90's) 21-Inch5hp Steel Deck Recycling View Diagrams & Manuals
GP21507B (Series 7)(83740) 21-Inch 5 Hp Steel Deck European View Diagrams & Manuals
GP21507BE (Series 7)(83750) 21-Inch 5 Hp Steel Deck European Electric Start View Diagrams & Manuals
21355P (Series 5)(83048) 21-Inch 3.5 Hp Steel Deck View Diagrams & Manuals
P21407T-2 (Series 7)(83940) 21-Inch 4 Hp 2 Cycle Steel Deck View Diagrams & Manuals
214X5PR (Series 5)(83088) 21-Inch 4 Hp Robin Steel Deck View Diagrams & Manuals
RP21501 (Series 1)(90 's) 21-Inch 5hp Steel Deck Recycling View Diagrams & Manuals
21355PD (Series 5)(83028) 21-Inch 3.5 Hp Steel Deck View Diagrams & Manuals
214X5PS (Series 5)(83198) 21-Inch 4 Hp Steel Deck Elecrtic Start View Diagrams & Manuals
RP21500T2 (Series 0)(90's) 21-Inch 5hp 2 Cycle Steel Deck Recycling View Diagrams & Manuals
RP21550 (Series 0)(90's) 21-Inch 5.5hp Steel Deck Recycling View Diagrams & Manuals
21405PD (Series 5)(83258) 21-Inch 4 Hp Steel Deck View Diagrams & Manuals
21405P (Series 5)(83278) 21-Inch 4 Hp Steel Deck View Diagrams & Manuals
214X5P (Series 5)(83318) 21-Inch 4 Hp Steel Deck View Diagrams & Manuals
CP21509R (Series 9)(80304) 21-Inch 5 Hp Steel Deck Commercial View Diagrams & Manuals
ECP21559BV (Series 9)(80306) 21-Inch 5.5 Hp Steel Deck Commercial European View Diagrams & Manuals
C21409R-2 (Series 9) 21-Inch 4 Hp 2 Cycle Steel Deck Commercial View Diagrams & Manuals
C21509R (Series 9) 21-Inch 5 Hp Steel Deck Commercial View Diagrams & Manuals
CP21409R-2 (Series 9) 21-Inch 4 Hp 2 Cycle Steel Deck Commercial View Diagrams & Manuals
CP21559BV (Series 9) 21-Inch 5.5 Hp Steel Deck Commercial View Diagrams & Manuals
CP215512KWV (Series 12)(82408) 21-Inch 5.5 Hp Steel Deck Commercial View Diagrams & Manuals
C216012RV (Series 12)(82409) 21-Inch 6 Hp Steel Deck Commercial View Diagrams & Manuals
CP216512RV (Series 12)(82409) 21-Inch 6.5 Hp Steel Deck Commercial View Diagrams & Manuals
CP214012R2 (Series 12)(84424) 21-Inch 4 Hp 2 Cycle Steel Deck Commercial View Diagrams & Manuals
CP216012RV (Series 12)(84646) 21-Inch 6 Hp Steel Deck Commercial View Diagrams & Manuals
CP215013KWV (Series 13)(84667) 21-Inch 5 Hp Steel Deck Commercial View Diagrams & Manuals
MCRP215014KWV (Series 14)(84323) 21-Inch 5 Hp Steel Deck Commercial -Inchm-Inch View Diagrams & Manuals
MCRS215014KWV (Series 14)(84332) 21-Inch 5 Hp Steel Deck Commercial Sw -Inchm-Inch View Diagrams & Manuals
MCRP215015KWV (Series 15)(84645) 21-Inch 5 Hp Steel Deck Commercial -Inchm-Inch View Diagrams & Manuals
CP214017R2 (Series 17)(84691) 21-Inch 4 Hp 2 Cycle Steel Deck Commercial View Diagrams & Manuals
CP216017RV (Series 17)(84692) 21-Inch 6 Hp Steel Deck Commercial View Diagrams & Manuals
CP215017HV (Series 17)(84907) 21-Inch 5 Hp Steel Deck Commercial View Diagrams & Manuals
CP215517HV (Series 17)(84908) 21-Inch 5.5 Hp Steel Deck Commercial View Diagrams & Manuals
CP215017KWV (Series 17)(85690) 21-Inch 5 Hp Steel Deck Commercial View Diagrams & Manuals
CRP216018KWV (Series 18)(80656) 21-Inch 6 Hp Steel Deck Commercial View Diagrams & Manuals
CP216018KWV (Series 18)(80657) 21-Inch 6 Hp Steel Deck Commercial View Diagrams & Manuals
CP215518HV (Series 18)(80658) 21-Inch 5.5 Hp Steel Deck Commercial View Diagrams & Manuals
CRP216019KWV (Series 19)(7800036) 21-Inch 6 Tp Steel Deck Commercial View Diagrams & Manuals
CP216019KWV (Series 19)(7800037) 21-Inch 6 Tp Steel Deck Commercial View Diagrams & Manuals
CP215519HV (Series 19)(7800038) 21-Inch 5.5 Tp Steel Deck Commercial View Diagrams & Manuals
CP216019KWV (Series 19)(7800194) 21-Inch 6 Tp Steel Deck Commercial View Diagrams & Manuals
CRP216019KWV (Series 19)(7800200) 21-Inch 6 Tp Steel Deck Commercial View Diagrams & Manuals
CP216019KWVFC (Series 19)(7800288) 21-Inch 6 Tp Steel Deck Commercial View Diagrams & Manuals
CP215520HVFC (Series 20)(7800289) 21-Inch 5.5 Tp Steel Deck Commercial View Diagrams & Manuals
CP215520HV (Series 20)(7800372) 21-Inch 5.5 Tp Steel Deck Commercial View Diagrams & Manuals
CRP218520 (Series 20)(7800764) 21-Inch 8.75 Tp Steel Deck Commercial View Diagrams & Manuals
CP218520 (Series 20)(7800772) 21-Inch 8.75 Tp Steel Deck Commercial View Diagrams & Manuals
CRP218520 (Series 20)(7800847-00) 21-Inch 8.75 Tp Steel Deck Commercial View Diagrams & Manuals
80474 (Series 0)(CP21500KWV)(90s) 21-Inch 5 Hp Steel Deck Commercial View Diagrams & Manuals
RP21500 (Series 0)(80405)(90's) 21-Inch 5hp Steel Deck Recycling View Diagrams & Manuals
80513 (Series 0)(ECP21500KWV)(90s) 21-Inch 5 Hp Steel Deck Commercial Euro View Diagrams & Manuals
82369 (Series 0)(CP21550KWV)(90s) 21-Inch 5.5 Hp Steel Deck Commercial View Diagrams & Manuals
DP21500 (Series 0)(90's) 21-Inch 5hp Steel Deck View Diagrams & Manuals
83096 (Series 0)(21R00PC) 21-Inch 5 Hp Robin Steel Deck View Diagrams & Manuals
83098 (Series 0)(21500PCR) 21-Inch 5 Hp Steel Deck Robin Commercial View Diagrams & Manuals
EDP21400 (Series 0)(90's) 21-Inch 4hp Steel Deck European View Diagrams & Manuals
EFRP21600TV (Series 0)(90's) 21-Inch6hp Steel Deck -Inchair-Inch Recycling Euro View Diagrams & Manuals
83768 (Series 0)(G21500PC) 21-Inch 5 Hp Bands (1-Inch To 7/8-Inch Crank) Steel Deck Comm Euro View Diagrams & Manuals
EP21400 (Series 0)(90's) 21-Inch 4hp Steel Deck European View Diagrams & Manuals
EP21450 (Series 0)(90's) 21-Inch 4hp Steel Deck European View Diagrams & Manuals
EP21500 (Series 0)(90's) 21-Inch 5hp Steel Deck European View Diagrams & Manuals
FRP216512TV (Series 12)(82539) 21-Inch 6.5 Hp Steel Deck -Inchair-Inch Recycling View Diagrams & Manuals
EP216012 (Series 12)(82540) 21-Inch 6 Hp Steel Deck European View Diagrams & Manuals
EFRP216512TV (Series 12)(82543) 21-Inch 6.5hp Steel Deck -Inchair-Inch Recycling European View Diagrams & Manuals
NFRP216012E (Series 12)(82549) 21-Inch 6 Hp Steel Deck (Electric Start) View Diagrams & Manuals
P216012 (Series 12)(84634) 21-Inch 6 Hp Steel Deck View Diagrams & Manuals
P216512BV (Series 12)(84635) 21-Inch 6.5 Hp Steel Deck View Diagrams & Manuals
P216012E (Series 12)(84636) 21-Inch 6 Hp Steel Deck Electric Start View Diagrams & Manuals
WP216512BV (Series 12)(84666) 21-Inch 6.5 Hp Steel Deck View Diagrams & Manuals
MRP216014B (Series 14)(82525) 21-Inch 6 Hp Steel Deck -Inchm-Inch View Diagrams & Manuals
MRP216014T (Series 14)(82526) 21-Inch 6 Hp Steel Deck -Inchm-Inch View Diagrams & Manuals
EMRP216014B (Series 14)(84252) 21-Inch 6 Hp Steel Deck European -Inchm-Inch View Diagrams & Manuals
83774 (Series 0)(21500PC) 21-Inch 5 Hp Bands (1-Inch To 7/8-Inch Crank) Steel Deck Commercial View Diagrams & Manuals
FRPS216015E (Series 15)(84287) 21-Inch 6 Hp Steel Deck (Electric Start) View Diagrams & Manuals
MRP216015B (Series 15)(84631) 21-Inch 6 Hp Steel Deck -Inchm-Inch View Diagrams & Manuals
CP21501KWV (Series 1)(80665)(90s) 21-Inch 5 Hp Steel Deck Commercial View Diagrams & Manuals
EMRP216015B (Series 15)(84639) 21-Inch 6 Hp Steel Deck European -Inchm-Inch View Diagrams & Manuals
ECP21501KWV (Series 1)(80666)(90s) 21-Inch 5 Hp Steel Deck Commercial Euro View Diagrams & Manuals
CP21401R2 (Series 1)(80667)(90s) 21-Inch 4 Hp 2 Cycle Steel Deck Commercial View Diagrams & Manuals
CP21402R2 (Series 2)(80903)(90s) 21-Inch 4 Hp 2 Cycle Steel Deck Commercial View Diagrams & Manuals
CP21507R (Series 7)(80080) 21-Inch 5 Hp Steel Deck Commercial View Diagrams & Manuals
MRP216015BV (Series 15)(84665) 21-Inch 6 Hp Steel Deck -Inchm-Inch View Diagrams & Manuals
EFRP216516TV (Series 16)(7084422) 21-Inch 6.5hp Steel Deck -Inchair-Inch Recycling European View Diagrams & Manuals
CVP21507B (Series 7)(80178) 21-Inch 5 Hp Cast Deck Side Discharge Commercial View Diagrams & Manuals
CVP21507R (Series 7)(80179) 21-Inch 5 Hp Cast Deck Side Discharge Commercial View Diagrams & Manuals
FRP216016 (Series 16)(7084428) 21-Inch 6 Hp Steel Deck -Inchair-Inch Recycling View Diagrams & Manuals
CP21407R2 (Series 7)(80302) 21-Inch 4 Hp 2 Cycle Steel Deck Commercial View Diagrams & Manuals
FRP216016 (Series 16)(7084637) 21-Inch 6 Hp Steel Deck -Inchair-Inch Recycling View Diagrams & Manuals
CP21557BV (Series 7)(80303) 21-Inch 5.5 Hp Steel Deck Commercial View Diagrams & Manuals
ECP21407R2 (Series 7)(80305) 21-Inch 4 Hp 2 Cycle Steel Deck Commercial European View Diagrams & Manuals
CP21507B (Series 7)(80777) 21-Inch 5 Hp Steel Deck Commercial View Diagrams & Manuals
EFRP216516BV (Series 16)(7084638) 21-Inch 6.5hp Steel Deck -Inchair-Inch Recycling European View Diagrams & Manuals
FRP216016 (Series 16)(84428) 21-Inch 6 Hp Steel Deck -Inchair-Inch Recycling View Diagrams & Manuals
EFRP216516TV (Series 16)(84422) 21-Inch 6.5hp Steel Deck -Inchair-Inch Recycling European View Diagrams & Manuals
PC21507R (Series 7)(83090) 21-Inch 5 Hp Steel Deck Commercial View Diagrams & Manuals
FRP216016 (Series 16)(84637) 21-Inch 6 Hp Steel Deck -Inchair-Inch Recycling View Diagrams & Manuals
EFRP216516BV (Series 16)(84638) 21-Inch 6.5hp Steel Deck -Inchair-Inch Recycling European View Diagrams & Manuals
PC21507BV (Series 7)(83120) 21-Inch 5 Hp Steel Deck Commercial View Diagrams & Manuals
EMRP216517B (Series 17)(80347) 21-Inch 6.5 Hp Steel Deck European -Inchmr-Inch View Diagrams & Manuals
P216517B (Series 17)(84324) 21-Inch 6.75 Hp Steel Deck View Diagrams & Manuals
PC21507B (Series 7)(83410) 21-Inch 5 Hp Steel Deck Commercial View Diagrams & Manuals
PC21407R-2 (Series 7)(83430) 21-Inch 4 Hp 2 Cycle Steel Deck Commercial View Diagrams & Manuals
GPC21507B (Series 7)(83760) 21-Inch 5 Hp Steel Deck Commercial European View Diagrams & Manuals
GPC21507BV (Series 7)(83830) 21-Inch 5 Hp Steel Deck Commercial European View Diagrams & Manuals
C21559BV (Series 9)(80301) 21-Inch 5 Hp Steel Deck Commercial View Diagrams & Manuals
CRP218520 (Series 20)(7800847-01) 21-Inch 8.75 Tp Steel Deck Commercial View Diagrams & Manuals
CP218520 (Series 20)(7800848) 21-Inch 8.75 Tp Steel Deck Commercial View Diagrams & Manuals
CP215520HV (Series 20)(7800849-00) 21-Inch 5.5 Gtp Steel Deck Commercial View Diagrams & Manuals
CP215520HV (Series 20)(7800849-01) 21-Inch 5.5 Gtp Steel Deck Commercial View Diagrams & Manuals
CP215520HV (Series 20)(7800849-02) 21-Inch 5.5 Gtp Steel Deck Commercial View Diagrams & Manuals
CP215520HV (Series 20)(7800849-03) 21-Inch 5.5 Gtp Steel Deck Commercial View Diagrams & Manuals
CP215520HV (Series 20)(7800849-04) 21-Inch 5.5 Gtp Steel Deck Commercial View Diagrams & Manuals
CRP2187520 (Series 20)(7800968-00) 21-Inch 8.75 Gtp Steel Deck Commercial View Diagrams & Manuals
CRP2187520 (Series 20)(7800968-01) 21-Inch 8.75 Gtp Steel Deck Commercial View Diagrams & Manuals
CRP218520 (Series 20)(7800968A-00) 21-Inch 8.5 Gtp Steel Deck Commercial View Diagrams & Manuals
DP21409B (Series 9)(80285) 21-Inch 4 Hp Propelled Steel Deck View Diagrams & Manuals
EP21509B (Series 9)(80288) 21-Inch 5 Hp Propelled Steel Deck Euro View Diagrams & Manuals
EP21509BE (Series 9)(80289) 21-Inch 5 Hp Propelled Steel Deck Electric Start Euro View Diagrams & Manuals
P21509T2 (Series 9)(80294) 21-Inch 5 Hp 2 Cycle Propelled Steel Deck View Diagrams & Manuals
P21509B (Series 9)(80295) 21-Inch 5 Hp Propelled Steel Deck View Diagrams & Manuals
P21509BE (Series 9)(80296) 21-Inch 5 Hp Propelled Steel Deck Electric Start View Diagrams & Manuals
P21559BV (Series 9)(80297) 21-Inch 5.5 Hp Propelled Steel Deck View Diagrams & Manuals
HWPS26600RV (Series 0)(84649) 26-Inch 6 Hp High-Wheel View Diagrams & Manuals
HWPS26700BV (Series 0)(84952) 26-Inch 7 Hp High-Wheel View Diagrams & Manuals
P217017BV (Series 17)(84956) 21-Inch 7 Hp Steel Deck View Diagrams & Manuals
P217017BVE (Series 17)(84957) 21-Inch 7 Hp Steel Deck View Diagrams & Manuals
RP217017BV (Series 17)(84958) 21-Inch 7 Hp Steel Deck View Diagrams & Manuals
RP217017BVE (Series 17)(84959) 21-Inch 7 Hp Steel Deck View Diagrams & Manuals
ERP217017BV (Series 17)(85619) 21-Inch 7 Hp Steel Deck European View Diagrams & Manuals
EP217017BV (Series 17)(85620) 21-Inch 7 Hp Steel Deck European View Diagrams & Manuals
MR216518B (Series 18)(80458) 21-Inch 6.5 Hp Steel Deck -Inchmr-Inch View Diagrams & Manuals
MRP216518B (Series 18)(80496) 21-Inch 6.5 Hp Steel Deck -Inchmr-Inch View Diagrams & Manuals
RP217018BV (Series 18)(80526) 21-Inch 7 Hp Steel Deck Recycling View Diagrams & Manuals
P2167519B (Series 19)(7800175) 21-Inch 6.75 Tp Steel Deck View Diagrams & Manuals
P2187519BV (Series 19)(7800176) 21-Inch 8.75 Tp Steel Deck View Diagrams & Manuals
P2187519BVE (Series 19)(7800178) 21-Inch 8.75 Tp Steel Deck View Diagrams & Manuals
P216019KWV (Series 19)(7800193) 21-Inch 6 Tp Steel Deck 2008 View Diagrams & Manuals
RP216019KWV (Series 19)(7800199) 21-Inch 6 Tp Steel Deck Recycling View Diagrams & Manuals
P2167519B (Series 19)(7800218) 21-Inch 6.75 Tp Steel Deck View Diagrams & Manuals
ERP2187519BV (Series 19)(7800249) 21-Inch 8.75gt Steel Deck European View Diagrams & Manuals
EP2187519BV (Series 19)(7800250) 21-Inch 8.75gt Steel Deck European View Diagrams & Manuals
P2167519BFC (Series 19)(7800285) 21-Inch 6.75 Gt Steel Deck Fc View Diagrams & Manuals
P2187519BVFC (Series 19)(7800286) 21-Inch 8.75 Gt Steel Deck Fc View Diagrams & Manuals
RP2167519BDVFC (Series 19)(7800287) 21-Inch 6.75 Gt Steel Deck Fc View Diagrams & Manuals
NX-100 (Series 20)(2691517-00)(ERP2187520) 21-Inch 8.75gt Steel Deck European View Diagrams & Manuals
RP217020BDV (Series 20)(7800424) 21-Inch 7 Tp Steel Deck Recycling View Diagrams & Manuals
RP2187520BV (Series 20)(7800425) 21-Inch 8.75 Tp Steel Deck Recycling View Diagrams & Manuals
RP2187520BVE (Series 20)(7800427) 21-Inch 8.75 Tp Steel Deck Recycling Electric Start View Diagrams & Manuals
P216518B (Series 18)(80527) 21-Inch 6.5 Hp Steel Deck View Diagrams & Manuals
RP216518KWV (Series 18)(80585) 21-Inch 6 Hp Steel Deck Recycling View Diagrams & Manuals
RP217018BVE (Series 18)(80636) 21-Inch 7 Hp Steel Deck Recycling View Diagrams & Manuals
P216518KWV (Series 18)(80650) 21-Inch 6 Hp Steel Deck View Diagrams & Manuals
EMRP216518B (Series 18)(80659) 21-Inch 6.5 Hp Steel Deck European -Inchmr-Inch View Diagrams & Manuals
P2167519B (Series 19)(7800032) 21-Inch 6.75 Tp Steel Deck View Diagrams & Manuals
P217019BV (Series 19)(7800033) 21-Inch 7 Tp Steel Deck View Diagrams & Manuals
ERP217018BV (Series 18)(80660) 21-Inch 7 Hp Steel Deck European View Diagrams & Manuals
P216019KWV (Series 19)(7800034) 21-Inch 6 Tp Steel Deck View Diagrams & Manuals
EP217018BV (Series 18)(80661) 21-Inch 7 Hp Steel Deck European View Diagrams & Manuals
P217018BV (Series 18)(85699) 21-Inch 7 Hp Steel Deck View Diagrams & Manuals
P2167520BFC (Series 20)(7800435) 21-Inch 6.75 Tp Steel Deck Fc View Diagrams & Manuals
P2187520BVFC (Series 20)(7800436) 21-Inch 8.75 Tp Steel Deck Fc View Diagrams & Manuals
NP2167520B (Series 20)(7800438) 21-Inch 6.75 Tp Steel Deck California View Diagrams & Manuals
P217019BVE (Series 19)(7800035) 21-Inch 7 Tp Steel Deck View Diagrams & Manuals
ERP2167519B (Series 19)(7800039) 21-Inch 7 Tp Steel Deck European View Diagrams & Manuals
ERP217019BV (Series 19)(7800040) 21-Inch 7 Tp Steel Deck European View Diagrams & Manuals
NP2187520BV (Series 20)(7800439) 21-Inch 8.75 Tp Steel Deck California View Diagrams & Manuals
ERP2187520BV (Series 20)(7800444) 21-Inch 8.75gt Steel Deck European View Diagrams & Manuals
EP2187520BV (Series 20)(7800445) 21-Inch 8.75gt Steel Deck European View Diagrams & Manuals
RP2187520BV2N1 (Series 20)(7800492) 21-Inch 8.75 Tp Steel Deck Recycling View Diagrams & Manuals
P2167520B (Series 20)(7800429) 21-Inch 6.75 Tp Steel Deck View Diagrams & Manuals
P2187520BV (Series 20)(7800430) 21-Inch 8.75 Tp Steel Deck View Diagrams & Manuals
P2187520BVE (Series 20)(7800432) 21-Inch 8.75 Tp Steel Deck View Diagrams & Manuals
RP217020BDVFC (Series 20)(7800433) 21-Inch 7 Tp Steel Deck Recycling Fc View Diagrams & Manuals
EP217019BV (Series 19)(7800041) 21-Inch 7 Tp Steel Deck European View Diagrams & Manuals
RP2167519BDV (Series 19)(7800066) 21-Inch 6.75 Tp Steel Deck Recycling View Diagrams & Manuals
RP2167519B (Series 19)(7800027) 21-Inch 6.75 Tp Steel Deck Recycling View Diagrams & Manuals
NP2187519BV (Series 19)(7800131) 21-Inch 8.75 Tp Steel Deck California View Diagrams & Manuals
RP217019BV (Series 19)(7800028) 21-Inch 7 Tp Steel Deck Recycling View Diagrams & Manuals
RP216019KWV (Series 19)(7800029) 21-Inch 6 Tp Steel Deck Recycling View Diagrams & Manuals
RP217019BVE (Series 19)(7800030) 21-Inch 7 Tp Steel Deck Recycling View Diagrams & Manuals
EP2187520 (Series 20)(7800875-00) 21-Inch 8.75gt Steel Deck European View Diagrams & Manuals
P2187520 (Series 20)(7800947-00) 21-Inch 8.75 Tp Steel Deck View Diagrams & Manuals
P2187520 (Series 20)(7800947-01) 21-Inch 8.75 Tp Steel Deck View Diagrams & Manuals
P2187520 (Series 20)(7800947-02) 21-Inch 8.75 Tp Steel Deck View Diagrams & Manuals
RP2187520BV2N1FC (Series 20)(7800493) 21-Inch 8.75 Tp Steel Deck Recycling Fc View Diagrams & Manuals
RP2187520 (Series 20)(7800552) 21-Inch 8.75 Tp Steel Deck View Diagrams & Manuals
RP2187520E (Series 20)(7800553) 21-Inch 8.75 Tp Steel Deck Recycling Electric Start View Diagrams & Manuals
P2187520 (Series 20)(7800554) 21-Inch 8.75 Tp Steel Deck View Diagrams & Manuals
P2187520E (Series 20)(7800555) 21-Inch 8.75 Tp Steel Deck Electric Start View Diagrams & Manuals
RP216020KWV (Series 20)(7800556) 21-Inch 6 Tp Steel Deck Recycling View Diagrams & Manuals
P216020KWV (Series 20)(7800557) 21-Inch 6 Tp Steel Deck View Diagrams & Manuals
RP2187520 (Series 20)(7800846) 21-Inch 8.75 Tp Steel Deck Recycling View Diagrams & Manuals
P217020B (Series 20)(7800597) 21-Inch 7 Tp Steel Deck View Diagrams & Manuals
P217020BFC (Series 20)(7800599) 21-Inch 7 Tp Steel Deck Fc View Diagrams & Manuals
RP2187520 (Series 20)(7800948-00) 21-Inch 8.75 Tp Steel Deck Recycling View Diagrams & Manuals
P2187520E (Series 20)(7800949-00) 21-Inch 8.75 Tp Steel Deck Electric Start View Diagrams & Manuals
RP2187520 (Series 20)(7800969-00) 21-Inch 8.75 Tp Steel Deck Recycling View Diagrams & Manuals
SP2187520E (Series 20)(7800970-00) 21-Inch 8.75 Tp Steel Deck Electric Start View Diagrams & Manuals
ERP2187520 (Series 20)(7800971-00) 21-Inch 8.75gt Steel Deck European View Diagrams & Manuals
ERP2187520 (Series 20)(7800971-01) 21-Inch 8.75gt Steel Deck European View Diagrams & Manuals
ERP2187520 (Series 20)(7800971-02) 21-Inch 8.75gt Steel Deck European View Diagrams & Manuals
P218520 (Series 20)(7800980-00) 21-Inch 8.5 Tp Steel Deck View Diagrams & Manuals
P2185020 (Series 20)(7800980A-00) 21-Inch 8.5 Gt Hv Steel Deck View Diagrams & Manuals
RP2185020 (Series 20)(7800981-00) 21-Inch 8.5 Tp Steel Deck Recycling View Diagrams & Manuals
RP2185020 (Series 20)(7800981A-00) 21-Inch 8.5 Tp Steel Deck Recycling View Diagrams & Manuals
P2185020E (Series 20)(7800982-00) 21-Inch 8.5 Tp Steel Deck Electric Start View Diagrams & Manuals
P2185020E (Series 20)(7800982A-00) 21-Inch 8.5 Tp Steel Deck Electric Start View Diagrams & Manuals
NP217020B (Series 20)(7800601) 21-Inch 7 Tp Steel Deck California View Diagrams & Manuals
RP217020 (Series 20)(7800602) 21-Inch 7 Tp Steel Deck View Diagrams & Manuals
RP217020FC (Series 20)(7800603) 21-Inch 7 Tp Steel Deck Recycling Fc View Diagrams & Manuals
ERP2187520 (Series 20)(7800685) 21-Inch 8.75gt Steel Deck European View Diagrams & Manuals
EP2187520 (Series 20)(7800686) 21-Inch 8.75gt Steel Deck European View Diagrams & Manuals
P2187520FC (Series 20)(7800691) 21-Inch 8.75 Tp Steel Deck Fc View Diagrams & Manuals
NP2187520 (Series 20)(7800692) 21-Inch 8.75 Tp Steel Deck California View Diagrams & Manuals
EP2187520 (Series 20)(7800731) 21-Inch 8.75gt Steel Deck European View Diagrams & Manuals
RP2187520 (Series 20)(7800754) 21-Inch 8.75 Tp Steel Deck Recycling View Diagrams & Manuals
P2187520 (Series 20)(7800758) 21-Inch 8.75 Tp Steel Deck View Diagrams & Manuals
P2187520E (Series 20)(7800759) 21-Inch 8.75 Tp Steel Deck Electric Start View Diagrams & Manuals
NP2187520 (Series 20)(7800771) 21-Inch 8.75 Tp Steel Deck California View Diagrams & Manuals
NP2167519B (Series 19)(7800134) 21-Inch 6.75 Tp Steel Deck California View Diagrams & Manuals
RP2187519BV (Series 19)(7800172) 21-Inch 8.75 Tp Steel Deck Recycling View Diagrams & Manuals
RP2187519BVE (Series 19)(7800173) 21-Inch 8.75 Tp Steel Deck Recycling View Diagrams & Manuals
P2172520B (Series 20)(7800842) 21-Inch 7.25 Tp Steel Deck View Diagrams & Manuals
P2187520 (Series 20)(7800843) 21-Inch 8.75 Tp Steel Deck View Diagrams & Manuals
P2187520E (Series 20)(7800844) 21-Inch 8.75 Tp Steel Deck Electric Start View Diagrams & Manuals
RP2172520 (Series 20)(7800845) 21-Inch 7.25 Tp Steel Deck Recycling View Diagrams & Manuals
EMRP216017B (Series 17)(84694) 21-Inch 6 Hp Steel Deck European -Inchmr-Inch View Diagrams & Manuals
EFRP2167517BV (Series 17)(84695) 21-Inch 6.75 Hp Steel Deck -Inchair-Inch Recycling Euro View Diagrams & Manuals
WMRP216017B (Series 17)(84742) 21-Inch 6 Hp Steel Deck -Inchmr-Inch View Diagrams & Manuals
WP2167517BV (Series 17)(84743) 21-Inch 6.75 Hp Steel Deck View Diagrams & Manuals
MRP216517B (Series 17)(84752) 21-Inch 6.5 Hp Steel Deck -Inchmr-Inch View Diagrams & Manuals
WMRP216517B (Series 17)(84757) 21-Inch 6.5 Hp Steel Deck -Inchmr-Inch View Diagrams & Manuals
RP2167517BV (Series 17)(84759) 21-Inch 6.75 Hp Steel Deck Recycling View Diagrams & Manuals
WP216517BV (Series 17)(84863) 21-Inch 6.5 Hp Steel Deck View Diagrams & Manuals
RP2167517BVE (Series 17)(84865) 21-Inch 6.75 Hp Steel Deck Recycling View Diagrams & Manuals
ERP2167517BV (Series 17)(84866) 21-Inch 6.75 Hp Steel Deck European View Diagrams & Manuals
EP2167517BV (Series 17)(84868) 21-Inch 6.75 Hp Steel Deck European View Diagrams & Manuals
RP215517HC (Series 17)(84905) 21-Inch 5.5 Hp Steel Deck Recycling View Diagrams & Manuals
P215517HC (Series 17)(84906) 21-Inch 5.5 Hp Steel Deck View Diagrams & Manuals
WRP216517BE (Series 17)(84920) 21-Inch 6.5 Hp Steel Deck Recycling View Diagrams & Manuals
WRPS216517B (Series 17)(84921) 21-Inch 6.75 Hp Steel Deck View Diagrams & Manuals
WRPS216517BE (Series 17)(84922) 21-Inch 6.75 Hp Steel Deck View Diagrams & Manuals
MRP216017B (Series 17)(84685) 21-Inch 6 Hp Steel Deck -Inchmr-Inch View Diagrams & Manuals
MRP216017BV (Series 17)(84686) 21-Inch 6 Hp Steel Deck -Inchmr-Inch View Diagrams & Manuals
P2167517BV (Series 17)(84688) 21-Inch 6.75 Hp Steel Deck View Diagrams & Manuals
P2167517BVE (Series 17)(84689) 21-Inch 6.75 Hp Steel Deck View Diagrams & Manuals
FRP2167517BV (Series 17)(84693) 21-Inch 6.75 Hp Steel Deck -Inchair-Inch Recycling View Diagrams & Manuals
Show More Compatible Models
This item works with the following types of products:
- Lawn Mower Parts
This part replaces obsolete part #: 7026693YP, 7029027YP, 7029027, 7026693
Customer Part Reviews ?
Average Rating (out of 5):
Click to filter by ratings:
5 stars
6
4 stars
2
3 stars
0
2 stars
0
1 stars
1
< PREV
- 1
Exactly What I needed
The part fit perfectly and worked great! I’m definitely not mechanically minded, but was able to change out the part and the mower is working great again. Thanks!
Guest -
May 23, 2023
Verified Purchase
Not an easy repair. Snapper provides no instruction.
Part was identical to original.
Guest -
October 7, 2019
Verified Purchase
worked perfect good seller
fast shiping
Guest -
September 21, 2019
Verified Purchase
Right part first time. Thanks for exploded parts views.
A+
Guest -
August 21, 2019
Verified Purchase
Just what I needed. Timely delivery!
Easy to find the part I needed on your website.
Guest -
July 30, 2019
Verified Purchase
Exactly correct
Exact replacement
Guest -
June 3, 2019
Verified Purchase
Right part, delivered quickly
The part was the right one and it was shipped promptly
Rick -
April 8, 2021
Verified Purchase
Works, but not press fit like OEM Snapper
Chinese made bearing fits into the hole on the driven disc adjustment bracket on my Snapper Ninja. Problem is, it's not oversized to be press fit into the bracket. Fortunately the bracket has four holes which can be drilled out for small pan head screw/nut which will keep the bearing in place. I used two small pan head screws (phillips) with nylock nuts which work just fine.
Guest -
July 11, 2019
Verified Purchase
did not fit
Bearing was too small of diameter. No grease in bearing. It is a sealed bearing. It the bearing turn rough, hard, gritty.
Old bearing is press in fit.
Your picture show made in USA, the 1 U sent was the poorest made china made bearing I have ever seen.
Guest -
August 15, 2019
Verified Purchase
t
t
t -
t days ago
Verified Purchase
eReplacementParts Team
t
Questions & Answers ?
Our customer Service team is at the ready daily to answer your part and product questions.

Ask our Team
We have a dedicated staff with decades of collective experience in helping customers just like you purchase parts to repair their products.
Does this fit my product?Questions & Answers for Ball Bearing
No questions have been asked yet
Customer Repair Instructions ?
All our customer repair instructions are solicited directly from other customers just like you who have purchased and replaced this exact part.
Bad Bearing on drive shaft bar
Joseph - May 15, 2016
👍 9 of 10 people found this instruction helpful
Tool Type
Lawn Mower
Difficulty
Easy
Time
15-30 minutes
Tools Used
Screwdriver, Socket set, Wrench Set, Rubber Hammer
Parts Used
1. Remove Drive Shaft "L" frame off of deck of Lawnmower and slide drive shaft off of "L"
frame.
2. Ball Bearing is mounted on left side of "L" frame (left side as you are standing behind mower
holding handle).
3. Use Socket Set or Wrench Set to remove the 4 self thread nuts holding the Bearing in place.
Note: of the 4 nuts, one will be shorter than the other 3, keep in mind which hole that you
took the shorter nut from when putting the new Bearing in.
4. The Bearing has a "Lip-Ring" on one side (same side as the side you removed the 4 bolts
from). On the other side, use a Screwdriver and a Rubber Hammer and "lightly" tap the old
Bearing out.
5. Insert the New Bearing in the same manner the old one came out and make sure the "Lip
-Ring" is on the same side as it was for the old Bearing (the Heads of the 4 nuts will hold the
new Bearing in place.
6. Install the 4 Nuts back in place and remember that they must be holding the "Lip-Ring" in
place.
7. Slide Drive Shaft back on "L" Frame.
8. Install Drive Shaft "L" Frame back on Lawnmower Deck.
Did you find this story helpful?
Thanks for voting and helping fellow customers!
Self propel stopped working
Dan - August 31, 2017
👍 1 of 1 people found this instruction helpful
Tool Type
Lawn Mower
Difficulty
Hard
Time
1-2 hours
Tools Used
Screwdriver, Pliers, Socket set, Wrench Set, bench grinder
Parts Used
The drive bearing on the snapper was press fit onto the hex shaft contrary to the service instructions that came with the mower. I had to cut off the bearing sleeve with a bench grinder before I could install the new bearing.
Then I had to add 4 self tapping screws to hold the bearing onto the mounting bracket. Once again the service instructions did not take this into account. It was as if the service instructions that came with the mower were for a different model.
Snapper mower instructions leave a lot to be desired.
Then I had to add 4 self tapping screws to hold the bearing onto the mounting bracket. Once again the service instructions did not take this into account. It was as if the service instructions that came with the mower were for a different model.
Snapper mower instructions leave a lot to be desired.
Did you find this story helpful?
Thanks for voting and helping fellow customers!
All parts of the power drive were worn.
Frank - July 24, 2017
👍 1 of 1 people found this instruction helpful
Tool Type
Lawn Mower
Difficulty
Medium
Time
More than 2 hours
Tools Used
Pliers, Socket set, Wrench Set
Took the drive all apart and replaced the worn parts. I used the schematic available on line to identify the parts needed and to reassemble the drive units.
Did you find this story helpful?
Thanks for voting and helping fellow customers!
Drive system rebuild, total frame and deck rework
Russell - September 8, 2016
👍 1 of 1 people found this instruction helpful
Tool Type
Lawn Mower
Difficulty
Medium
Time
More than 2 hours
Tools Used
Screwdriver, Pliers, Socket set, Wrench Set, Nutdriver, Adjustable Wrench
Parts Used
- Pulley/spring Assembly - 498144
- Filter-a/c Cartridge - 697029
- Rope-starter - 697316
- Tube-breather - 692937
- O-ring, 1idx1.25x.125 - 704008
- Blade, 21 - 7019795BZYP
- Poly V-belt - 7012354YP
- Ball Bearing - 7028014YP
- Ball Bearing - 707608
- Assembly, Drive-disc - 7073528YP
- Bushing - 703971
- Belt, Engine Drive - 7046784YP
- Disc, Driven - 7041855YP
Stripped lawnmower down to clean and repair. Painted deck and repaired drive system. All parts fit perfect.
Did you find this story helpful?
Thanks for voting and helping fellow customers!
Rubber Drive disc and support bearing failed
Harry - July 26, 2023
Tool Type
Lawn Mower
Difficulty
Medium
Time
30-60 minutes
Tools Used
Screwdriver, Power Drill, Nutdriver, Snap ring pliers and hammer
Parts Used
Removed tension spring and cotter pin and linkage arm
Slid assembly off of machine
Removed external snap ring and drive disc
Drove bearing from the bracket it was swaged in place from snapper
Installed new bearing and retained it with four 10/32 screws, nuts, flat washers and lock washers. Not included
Installed drive disc and retaining snap ring
Slid assembly back in place after sanding and cleaning the drive plate that runs the rubber drive disc
Reinstalled the tension spring and tested the mower
All good
Did you find this story helpful?
Thanks for voting and helping fellow customers!
Drive for walk behind mower
Stephen - October 4, 2020
Tool Type
Lawn Mower
Difficulty
Medium
Time
30-60 minutes
Tools Used
Socket set, Adjustable Wrench, Snap ring plyrrs
Replaced bearings & Drive Shaft & drive wheel!
Did you find this story helpful?
Thanks for voting and helping fellow customers!
front axle, wheel adjustment brackets and drive bearings were all worn and decals in bad shape.
Monte - January 6, 2020
Tool Type
Lawn Mower
Difficulty
Easy
Time
More than 2 hours
Tools Used
Socket set, Wrench Set, Snap ring pliers
Took drive train completely apart and changed bearings, Removed front wheel brackets and axle and removed old decals. While I had everything apart I sanded and painted and replaced decals.
Did you find this story helpful?
Thanks for voting and helping fellow customers!
self propell froze up
Robert - July 19, 2019
Tool Type
Lawn Mower
Difficulty
Easy
Time
15-30 minutes
Tools Used
Socket set, Wrench Set, n/a
Parts Used
replace drive bearing
Did you find this story helpful?
Thanks for voting and helping fellow customers!
Bearings locked up on the self propel mechanism .
Kevin - June 17, 2018
Tool Type
Lawn Mower
Difficulty
Medium
Time
1-2 hours
Tools Used
Screwdriver, Pliers, Socket set, Wrench Set, Snap ring pliers
Took the self propel mechanism apart, removed the bearings from their housings put the new ones in. Then put the new drive belt on before reassembling the mechanism.
Did you find this story helpful?
Thanks for voting and helping fellow customers!
Self propelled bearings and drive wheel, completly worn out.
Brad - March 19, 2017
Tool Type
Lawn Mower
Difficulty
Medium
Time
15-30 minutes
Tools Used
Screwdriver, Socket set, Wrench Set
Placed lawnmower on tailgate of truck.
Removed lawnmower blade to install new drive belt.
Disassembled Drive wheel and shaft.
Removed, replaced 4 screws to install new rubber on drive wheel.
Removed necessary screws and replaced both bearings.
Replaced belt and reassembled drive unit and blade.
Fairly simple job, Self propelled drive back in business.
Did you find this story helpful?
Thanks for voting and helping fellow customers!
OEM stands for Original Equipment Manufacturer and means the part you’re buying is sourced directly from the manufacturer who made your product. At eReplacementParts, we sell only genuine OEM parts, guaranteeing the part you’re purchasing is of better design and of higher quality than aftermarket parts.
Our product descriptions are a combination of data sourced directly from the manufacturers who made your product as well as content researched and curated by our content & customer service teams. This content is edited and reviewed internally before being made public to customers.
Our customer service team are at the ready daily to answer your part and product questions. We have a dedicated staff with decades of collective experience in helping customers just like you purchase parts to repair their products.
All our part reviews are solicited directly from other customers who have purchased this exact part. While we moderate these reviews for profanity, offensive language or personally identifiable information, these reviews are posted exactly as submitted and no alterations are made by our team.
All our customer repair instructions are solicited directly from other customers just like you who have purchased and replaced this exact part. While we moderate these reviews for profanity, offensive language or personally identifiable information, these reviews are posted exactly as submitted and no alterations are made by our team.
Based on data from past customer purchasing behaviors, these parts are most commonly purchased together along with the part you are viewing. These parts may be necessary or helpful to replace to complete your current repair.
All our installation videos are created and produced in collaboration with our in-house repair technician, Mark Sodja, who has helped millions of eReplacementParts customers over the last 13 years repair their products. Mark has years of experience in selling and repairing both commercial and residential products with a specialty in gas-powered equipment.
This data is collected from customers who submitted a repair instruction after replacing this exact part. Customers can rate how easy the repair was to complete and how long it took. We aggregate this data to provide a repair rating that allows customers to quickly determine the difficulty and time needed to perform their own repair.