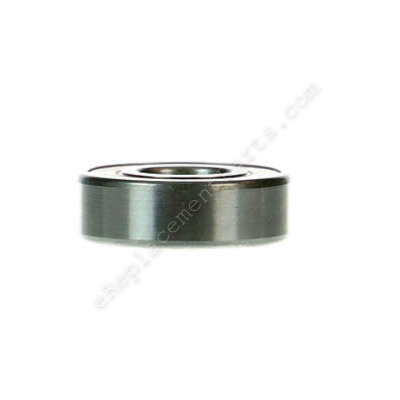
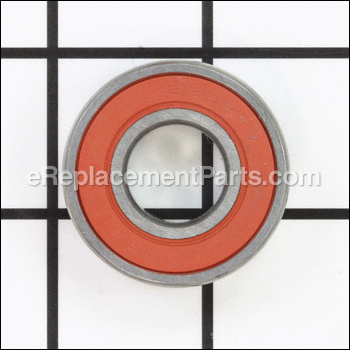


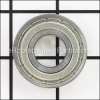
Ball Bearing 6202 080009006137
Part Number: 080009006137
Leaves our warehouse within
7 - 12 business days
7 - 12 business days
*This part replaces obsolete part #: , 80029002051, 820722-6, 080029002051, 680273002, 823762, 420010005, 1750001, HJ032000 and HJ036300.
Product Information
Description:
| This genuine OEM sourced replacement ball bearing is made for use with a variety of power tools. Bearings are use in different locations based on a tool. Please make sure to check appropriate diagrams for correct location and application of this item. Ball bearings are used to connect two parts and allow them to rotate freely. Over time due to constant pressure, heat and friction bearings will break down requiring replacement. Please note this bearing is sealed on both sides. Includes one (1) metal bearing. |
Frequently Purchased With
Compatibility
the 47 compatible machines
This part is compatible with the following machines:
Ryobi
C358 14" Cut-Off Saw
AP-12 Planer
C35611 Cutting Saw
TS-260 Compound Miter Saw
TS-260 Compound Miter Saw
W201S Circular Saw
AP-12 Planer
C35611 Cutting Saw
TS-260 Compound Miter Saw
TS-260 Compound Miter Saw
W201S Circular Saw
W201S Circular Saw
TSS220 Compound Miter Saw
TSS220 Compound Miter Saw
SP1800A Sander-Polisher
SP1800A Sander-Polisher
JP06101 6-1/8-Inch (156 Mm)
TSS220 Compound Miter Saw
TSS220 Compound Miter Saw
SP1800A Sander-Polisher
SP1800A Sander-Polisher
JP06101 6-1/8-Inch (156 Mm)
Ridgid
BS14000 14" Band Saw
BS14000 14" Band Saw
BS14001 14" Band Saw
BS14001 14" Band Saw
BS14002 14" Band Saw
BS14002 14" Band Saw
JP06000 6 1/8" Jointer / Planer
JP06000 6 1/8" Jointer / Planer
JP06100 6 1/8" Jointer / Planer
JP06100 6 1/8" Jointer / Planer
TS3650 10" Table Saw
TS3650 10" Table Saw
TS3660 10" Table Top Saw
TS3660 10" Table Top Saw
JP06101 6 1/8" Jointer/Planer
JP06101 6 1/8" Jointer/Planer
CM1450 14" Abrasive Cut-Off Machine
CM1450 14" Abrasive Cut-Off Machine
JP0610 6 1/8" Jointer/Planer
JP0610 6 1/8" Jointer/Planer
R3200 7-1/4" Circular Saw
R3200 7-1/4" Circular Saw
R3201 7-1/4" Circular Saw
R3201 7-1/4" Circular Saw
R4010 Tile Saw
R4010 Tile Saw
R4141 14" Abrasive Cut-Off Machine
R4141 14" Abrasive Cut-Off Machine
R4010TR 10 in. Tile Saw
R4010TR 10 in. Tile Saw
R4142 14" Abrasive Cut-Off Machine
R4142 14" Abrasive Cut-Off Machine
R41421 14 In. Abrasive Cut-Off Machine
JP0610 6 1/8" Jointer/Planer
JP0610 6 1/8" Jointer/Planer
R3200 7-1/4" Circular Saw
R3200 7-1/4" Circular Saw
R3201 7-1/4" Circular Saw
R3201 7-1/4" Circular Saw
R4010 Tile Saw
R4010 Tile Saw
R4141 14" Abrasive Cut-Off Machine
R4141 14" Abrasive Cut-Off Machine
R4010TR 10 in. Tile Saw
R4010TR 10 in. Tile Saw
R4142 14" Abrasive Cut-Off Machine
R4142 14" Abrasive Cut-Off Machine
R41421 14 In. Abrasive Cut-Off Machine
MK Diamond
Products Compatibility
List
This item works with the following types of products:
- • Band Saw
- • Chop Saw
- • Circular Saw
- • Jointer
- • Miter Saw
- • Planer
- • Polisher
- • Sander
- • Saw
- • Table Saw
- • Tile Saw
Questions & Answers for Ball Bearing 6202
No questions have been asked yet
Repair Instructions: Submitted by Customers Like You
4 of 4 people found this instruction helpful
Tool Type:
Planer
Repair Difficulty:
Hard
Time Spent Repairing:
More than 2 hours
Tools Used:
Screwdriver, Pliers, Socket set, Drimmel
Bearing went out on the planer
The opening for the non-driven end of the planer shaft is too small for my smallest gear puller to fit through the bearing mount opening to pull the fused inner race of the failed bearing. The slot in the frame for the planner shaft for original factory installation was too small for the shaft to be removed with a fused inner race stuck on the shaft.
I opened up the slot for the original shaft installation slightly top and bottom to allow the race to slide through the opening so the fused Inner race could be removed with a small Dremel bit. Once the inner race was removed. I cleaned all of the associated parts and mounts and reassembled the shaft with the new bearings and chains.
I opened up the slot for the original shaft installation slightly top and bottom to allow the race to slide through the opening so the fused Inner race could be removed with a small Dremel bit. Once the inner race was removed. I cleaned all of the associated parts and mounts and reassembled the shaft with the new bearings and chains.
Did you find this story helpful?
Thanks for voting and helping fellow customers!
0 of 1 people found this instruction helpful
Tool Type:
Jointer
Parts Used:
Repair Difficulty:
Easy
Time Spent Repairing:
30-60 minutes
Tools Used:
Screwdriver, Socket set, Wrench Set, Nutdriver, Bearing puller
Bought a used ridgid jointer and replaced the worn out parts
1. Removed the fence with the slide all together by loosening two rear allen bolts ( careful it is very heavy so if you can get another person to help you remove it)
2. Remove the guard cutter.
3. Remove the pulley guard cover.
4. Remove the belt.
5. Lower both infeed and outfeed table.
6. Loosen both hex screws that hold the cutter head. ( lift the cutter head as you loosen the screws there is barely any room for the screw to go down).
7. Remove the cutter head ( careful don't get cut with the blades).
8. Remove pulley.
9. With a bearing puller remove both support bearing and bearing.( now is the time to upgrade your cutter head like I did)
10. Press both bearings and follow everything in reverse order to assemble back.
11. Enjoy your new parts.
Did you find this story helpful?
Thanks for voting and helping fellow customers!
Product Information