
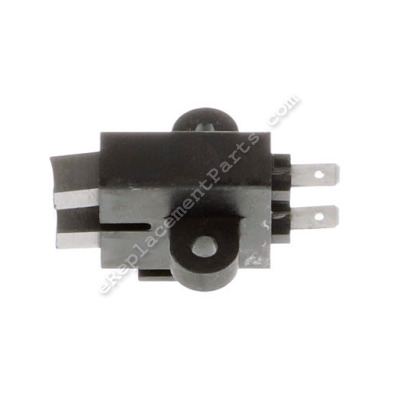


This brush holder assembly is an authentic OEM replacement part that is specially designed for use on Briggs and Stratton generators. Brushes help to conduct electric current in the motor that powers the unit. This assembly includes one plastic brush holder and two carbon brushes with a lead wires and springs attached. You would need a screwdriver to complete this job.
Assembly, Holder, Brush 66386GS
OEM part for: Briggs and Stratton, Snapper
Part Number: 66386GS
$25.41
In Stock
Jump To:
Frequently Purchased Together ?

Compatibility
This part will fit the following 406 machines
Briggs and Stratton
040243-0 Generator View Diagrams & Manuals
040243-1 Generator View Diagrams & Manuals
040248-0 Generator View Diagrams & Manuals
040276-0 Generator View Diagrams & Manuals
040277-0 Generator View Diagrams & Manuals
040297-0 Generator View Diagrams & Manuals
040298-0 Generator View Diagrams & Manuals
1678-0 Generator View Diagrams & Manuals
1897-0 Generator View Diagrams & Manuals
01975-0 Generator View Diagrams & Manuals
040211-0 Generator View Diagrams & Manuals
040220-0 Generator View Diagrams & Manuals
040220A-0 Generator View Diagrams & Manuals
040221-0 Generator View Diagrams & Manuals
040226-0 Generator View Diagrams & Manuals
040226-1 Generator View Diagrams & Manuals
040227-0 Generator View Diagrams & Manuals
040228-0 Generator View Diagrams & Manuals
040228-1 Generator View Diagrams & Manuals
030210-1 Portable Generator View Diagrams & Manuals
030210-2 Portable Generator View Diagrams & Manuals
030211-0 Portable Generator View Diagrams & Manuals
030211-1 Portable Generator View Diagrams & Manuals
030213-0 Portable Generator View Diagrams & Manuals
030216-0 Portable Generator View Diagrams & Manuals
030216-1 Portable Generator View Diagrams & Manuals
030220-0 Portable Generator View Diagrams & Manuals
030221-0 Portable Generator View Diagrams & Manuals
030228-0 Portable Generator View Diagrams & Manuals
030231-0 Portable Generator View Diagrams & Manuals
030236-0 Portable Generator View Diagrams & Manuals
030237-0 Portable Generator View Diagrams & Manuals
030244-0 Portable Generator View Diagrams & Manuals
030201-0 Portable Generator View Diagrams & Manuals
030244-2 Portable Generator View Diagrams & Manuals
030247-0 Portable Generator View Diagrams & Manuals
030247-1 Portable Generator View Diagrams & Manuals
030247-2 Portable Generator View Diagrams & Manuals
030254-0 Portable Generator View Diagrams & Manuals
030297-0 Portable Generator View Diagrams & Manuals
030335-0 Portable Generator View Diagrams & Manuals
030336-0 Portable Generator View Diagrams & Manuals
030337-0 Portable Generator View Diagrams & Manuals
030338-0 Portable Generator View Diagrams & Manuals
030339-0 Portable Generator View Diagrams & Manuals
030340-0 Portable Generator View Diagrams & Manuals
030342-0 Portable Generator View Diagrams & Manuals
030344-0 Portable Generator View Diagrams & Manuals
030345-0 Portable Generator View Diagrams & Manuals
030358-0 Portable Generator View Diagrams & Manuals
030359-0 Portable Generator View Diagrams & Manuals
030373-0 Portable Generator View Diagrams & Manuals
030374-0 Portable Generator View Diagrams & Manuals
030375-0 Portable Generator View Diagrams & Manuals
030207-0 Portable Generator View Diagrams & Manuals
0453-0 Portable Generator View Diagrams & Manuals
0486-0 Portable Generator View Diagrams & Manuals
0487-0 Portable Generator View Diagrams & Manuals
0488-0 Portable Generator View Diagrams & Manuals
030381-0 Portable Generator View Diagrams & Manuals
0488-1 Portable Generator View Diagrams & Manuals
0490-0 Portable Generator View Diagrams & Manuals
030382-0 Portable Generator View Diagrams & Manuals
0491-0 Portable Generator View Diagrams & Manuals
030383-0 Portable Generator View Diagrams & Manuals
0493-0 Portable Generator View Diagrams & Manuals
0496-0 Portable Generator View Diagrams & Manuals
030384-0 Portable Generator View Diagrams & Manuals
0497-0 Portable Generator View Diagrams & Manuals
0562-0 Portable Generator View Diagrams & Manuals
030385-0 Portable Generator View Diagrams & Manuals
0567-0 Portable Generator View Diagrams & Manuals
030386-0 Portable Generator View Diagrams & Manuals
0567-1 Portable Generator View Diagrams & Manuals
030387-0 Portable Generator View Diagrams & Manuals
030419-0 Portable Generator View Diagrams & Manuals
0567-3 Portable Generator View Diagrams & Manuals
030426-0 Portable Generator View Diagrams & Manuals
0633-0 Portable Generator View Diagrams & Manuals
1006-0 Portable Generator View Diagrams & Manuals
030432-0 Portable Generator View Diagrams & Manuals
1006-1 Portable Generator View Diagrams & Manuals
1013-0 Portable Generator View Diagrams & Manuals
1017-0 Portable Generator View Diagrams & Manuals
1019-0 Portable Generator View Diagrams & Manuals
1019-1 Portable Generator View Diagrams & Manuals
1019-3 Portable Generator View Diagrams & Manuals
1020-0 Portable Generator View Diagrams & Manuals
1020-1 Portable Generator View Diagrams & Manuals
1021-0 Portable Generator View Diagrams & Manuals
1189-0 Portable Generator View Diagrams & Manuals
1190-0 Portable Generator View Diagrams & Manuals
1277-0 Portable Generator View Diagrams & Manuals
1313-0 Portable Generator View Diagrams & Manuals
1313-1 Portable Generator View Diagrams & Manuals
1314-0 Portable Generator View Diagrams & Manuals
1315-0 Portable Generator View Diagrams & Manuals
9797-2 5,500 EXL Generator View Diagrams & Manuals
9797-1 5,500 EXL Generator View Diagrams & Manuals
9785-0 8,000 Watt (Rev 0 6/5/95) Generator View Diagrams & Manuals
9783-0 6,500 Watt Generator View Diagrams & Manuals
9779-1 6,500 XL Generator View Diagrams & Manuals
9779-0 6,500 XL 6,500 Watt Generator View Diagrams & Manuals
9778-0 5,500XL 5,500 Watt Generator View Diagrams & Manuals
9777-4 4,000 XL Generator View Diagrams & Manuals
9777-3 4,000 XL Generator View Diagrams & Manuals
9777-2 4,000 XL Generator View Diagrams & Manuals
9719-0 SVP 5000 Generator View Diagrams & Manuals
9777-1 4,000 XL Generator View Diagrams & Manuals
9777-0 4,000 XL Generator View Diagrams & Manuals
9753-0 4,000 XL Generator View Diagrams & Manuals
9717-0 SV4200 4,200 Watt Generator View Diagrams & Manuals
9716-0 SV2400 2,400 Watt Generator View Diagrams & Manuals
9704-2 3,500 XL 3,500 Watt Generator View Diagrams & Manuals
9720-0 SVT5000 5,000 Watt Generator View Diagrams & Manuals
9704-1 3,500 XL 3,500 Watt Generator View Diagrams & Manuals
9704-0 3,500 XL 3,500 Watt Generator View Diagrams & Manuals
9676-0 S-4000 4,000 Watt Generator View Diagrams & Manuals
9700-0 EP4600 4,600 Watt Generator View Diagrams & Manuals
9608-0 3,500 Watt Generator View Diagrams & Manuals
9699-0 9500LX 3,500 Watt Generator View Diagrams & Manuals
9586-0 3,500 Watt Generator View Diagrams & Manuals
9580-0 4,000 Watt Generator View Diagrams & Manuals
9579-0 5,000 Watt Generator View Diagrams & Manuals
9578-0 4,000 Watt Generator View Diagrams & Manuals
9570-0 5,500 Watt Generator View Diagrams & Manuals
9530-0 2,400 Watt Generator View Diagrams & Manuals
9569-1 4,000 Watt (Revised) Generator View Diagrams & Manuals
9528-1 EP5000 5,000 Watt Generator View Diagrams & Manuals
9569-0 5,000 Watt Generator View Diagrams & Manuals
9528-0 5,000 Watt Generator View Diagrams & Manuals
9551-0 2,200 XL Generator View Diagrams & Manuals
9514-3 3,500 Watt Generator View Diagrams & Manuals
9547-0 2,500 Watt Generator View Diagrams & Manuals
9514-2 3,500 Watt Generator View Diagrams & Manuals
9540-2 3,500 Watt Generator View Diagrams & Manuals
9514-1 3,500 Watt Generator View Diagrams & Manuals
9540-0 3,500 Watt Generator View Diagrams & Manuals
9538-2 3,000 XL Generator View Diagrams & Manuals
9514-0 3,500 Watt Generator View Diagrams & Manuals
9538-1 3,000 Watt Generator View Diagrams & Manuals
9495-0 ET2100 2,100 Watt Generator View Diagrams & Manuals
9493-0 ET2100 2,100 Watt Generator View Diagrams & Manuals
9487-0 C5000 5,000 Watt Generator View Diagrams & Manuals
9486-0 C5000 5,000 Watt Generator View Diagrams & Manuals
9483-0 G1600 1,400 Watt Generator View Diagrams & Manuals
9478-1 ET2100 2,100 Watt Generator View Diagrams & Manuals
9478-0 ET2100 2,100 Watt Generator View Diagrams & Manuals
9477-0 C5000 5,000 Watt Generator View Diagrams & Manuals
9460-0 S4000 4,000 Watt Generator View Diagrams & Manuals
9459-0 S4000 4,000 Watt Generator View Diagrams & Manuals
9458-0 S4000 4,000 Watt Generator View Diagrams & Manuals
9456-0 S2400 2,400 Watt Generator View Diagrams & Manuals
9451-0 5,000 Watt Generator View Diagrams & Manuals
9450-1 5,000 Watt Generator View Diagrams & Manuals
9450-0 5,000 Watt Generator View Diagrams & Manuals
9447-1 4,000 Watt (Rev 1 6/16/95) Generator View Diagrams & Manuals
9683-0 Smartweld 300 Welder View Diagrams & Manuals
9683-1 Smartweld 300 Welder View Diagrams & Manuals
9904-0 10,000 XL Generator View Diagrams & Manuals
9903-0 6,500 XL (Rev 0 12/22/94) Generator View Diagrams & Manuals
9903-1 6,500 XL Generator View Diagrams & Manuals
9886-0 8,000 XL (Rev 0 12/6/95) Generator View Diagrams & Manuals
9885-3 5,500 XL Generator View Diagrams & Manuals
9885-2 5,500 XL Generator View Diagrams & Manuals
9885-1 5,500 XL Generator View Diagrams & Manuals
9878-1 4,000 XL (11/96) Generator View Diagrams & Manuals
9885-0 5,500 XL (Rev 0 7/2/95) Generator View Diagrams & Manuals
9863-0 10,000 Watt Generator View Diagrams & Manuals
9862-1 8,000 Watt Generator View Diagrams & Manuals
9862-0 8,000 Watt Generator View Diagrams & Manuals
9861-0 6,500 Watt Generator View Diagrams & Manuals
9860-0 5,500 Watt (Revised) Generator View Diagrams & Manuals
9831-0 G-FORCE 5,000 Watt Generator View Diagrams & Manuals
9830-0 G-Force 4,200 Watt Generator View Diagrams & Manuals
9829-0 G-Force 2,400 Watt Generator View Diagrams & Manuals
9809-0 MC 10000 Generator View Diagrams & Manuals
9447-0 4,000 Watt Generator View Diagrams & Manuals
9441-3 3,500 XL 3,500 Watt (9/95) Generator View Diagrams & Manuals
9446-3 2,400 Watt Generator View Diagrams & Manuals
9441-2 3,500 XL Generator View Diagrams & Manuals
9411-1 3,500 XL 3,500 Watt Generator View Diagrams & Manuals
9446-0 2,400 Watt Generator View Diagrams & Manuals
9441-0 3,500 XL 3,500 Watt Generator View Diagrams & Manuals
9443-1 HD3000 3,000 Watt Generator View Diagrams & Manuals
9443-0 3,000 Watt Generator View Diagrams & Manuals
9441-5 3,500 XL (06/96) Generator View Diagrams & Manuals
9439-0 1,400 Watt Generator View Diagrams & Manuals
9438-0 5,000 Watt Generator View Diagrams & Manuals
9441-4 3,500 XL 3,500 Watt Generator View Diagrams & Manuals
9437-0 4,000 Watt Generator View Diagrams & Manuals
9436-0 5,000 Watt Generator View Diagrams & Manuals
9404-1 8,000 Watt Generator View Diagrams & Manuals
9435-0 4,000 Watt Generator View Diagrams & Manuals
9397-0 5,000 Watt Generator View Diagrams & Manuals
9434-0 5,000 Watt Generator View Diagrams & Manuals
9433-0 4,000 Watt Generator View Diagrams & Manuals
9396-0 4,000 Watt Generator View Diagrams & Manuals
9432-0 2,250 Watt Generator View Diagrams & Manuals
9387-0 S3000 3,000 Watt (Revised) Generator View Diagrams & Manuals
9431-0 1,350 Watt Generator View Diagrams & Manuals
9386-2 C8000 8,000 Watt Generator View Diagrams & Manuals
9430-0 C5000 5,000 Watt Generator View Diagrams & Manuals
9386-1 C8000 8,000 Watt Generator View Diagrams & Manuals
9429-1 C5000 5,000 Watt Generator View Diagrams & Manuals
9374-2 8,000 Watt Generator View Diagrams & Manuals
9423-1 C4000 4,000 Watt Generator View Diagrams & Manuals
9374-1 8,000 Watt Generator View Diagrams & Manuals
9423-0 C4000 4,000 Watt Generator View Diagrams & Manuals
9421-0 S4000 4,000 Watt Generator View Diagrams & Manuals
9420-0 S4000 4,000 Watt Generator View Diagrams & Manuals
9419-0 S2400 2,400 Watt Generator View Diagrams & Manuals
9415-1 S2400 2,400 Watt Generator View Diagrams & Manuals
9415-0 S2400 2,400 Watt Generator View Diagrams & Manuals
9404-2 8,000 Watt Generator View Diagrams & Manuals
9288-3 8,000 Watt Generator View Diagrams & Manuals
9288-2 R-8000 Generator View Diagrams & Manuals
9288-0 8,000 Watt Generator View Diagrams & Manuals
9261-0 EC6400 6,400 Watt Generator View Diagrams & Manuals
9219-0 EC-4000D E.S. Generator View Diagrams & Manuals
9218-1 4,000 Watt Generator View Diagrams & Manuals
9374-0 8,000 Watt Generator View Diagrams & Manuals
9216-1 5,000 Watt Generator View Diagrams & Manuals
9335-0 4,000 Watt Generator View Diagrams & Manuals
9333-0 4,000 Watt (Revised) Generator View Diagrams & Manuals
9332-0 4,000 Watt (Revised) Generator View Diagrams & Manuals
9331-0 2,400 Watt Generator View Diagrams & Manuals
9325-0 3,000 Watt (Revised) Generator View Diagrams & Manuals
9322-0 5,000 Watt Generator View Diagrams & Manuals
9321-1 4,000 Watt Generator View Diagrams & Manuals
9321-0 4,000 Watt Generator View Diagrams & Manuals
9320-1 2,200 Watt (Revised) Generator View Diagrams & Manuals
9320-0 2,200 Watt Generator View Diagrams & Manuals
9308-0 4,000 Watt Generator View Diagrams & Manuals
9307-0 2,000 Watt Generator View Diagrams & Manuals
9296-1 2,400 Watt Generator View Diagrams & Manuals
9175-0 4,000 Watt (Revised) Generator View Diagrams & Manuals
9173-0 S4001 4,000 Watt Generator View Diagrams & Manuals
9163-2 8,000 Watt Generator View Diagrams & Manuals
9163-1 8,000 Watt Generator View Diagrams & Manuals
9163-0 8,000 Watt Generator View Diagrams & Manuals
1470-0 Portable Generator View Diagrams & Manuals
1470-1 Portable Generator View Diagrams & Manuals
1525-0 Portable Generator View Diagrams & Manuals
1645-0 Portable Generator View Diagrams & Manuals
1656-0 Portable Generator View Diagrams & Manuals
1656-1 Portable Generator View Diagrams & Manuals
1657-0 Portable Generator View Diagrams & Manuals
1657-1 Portable Generator View Diagrams & Manuals
1657-2 Portable Generator View Diagrams & Manuals
1893-0 Portable Generator View Diagrams & Manuals
1894-0 Portable Generator View Diagrams & Manuals
1894-1 Portable Generator View Diagrams & Manuals
1783-0 Portable Generator View Diagrams & Manuals
1925-0 Portable Generator View Diagrams & Manuals
1784-0 Portable Generator View Diagrams & Manuals
1925-1 Portable Generator View Diagrams & Manuals
1932-0 Portable Generator View Diagrams & Manuals
1785-0 Portable Generator View Diagrams & Manuals
1932-1 Portable Generator View Diagrams & Manuals
1933-0 Portable Generator View Diagrams & Manuals
1786-0 Portable Generator View Diagrams & Manuals
1933-1 Portable Generator View Diagrams & Manuals
1787-0 Portable Generator View Diagrams & Manuals
1934-0 Portable Generator View Diagrams & Manuals
1934-1 Portable Generator View Diagrams & Manuals
1788-0 Portable Generator View Diagrams & Manuals
1934-2 Portable Generator View Diagrams & Manuals
1789-0 Portable Generator View Diagrams & Manuals
1935-0 Portable Generator View Diagrams & Manuals
5520-0 Portable Generator View Diagrams & Manuals
1935-1 Portable Generator View Diagrams & Manuals
5521-0 Portable Generator View Diagrams & Manuals
5522-0 Portable Generator View Diagrams & Manuals
5523-0 Portable Generator View Diagrams & Manuals
5524-0 Portable Generator View Diagrams & Manuals
5509-0 Portable Generator View Diagrams & Manuals
5510-0 Portable Generator View Diagrams & Manuals
5511-0 Portable Generator View Diagrams & Manuals
5512-0 Portable Generator View Diagrams & Manuals
5513-0 Portable Generator View Diagrams & Manuals
5513-1 Portable Generator View Diagrams & Manuals
5514-0 Portable Generator View Diagrams & Manuals
5516-0 Portable Generator View Diagrams & Manuals
5517-0 Portable Generator View Diagrams & Manuals
5518-0 Portable Generator View Diagrams & Manuals
5519-0 Portable Generator View Diagrams & Manuals
8835-0 Portable Generator View Diagrams & Manuals
8836-0 Portable Generator View Diagrams & Manuals
8837-0 Portable Generator View Diagrams & Manuals
8839-0 Portable Generator View Diagrams & Manuals
8840-0 Portable Generator View Diagrams & Manuals
9115-0 2,400 Watt Generator View Diagrams & Manuals
9160-2 5,000 Watt Generator View Diagrams & Manuals
8845-0 Portable Generator View Diagrams & Manuals
9160-1 5,000 Watt Generator View Diagrams & Manuals
9101-3 8,000 Watt Generator View Diagrams & Manuals
9159-0 L4004 4,000 Watt Generator View Diagrams & Manuals
9158-0 L2400 2,400 Watt Generator View Diagrams & Manuals
9157-0 L1400 1,400 Watt Generator View Diagrams & Manuals
9101-2 R-8000 Generator View Diagrams & Manuals
9101-0 8,000 Watt Generator View Diagrams & Manuals
8846-0 Portable Generator View Diagrams & Manuals
8847-0 Portable Generator View Diagrams & Manuals
8865-6 Portable Generator View Diagrams & Manuals
8865-7 Portable Generator View Diagrams & Manuals
8865-8 Portable Generator View Diagrams & Manuals
9094-0 S2400 2,400 Watt Generator View Diagrams & Manuals
9093-0 HD6000 4,000 Watt Generator View Diagrams & Manuals
9091-0 50HZ 3,300 Watt Generator View Diagrams & Manuals
9085-4 4,000 Watt Generator View Diagrams & Manuals
9075-0 G6000 TTI 4,000 Watt Generator View Diagrams & Manuals
9072-0 G3000 TTI 2,250 Watt Generator View Diagrams & Manuals
9063-1 L4003 4,000 Watt Generator View Diagrams & Manuals
9063-0 L4003 4,000 Watt Generator View Diagrams & Manuals
9024-2 5,000 Watt Generator View Diagrams & Manuals
9024-1 5,000 Watt Generator View Diagrams & Manuals
9024-0 5,000 Watt Generator View Diagrams & Manuals
9023-0 L4000 Generator View Diagrams & Manuals
9014-1 R4000D 4,000 Watt Generator View Diagrams & Manuals
5525-0 Portable Generator View Diagrams & Manuals
8969-2 A4000 3,600 Watt Generator View Diagrams & Manuals
5526-0 Portable Generator View Diagrams & Manuals
8969-0 A4000 3,600 Watt Generator View Diagrams & Manuals
8968-2 A2400 2,400 Watt Generator View Diagrams & Manuals
8968-1 A2400 Generator View Diagrams & Manuals
8968-0 A2400 2,250 Watt Generator View Diagrams & Manuals
8967-2 A1400 1,350 Watt Generator View Diagrams & Manuals
8967-0 A1400 1,350 Watt Generator View Diagrams & Manuals
8966-2 3,600 Watt Generator View Diagrams & Manuals
8966-1 3,600 Watt Generator View Diagrams & Manuals
5527-0 Portable Generator View Diagrams & Manuals
5528-0 Portable Generator View Diagrams & Manuals
5529-0 Portable Generator View Diagrams & Manuals
5530-0 Portable Generator View Diagrams & Manuals
5531-0 Portable Generator View Diagrams & Manuals
5532-0 Portable Generator View Diagrams & Manuals
5559-1 Portable Generator View Diagrams & Manuals
5541-0 Portable Generator View Diagrams & Manuals
5541-1 Portable Generator View Diagrams & Manuals
5561-1 Portable Generator View Diagrams & Manuals
5542-0 Portable Generator View Diagrams & Manuals
5563-0 Portable Generator View Diagrams & Manuals
5542-1 Portable Generator View Diagrams & Manuals
5563-1 Portable Generator View Diagrams & Manuals
5543-0 Portable Generator View Diagrams & Manuals
5563-2 Portable Generator View Diagrams & Manuals
5544-0 Portable Generator View Diagrams & Manuals
5564-1 Portable Generator View Diagrams & Manuals
5546-0 Portable Generator View Diagrams & Manuals
5564-2 Portable Generator View Diagrams & Manuals
5547-0 Portable Generator View Diagrams & Manuals
5548-0 Portable Generator View Diagrams & Manuals
5565-1 Portable Generator View Diagrams & Manuals
5549-0 Portable Generator View Diagrams & Manuals
5565-2 Portable Generator View Diagrams & Manuals
5552-0 Portable Generator View Diagrams & Manuals
5566-1 Portable Generator View Diagrams & Manuals
5553-0 Portable Generator View Diagrams & Manuals
5566-2 Portable Generator View Diagrams & Manuals
5556-0 Portable Generator View Diagrams & Manuals
5567-0 Portable Generator View Diagrams & Manuals
5557-0 Portable Generator View Diagrams & Manuals
5567-1 Portable Generator View Diagrams & Manuals
5568-0 Portable Generator View Diagrams & Manuals
8928-1 4,000 Watt Generator View Diagrams & Manuals
9085-3 4,000 Watt Generator View Diagrams & Manuals
9084-0 2,400 Watt Generator View Diagrams & Manuals
9014-0 R4000D 4,000 Watt Generator View Diagrams & Manuals
8983-4 S5002 5,000 Watt Generator View Diagrams & Manuals
8983-3 S5002 5,000 Watt Generator View Diagrams & Manuals
8983-2 S5002 5,000 Watt Generator View Diagrams & Manuals
8983-0 S5002 5,000 Watt Generator View Diagrams & Manuals
8973-4 S4002 4,000 Watt Generator View Diagrams & Manuals
8973-3 S4002 4,000 Watt Generator View Diagrams & Manuals
8973-2 S4002 4,000 Watt Generator View Diagrams & Manuals
8973-1 S4002 4,000 Watt Generator View Diagrams & Manuals
8973-0 S4002 4,000 Watt Generator View Diagrams & Manuals
8972-4 S4001 4,000 Watt Generator View Diagrams & Manuals
8972-3 S4001 4,000 Watt Generator View Diagrams & Manuals
8972-2 S4001 4,000 Watt Generator View Diagrams & Manuals
8972-0 S4001 4,000 Watt Generator View Diagrams & Manuals
8971-4 S4000 4,000 Watt Generator View Diagrams & Manuals
8971-2 S4000 4,000 Watt Generator View Diagrams & Manuals
8971-0 S4000 4,000 Watt Generator View Diagrams & Manuals
8970-3 S2400 2,400 Watt Generator View Diagrams & Manuals
8970-2 S2400 2,250 Watt Generator View Diagrams & Manuals
8970-0 S2400 2,250 Watt Generator View Diagrams & Manuals
8915-3 L4002 4,000 Watt Generator View Diagrams & Manuals
8915-2 L4002 4,000 Watt Generator View Diagrams & Manuals
8915-1 L4002 4,000 Watt Generator View Diagrams & Manuals
8911-4 L4001 4,000 Watt Generator View Diagrams & Manuals
8966-0 3,600 Watt Generator View Diagrams & Manuals
8911-3 L4001 Generator View Diagrams & Manuals
8965-2 2,400 Watt Generator View Diagrams & Manuals
8911-2 L4001 4,000 Watt Generator View Diagrams & Manuals
8965-1 2,400 Watt Generator View Diagrams & Manuals
8965-0 2,400 Watt Generator View Diagrams & Manuals
8964-1 1,400 Watt Generator View Diagrams & Manuals
030242-0 6,200 Watt Generator View Diagrams & Manuals
1799-0 6,300 Watt Generator View Diagrams & Manuals
030207-01 10,000 Watt Generator View Diagrams & Manuals
030299-0 6,300 Watt Generator View Diagrams & Manuals
030299-1 6,300 Watt Generator View Diagrams & Manuals
Snapper
G62000 30216 6200 Watt 11 Hp Generator View Diagrams & Manuals
G62000 (85907)(030216) 6200 Watt 11 Hp Generator View Diagrams & Manuals
Show More Compatible Models
This item works with the following types of products:
- Generator Parts
Questions & Answers ?
Our customer Service team is at the ready daily to answer your part and product questions.

Ask our Team
We have a dedicated staff with decades of collective experience in helping customers just like you purchase parts to repair their products.
Does this fit my product?Questions & Answers for Assembly, Holder, Brush
No questions have been asked yet
Customer Repair Instructions ?
All our customer repair instructions are solicited directly from other customers just like you who have purchased and replaced this exact part.
No power
Don - February 5, 2017
👍 1 of 1 people found this instruction helpful
Tool Type
Generator
Difficulty
Easy
Time
Less than 15 minutes
Tools Used
Screwdriver, Pliers
Replaced the old parts with the new ones followed instructions that came with the parts . All went well generator now puts out electricity problem fixed. Advice take photo of wiring so everything go's back the same way. Reair was very easy.
Did you find this story helpful?
Thanks for voting and helping fellow customers!
Generator did not put out 120 volts
Abellino - August 17, 2016
👍 1 of 1 people found this instruction helpful
Tool Type
Generator
Difficulty
Easy
Time
15-30 minutes
Tools Used
Screwdriver, Nutdriver
I took cover of generator off replaced the avr and the brushes and put everything back on started the generator up and checked it ready to go
Did you find this story helpful?
Thanks for voting and helping fellow customers!
No output from generator
Scott - July 7, 2016
👍 1 of 1 people found this instruction helpful
Tool Type
Generator
Difficulty
Medium
Time
30-60 minutes
Tools Used
Screwdriver, Socket set, Small alligator clip jumper cables
1. Removed generator cap using 8mm socket set
2. Removed and replaced old AVR and brush assembly
3. Followed included instructions to remagnetize brush assembly by using small alligator 4. Clip jumper cables (not included) to connect positive and negative leads of brushes to a positive and negative posts of a 12 V battery (not included).
5. Started and ran the generator for a few seconds.
6. Removed jumper cables.
7. Reconnected lead wires.
8. Re-installed the cap.
9. Started generator and now works as good as new!
Did you find this story helpful?
Thanks for voting and helping fellow customers!
10kw Briggs & Stratton generator - start up and shut down, would not stay running
Anthony - January 7, 2016
👍 1 of 1 people found this instruction helpful
Tool Type
Generator
Difficulty
Hard
Time
More than 2 hours
Tools Used
Screwdriver, Socket set
Parts Used
Turned out the brushes were bad and not sending enough voltage through the system, the system detected low voltage and shut down. It would start, run for 30 seconds and shut down 3 times. No error codes on the panel, just wouldn't stay running.
Because the brushes are at the bottom of this model I actually had to take off the side panels, disconnect all wiring and fuel line and remove the engine. The cap needs to be removed from the alternator at the very bottom of the engine/generator assembly to get to the brushes. Once you have it out, its very easy to get them out and replace them. Unfortunately because of the design and that the generator side of the unit is sunk down into the bottom of the unit I don't believe there is a way to change the brushes with the engine still in the unit. Its also impossible to just remove the generator from the engine as you would need a puller to disconnect it and this can't be done with the engine in place.
The engine is very heavy and took 2 people to lift out from the mounts and move it. If your strong you can probably move it a short ways out of the unit and lay it down to work on it.
Did you find this story helpful?
Thanks for voting and helping fellow customers!
Love to no electricity from generator
bruce - June 3, 2020
Tool Type
Generator
Difficulty
Easy
Time
Less than 15 minutes
Tools Used
Nutdriver
Parts Used
Took off cover
Took off old brushes
Replaced with a new set
Replaced cover
Took off old brushes
Replaced with a new set
Replaced cover
Did you find this story helpful?
Thanks for voting and helping fellow customers!
Generator would run but there was NO output voltage
Ben - February 25, 2019
Tool Type
Generator
Difficulty
Medium
Time
30-60 minutes
Tools Used
Screwdriver, Pliers, Socket set, Nutdriver
Tested AVR by jumping brushes to establish a field. This did not work. R/R AVR but still no output voltage. R/R brushes, idle control, and idle control PCB. Generator works properly.
Did you find this story helpful?
Thanks for voting and helping fellow customers!
Generator only had 3 volts on output
Brad - March 1, 2018
Tool Type
Generator
Difficulty
Easy
Time
15-30 minutes
Tools Used
Pliers, Nutdriver
1. Removed front cover from rotor and stator. 7mm nut driver
2. Removed brush assembly and regulator.7mm nut driver
3. Used pliers to pull wire connectors off
4. Installed new parts.
5. Our front cover back on.
6. Started generator tested power.
2. Removed brush assembly and regulator.7mm nut driver
3. Used pliers to pull wire connectors off
4. Installed new parts.
5. Our front cover back on.
6. Started generator tested power.
Did you find this story helpful?
Thanks for voting and helping fellow customers!
Generator put out no power when running
Gregory - December 2, 2017
Tool Type
Generator
Difficulty
Easy
Time
Less than 15 minutes
Tools Used
Screwdriver
1. Remove plastic cap/vent off the end of generator
2. Remove and replace brush assembly, being sure to connect wires correctly
3. Remove the old voltage regulator and booster (if equipped), replacing both items with the voltage regulator as described in the directions included with the new voltage regulator
4. Start generator and retest for proper function (electrical output)
Did you find this story helpful?
Thanks for voting and helping fellow customers!
Not producing electricity
Rosemary - September 25, 2017
Tool Type
Generator
Difficulty
Easy
Time
15-30 minutes
Tools Used
Socket set
Disconnected spark plug for safety reasons,
Removed cover with socket set
Slid out regulator - AVR control out of slot holding it....
Removed screw holding in Assy Holder , brush...... disconnected wires by pulling them off....
Pulled out assy holder, brush and replaced with new one after plugging wires back on new one , then screwed it back in.
Removed wires from regulator - AVR control, and then plugged those wires on new AVR control
Then slid back into slot ....
Replaced cover, reconnected spark plug....
And now have electricity.!!!!!
Did you find this story helpful?
Thanks for voting and helping fellow customers!
OEM stands for Original Equipment Manufacturer and means the part you’re buying is sourced directly from the manufacturer who made your product. At eReplacementParts, we sell only genuine OEM parts, guaranteeing the part you’re purchasing is of better design and of higher quality than aftermarket parts.
Our product descriptions are a combination of data sourced directly from the manufacturers who made your product as well as content researched and curated by our content & customer service teams. This content is edited and reviewed internally before being made public to customers.
Our customer service team are at the ready daily to answer your part and product questions. We have a dedicated staff with decades of collective experience in helping customers just like you purchase parts to repair their products.
All our part reviews are solicited directly from other customers who have purchased this exact part. While we moderate these reviews for profanity, offensive language or personally identifiable information, these reviews are posted exactly as submitted and no alterations are made by our team.
All our customer repair instructions are solicited directly from other customers just like you who have purchased and replaced this exact part. While we moderate these reviews for profanity, offensive language or personally identifiable information, these reviews are posted exactly as submitted and no alterations are made by our team.
Based on data from past customer purchasing behaviors, these parts are most commonly purchased together along with the part you are viewing. These parts may be necessary or helpful to replace to complete your current repair.
All our installation videos are created and produced in collaboration with our in-house repair technician, Mark Sodja, who has helped millions of eReplacementParts customers over the last 13 years repair their products. Mark has years of experience in selling and repairing both commercial and residential products with a specialty in gas-powered equipment.
This data is collected from customers who submitted a repair instruction after replacing this exact part. Customers can rate how easy the repair was to complete and how long it took. We aggregate this data to provide a repair rating that allows customers to quickly determine the difficulty and time needed to perform their own repair.