
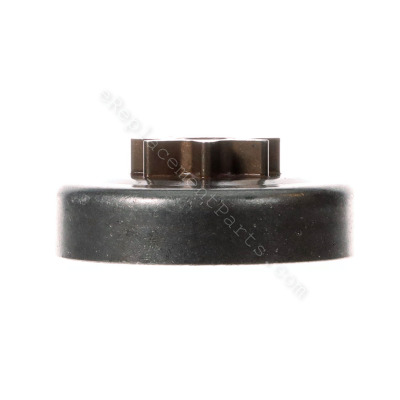


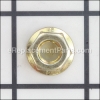
This is an OEM sourced replacement part used on Poulan chainsaws. A centrifugal clutch uses centrifugal force to connect two concentric shafts, with the driving shaft nested inside the driven shaft. Often centrifugal clutches will function even when they shouldn’t, far beyond the point of when they need to be replaced. Keeping an eye on equipment performance will determine when the clutch requires attention. This assembly includes metal clutch drum and a sprocket.
To replace this item you would need a wrench set.
• Remove the chain brake, bar, and chain.
• Remove the cover and spark plug.
• Bind the piston. (If you skip this step, the clutch will spin freely and you won't be able to remove it. If you have a piston stopper, just thread it into the spark plug hole. )
• Remove the clutch.
• Replace old drum with a new assembly
• Seat the clutch.
• Unbind the piston.
• Secure the bar, chain, and chain brake.
• Tension the chain
Drum And Sprocket Assembly 545171901
OEM part for: Poulan
Part Number: 545171901
Jump To:
Product Description ?
- Classification: Part
- Weight: 0.27 lbs.
- Shipping: Ships Worldwide
Frequently Purchased Together ?


Compatibility
This part will fit the following 2 machines
Poulan
This item works with the following types of products:
- Chain Saw Parts
- Saw Parts
Repair Videos ?

|
Step-by-step instructions for removing and installing the drum and sprocket on your Poulan Pro chainsaw....
November 08, 2017
|

Customer Part Reviews ?
- 1
Questions & Answers ?
Our customer Service team is at the ready daily to answer your part and product questions.

Ask our Team
We have a dedicated staff with decades of collective experience in helping customers just like you purchase parts to repair their products.
Does this fit my product?Questions & Answers for Drum And Sprocket Assembly
Customer Repair Instructions ?
All our customer repair instructions are solicited directly from other customers just like you who have purchased and replaced this exact part.
The chain drive sprocket had broken teeth and the whole drum assembly needed to be replaced. Also, while I had the saw apart, I decided to install a new filter, and a new chain tensioner.
Tool Type
Chain Saw
Difficulty
Easy
Time
15-30 minutes
Tools Used
Screwdriver, Pliers, Piston stop
Sprocket teeth broke
Tool Type
Chain Saw
Difficulty
Easy
Time
Less than 15 minutes
Tools Used
Screwdriver, Hammer
Parts Used
worn sprocket
Tool Type
Chain Saw
Difficulty
Easy
Time
15-30 minutes
Tools Used
Socket set
2. incert piston stop
3.remove clutch
4.remove worn sprocket
5. re assemble
broken teeth on sprocket
Tool Type
Chain Saw
Difficulty
Easy
Time
Less than 15 minutes
Tools Used
Power Drill
Parts Used
Chain sprocket was worn out
Tool Type
Chain Saw
Difficulty
Easy
Time
Less than 15 minutes
Tools Used
, Cordless impact, clutch spanner tool
Parts Used
Worn/broken teeth on sprocket
Tool Type
Chain Saw
Difficulty
Easy
Time
Less than 15 minutes
Tools Used
Screwdriver, Pliers, Socket set, Rope
Parts Used
Inserted rope in cylinder
Removed side cover
Removed old drum and sprocket
Installed new part
Sprocket broken
Tool Type
Chain Saw
Difficulty
Easy
Time
15-30 minutes
Tools Used
Wrench Set
Parts Used
Clutch came apart
Tool Type
Chain Saw
Difficulty
Easy
Time
Less than 15 minutes
Tools Used
Nutdriver, Hammer, punch, safety glasses, chain file set
Chain catcher broke off and Sprocket badly worn
Tool Type
Chain Saw
Difficulty
Medium
Time
15-30 minutes
Tools Used
, Hammer and 12\\
Tapped clutch crossbar with a hammer and a 12' rod to loosen clutch in clockwise direction.
Two good taps and it was off...
removed/replaced sprocket-hub.
Tapped clutch crossbar counterclockwise solidly 2 times with hammer and rod.
reinstalled chain/bar /cover assy.
set chain tension and immediately cut a hardwood piece to set the spinning torque on the sprocket, no torque wrench needed
Chain drive gear worn
Tool Type
Chain Saw
Difficulty
Medium
Time
15-30 minutes
Tools Used
Screwdriver, Socket set, Hammer, brass punch, .400 dowel rod
Parts Used
2. Loosened chain
3. Removed cover to access sparkplug and the sparkplug.
4. Inserted wooden dowel rod to prevent engine rotation
5. Following direction symbol on drive clutch used hammer and punch to spin drive clutch from engine shaft
6. Lubed bushing in drive gear, replaced drive gear and reassembled saw
OEM stands for Original Equipment Manufacturer and means the part you’re buying is sourced directly from the manufacturer who made your product. At eReplacementParts, we sell only genuine OEM parts, guaranteeing the part you’re purchasing is of better design and of higher quality than aftermarket parts.
Our product descriptions are a combination of data sourced directly from the manufacturers who made your product as well as content researched and curated by our content & customer service teams. This content is edited and reviewed internally before being made public to customers.
Our customer service team are at the ready daily to answer your part and product questions. We have a dedicated staff with decades of collective experience in helping customers just like you purchase parts to repair their products.
All our part reviews are solicited directly from other customers who have purchased this exact part. While we moderate these reviews for profanity, offensive language or personally identifiable information, these reviews are posted exactly as submitted and no alterations are made by our team.
All our customer repair instructions are solicited directly from other customers just like you who have purchased and replaced this exact part. While we moderate these reviews for profanity, offensive language or personally identifiable information, these reviews are posted exactly as submitted and no alterations are made by our team.
Based on data from past customer purchasing behaviors, these parts are most commonly purchased together along with the part you are viewing. These parts may be necessary or helpful to replace to complete your current repair.
All our installation videos are created and produced in collaboration with our in-house repair technician, Mark Sodja, who has helped millions of eReplacementParts customers over the last 13 years repair their products. Mark has years of experience in selling and repairing both commercial and residential products with a specialty in gas-powered equipment.
This data is collected from customers who submitted a repair instruction after replacing this exact part. Customers can rate how easy the repair was to complete and how long it took. We aggregate this data to provide a repair rating that allows customers to quickly determine the difficulty and time needed to perform their own repair.