Why Read This Article?
Finish Nailer Repair - Replacing the Driver Guide (Ridgid Part # 79004001022)
Article Breakdown
Finish Nailer Repair - Replacing the Driver Guide (Ridgid Part # 79004001022)
Tools & Materials
- Snap ring pliers.
- 2-jaw bearing puller.
- 7-piece drive pin punch set.
- Scredriver Set
- Hammer
- Vice
Safety Guidelines
- Always perform repairs in a clean, organized area.
- Double check that the tool is unplugged before repair.

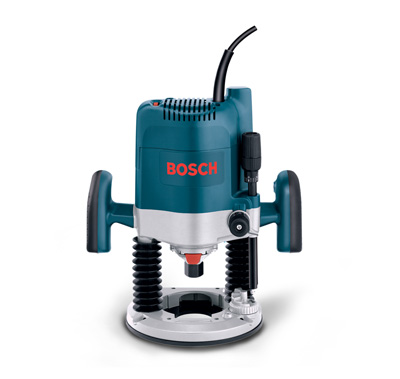
The steps below and our video at the bottom of this page fully demonstrate how to remove these router bearings.
Step by Step Instructions
First, there are two carbon brushes on these routers that must be removed. They are located behind access panels on the sides of the router motor housing.
1. Remove the carbon brushes by unscrewing one Phillips head screw from each access panel on either side of the router.
An additional retaining screw holding the brushes in place will have to be removed from each brush before the brushes can be pulled out.
2. Next, remove the motor housing cover on the top of the router's motor housing by unscrewing the four Phillips head screws holding the housing in place.
(Note: For the EVS model, the speed control wires leading from the switch will also have to be removed. Make sure to note their arrangement and/or mark them for easy reassembly.)
For both models, the wire leading to the carbon brushes will also have to be released before the motor housing cover can come off.
3. There is a plastic bracket that holds the carbon brush wires in place which needs to come out nest. This is done by removing the two screws holding the bracket down.
4. Remove the four screws and two nuts holding the plunger assembly in place, and remove the plunger assembly. The router's plunger assembly at the bottom end of the tool must be freed-up so that the armature can come out.
5. Remove the fan housing by unscrewing the four screws at the bottom of the motor housing. Two additional screws on the fan housing lock plate must be removed while holing the lock plate in position.
6. Using a small two-jaw bearing puller (OTC 1020), lock onto the armature bearing at the top of the armature, turning the bearing puller, press the armature out of the bottom of the motor housing.
7. Now that the armature is out of the motor housing, the large nut on the bottom of the armature shaft must be removed. Securing the armature in a vise is the best way to remove the nut.
With the armature secured, use a flathead screwdriver to apply pressure to the side of the nut, and turn the router's motor housing to loosen the nut.
Unscrew the nut the rest of the way by hand once it is accessible. With the nut completely unscrewed, the armature can be completely removed from the motor housing.
8. To remove the bearing from the fan housing, take out the three screws holding the plate on the bearing, and then tap the bearing out with pin punch.
9. Using a pair of snap ring pliers, remove the retaining ring that holds the motor housing bearing in place. Use a socket extension and a 3/8" socket (or similar) to tap out the bearing from the inside of the motor housing.
The router's bearings are now completely removed. The video below shows this bearing removal being performed on the Bosch 1615EVS router.
[Back to top]
What we're about.


