


Why Read This Article?
Finish Nailer Repair - Replacing the Driver Guide (Ridgid Part # 79004001022)
Article Breakdown
Finish Nailer Repair - Replacing the Driver Guide (Ridgid Part # 79004001022)
Video
Tools & Materials
- Torx drivers
- Flat-head screwdriver
 Before beginning any repair, make sure you have the right parts for your DeWalt tools by using our handy DeWalt parts search.
Replacing the Anvil
1. Remove the housing
Remove the battery and the numerous screws that secure the housing.

Now you can separate the housing. You may need to use a screwdriver to separate the two halves.
2. Disconnect the light wire
Separate the connection on the driver's light wire.
Now you can remove the anvil assembly.

3. Remove the anvil
Push on the front of the anvil to slide it from its housing.
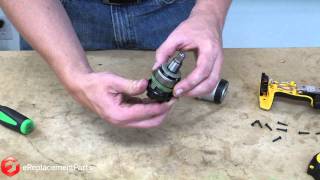
4. Rebuild the anvil assembly
Add the spacer washer to the new anvil and set it into position on the hammer.
The ring gear sits on top of two pinion gears and should nestle all the way into the black housing.
Replace the outer housing. Be sure that it aligns with the notch on the lower housing.
5. Mate the hammer to the motor
Now you can align the hammer assembly and motor. The hammer assembly has a pin and tabs that must align perfectly with the motor. It may take a few tries to get things lined up precisely.
Once you have things lined up, you can drop the entire assembly into the driver housing. Then just reconnect the light wire, and use a flat-head screwdriver to make sure the cords are nestled in the driver body to prevent them from being pinched later.
6. Reinstall the housing
Now all you have to do is reinstall the driver housing with the screws you removed earlier.
Conclusion
Replacing the anvil on your impact driver is a low-cost, time-friendly repair that will help breathe new life into a tool you rely on. Impact drivers get a lot of use and the wear and tear usually shows up in the anvil first. Now you can properly maintain your impact driver yourself, without the cost and waits that come with repair shops.
Before beginning any repair, be sure you have the right power tool parts by using our website's parts look-up tool.
[Back to Top]
What We're About
