


Why Read This Article?
Finish Nailer Repair - Replacing the Driver Guide (Ridgid Part # 79004001022)
Article Breakdown
Finish Nailer Repair - Replacing the Driver Guide (Ridgid Part # 79004001022)
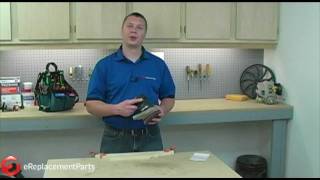
Video
Tools & Materials
- A phillips-head screwdriver.
- Optional: A small screwdriver.
 Luckily, replacing the clutch belt is an easy repair that will have you back to gouge-free sanding in minutes.
Before you begin any repair, be sure you have the right parts.
Use our convenient search feature at the top of this page to find the right clutch belt for your sander.
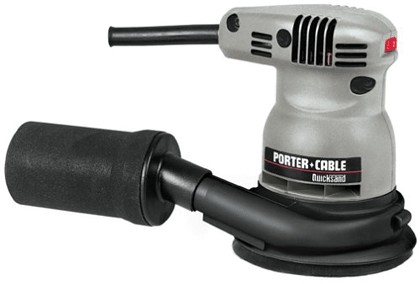
Steps to Replacing a Porter Cable Orbital Sander Clutch Belt
Replacing the clutch belt on a random orbital sander may differ from model to model, but the steps are similar for most sanders.
We demonstrate this repair on a Porter Cable random orbital sander.
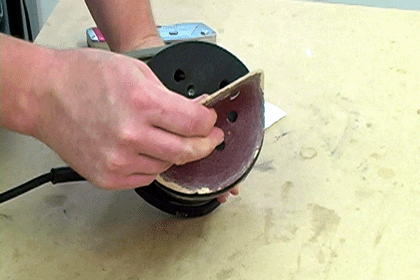
1. Remove the sandpaper.
Peel the sandpaper off the sanding pad to gain access to the pad's fastening screws.
 [Back to top]
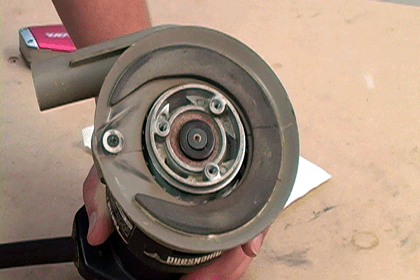
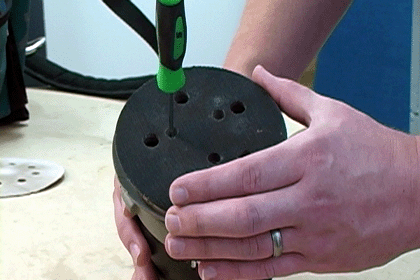
2. Remove the sanding pad.
Now you can remove the three screws that hold the sanding pad to the random orbital sander.
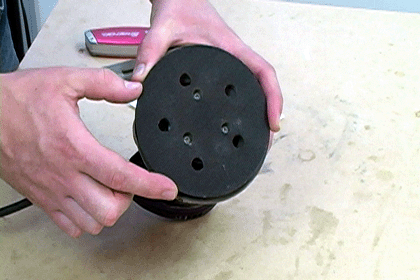
With the sanding pad removed, you can see the pulleys where the clutch belt should go. Because clutch belts often fly out of the sander when they break, you may not see the old belt.
[Back to top]
3. Wrap the clutch belt onto the pulleys.
Now it's time to thread the new clutch belt onto the pulleys. Start by looping one end of the belt around the small pulley.
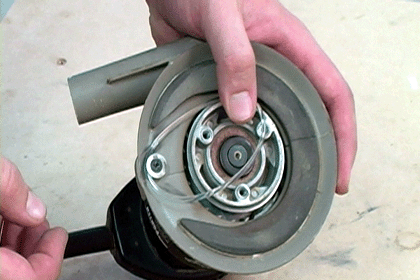
Next, thread the belt onto one side of the large pulley.
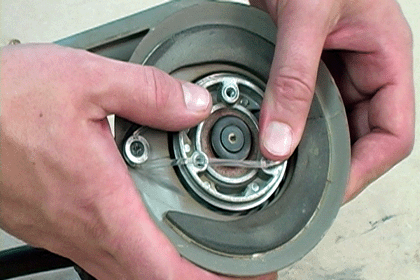
Then rotate the large pulley until the belt slides on.
 [Back to top]
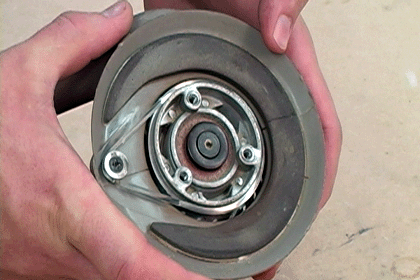
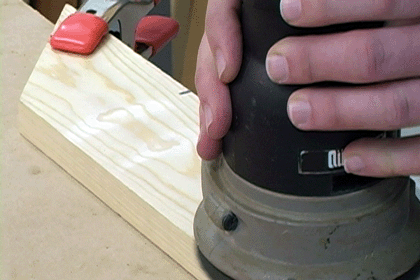
4. Reinstall the sanding pad and sandpaper.
Now you can reinstall the sanding pad. You can use a small screwdriver to help align the holes.
With the sanding pad secured, all you have to do is reattach the sandpaper. Now your sander will only spin at high RPMs when it has made contact with a surface, preventing the gouging that occurs when a missing clutch belt causes the sander to spins out of control.
[Back to top]
Conclusion
You can breathe new life into your random orbit sander with a simple clutch belt repair. The sander will have better control and won't gouge your projects.
 You can even order your clutch belt online with eReplacementParts.com's specialized power tools parts ordering service.
Your O.E.M. clutch belt will be conveniently delivered right to your home, saving you time and money at the repair shop.
[Back to top]
You can even order your clutch belt online with eReplacementParts.com's specialized power tools parts ordering service.
Your O.E.M. clutch belt will be conveniently delivered right to your home, saving you time and money at the repair shop.
[Back to top]
What we're about.
