


Why Read This Article?
Finish Nailer Repair - Replacing the Driver Guide (Ridgid Part # 79004001022)
Article Breakdown
Finish Nailer Repair - Replacing the Driver Guide (Ridgid Part # 79004001022)
Video

 We'll show you how easy reloading is with a Speed-Feed head, explain how to fit one to any compatible trimmer, and demonstrate trimmer head installation steps.
Installing a new Speed-Feed trimmer head should take less than five minutes with the help of this article and video demonstration.
How to Load a Speed Feed Trimmer Head
We'll show you how easy reloading is with a Speed-Feed head, explain how to fit one to any compatible trimmer, and demonstrate trimmer head installation steps.
Installing a new Speed-Feed trimmer head should take less than five minutes with the help of this article and video demonstration.
How to Load a Speed Feed Trimmer Head
There are a few steps involved in reloading a Speed-Feed trimmer head, but a Speed-Feed reload only takes about 30 seconds!
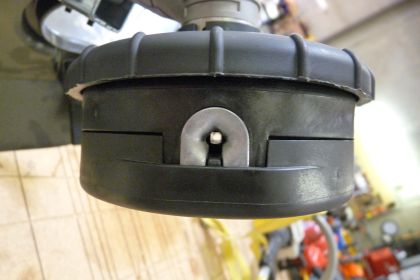
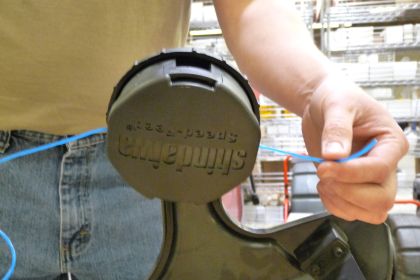
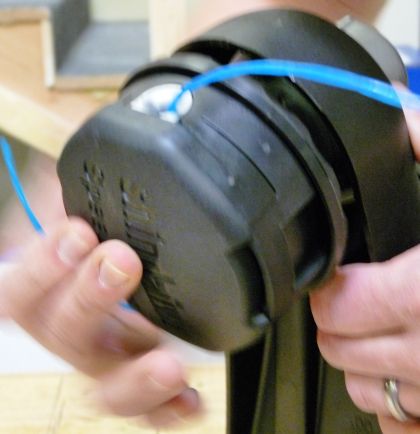
1. Line Up the Trimmer Head Arrows with the Eyelets
Shindaiwa Speed-Feed trimmer heads have two arrows on the top of their heads set at 180º.
The first step to reload the line is to line up the arrows with the trimmer head eyelets as shown in the picture above. Light will be visible on the other side if you look through the holes.
 [Back to top]
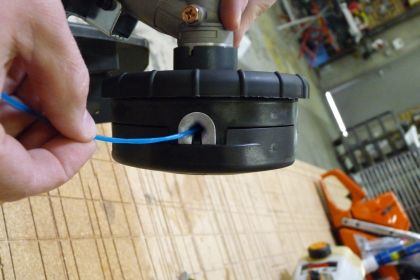
2. Load Line Through One Side of the Trimmer Head
[Back to top]
2. Load Line Through One Side of the Trimmer Head
Guide a very long length (check trimmer head instructions) of line through one of the eyelets out to the other side.
 [Back to top]
3. Even Out Line Lengths
[Back to top]
3. Even Out Line Lengths
Extend both ends of the line all they way out until their lengths match. You will have to step several feet away from the trimmer to do this.
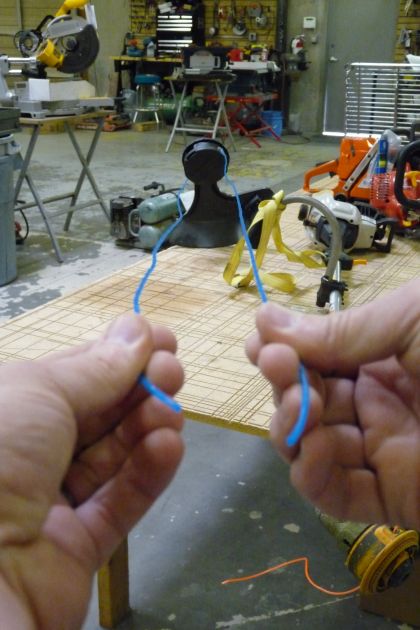
Walk back toward the trimmer and release the lines. [Back to top] 4. Load the Line by Twisting the Trimmer Head
Twist the top of the trimmer head in the indicated direction.

The cutting line will automatically load in both ends of the trimmer as you twist the head!
Loading trimmer line with a Shindaiwa Speed-Feed trimmer head takes under 30 seconds.
[Back to top]
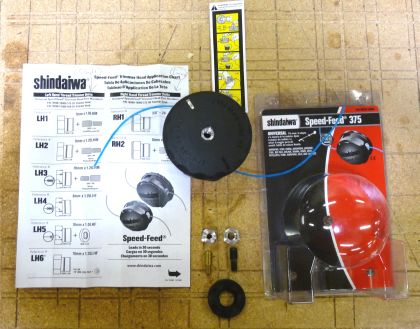
Speed-Feed Trimmer Head Compatibility
Shindaiwa Speed-Feed trimmer heads fit hundreds of trimmer models, because each new head includes a versatile set of thread adapters and bolt adapters.
These adapters fit standard arbors common to professional-use gasoline trimmers and other models.
 Some gasoline homeowner trimmer models may use standard (compatible) arbors, but many homeowner models use unique parts to affix trimmer heads that make after-market compatibility impossible.
Click the link below for more information about trimmer head compatibility:
"How to Buy a Compatible Trimmer Head"
Two of the three Speed-Feed trimmer head models are made for straight shaft trimmers, and one of the trimmer head models is made for curved shaft trimmers. Straight and curved shaft trimmer head arbors are threaded in opposite directions, because their trimmer heads actually spin in opposite directions.
Straight Shaft Trimmer Compatibility
Two of the three Speed-Feed trimmer head models are made for straight shaft trimmers. Straight shaft trimmers with standard arbors are left hand threaded.
The female thread adapters and male bolt adapters included with each straight shaft trimmer head are threaded accordingly.
Female thread adapters included:
- 8mmx1.25LHF
- 10mmx1.0LHF
- 10mmx1.25LHF
- 7mmx1.0LHM
- 8mmx1.25LHM
- 10mmx1.25LHM
Curved Shaft Trimmer Compatibility
Curved shaft trimmers use a direct drive design to turn their cutting heads, whereas straight shaft trimmers have a set of gears just above the trimmer head that transfers power from the engine. Curved shaft and straight shaft trimmers spin in opposite directions because of this difference. Likewise, their arbor bolts are threaded in opposite directions so that their heads will stay tight under the centrifugal force of trimmer operation. Curved shaft trimmers with standard arbors are right hand threaded. The female thread adapter and male bolt adapter included with each curved shaft trimmer head are threaded accordingly. Female thread adapter included:
- 3/8"-24RHF
- 8mmx1.25RHM
In addition to matching the correct shaft type trimmer head to your trimmer, you'll also have to match the trimmer head size to your trimmer's engine size. For the Shindaiwa Speed-Feed Trimmer heads:
- The two "375" models (one for straight shaft trimmers, the other for curved shaft) can be used with trimmers of any engine size.
Although owners of larger trimmers (24cc and up) can opt to use the larger trimmer head, many prefer to use the smaller heads on larger trimmers for the higher RPM's.
- The "475" model is for straight shaft trimmers only, and it should only be used on trimmers with 24cc engines or larger.
Your Speed-Feed head will come with one of the female thread adapters already installed, the 10mmx1.25 adapter. You will not have to change out the female thread adapter in two situations:
- If your trimmer's arbor is female (accepts a male bolt).
In this case, all you have to do is select the correct male bolt adapter that came with your trimmer head. Screw it into the thread adapter already installed in head and the head will be ready to install on your trimmer.
- If your trimmer's arbor is a male, 10mm1.25 bolt.
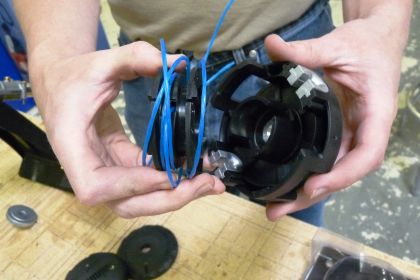
The thread adapter for this bolt is already installed in your Speed-Feed head. If your trimmer needs a female thread adapter of a different size, then you need to change the thread adapter in the Speed-Feed head. Changing the thread adapter requires completely dismantling the trimmer head, but it is very easy to do and should only take about three minutes. Here are the steps for changing the Speed-Feed thread adapter: 1. Pull the cap off.
 2. Separate the head.
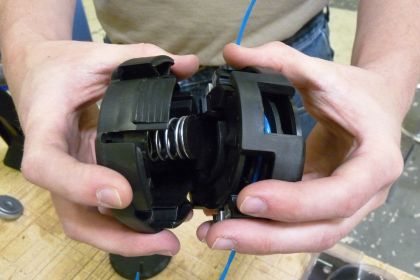
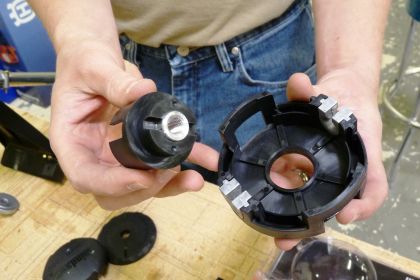
Two tabs on the trimmer head must be pressed to separate its two halves. Press each tab on the side of the trimmer head one at a time, then pull the assembly apart. 3. Set the bottom half of the trimmer head aside. 4. Remove the spool.
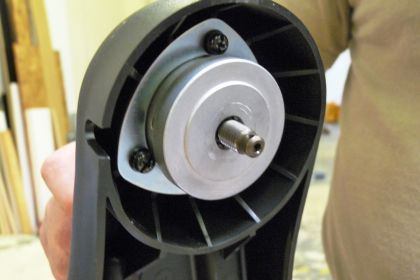
 5. Remove the thread adapter cap.
 6. Press the thread adapter out with a hammer.
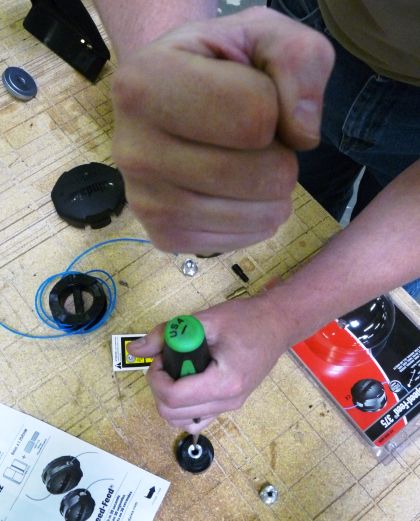 7. Install the correct adapter thread.
8. Reassemble the trimmer head by replacing parts in the reverse order that you removed them.
These Speed-Heads are conveniently designed so that they can not be reassembled incorrectly. The design simply will not allow the two sides to close unless all the parts are installed properly.
Also, these trimmer heads can not be reassembled with cutting line still installed in the spool. Again, changing a thread adapter should only take about three minutes.
[Back to top]
How to Install the Speed-Feed Trimmer Head
Once you have the thread adapter and/or bolt adapter that you need on your new Speed-Feed trimmer head, all you have to do is install it on your trimmer.
Installing your new trimmer head on your trimmer should take less than a minute or two.
Here are the steps:
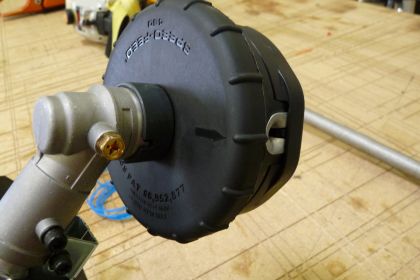
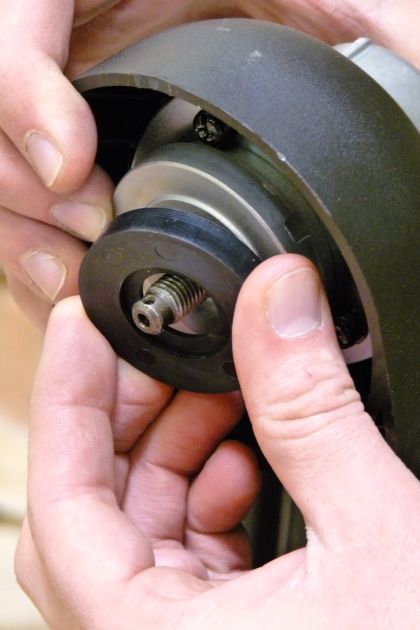
1. Lock your trimmer's spindle.

Most trimmers will have a small hole on their spindle right above the trimmer head. You'll have to spin the trimmer head so that the outer and inner holes line up.
Insert a small screwdriver into the spindle hole to lock it. 2. Spin the old trimmer head off.
With the spindle locked, your old trimmer head should twist right off with a little force. 3. Install the trimmer head spacer (if needed).
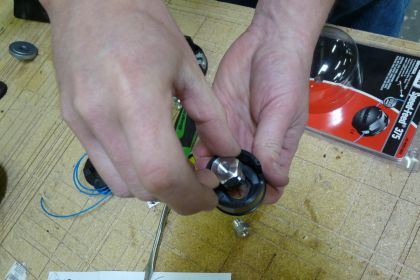
If your trimmer's arbor bolt is especially long, or if it has splines exposed at its base, you will also need to install the trimmer head spacer that comes with your new Speed-Feed trimmer. 4. Screw the new trimmer head on.
 5. Tighten the trimmer head into position.
You'll need to insert that screwdriver into the spindle holes once again to lock the trimmer head.
Once the trimmer head is locked with a screwdriver, tighten your new trimmer head on by twisting it with some added pressure.
[Back to top]
Conclusion
Visit our Trimmer Heads page here at eReplacementParts.com to view our selection of trimmer head and other Power Tool Accessories.
Also, here's those links for the Speed-Feed Shindaiwa Trimmer Heads once again.
Straight shaft:
