


Why Read This Article?
Finish Nailer Repair - Replacing the Driver Guide (Ridgid Part # 79004001022)
Article Breakdown
Finish Nailer Repair - Replacing the Driver Guide (Ridgid Part # 79004001022)
Video

Tools & Materials
- a vise
- a Dremel tool
- a bearing separator
- a bearing puller
- needle nose pliers
Safety Guidelines
- Wear safety eyewear for this repair.
Most armature bearings are easily removed with a specialized tool for tool repair called a bearing puller. DeWALT Miter Saw armatures present a special case where simply using a bearing puller isn't enough to get the bearing off.
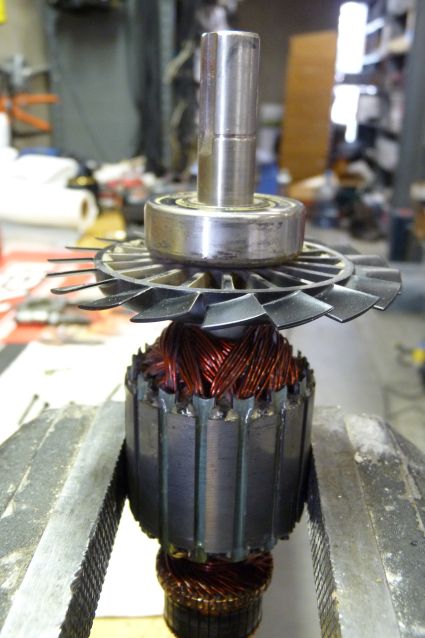
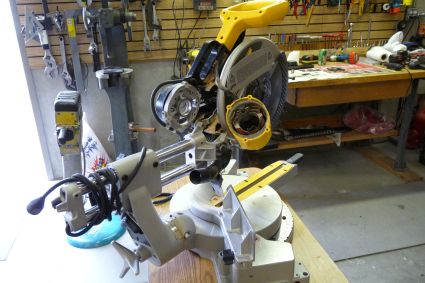 Most DeWALT miter saw armatures are designed with the armature bearings very close to the armature fans. The space between the bearing and the fan usually isn't enough for a bearing puller to get a good enough grip. Also, the fan is too close to an adjoining snap ring for both the fan and the bearing to be pulled at once.
 To compensate for this difficulty, the armature bearing must be carefully scored with a multi-tool and then broken in a vise to remove its outer race. The inner race can then be removed with a bearing separator and a a bearing puller.
Steps for this Armature Bearing Removal
To compensate for this difficulty, the armature bearing must be carefully scored with a multi-tool and then broken in a vise to remove its outer race. The inner race can then be removed with a bearing separator and a a bearing puller.
Steps for this Armature Bearing Removal
1. Gently secure the miter saw armature in a vise and use a multi-tool to carefully score two opposite sides of the armature bearing. (Wear eye protection for this and other steps)
2. Remove the armature from the vise, and reposition it so that the vise grips only the armature bearing.
3. With one hand on the body of the armature and the other hand on the vise lever, use some elbow grease to break the outer race off of the armature bearing, which will pop and then fall to the floor when it breaks.
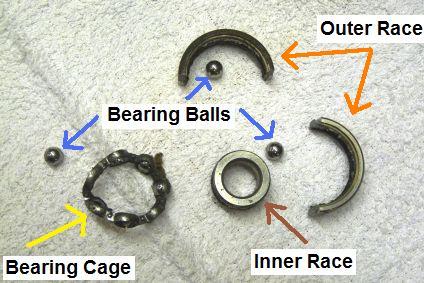
4. Remove the armature from the vise again, and again gently secure its body in the vise. Use a pair of needle nose pliers to remove the bearing balls and bearing cage from the inner race of the bearing.
5. To remove the inner race of the bearing from the armature, both a bearing separator and a bearing puller must be used. First, affix a bearing separator to the inner race of the armature bearing.
6. Reinsert the armature shaft screw that was previously unscrewed from the armature during the miter saw's disassembly.
7. Affix a set of bearing pullers to the bearing separator.
8. Now that the bearing pullers are attached to the bearing separator (which is attached to the inner race of the armature bearing), operate the bearing pullers to pull all three items off of the armature.
[Back to top]
Conclusion
Visit our DeWALT Miter Saw Parts page to get started with your armature bearing repair.
For help with other technical questions on this repair, view this article's demonstration video or visit our Tool Repair Forum for expert advice.
[Back to top]
What we're about.
