


Why Read This Article?
Finish Nailer Repair - Replacing the Driver Guide (Ridgid Part # 79004001022)
Article Breakdown
Finish Nailer Repair - Replacing the Driver Guide (Ridgid Part # 79004001022)
Video

Tools & Materials

String trimmer out of whack? It's time to face the fix. Whether you are a legendary landscaper or a weekend weed whacker, eReplacementParts.com provides the parts, procedures and facts you need to fearlessly fix what fails you.
The lockout lever is a safety device on the Echo SRM-225 trimmer. As a requisite contact point, the lever must be depressed before the throttle can be activated. Because it is made of plastic, the lockout lever is susceptible to occasional damage. If a broken lockout lever has locked you out of your trimmer, this article will guide you through the steps required to quickly remove and replace it.
Let's get started.
 REMOVING THE LOCKOUT LEVER [top]
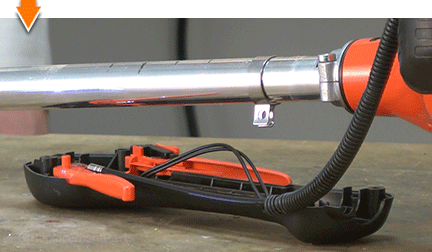
1. Remove the control handle assembly.
REMOVING THE LOCKOUT LEVER [top]
1. Remove the control handle assembly.
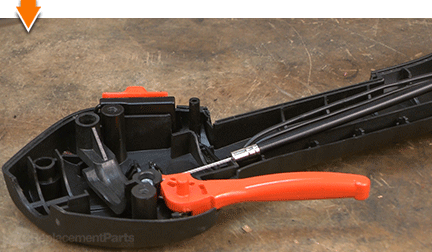
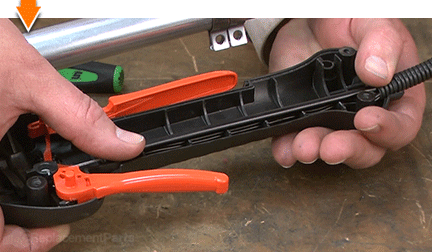
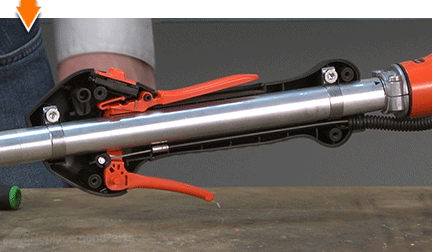
Remove the (4) screws from the cover of the control handle assembly.
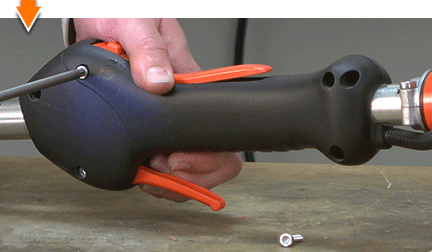
Remove the cover from the control handle assembly.
Remove the (2) screws from the clamps inside the control handle.
Remove the control handle assembly.
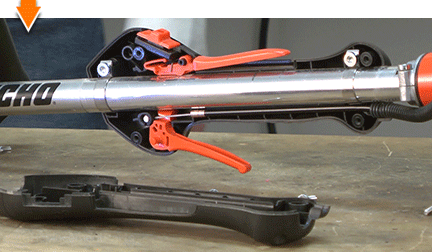
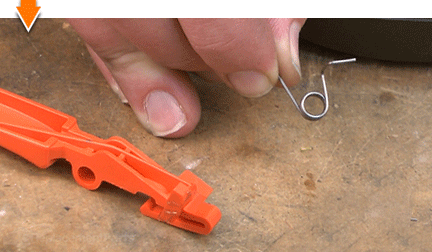
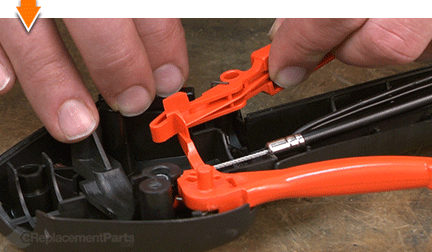
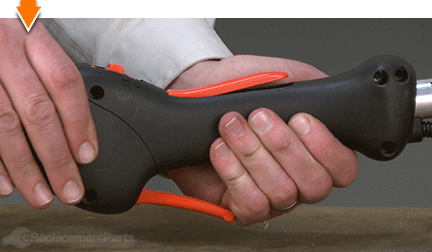
2. Remove the lockout lever.
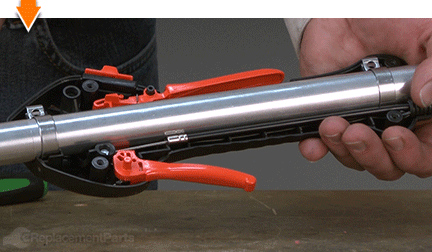
Slide the lockout lever off the mounting post on the control handle.
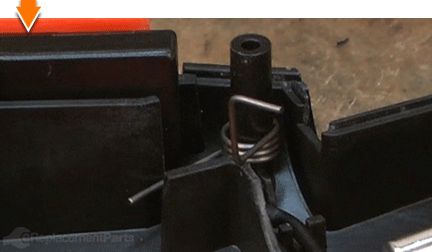
Remove the lever return spring from the lockout lever.
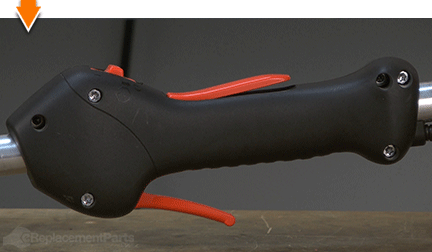
INSTALLING THE NEW LOCKOUT LEVER [top] 3. Install the lockout lever.
Slide the lever return spring over the mounting post on the control handle; the straight portion of the spring should face down.
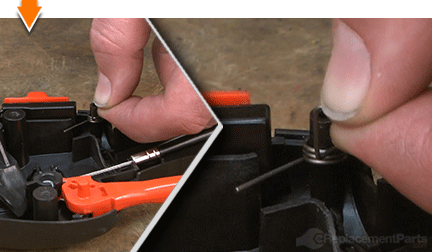
Situate the straight end of the spring between the outside wall and the plastic retaining tab on the control handle.
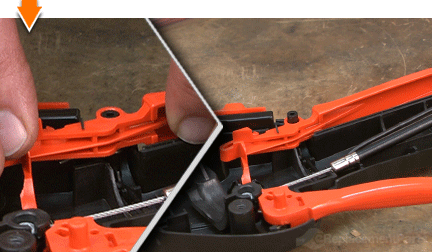
Partially install the new lockout lever; position the squared portion (top) of the return spring on top of the lockout lever.
Slide the new lockout lever over the mounting post and into the control handle.
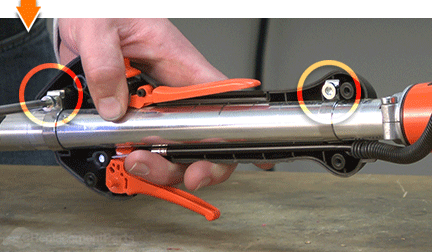
REASSEMBLING THE UNIT [top] 4. Reinstall the control handle assembly.
Use a screwdriver to tuck the ignition wires into the channels along the inside of the control handle.
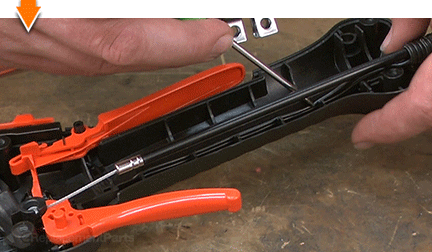
Align the throttle cable with the grooves along the control handle (above the ignition wires).
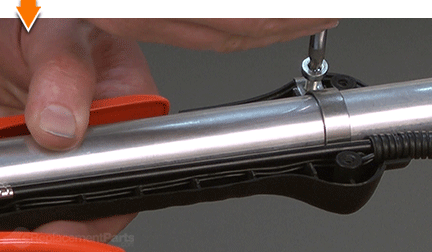
Position the control handle assembly on the main pipe.

Align the metal ring clamps with the slots in the control handle assembly.
Install (but do not fully tighten) the (2) screws into the ring clamps.
Rotate the control handle assembly into alignment with the engine and the front handle.
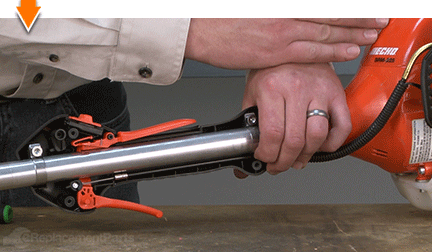
Fully tighten the screws in the ring clamps to secure the control handle assembly.
5. Reinstall the control handle cover.
Install the cover onto the control handle assembly.
Secure the cover with the (4) screws.

You don't have to leverage your savings to level your lawns. As you just learned, repairing your own equipment is easy when you follow our step-by-step guides. Not only did you restore trimmer functionality at a fraction of the cost of replacement; you have taken the edge off of future repairs, wherever you may find them.
