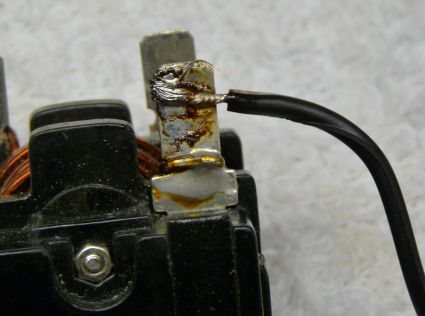
Why Read This Article?
Finish Nailer Repair - Replacing the Driver Guide (Ridgid Part # 79004001022)
Article Breakdown
Finish Nailer Repair - Replacing the Driver Guide (Ridgid Part # 79004001022)
Tools & Materials
- Soldering iron or gun.
- Flux.
- Solder.
- Desoldering tape.
- Cleaning materials.
Safety Guidelines
- Because fumes from burning flux can be toxic when inhaled, soldering should be performed in a well-ventilated area.
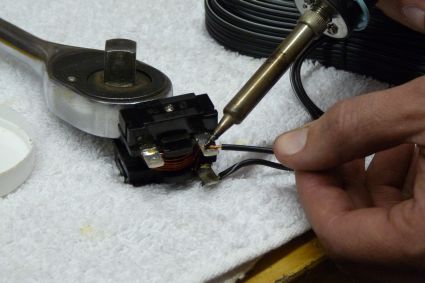
Even though it is probably review for some readers, we'll begin with a very short description of what soldering is and how it works.
What is Soldering?
- Soldering is a process of joining two metals together (usually electrical components) without having to actually melt the base materials (as in welding).
- Instead, a soldering iron/gun is used to melt a filler metal (solder) at relatively low temperatures without the high risk of heat damage as with welding and brazing.
- The liquid solder spreads between the contact points being connected.
- When the solder hardens, a strong, electrically-conductive bond is made between the two base metals.
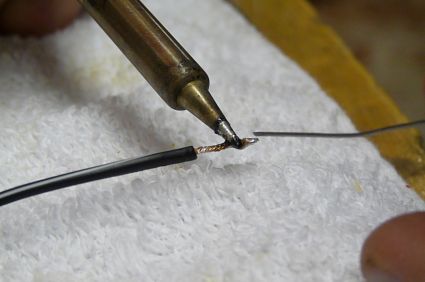
Quick wicking allows the melted solder to fill up tiny spaces between parts and microscopic "imperfections" on the surface of the contact material before it hardens, creating a micro-tight hold.
[Back to top]
Soldering Tools, Materials, and Accessories
Now, with an idea of what soldering is and how it works, the next step is to go down the list of tools and materials needed for soldering.
Here's a list of the bare minimum equipment needed for soldering:
- a soldering iron, gun, or torch.
- solder
- flux
- cleaning materials (depends on the job), and
- de-soldering tape
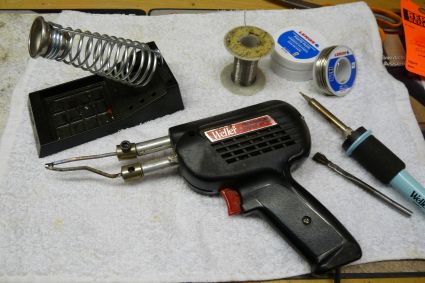
This section addresses each of the above soldering essentials, options available on the market for each item, and which is best for the soldering tool repairman.
Solder Irons, Guns, and Torches
One way or another, the solder is going to have to be heated in order to melt. Soldering irons and soldering guns are the two most common devices used for heating solder, although torches and air pencils are sometimes used.
For choosing soldering irons and guns, the most important step is to match the wattage of the heating device to the size of the soldering job. More wattage does not mean a hotter gun; more wattage only means that the gun or iron will be able to efficiently melt more solder.
If wattage is too low, then the iron or gun will not melt the solder fast enough for it wet and cover the contact surfaces correctly, and the solder joint will be weak. If wattage is too high for the size of the job, then the extra heat coming from the iron or gun is likely to damage components surrounding the soldering area.
For example, 15-30 watt irons tend to be best for small soldering, like circuit boards, 40-100 watt irons are usually used for soldering in audio equipment, and 100-200 watt irons and guns are preferred by tool repairmen for power tool soldering.
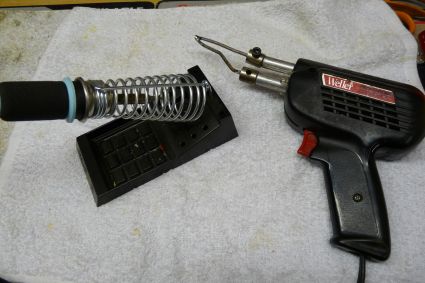
Really though, there are no definite rules outside the preference of the user. As we discuss below, if an iron is not hot enough to make good joints, you'll know it. As long as a gun or iron has enough wattage for the size of its work and is not damaging surrounding parts, solderers should use what is comfortable. Power tool repairmen tend to prefer higher power solder guns over lower power irons, for faster work.
More expensive, temperature controlled irons are available for applications where constant temperature is important, but temperature controlled irons are needed seldom (if ever) by tool repairmen, since fixed temperature irons work fine.
Soldering guns and irons are also available in portable and non-portable versions, and they can include other features and accessories. These include differently-shaped tips, stands for the gun or iron, clamps for holding work in place, a temperature gauge, and, sometimes, a heat boost button.
These features and accessories are pretty self-explanatory, and because only the most ordinary kinds of irons and guns are needed for tool repair, they are not necessarily essential for tool repair soldering.
[Back to top]
Solder
Solder is the filler material that is melted in soldering to make a joint between contact areas. Solder materials are designed or chosen for their low melting temperatures, quick wetting action, and fast hardening. Most solder types are either alloys or other mixtures of metals.
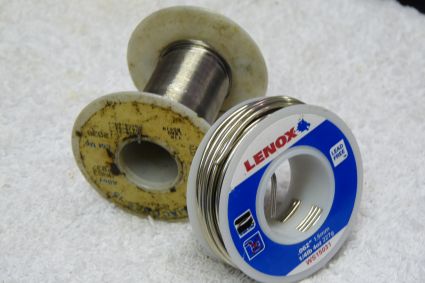
Now, this is where things can easily get overcomplicated for a soldering tool repairman. A little research will quickly reveal that many kinds solder materials are available for many soldering applications, and each is a little different. Solder comes in combinations of tin-lead, lead-silver, tin-silver, zinc-aluminum, tin-zinc, cadmium-sliver, and tin-bismuth, to name a few.
Tool repairmen can forget all that and simply look for common solder products advertised as multi-use or multi-purpose solder. These will generally be tin-lead or tin-bismuth combinations, the most general-application types of solder.
Other than choosing an average solder, tool repairmen have two more decisions to consider about solder products:
1. Lead-free or not lead-free, and
2. Rosin or no rosin. First is the issue of lead. For environmental and health reasons, solder manufacturers are producing more lead-free soldering materials. For health reasons, lead-free solders are best when children could possibly have access to it. As far as the environmental concerns about lead, opinions and level of concern vary, so it just comes down to the preference of the repairman. Second is the choice between solder that includes flux, and flux-free solder. Rosin is one kind of flux, and most flux-containing solders use rosin. Although having rosin included with the solder promotes stronger joints by preventing oxidation, repairmen tend to like rosin-free solder since its usually best to flux separately anyway, regardless of the solder type being used. [Back to top] Flux When solder heats up, the heat given to it by the iron or gun gives the metals in the solder some of the energy they need to react with oxygen in the air. This is an oxidation reaction that produces byproducts, impurities, which can weaken the strength of a solder joint. That's where flux comes in. Flux paste is made of or includes materials called "reducing agents," which reverse the chemical reactions involved in oxidation when heated up. Flux prevents impurities from forming through oxidation when it is used to coat solder and contact surfaces, and it also reverses oxidation that has occurred. Flux is inactive at room temperatures.
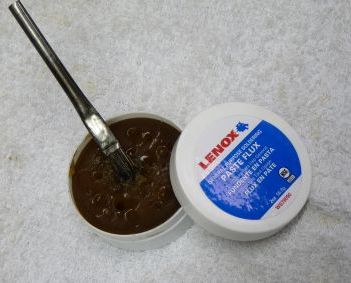
Keeping solder and base metal "clean" of oxidation impurities is important, because the solder cannot adhere to the impurities as well as a clean metal surface. Soldering without flux, or using flux incorrectly, will make solder joints weak.
Flux that contains zinc chloride and/or ammonium chloride should be handled with caution (gloves and goggles recommended). Also, fumes from heated or burning flux can be toxic, so good ventilation is important when soldering.
[Back to top]
Cleaning Materials
The first step before any soldering job should be to make sure that the solder and base metals are clean. Cleaning is not needed for most small, electronic work, but it is occasionally necessary.
Wire brushes and small sponges work well for wiping rust, dirt, grease, and other impurities from components. Tool repairmen and other solderers recommend different cleaning materials and methods, but the important part is just that the surfaces are clean. Some solder joints will require cleaning of flux residue after completion as well.
[Back to top]
DeSoldering Tape
Desoldering tape also goes by the names "desoldering braid," and "desoldering wick." These tapes are usually made of braided copper that contains rosin flux.
Using desoldering tape is the best way to remove old solder joints without damaging surrounding surfaces and components.
To remove solder with desoldering tape, the tape is held against the solder joint to be removed, and then heat is applied to the tape (not the joint). As the desoldering braid heats up, it will pass heat to the solder joint until the solder is hot enough to melt. Once melted, the liquid solder will automatically flow onto the clean wick.
Using desoldering tape is also a good way to clean contact surfaces of impurities before soldering, and having some handy is a must anytime a solder joint needs to be removed.
[Back to top]
Steps and Tips for Good Soldering
These basic steps for soldering apply to soldering of all types. General steps for soldering are:
1. Clean all surfaces.
2. "Tin" wires and soldering iron/gun.
3. Apply flux.
4. Heat and apply filler (solder).
5. Remove heat and hold still until solder cools. 1. Clean all contact surfaces.
For solder joints to hold, all contact surfaces must be clean and free of oxidation. Cleaning wires and base metals can be done with sponges, wire brushes, and cotton swabs.
2. "Tin" wires and soldering iron/gun.
When talking about soldering, "tinning" means to coat with solder. In order to create the strongest joint possible, each contact surface needs to be equally hot enough to melt the filler material. Tinning the soldering iron/gun and wires allows heat from the gun to transfer to other surfaces more easily, so that the solder melts quickly and completely when touched to the hot base materials.
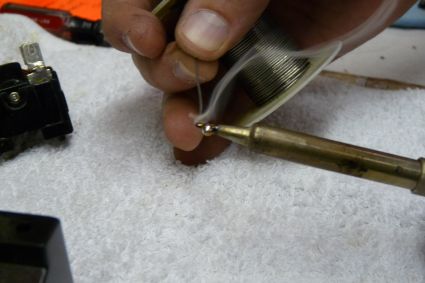
3. Apply flux.
The best way to make a bad soldering joint is by soldering without flux. After tinning, flux should be applied to each contact surface, including base metals and wires. Flux can also be applied to the tinned soldering iron/gun, but it is not completely necessary.
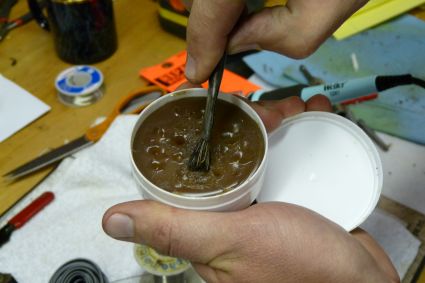
4. Heat contact surfaces and apply filler (solder).
Heat should be applied to base metals and contact surfaces before solder is introduced. That way, the metals should already be hot enough to melt the solder when it touches.
Solder should be applied to hot contact surfaces, not to the soldering iron/gun. By applying solder to the hot materials where the joint will be made, the solder is allowed to wick (wet) directly onto the spot where it needs to solidify.
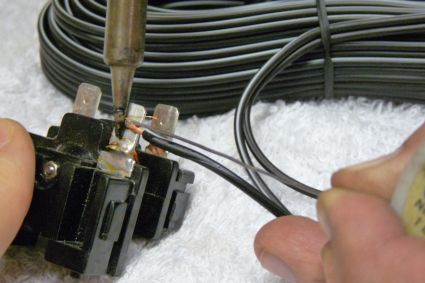
Also, attention should be given to how much solder is being used. Using less solder tends to make better joints.
Applying solder directly to an iron or gun is bad joint waiting to happen. Applying solder to cold contact surfaces will also create weak joints. Again, contact surfaces should be heated first, and then solder should be applied to the hot contact surfaces, never to the gun or iron.
5. Remove heat and hold still until the solder completely cools.
Once the solder has wicked onto the base metals, the connection must be held very still until the joint completely hardens. This should only take about 3 seconds. If a joint is moved before its solder hardens, even slightly, the movement can severely weaken the joint.
Here are some extra tips about good soldering:
- Cleanliness. Only solder surfaces that are clean, and keep the tip of your solder iron/gun clean.
- Use the correct wattage iron or gun for the job. Over or under heating the solder can make bad joints or damage components.
- Always pre-tin the tip of the iron or gun before soldering.
- Always use flux.
- Always apply solder to the work, not to the iron or gun.
- Be patient, especially at first.
- If it makes it easier, secure the work when possible (soldering clamps come in handy for this).
- Practice. Even though the steps sound simple, good soldering takes practice.
- Good solder joints will be smooth and shiny.
- Poor solder joints will be dull, crinkled, and/or look otherwise contaminated.
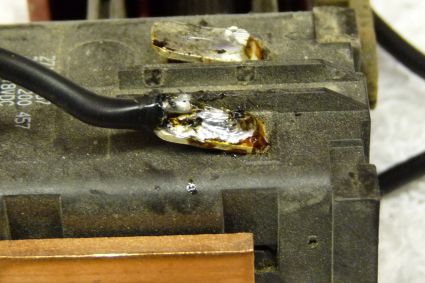
Example of a Good Solder Joint:
Conclusion If you're just starting out with tool repairs that involve soldering, or if you're new to soldering in general, it will probably take a little practice before joints start looking smooth and shiny. Either way, getting on top of soldering practice and technique is worth the time and effort. Common tool repairs, like replacing power switches, often involve a little soldering, so having the experience and equipment around is a good way to keep tools running well. For a "Power Switch Repair" article--Click here. Other repair tips and suggestions are available through eReplacementParts.com's repair forum and discussion board features, information tools that address machine and tool part replacements and other services issues. Good luck with your soldering and tool repairs! [Back to top] What we're about.


