


Why Read This Article?
Finish Nailer Repair - Replacing the Driver Guide (Ridgid Part # 79004001022)
Article Breakdown
Finish Nailer Repair - Replacing the Driver Guide (Ridgid Part # 79004001022)
Video

Tools & Materials


If raised grains and elbow strains are sanding away your patience, it's time to face the fix. Whether you are a sanding pro or a seasonal sander, eReplacementParts.com provides the parts, procedures and facts you need to fearlessly fix what fails you.
The switch on a belt sander endures constant use, and eventually, it will fail. Often, this happens without any prior warning. In fact, one of the most common (and frustrating) symptoms of a faulty switch is that the sander works perfectly one minute, and then fails to work at all the next time you activate the switch. Fortunately, replacing the switch in a belt sander is easy to do, especially when you follow our step-by-step instructions. If you're ready to make the switch, this article will show you how.
Let's get started.
 REMOVING THE SWITCH [top]
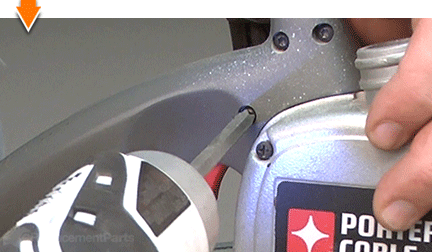
1. Remove half of the trigger handle.
REMOVING THE SWITCH [top]
1. Remove half of the trigger handle.
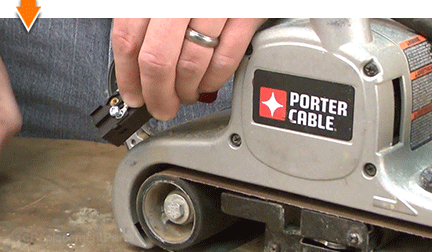
Remove the screws from the trigger handle.
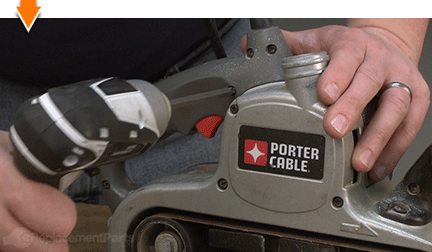
Remove half of the trigger handle.
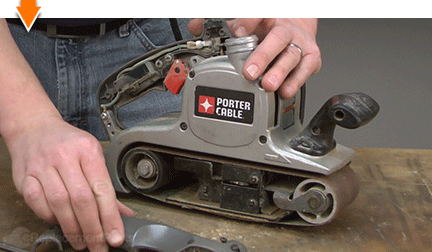
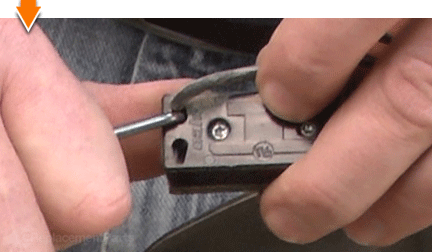
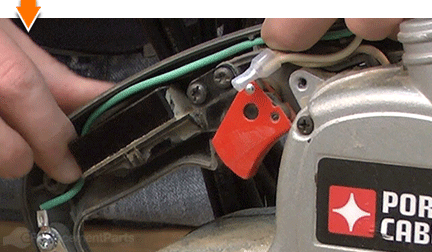
2. Remove the switch from the housing.
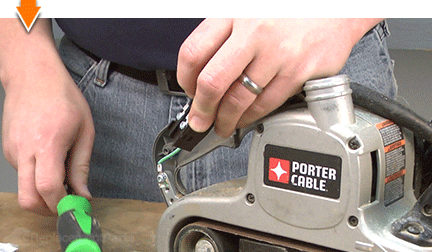
Remove the two retaining screws from the switch.
Remove the switch from the housing.
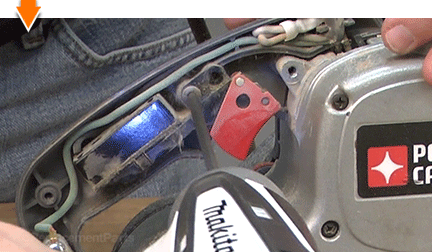
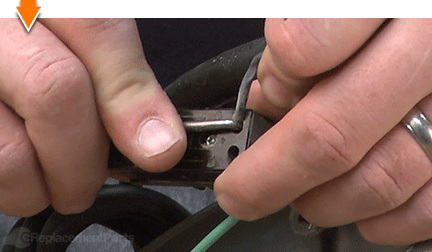
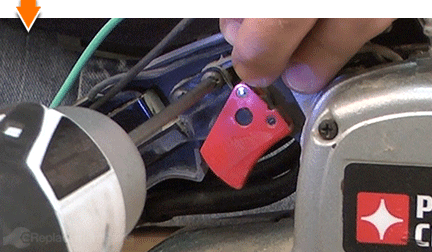
3. Remove the wires from the switch.
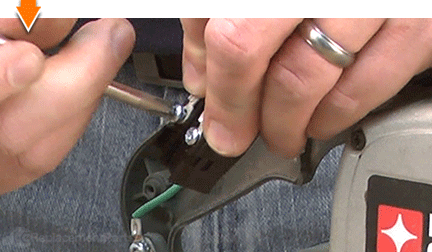
Insert a pick into the terminals (where the black wire attach to the switch). This will release the trap-door locking mechanism in the terminals.
Remove both of the wires from the switch.
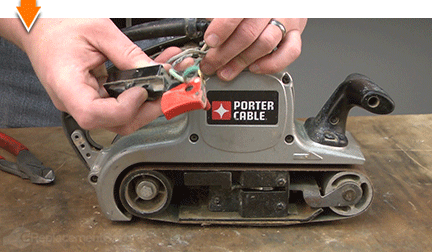
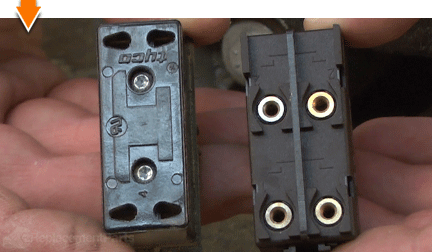
INSTALLING THE NEW SWITCH [top] 4. Prepare the existing wires.
SPECIFIX: The new switch uses screws (instead of trap doors) to secure the wires. The switch kit includes new eyelets and screws to facilitate installation.
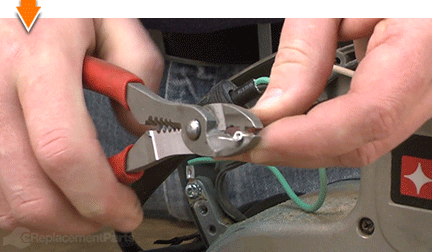
Use wire cutters to trim the exposed portion of each black wire (to approximately one-quarter of an inch).
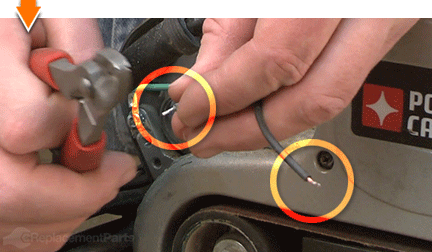
Slide one of the eyelets over the exposed portion of one of the black wires.
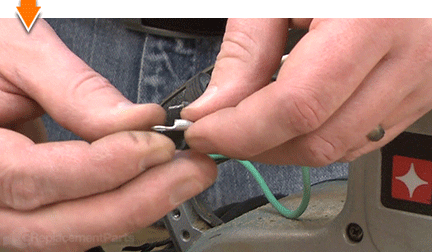
Use a crimping tool to crimp the eyelet and secure the connection.
Repeat this step to install the second eyelet onto the remaining black wire.
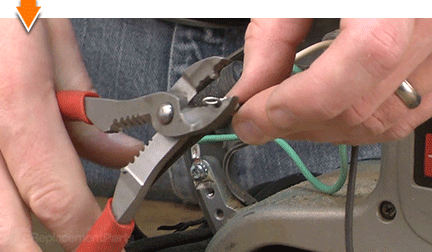
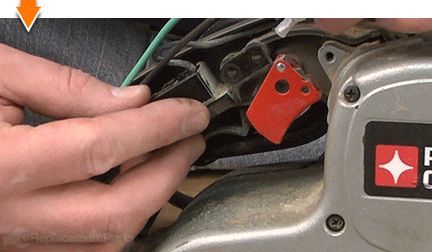
5. Connect the new switch.
Identify the two sets of markings on the new switch; they are labeled 1 and 2. You will be using only the poles marked 2 for this installation.
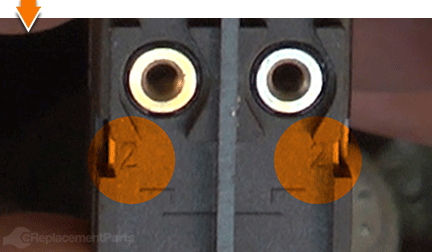
Attach the motor wire to one of the number 2 poles (using the included screw).
Attach the power wire to the remaining number 2 pole (using the included screw).
Use a Phillip's screwdriver to secure both of the connections.
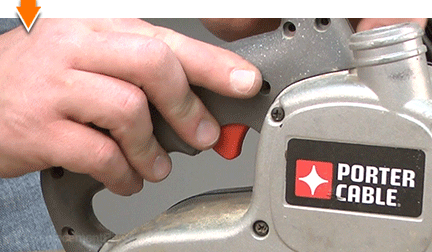
REASSEMBLING THE UNIT [top] 6. Reinstall the switch.
Align the switch with the mounting holes in the handle.
Secure the switch to the handle with the two screws.
 7. Tuck the wires.
Tuck all of the wires into the corresponding tabs or channels along the perimeter of the handle.
 8. Reinstall the handle side cover.
Install the handle side cover.
Secure the cover with the screws.

Sanding can be a demanding task. But you don't have to rough-up your accountant to smooth-out your countertops. As you just learned, repairing your own power tools is simple when you follow our step-by-step guides. Not only did you expand sander functionality at a fraction of the cost of replacement; you have taken the edge off all future repairs. Find your next fix here. [top]
