


Why Read This Article?
Finish Nailer Repair - Replacing the Driver Guide (Ridgid Part # 79004001022)
Article Breakdown
Finish Nailer Repair - Replacing the Driver Guide (Ridgid Part # 79004001022)
Video

Tools & Materials
 THE FACTS | THE FIX | THE FINISH
If engine rust and concrete dust are cutting into your construction budget, it's time to face the fix. Whether you are a master mason or a backyard builder, eReplacementParts.com provides the parts, procedures and facts you need to fearlessly fix what fails you.
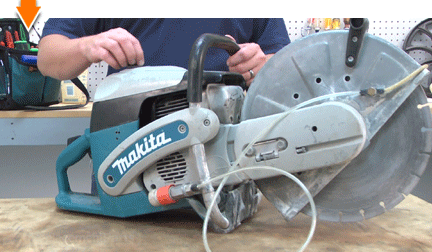
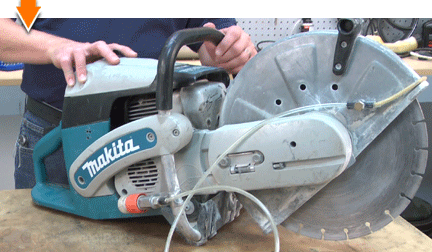
The pre-filter is the first line of defense against incoming dust and debris on your Makita cut-off saw. It is made of foam and can (usually) be cleaned several times (with soap and water) before replacement is required. Over time, the foam will begin to deteriorate or de-laminate. When this happens, the pre-filter will need to be replaced. Fortunately, you can complete this simple repair in under five minutes when you follow the steps below.
THE FACTS | THE FIX | THE FINISH REMOVING THE PRE-FILTER [top] 1. Remove the filter cover assembly.
Rotate the locking knob on the top of the assembly to the unlocked position.
Lift the filter cover assembly away from the unit.
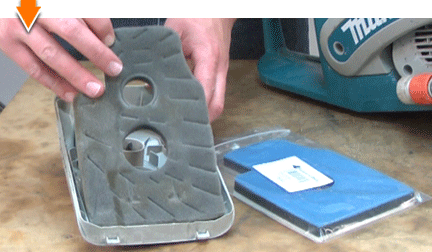
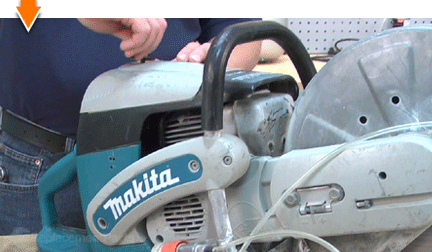
 2. Remove the pre-filter.
Remove the pre-filter from the inside of the filter cover assembly.
INSTALLING THE NEW PRE-FILTER [top] 3. Install the pre-filter.
Brush or blow away any dirt or debris from the filter cover.
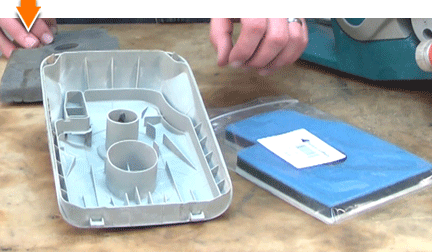
Install the pre-filter into the cover assembly.

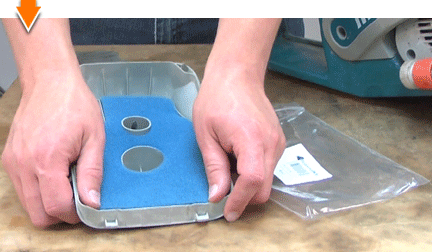
Press along the perimeter of the pre-filter to ensure that all sides are smoothly seated within the plastic channels.
REASSEMBLING THE UNIT [top] 4. Reinstall the filter cover assembly.
Install the filter cover assembly onto the saw.
Rotate the locking knob to the locked position.
THE FACTS | THE FIX | THE FINISH While cutting concrete can be a valuable skill; cutting costs is priceless. But you don't have to be a master mason to cut out the middle-man. As you just learned, maintaining your own power equipment allows you slash offsite repair costs and empowers you to face future fixes wherever you may find them. Save your saw. See more savings. Find your next fix here. [top]
