


Why Read This Article?
Finish Nailer Repair - Replacing the Driver Guide (Ridgid Part # 79004001022)
Article Breakdown
Finish Nailer Repair - Replacing the Driver Guide (Ridgid Part # 79004001022)
Video

Tools & Materials
 THE FACTS | THE FIX | THE FINISH
If falling leaves and a faulty blower are threatening to bury you beneath a pile of debt and debris, it's time to face the fix. Whether you are a seasonal garden enthusiast or a seasoned landscape professional, eReplacementparts.com provides the parts, procedures and facts you need to fearlessly fix what fails you.
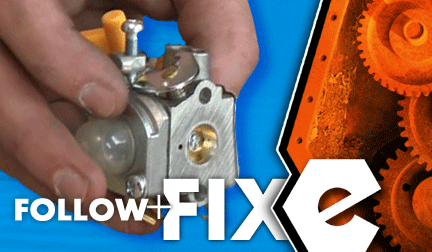
A steel heart within a device comprising plastic, metal and wire; the carburetor fuels the vital fires that keep your small engine alive. While routine maintenance and tuning can help extend the life of this device, time and trauma sometimes decide otherwise. Difficulty starting, rough idle, high idle, false-start, no-start, excessive fuel consumption, fuel leakage: these are the signs of a carburetor in decline. When they begin to multiply, it might be wise to change the entire assembly.
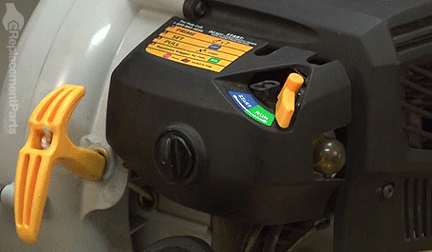
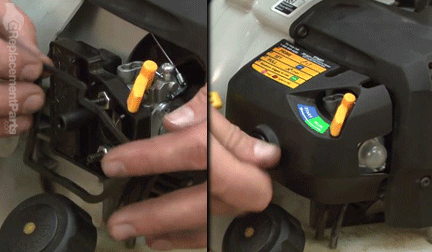
When all attempts have failed to revive a once-thriving carburetor, this article will guide you through the steps required to replace and reignite the steel heart of your machine. THE FACTS | THE FIX | THE FINISH REMOVING THE CARBURETOR [top] 1. Remove the air filter cover.
Unscrew the retaining bolt and pull gently to remove the air filter cover.
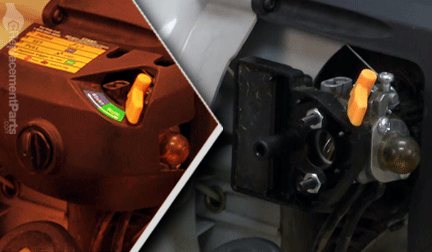 2. Remove the air filter base.
Remove the two nuts holding the air filter base using a ratchet wrench.
Remove the air filter base.
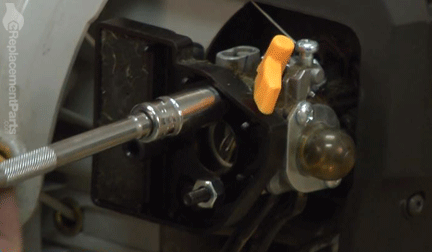
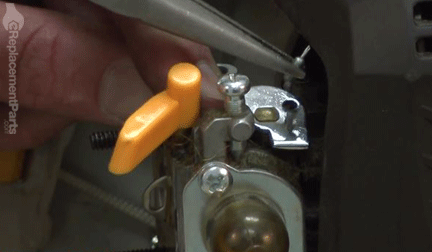
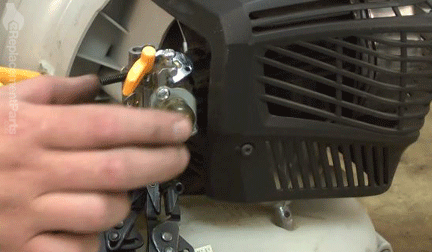
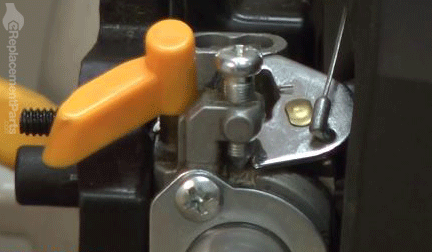
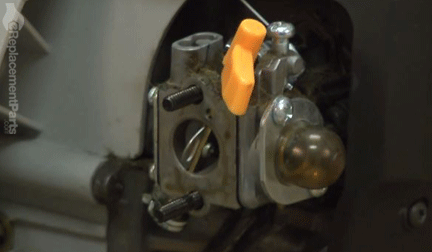 3. Remove the throttle cable from the carburetor.
Retract the throttle arm slightly to create slack in the throttle cable; remove the cable from the carburetor assembly.
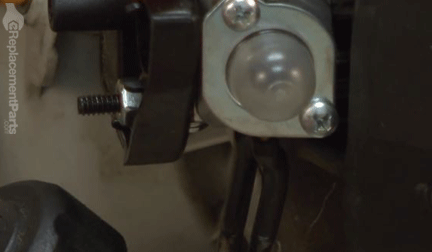
 4. Remove the fuel lines from the carburetor.
FIX TRIX: It is advisable to clamp the fuel lines prior to removal. If you do not have fuel line clamps, you can drain the fuel from the fuel tank.
Clamp fuel lines with fuel line clamps.
Use a flathead screwdriver and/or long-nosed pliers to disconnect the fuel lines from the carburetor.
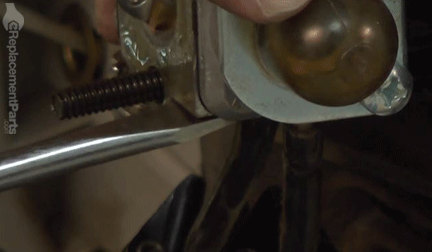
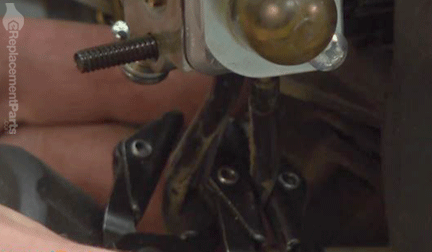
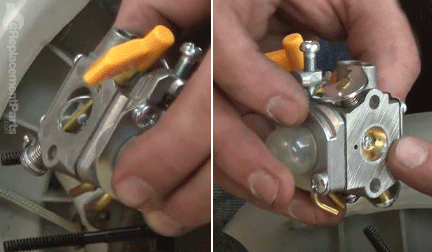
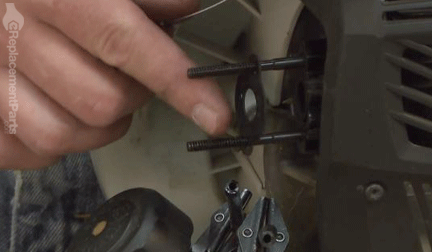
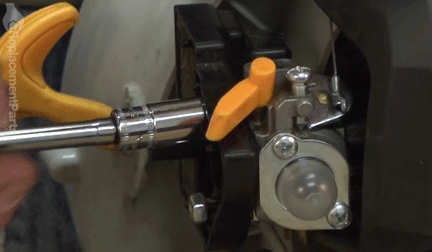
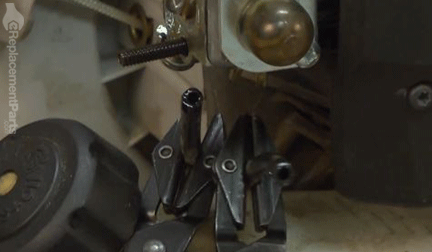 5. Remove the carburetor from the engine.
Slide the carburetor assembly off of the retaining bolts and away from the engine.
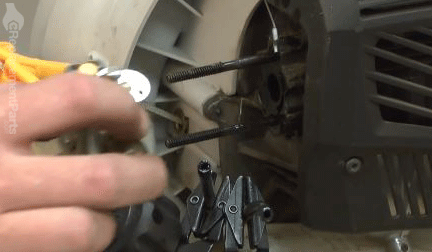
Remove the carburetor gasket from the heat dam assembly (or verify that the gasket is still connected to the carburetor throttle plate).
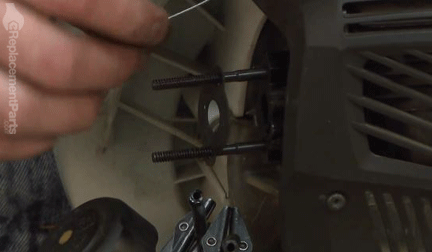
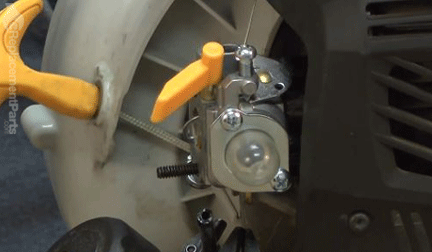
INSTALLING THE NEW CARBURETOR [top] 6. Reinstall the carburetor assembly.
SPECIFIX: During installation, ensure that the throttle plate is facing the engine, and the choke plate is facing away from the engine.
Reinstall the carburetor gasket. (It is recommend that worn or torn gaskets be replaced during installation.)
Reinstall the carburetor assembly.
Reinstall the air filter base.
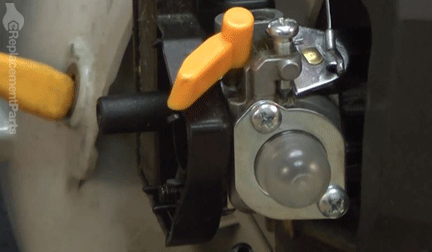
Secure the air filter base and the carburetor to the engine with the two nuts removed earlier.
REASSEMBLING THE UNIT [top] 7. Reinstall the fuel lines.
Reattach the fuel lines to the carburetor and remove the fuel line clamps.
 8. Reinstall the throttle cable.
Retract the throttle arm slightly and using long-nosed pliers -- install the throttle cable into the attachment recess.
 9. Reinstall the air filter cover.
Reposition and seat the air filter gasket; align and secure the air filter cover.
 THE FACTS | THE FIX | THE FINISH
You can't place a value on a job well done; unless you did it yourself. (Which you just did.) Now you can place the value right back into your own pocket. Or back into your business. Not only did you restore blower functionality at a fraction of the cost of replacement; you have blown away all doubts about your ability to fearlessly face the next fix, whatever it may be.
Find your next fix here.
.
[top]
THE FACTS | THE FIX | THE FINISH
You can't place a value on a job well done; unless you did it yourself. (Which you just did.) Now you can place the value right back into your own pocket. Or back into your business. Not only did you restore blower functionality at a fraction of the cost of replacement; you have blown away all doubts about your ability to fearlessly face the next fix, whatever it may be.
Find your next fix here.
.
[top]
