


Why Read This Article?
Finish Nailer Repair - Replacing the Driver Guide (Ridgid Part # 79004001022)
Article Breakdown
Finish Nailer Repair - Replacing the Driver Guide (Ridgid Part # 79004001022)
Video

Tools & Materials
- Torx driver
- Needle-nose pliers
Safety Guidelines
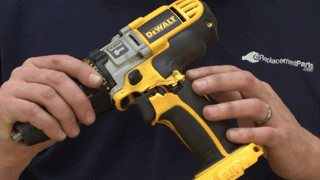
Remember to find all the DeWalt drill parts you need by finding your drill model here. Breaking the Drill Down
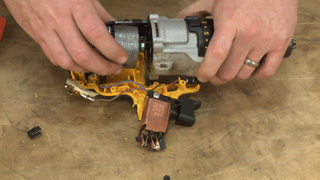
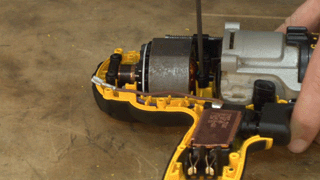
1. Separate the handle assembly
First, remove the two transmission screws on the back of the drill. When looking at the drill, you should see the heads of all the housing screws.
![]()
Now remove the housing screws and separate the housings.
2. Check for further damage
Do an initial check of any other damage that may have occurred. For example, in our drill we clearly saw the switch was broken at this point.
3. Remove the other two transmission screws
Now flip the drill over and remove the other two transmission screws to free up the motor.
![]()
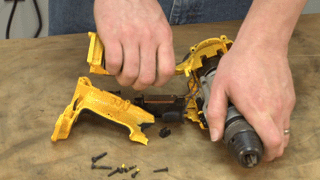
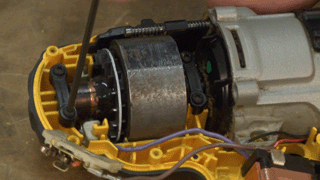
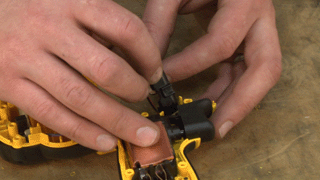
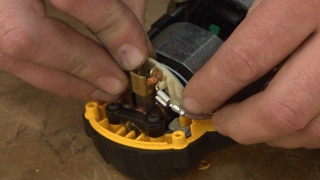
4. Remove the two armature blocks
Flip the drill back over and look near the back of the motor. You'll see two blocks that secure the armature bearings. Remove the screws that secure these and set them aside.
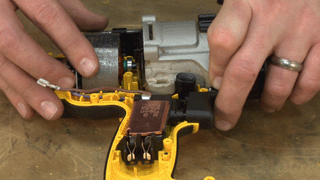
5. Remove the motor assembly
Now you can pull the motor and transmission away from the drill.
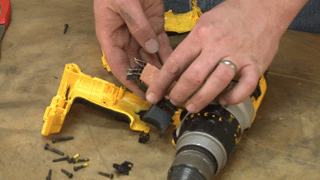
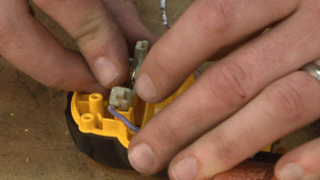
6. Remove the lower brush holder
Before you remove the brush holder, note where the wire attaches to the switch. Then remove the brush holder and disconnect the wire from the switch.
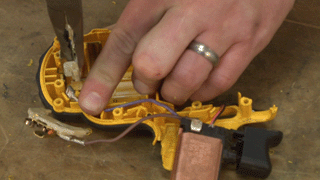
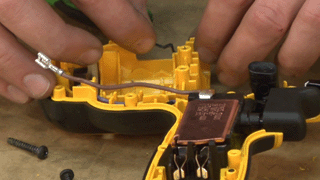
7. Check for further damage
With everything out of your drill, you can do one last damage inspection. Check the motor and transmission, the switch, and all other drill components. At this point we discovered we had three bent screws that also needed replacing.
[Back to Top] Assembling the Drill
1. Start with one side of the housing
Begin by working with the lower section of the housing. You'll know you have the lower section if you see the female screw receivers.
2. Install the switch
Place the switch into place inside the drill.
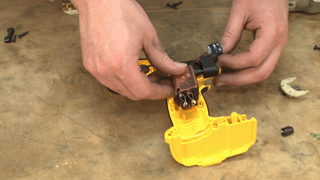
Route the lower brush wire through the handle to prevent pinching later.
3. Install the lower brush holder
Now install the lower brush holder into the drill housing.
4. Install the forward/reverse lever
Put the forward/reverse lever into place above the switch.
5. Transfer the old leaf springs
Look inside the old housing assembly for two leaf springs--one per side. These help keep the transmission in gear. Transfer them over to the new housings.
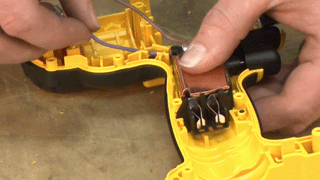
6. Install the motor assembly
Place the motor assembly back in the drill.
7. Fasten the armature blocks
Re-install both bearing blocks over the armature.
8. Install the transmission screws
Flip the drill back over and fasten the two transmission screws to secure your motor assembly.
![]()
9. Install the upper brush
Flip the drill again, and place the upper brush assembly over the motor.
10. Combine the housings
Now you can combine the housings. Take the bit holder from the old housings and put it in place between the two.
Then close up the housings and fasten the body screws.
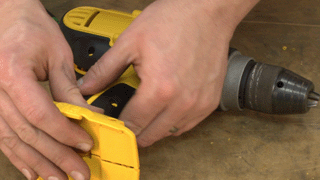
Fasten the two transmission screws to finish the repair.
![]()
[Back to Top]
Conclusion
And that's how easy it is to replace the housing on your drill. Not only will this repair save you a lot of money compared to a repair shop, but you now know how to completely break down your DeWalt drill, which will make future repairs a snap.
Remember, you can find more than just parts for DeWalt drills. We stock thousands of DeWalt replacement parts on our site.
[Back to Top]
What We're About
