


Why Read This Article?
Finish Nailer Repair - Replacing the Driver Guide (Ridgid Part # 79004001022)
Article Breakdown
Finish Nailer Repair - Replacing the Driver Guide (Ridgid Part # 79004001022)
Video

Tools & Materials
- Phillip's-head screwdriver
- Multimeter
Safety Guidelines
 Remember to find the right switch for your Makita saw by visiting our Makita saw parts page.
Replacing the Switch
Remember to find the right switch for your Makita saw by visiting our Makita saw parts page.
Replacing the Switch
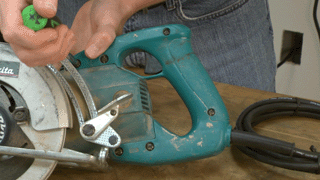
1. Remove the handle side cover
Start by removing the five screws that secure the side cover, then set it aside.
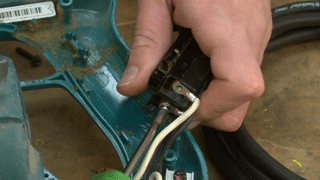
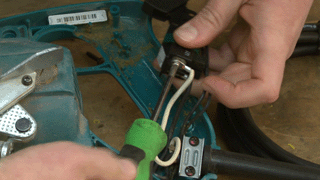
2. Remove the switch wires
Now that you have access to the switch, note where all the wires connect, then remove the wires.
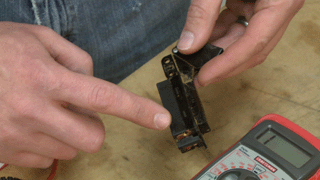
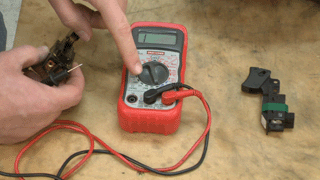
3. Check for continuity
If your replacement switch looks different than the one in your saw, you may want to do a continuity check with a multimeter to ensure that the switches are wired the same way. Check out the video to the left for specific instructions on checking the continuity of the new switch.
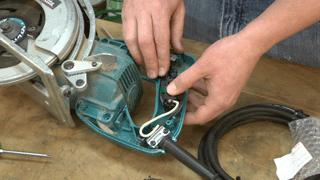
4. Connect the wires
Connect the wires as they were attached before. If your new switch has a different wiring pattern, just adjust the continuity to match.
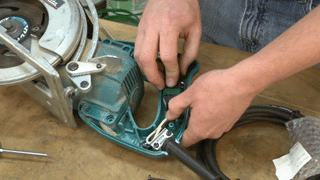
5. Install the switch
Place the new switch back into the saw's handle.
Tuck the wires out of the way so they won't get pinched by the new handle.
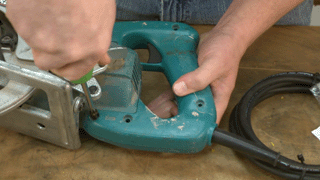
6. Re-attach the handle side cover
Now just secure the handle side cover to finalize the repair!
 [Back to Top]
Conclusion
And that's how easy it is to replace the switch in your Makita saw. This repair will save you at least $20 compared to a repair shop and will only take you about 10 minutes to complete. How's that for a bargain?
Have other power tools that need a bit of fixing up? Check out our power tool parts page to find all the right parts for your repairs.
[Back to Top]
[Back to Top]
Conclusion
And that's how easy it is to replace the switch in your Makita saw. This repair will save you at least $20 compared to a repair shop and will only take you about 10 minutes to complete. How's that for a bargain?
Have other power tools that need a bit of fixing up? Check out our power tool parts page to find all the right parts for your repairs.
[Back to Top]
What We're About
