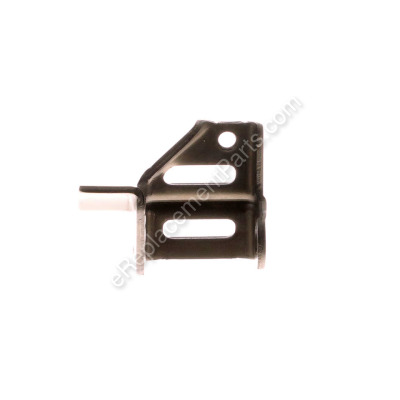


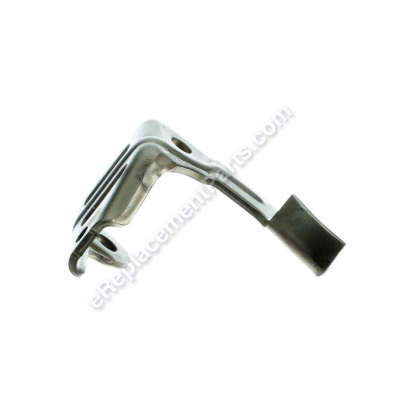
This is an exhaust valve rocker arm used for small engines and equipment like pressure washers. Rocker arms transmit motion from a camshaft to valves, controlling valve timing and duration. If your engine struggles to start, misfires, or will not start, inspect the rocker arm(s) for excess play, wear, or bending due to high temperatures. To replace it, disconnect the spark plug and/or starting coil, remove the valve cover, and locate the rocker arm(s). Rotate the camshaft until pistons are up and rocker arms are loose. Slide out the pin, remove the old rocker arm, and install the new one with its pin. Tighten the adjustment screw to the manufacturer specifications, reinstall the spark plug, replace valve cover sealant, and reattach the cover.
Valve Rocker Arm 14441-Z0J-000
OEM part for: Honda, Toro, Lawn Boy
Part Number: 14441-Z0J-000
Jump To:
Frequently Purchased Together ?


Compatibility
This part will fit the following 382 machines
Honda
Toro
Lawn Boy
This item works with the following types of products:
- Engine Parts
- Lawn Mower Parts
- Snowblower Parts
This part replaces obsolete part #: 14441-ZL8-000
Customer Part Reviews ?
- 1
Questions & Answers ?
Our customer Service team is at the ready daily to answer your part and product questions.

Ask our Team
We have a dedicated staff with decades of collective experience in helping customers just like you purchase parts to repair their products.
Does this fit my product?Questions & Answers for Valve Rocker Arm
Customer Repair Instructions ?
All our customer repair instructions are solicited directly from other customers just like you who have purchased and replaced this exact part.
Honda GCV 160 Pressure Washer Wouldn't Start and was difficut to pull.
Tool Type
Engine
Difficulty
Easy
Time
15-30 minutes
Tools Used
Socket set, Honda Bond 4 or equivalent
Parts Used
When I start my pull start motor I try to start them at Top Dead Center knowing this and experiencing the kick back almost immediately after pulling the cord and feeling the high level of tension getting there I immediately suspected a stuck exhaust valve.
I took the 4 valve cover bolts off and carefully pulled the glued on valve cover off to see that the rocker arm for the exhaust valve had been split. When the rocker arm was putting force on the valve and the valve didn't move the rocker arm broke. Fortunately the exhaust valve wasn't so stuck that 2 taps with a dead blow hammer freed it right up. Replaced the rocker arm and set the valve clearance to specifications and verified the intake valve clearance as well (clearances was set to 0.15mm intake and 0.20mm exhaust).
A few things that I took note of since this was the first time I have worked on the this motor. Most of the motor does not use gaskets it calls for Honda Bond 4. I Permatex Ultra Grey RTV. You could also use Yamabond 4, but the Permatex is cheaper and more readily available.
This motor does not have a removable cylinder head. If you have a ton of hours on your motor maybe 100, 200, maybe 500. You may as well tear the motor completely down anyways and replace the timing belt clean the cylinder head (Which you have to do by going in through the bottom of the cylinder, and inspecting the parts of the bottom end). I didn't even consider doing all that because my motor had less than 50 hours on it.
My Lessons learned from this is that in addition to what the manual says to do for long term storage I will also be taking off the muffler and carb to have access to the intake and exhaust ports. While cycling the motor with the starter rope I will spray some PB Blaster on the valve stems as additional lubricant to the motor oil that already got poured into the cylinder, and then cycling the starter rope to store the piston at TDC(top dead center) to trap out any moisture that could possible freeze up the valves.
I know this was lengthy, but if you took the time to read all that I wrote I hope that it'll help you in the future with your equipment repairs.
Thanks,
James
Rocker arm cracked at the adjusting bolt and would not set correctly
Tool Type
Engine
Difficulty
Easy
Time
15-30 minutes
Tools Used
Socket set, filler gage
Parts Used
The Arm-Ex Valve Rocker was cracked.
Tool Type
Engine
Difficulty
Medium
Time
Less than 15 minutes
Tools Used
Socket set
Adjust lash at intake and exhaust rockers. Replace valve cover.
Knocking noise and stuck exhuast valve on Honda GCV 160 engine
Tool Type
Lawn Mower
Difficulty
Medium
Time
More than 2 hours
Tools Used
Screwdriver, Pliers, Socket set, Wrench Set
After reassembly, did not have any compression, found adjustment out on the rocker arms, was keeping exhaust valve open a little, not allowing compression to build up. Adjusted, then after two or three pulls, engine started.
With the timing belt, it is important to make sure that is reassembled correctly to have valves timed properly. Found a video on youtube that explained how to do that.
Exhaust rocker arm broke
Tool Type
Engine
Difficulty
Medium
Time
30-60 minutes
Tools Used
Screwdriver, Socket set, Wrench Set, Adjustable Wrench
Timing belt slipped and broke rocker and camshaft
Tool Type
Engine
Difficulty
Medium
Time
1-2 hours
Tools Used
Screwdriver, Wrench Set, Nutdriver
Valve lifter cracked
Tool Type
Engine
Difficulty
Easy
Time
15-30 minutes
Tools Used
Pliers, Socket set
Removed lifter pins ( held in by the cover)
Replaced lifters with new parts and set lash.
Replaced cam pulley
Put sealant on back side on cover. Installed cover by tightening 4 bolts
Let sealant set up over night.
Added oil and gas....... Engine started on first pull!
Valve rocker arm cracked
Tool Type
Engine
Difficulty
Medium
Time
15-30 minutes
Tools Used
Power Drill, Socket set, Wrench Set
Parts Used
Found rocker arm cracked
Placed order online
Received new parts removed old parts
Adjusted exhaust/intake to proper position
Replaced valve cover
Topped off motor oil to proper level
Started motor, adjusted carburetor lean
Happy customer
Honda Engine 190 on pressure washer would not start.
Tool Type
Engine
Difficulty
Easy
Time
15-30 minutes
Tools Used
Socket set
Parts Used
Removed valve cover, rocker arm, and pin - replaced and adjusted.
Exhaust rocker arm was bent.
Tool Type
Engine
Difficulty
Medium
Time
30-60 minutes
Tools Used
Socket set, Wrench Set, Adjustable Wrench
Parts Used
2. Remove the spark plug.
3. Remove the exhaust guard.
4. Remove the valve cover.
5. Clean the gasket surfaces.
6. Install the new rocker arm.
7. Set the rocker arm gap.
8. Put it back together.
OEM stands for Original Equipment Manufacturer and means the part you’re buying is sourced directly from the manufacturer who made your product. At eReplacementParts, we sell only genuine OEM parts, guaranteeing the part you’re purchasing is of better design and of higher quality than aftermarket parts.
Our product descriptions are a combination of data sourced directly from the manufacturers who made your product as well as content researched and curated by our content & customer service teams. This content is edited and reviewed internally before being made public to customers.
Our customer service team are at the ready daily to answer your part and product questions. We have a dedicated staff with decades of collective experience in helping customers just like you purchase parts to repair their products.
All our part reviews are solicited directly from other customers who have purchased this exact part. While we moderate these reviews for profanity, offensive language or personally identifiable information, these reviews are posted exactly as submitted and no alterations are made by our team.
All our customer repair instructions are solicited directly from other customers just like you who have purchased and replaced this exact part. While we moderate these reviews for profanity, offensive language or personally identifiable information, these reviews are posted exactly as submitted and no alterations are made by our team.
Based on data from past customer purchasing behaviors, these parts are most commonly purchased together along with the part you are viewing. These parts may be necessary or helpful to replace to complete your current repair.
All our installation videos are created and produced in collaboration with our in-house repair technician, Mark Sodja, who has helped millions of eReplacementParts customers over the last 13 years repair their products. Mark has years of experience in selling and repairing both commercial and residential products with a specialty in gas-powered equipment.
This data is collected from customers who submitted a repair instruction after replacing this exact part. Customers can rate how easy the repair was to complete and how long it took. We aggregate this data to provide a repair rating that allows customers to quickly determine the difficulty and time needed to perform their own repair.