
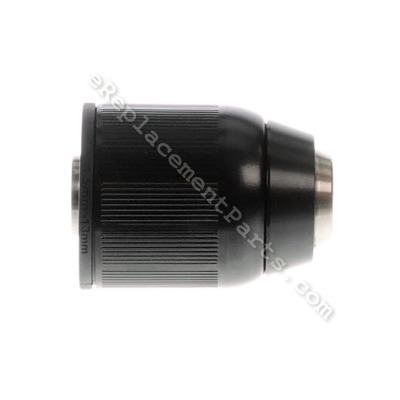


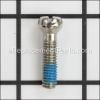
This is an authentic Milwaukee part, sold individually. If your drill's bit retention is suffering, the rotation feels stiff, or the chuck has seized up entirely, a new chuck should fix the problem. The chuck is the top portion of the drill that holds the different drill bits. It is compatible with the hammer drills listed below. In order to install this chuck you will need to thread the chuck assembly onto the spindle then secure the chuck assembly as tightly as possible (by hand). Then open the chuck to accept the retaining screw and install the retaining screw. Secure the screw with a Phillips screwdriver. The screw is reverse threaded requiring counter clockwise rotation to secure.
Chuck (1/2-inch) 42-66-0785
OEM part for: Milwaukee
Part Number: 42-66-0785
$43.74
In Stock
Jump To:
Frequently Purchased Together ?
Compatibility
This part will fit the following 5 machines
Milwaukee
2602-20 (SER C15A) M18 1/2" Compact Hammer Drill View Diagrams & Manuals
2602-20 (C15B) M18 1/2" Compact Hammer-Drill View Diagrams & Manuals
2602-20 (C15C) M18 1/2" Compact Hammer-Drill View Diagrams & Manuals
2602-20 (SER C15D) M18 1/2" Compact Hammer Drill View Diagrams & Manuals
2602-22DC M18 1/2" Compact Hammer Drill View Diagrams & Manuals
This item works with the following types of products:
- Drill Parts
- Hammer Drill Parts
This part replaces obsolete part #: 42-66-0780
Repair Videos ?
Watch the Repair Video for
Chuck (1/2-inch)

Articles:
|
Broken gearboxes and sticky chuck screws can make removing a drill chuck difficult. This article explains the tricks you...
August 12, 2010
|

|
Chuck stuck? You're in luck. This article will show you how quickly remove and install a new chuck on a Milwaukee cordle...
December 10, 2014
|

Customer Part Reviews ?
Average Rating (out of 5):
Click to filter by ratings:
5 stars
2
4 stars
0
3 stars
0
2 stars
0
1 stars
0
< PREV
- 1
It was easy to find parts and fast to get them everything fit perfect thanks
Thanks again great service parts fit perfect
Robbe -
May 19, 2022
Verified Purchase
1/2” Milwaukee drill chuck
New Milwaukee part. Just as advertised. Transaction was easy, price was right and shipping time was good. Thank you.
Guest -
March 2, 2020
Verified Purchase
t
t
t -
t days ago
Verified Purchase
eReplacementParts Team
t
Questions & Answers ?
Our customer Service team is at the ready daily to answer your part and product questions.

Ask our Team
We have a dedicated staff with decades of collective experience in helping customers just like you purchase parts to repair their products.
Does this fit my product?Questions & Answers for Chuck (1/2-inch)
No questions have been asked yet
Customer Repair Instructions ?
All our customer repair instructions are solicited directly from other customers just like you who have purchased and replaced this exact part.
Chuck won't close
William - May 22, 2016
👍 2 of 2 people found this instruction helpful
Tool Type
Hammer Drill
Difficulty
Easy
Time
Less than 15 minutes
Tools Used
Screwdriver, Allen wrench
Parts Used
I removed the LH chuck screw from the chuck. I was able to close the chuck tight enough on the short end of an allen wrench. I then put the chuck in drill mode and in low gear and laid it on the work bench. I then hit the allen wrench with a hammer a few times and finally the chuck was loose. I removed the the old chuck from the spindle and put the new chuck on as tight as I could with my hands. Then I screwed in the chuck screw and I was done.
Did you find this story helpful?
Thanks for voting and helping fellow customers!
Chuck would only tighten half way. But was about 5 years old with lots of use.
william - January 20, 2016
👍 1 of 1 people found this instruction helpful
Tool Type
Hammer Drill
Difficulty
Easy
Time
Less than 15 minutes
Tools Used
Screwdriver, Hammer and allen wrench
Parts Used
Watch your video !!! That's how I learned it and about left hand thread.
https://www.youtube.com/watch?v=usC8unA5RiA
https://www.youtube.com/watch?v=usC8unA5RiA
Did you find this story helpful?
Thanks for voting and helping fellow customers!
The keyless chuck broke.
Josh - July 6, 2021
Tool Type
Hammer Drill
Difficulty
Easy
Time
Less than 15 minutes
Tools Used
, T27 Torx wrench
Parts Used
1. Unscrew reverse thread Torx 27 screw in chuck
2. Unscrew chuck
3. Screw on new chuck
4. Reinstall Torx 27 screw
2. Unscrew chuck
3. Screw on new chuck
4. Reinstall Torx 27 screw
Did you find this story helpful?
Thanks for voting and helping fellow customers!
Chuck locked up
justin - March 6, 2019
Tool Type
Hammer Drill
Difficulty
Easy
Time
Less than 15 minutes
Tools Used
Screwdriver, Large Allen key
Parts Used
The teeth inside stopped moving . I was able to get to the inner screw easily because everything was locked open. Once out I did have to use a pipe wrench on the outer collar . Carfully losened that and the entire chuck removed from the drill. I reffered to a you tube video for this process just improvised with the pipe wrench because of my case of damage
Did you find this story helpful?
Thanks for voting and helping fellow customers!
Chuck wouldn't close
Tom - May 18, 2018
Tool Type
Hammer Drill
Difficulty
Easy
Time
Less than 15 minutes
Tools Used
Screwdriver, Allen wrench
1. Watched video
2. Removed screw
3. Used allen key and hammer
4. Assembled chuck per video
https://www.youtube.com/watch?v=usC8unA5RiA
2. Removed screw
3. Used allen key and hammer
4. Assembled chuck per video
https://www.youtube.com/watch?v=usC8unA5RiA
Did you find this story helpful?
Thanks for voting and helping fellow customers!
Drill Chuck went bad, had to replace
Doug - May 9, 2018
Tool Type
Hammer Drill
Difficulty
Easy
Time
Less than 15 minutes
Tools Used
Screwdriver, Allen wrench
Parts Used
Googled "replacing a Milwaukee drill Chuck". Watched a YouTube video about it. Very simple replacement. https://www.youtube.com/watch?v=x0y4mfUODsY
Did you find this story helpful?
Thanks for voting and helping fellow customers!
Chuck on 1/2 inch Milwaukee cordless drill had broken, would not hold a bit securely.
ROBERT - February 1, 2018
Tool Type
Cordless Drill
Difficulty
Easy
Time
Less than 15 minutes
Tools Used
Screwdriver, Power Drill
Parts Used
Repair was easy, followed your YouTube video.
Removed the original retaining screw. Unscrewed the old chuck. Screwed on the new chuck. Installed the new retaining screw. Job done. I suggest you buy a new retaining screw when you purchase the drill chuck.
Removed the original retaining screw. Unscrewed the old chuck. Screwed on the new chuck. Installed the new retaining screw. Job done. I suggest you buy a new retaining screw when you purchase the drill chuck.
Did you find this story helpful?
Thanks for voting and helping fellow customers!
Chuck needed replacing due to wear & tear
DEREK - January 17, 2018
Tool Type
Hammer Drill
Difficulty
Easy
Time
15-30 minutes
Tools Used
, Torx bit, large allen key, hammer
Parts Used
I actually followed a youtube video on the repair, and it was very concise.
I had to use a torx drive to remove the center screw ( LH THREAD) that was securing the chuck to the drill. Once I removed it, I then used a very large allen key, tighten it onto the chuck and hit the allen key to loosen the chuck from the drill. I unscrewed the chuck, replaced it with the new one, tighten it as much as I could, then secured it again with the torx screw...
Took me all of 15 minutes
Did you find this story helpful?
Thanks for voting and helping fellow customers!
Chuck was not holding bits.
John - December 30, 2017
Tool Type
Hammer Drill
Difficulty
Easy
Time
Less than 15 minutes
Tools Used
Screwdriver, Wrench Set, Hammer
Parts Used
1. Removed the screw inside the chuck, it is reverse threaded so it loosens to the right.
2. Tightened a large Allen wrench in the chuck.
3. Placed the drill on a table and used a hammer to sharply it wrench several times until it loosened.
4. Revered the steps to install the new chuck.
2. Tightened a large Allen wrench in the chuck.
3. Placed the drill on a table and used a hammer to sharply it wrench several times until it loosened.
4. Revered the steps to install the new chuck.
Did you find this story helpful?
Thanks for voting and helping fellow customers!
Chuck was sticking in places
Scott - July 19, 2017
Tool Type
Drill
Difficulty
Easy
Time
Less than 15 minutes
Tools Used
Screwdriver, Allen Wrench
Parts Used
1> open chuck completely
2> removed chuck retaining screw with a # 2 Phillips
3> Placed large allen wrench in chuck and tightened the chuck.
4> held drill and struck allen wrench with rubber hammer, took 3 blows to loosen it.
5> finished removing old chuck by hand and placed new one on and hand tightened.
6> replaced retaining screw and tested, back to like new.
Did you find this story helpful?
Thanks for voting and helping fellow customers!
Load More Install Stories
OEM stands for Original Equipment Manufacturer and means the part you’re buying is sourced directly from the manufacturer who made your product. At eReplacementParts, we sell only genuine OEM parts, guaranteeing the part you’re purchasing is of better design and of higher quality than aftermarket parts.
Our product descriptions are a combination of data sourced directly from the manufacturers who made your product as well as content researched and curated by our content & customer service teams. This content is edited and reviewed internally before being made public to customers.
Our customer service team are at the ready daily to answer your part and product questions. We have a dedicated staff with decades of collective experience in helping customers just like you purchase parts to repair their products.
All our part reviews are solicited directly from other customers who have purchased this exact part. While we moderate these reviews for profanity, offensive language or personally identifiable information, these reviews are posted exactly as submitted and no alterations are made by our team.
All our customer repair instructions are solicited directly from other customers just like you who have purchased and replaced this exact part. While we moderate these reviews for profanity, offensive language or personally identifiable information, these reviews are posted exactly as submitted and no alterations are made by our team.
Based on data from past customer purchasing behaviors, these parts are most commonly purchased together along with the part you are viewing. These parts may be necessary or helpful to replace to complete your current repair.
All our installation videos are created and produced in collaboration with our in-house repair technician, Mark Sodja, who has helped millions of eReplacementParts customers over the last 13 years repair their products. Mark has years of experience in selling and repairing both commercial and residential products with a specialty in gas-powered equipment.
This data is collected from customers who submitted a repair instruction after replacing this exact part. Customers can rate how easy the repair was to complete and how long it took. We aggregate this data to provide a repair rating that allows customers to quickly determine the difficulty and time needed to perform their own repair.